For 1990-2009 cars only
Removal Procedure
- Remove the air cleaner outlet duct. Refer to Air Cleaner Resonator Outlet Duct Replacement.
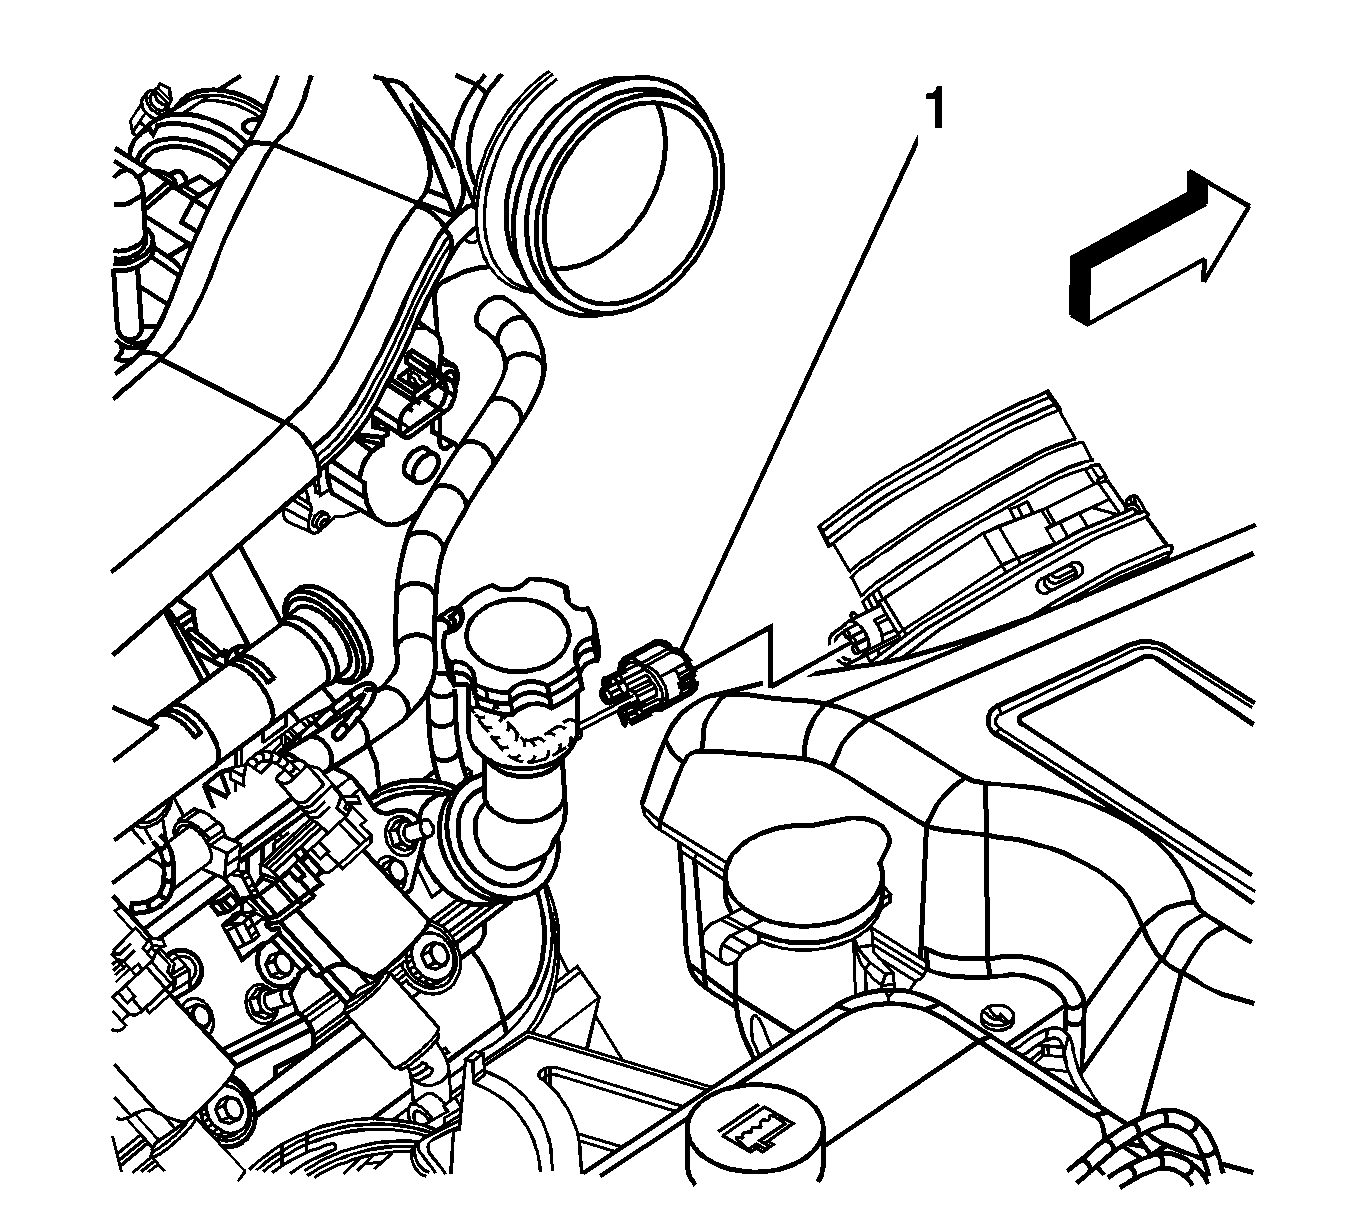
- Disconnect the mass air flow (MAF) / intake air temperature (IAT) sensor electrical connector (1).
- Remove the radiator support diagonal brace. Refer to Radiator Support Diagonal Brace Replacement.
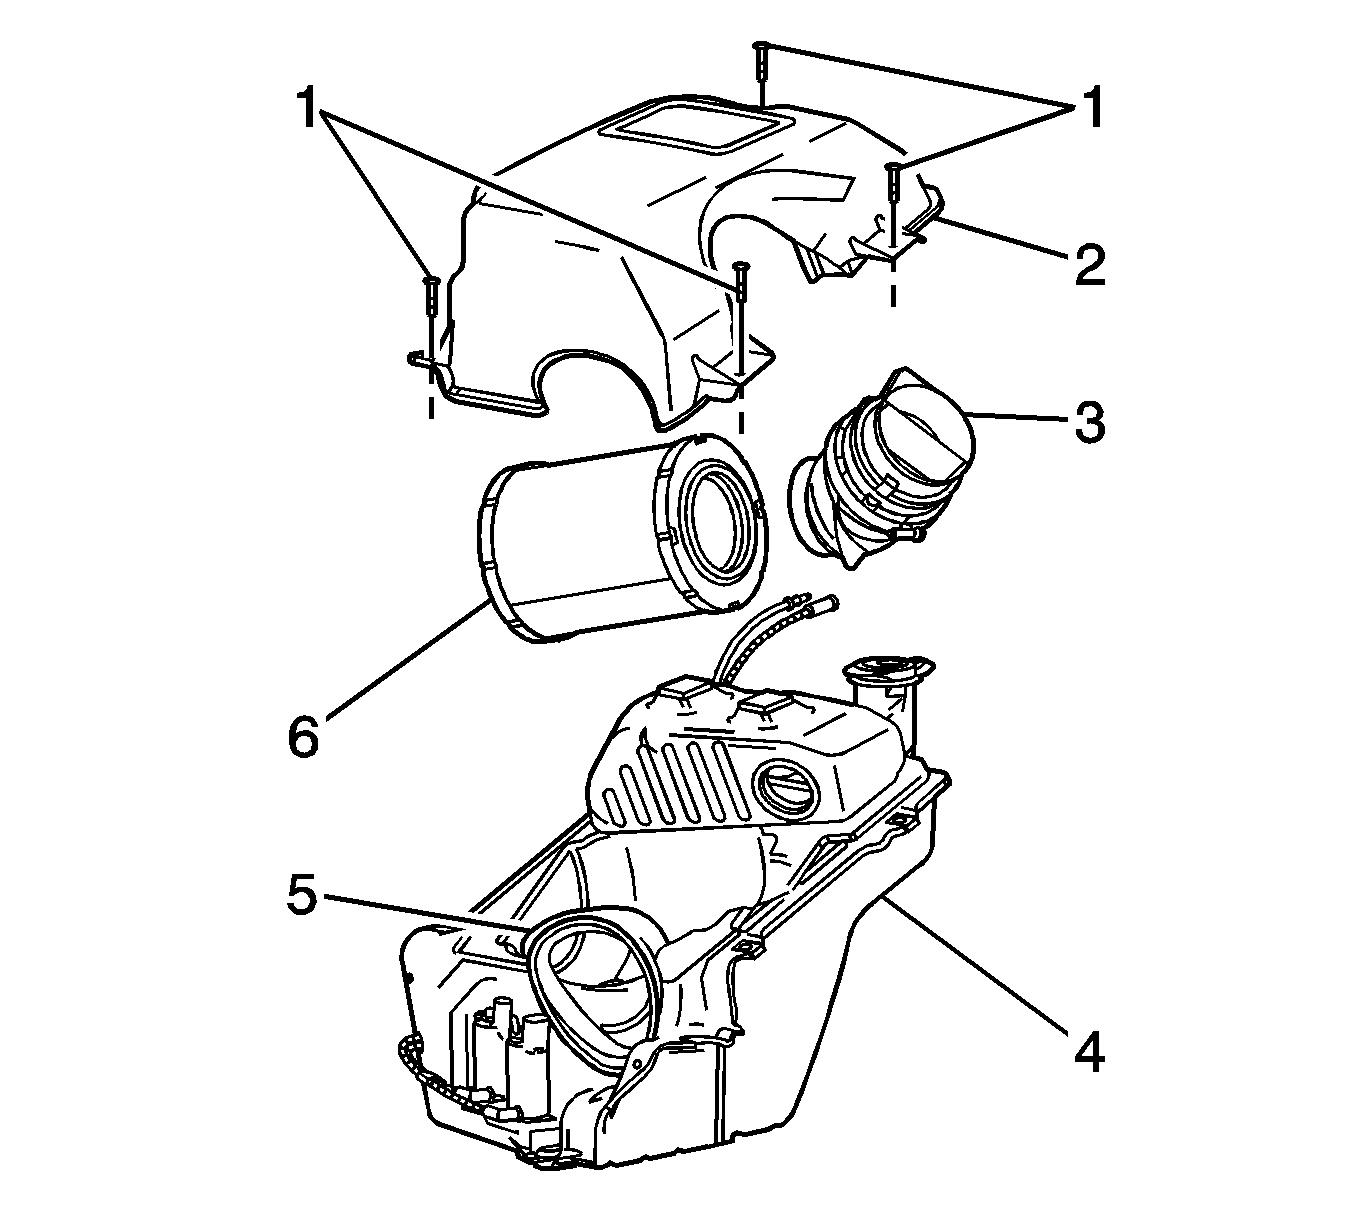
- Loosen the 4 air cleaner cover retaining screws (1).
- Remove the air cleaner housing cover (2). Lift and rotate the cover in order to remove the cover from the vehicle.
- Remove the air filter element (6) and the MAF/IAT sensor (3) from the lower air cleaner housing/washer solvent tank assembly (4).
- Separate the air filter element (6) from the MAF/IAT sensor (3).
- Inspect the entire assembly for dust, debris, or water. Clean or replace as necessary.
Installation Procedure
- Install the MAF/IAT sensor (3) to the air filter element (6).
- Install the air filter element (6) and MAF/IAT sensor (3) to the lower air cleaner housing/washer solvent tank assembly (4).
- Install the air cleaner cover (2) and secure with 4 retaining screws (1).
- Install the radiator support diagonal brace. Refer to Radiator Support Diagonal Brace Replacement.
- Connect the MAF/IAT sensor electrical connector (1).
- Install the air cleaner outlet duct. Refer to Air Cleaner Resonator Outlet Duct Replacement.
Notice: Refer to Fastener Notice in the Preface section.
Important: Ensure the air inlet duct (5) is properly positioned in the lower air cleaner housing/washer solvent tank assembly (4) before installing the air cleaner cover (2).
Tighten
Tighten the screws to 4 N·m (35 lb in).
