For 1990-2009 cars only
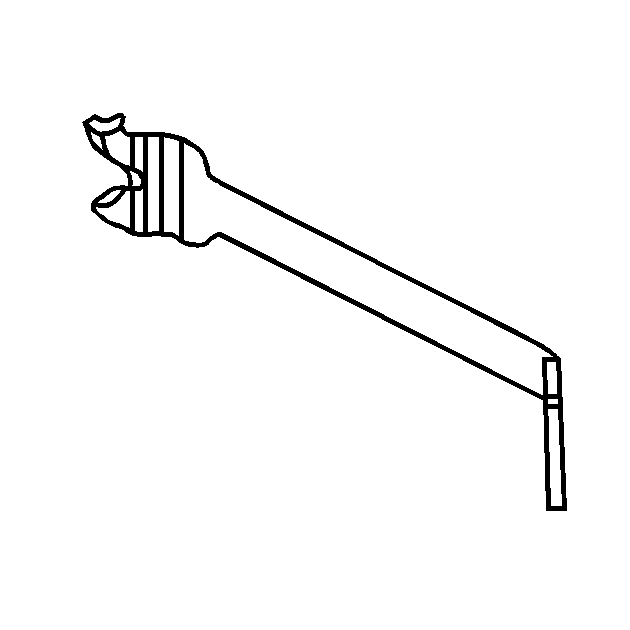
Special Tools
J 46406 Fan Clutch Remover and Installer
Removal Procedure
- Disconnect the battery negative cable. Refer to Battery Negative Cable Disconnection and Connection.
- Disconnect the fan clutch electrical connector.
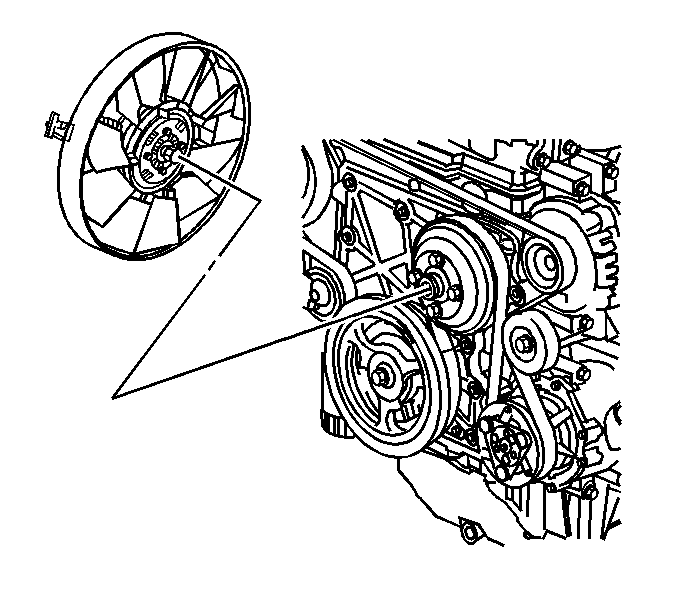
- Using J 46406 remove the cooling fan clutch from the water pump pulley and leave loose inside of the fan shroud.
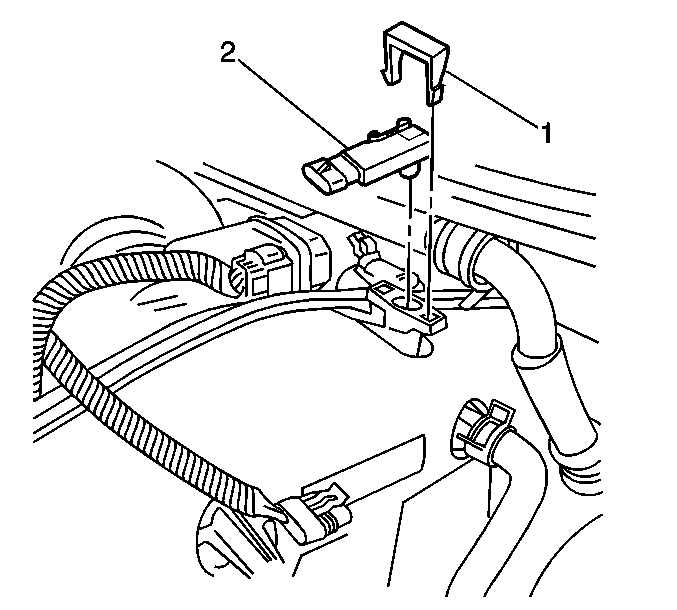
- Remove the manifold absolute pressure (MAP) sensor electrical connector and retainer (1).
- Remove the MAP sensor (2).
- Remove the right shock module, if frame engine mount is being removed. Refer to Shock Absorber and Spring Assembly Replacement.
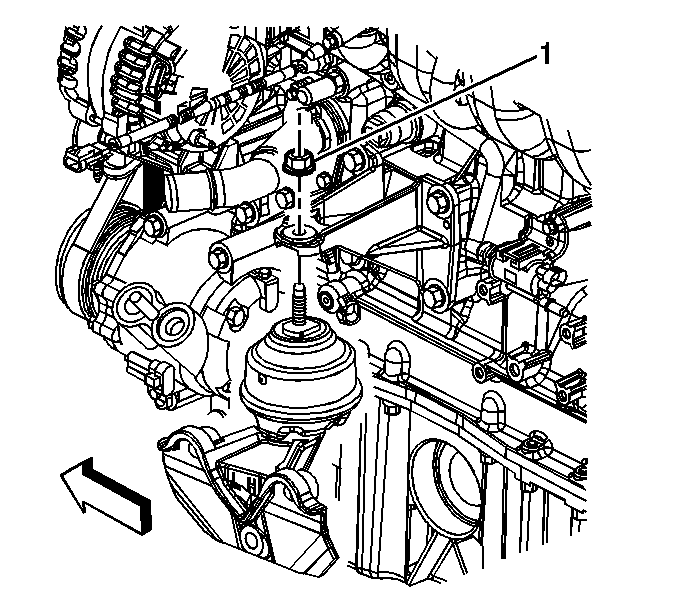
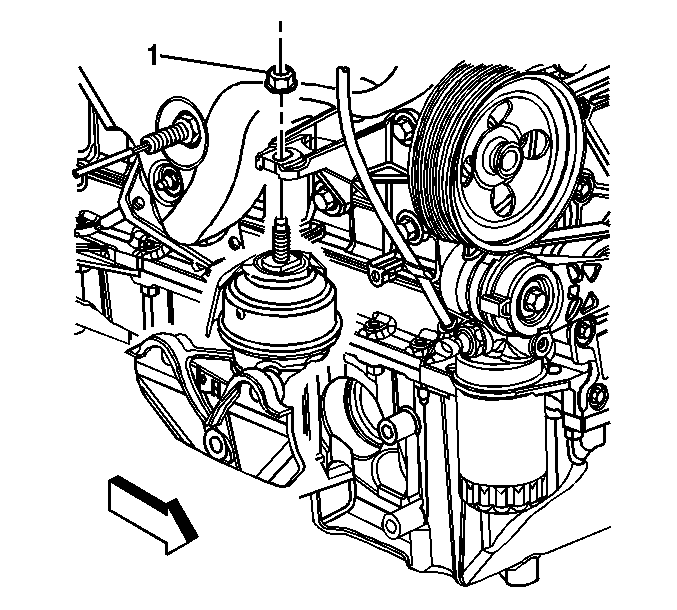
- Remove the right and the left upper engine mount nuts (1).
- Raise the vehicle. Refer to Lifting and Jacking the Vehicle.
- Remove the right and the left lower engine mount nuts.
- Remove the engine protection shield. Refer to Engine Protection Shield Replacement.
- Lower the vehicle and place a floor jack under the oil pan with a block of wood.
- Raise the engine with the jack just enough to clear the engine mount studs.
- Remove the right engine mount from the bracket. Note the location of the heat shield for installation.
- Graphic shows left, right is similar.
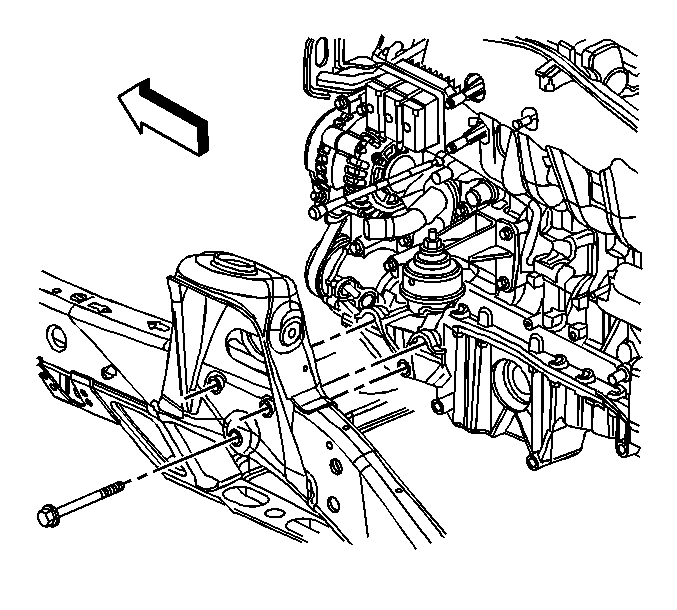
- Remove the right engine mount bracket.
- Graphic shows left, right is similar.
- Remove the right frame engine mount bracket, if required.
Note: When placing jack onto the oil pan, pay close attention to not damaging the oil level sender.
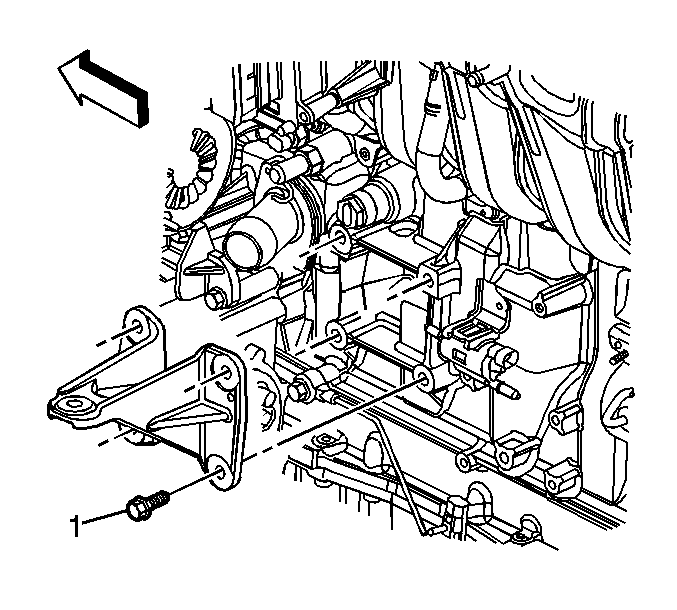
Remove the right engine mount bracket bolts (1).
Remove the right frame engine mount bracket bolts, if required.
Installation Procedure
- Graphic shows left, right is similar.
- Install the right frame engine mount bracket bolts, if removed and tighten to 110 N·m (81 lb ft).
- Graphic shows left, right is similar.
- Install the right engine mount.
- Lower the engine onto the engine mounts.
- Install the right and the left upper engine mount nuts (1) and tighten to 70 N·m (52 lb ft).
- Raise the vehicle and remove the floor jack from under the vehicle.
- Install the engine protection shield and secure with the bolts. Refer to Engine Protection Shield Replacement.
- Install the right and the left lower engine mount nuts and tighten to 70 N·m (52 lb ft).
- Lower the vehicle.
- Install the right shock module. Refer to Shock Absorber and Spring Assembly Replacement.
- Install the MAP sensor (2).
- Install the MAP sensor retainer (1) and the electrical connector.
- Using J 46406 install the cooling fan clutch to the water pump pulley.
- Connect the fan clutch electrical connector.
- Connect the battery negative cable. Refer to Battery Negative Cable Disconnection and Connection.
Install the right frame engine mount bracket, if removed.
Caution: Refer to Fastener Caution in the Preface section.
Install the right engine mount bracket and secure with the bolts (1) and tighten to 50 N·m (37 lb ft).
Note: Ensure that the heat shield is located properly over the anti-rotation feature - right side only.
