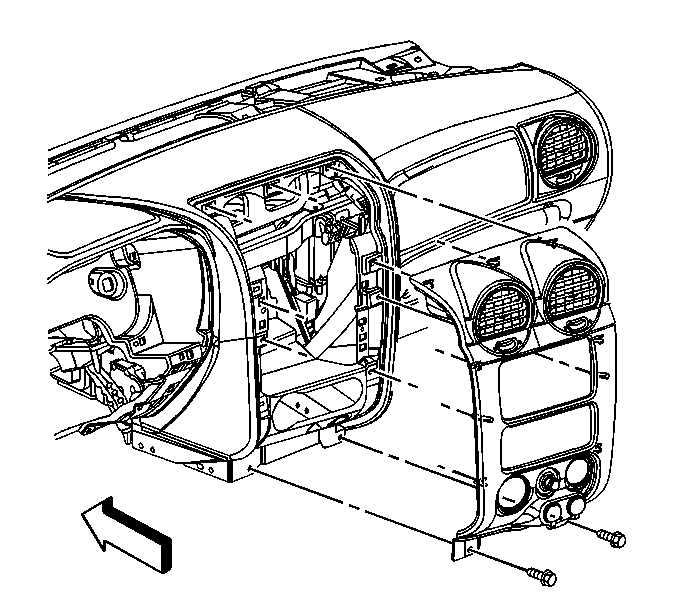
Instrument Panel Accessory Trim Plate Replacement GMC
Removal Procedure
- Remove the center console. Refer to
Console Replacement .
- Remove the center lower closeout/insulator panel. Refer to
Instrument Panel Insulator Panel Replacement .

- Remove the lower trim plate retaining screws.
- Starting at the bottom of the trim plate, release the 2 lower retaining clips and the 2 intermediate retaining clips.
- Release the 3 upper retaining clips.
- Disconnect the electrical connectors as necessary.
- If replacing the trim plate, perform the following steps:
Installation Procedure
- If installing a new trim plate, perform the following steps:

- Connect the electrical connectors as necessary.
- Install the trim plate to the IP. Ensure that all of the retaining clips are properly seated.
Notice: Refer to Fastener Notice in the Preface section.
- Install the lower trim plate retaining screws.
Tighten
Tighten the screws to 2.5 N·m (22 lb in).
- Install the center closeout/insulator panel. Refer to
Instrument Panel Insulator Panel Replacement .
- Install the center console. Refer to
Console Replacement .


