For 1990-2009 cars only
Removal Procedure
- Remove the accessory switch panel. Refer to Door Lock and Side Window Switch Replacement - Driver Side .
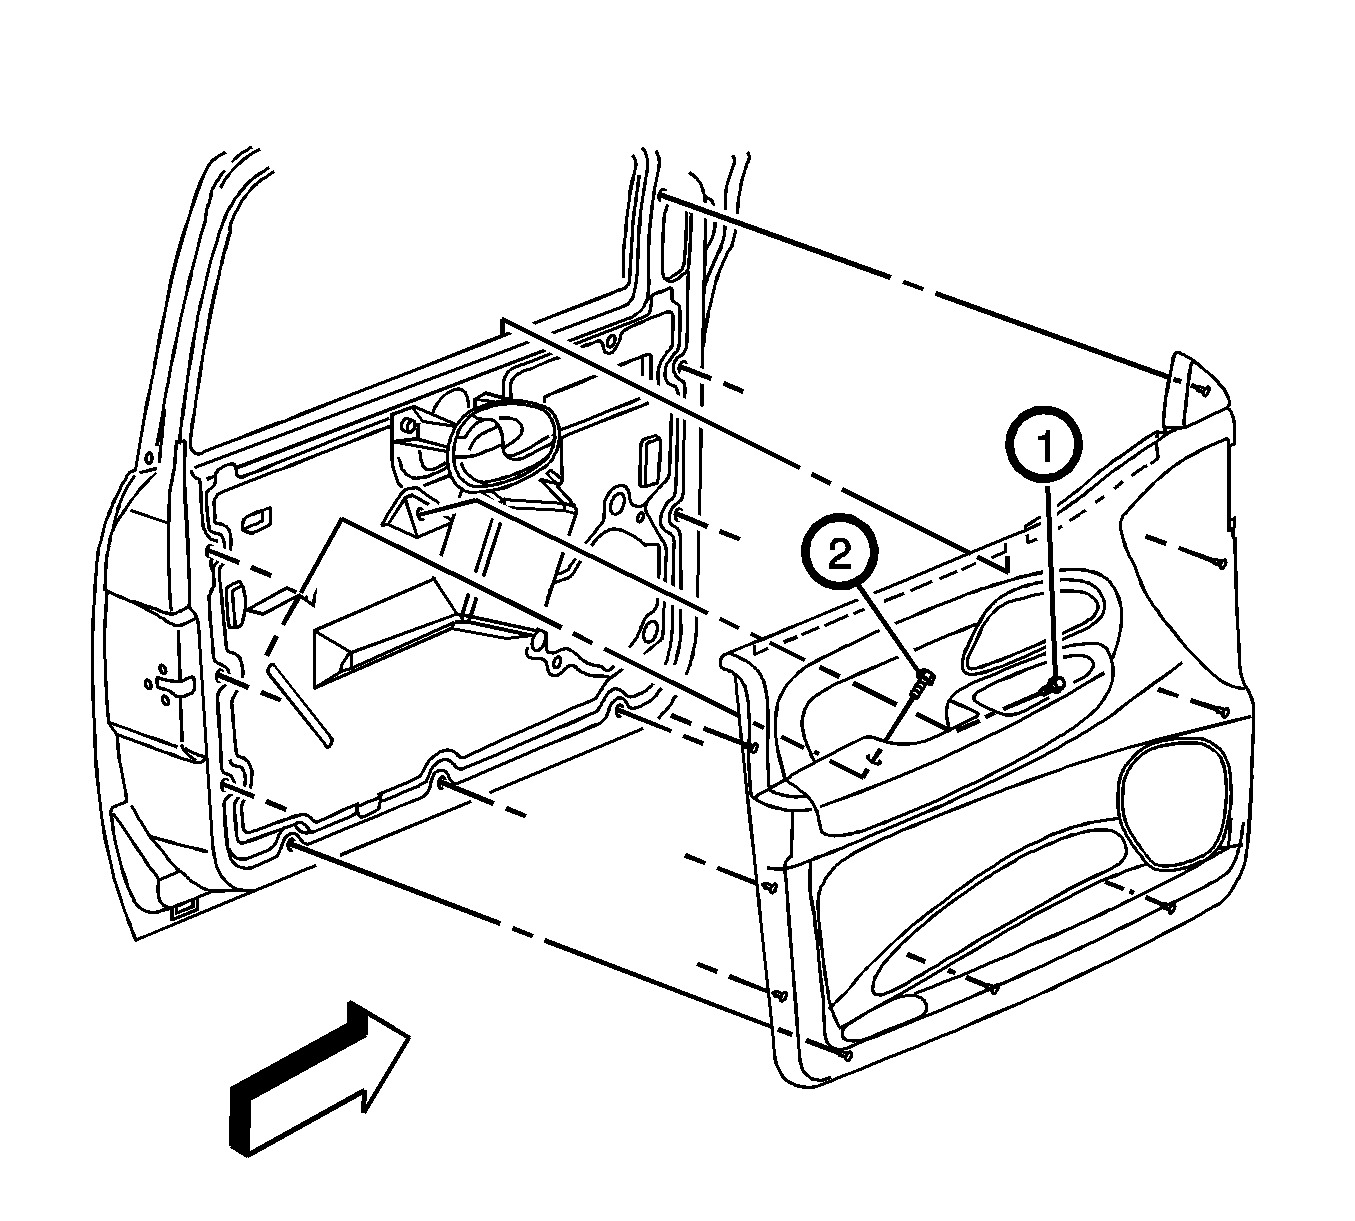
- Remove the 2 trim panel retaining bolts (1 and 2).
- Pull to release the 9 trim panel fasteners from the door.
- Remove the trim panel from the door.
- Remove the inside door handle bezel. Refer to Door Handle Bezel Replacement .
- Remove the outside rear view mirror (ORVM) switch, if equipped. Refer to Power Mirror Switch Replacement .
Installation Procedure
- Install the ORVM switch, if equipped. Refer to Power Mirror Switch Replacement .
- Install the door trim panel to the door, as follows:
- Install the inside door handle bezel. Refer to Door Handle Bezel Replacement .
- Install the accessory switch panel. Refer to Door Lock and Side Window Switch Replacement - Driver Side .
| 2.1. | Install the panel on the door by placing the upper flange into the belt seal lip. |
| 2.2. | First install the forward upper retainer. |
| 2.3. | Second install the rear upper retainer . |
| 2.4. | Install the remaining seven retainers. |
| 2.5. | Install the forward trim panel retaining bolt first (1). Do not tighten the bolt. |
| 2.6. | Install the rearward trim panel retaining bolt second (2). |
Notice: Refer to Fastener Notice in the Preface section.
| 2.7. | Tighten the 2 retaining bolts. |
Tighten
Tighten the bolts to 10 N·m (89 lb in).
