Refer to
Fuel Injectors
.
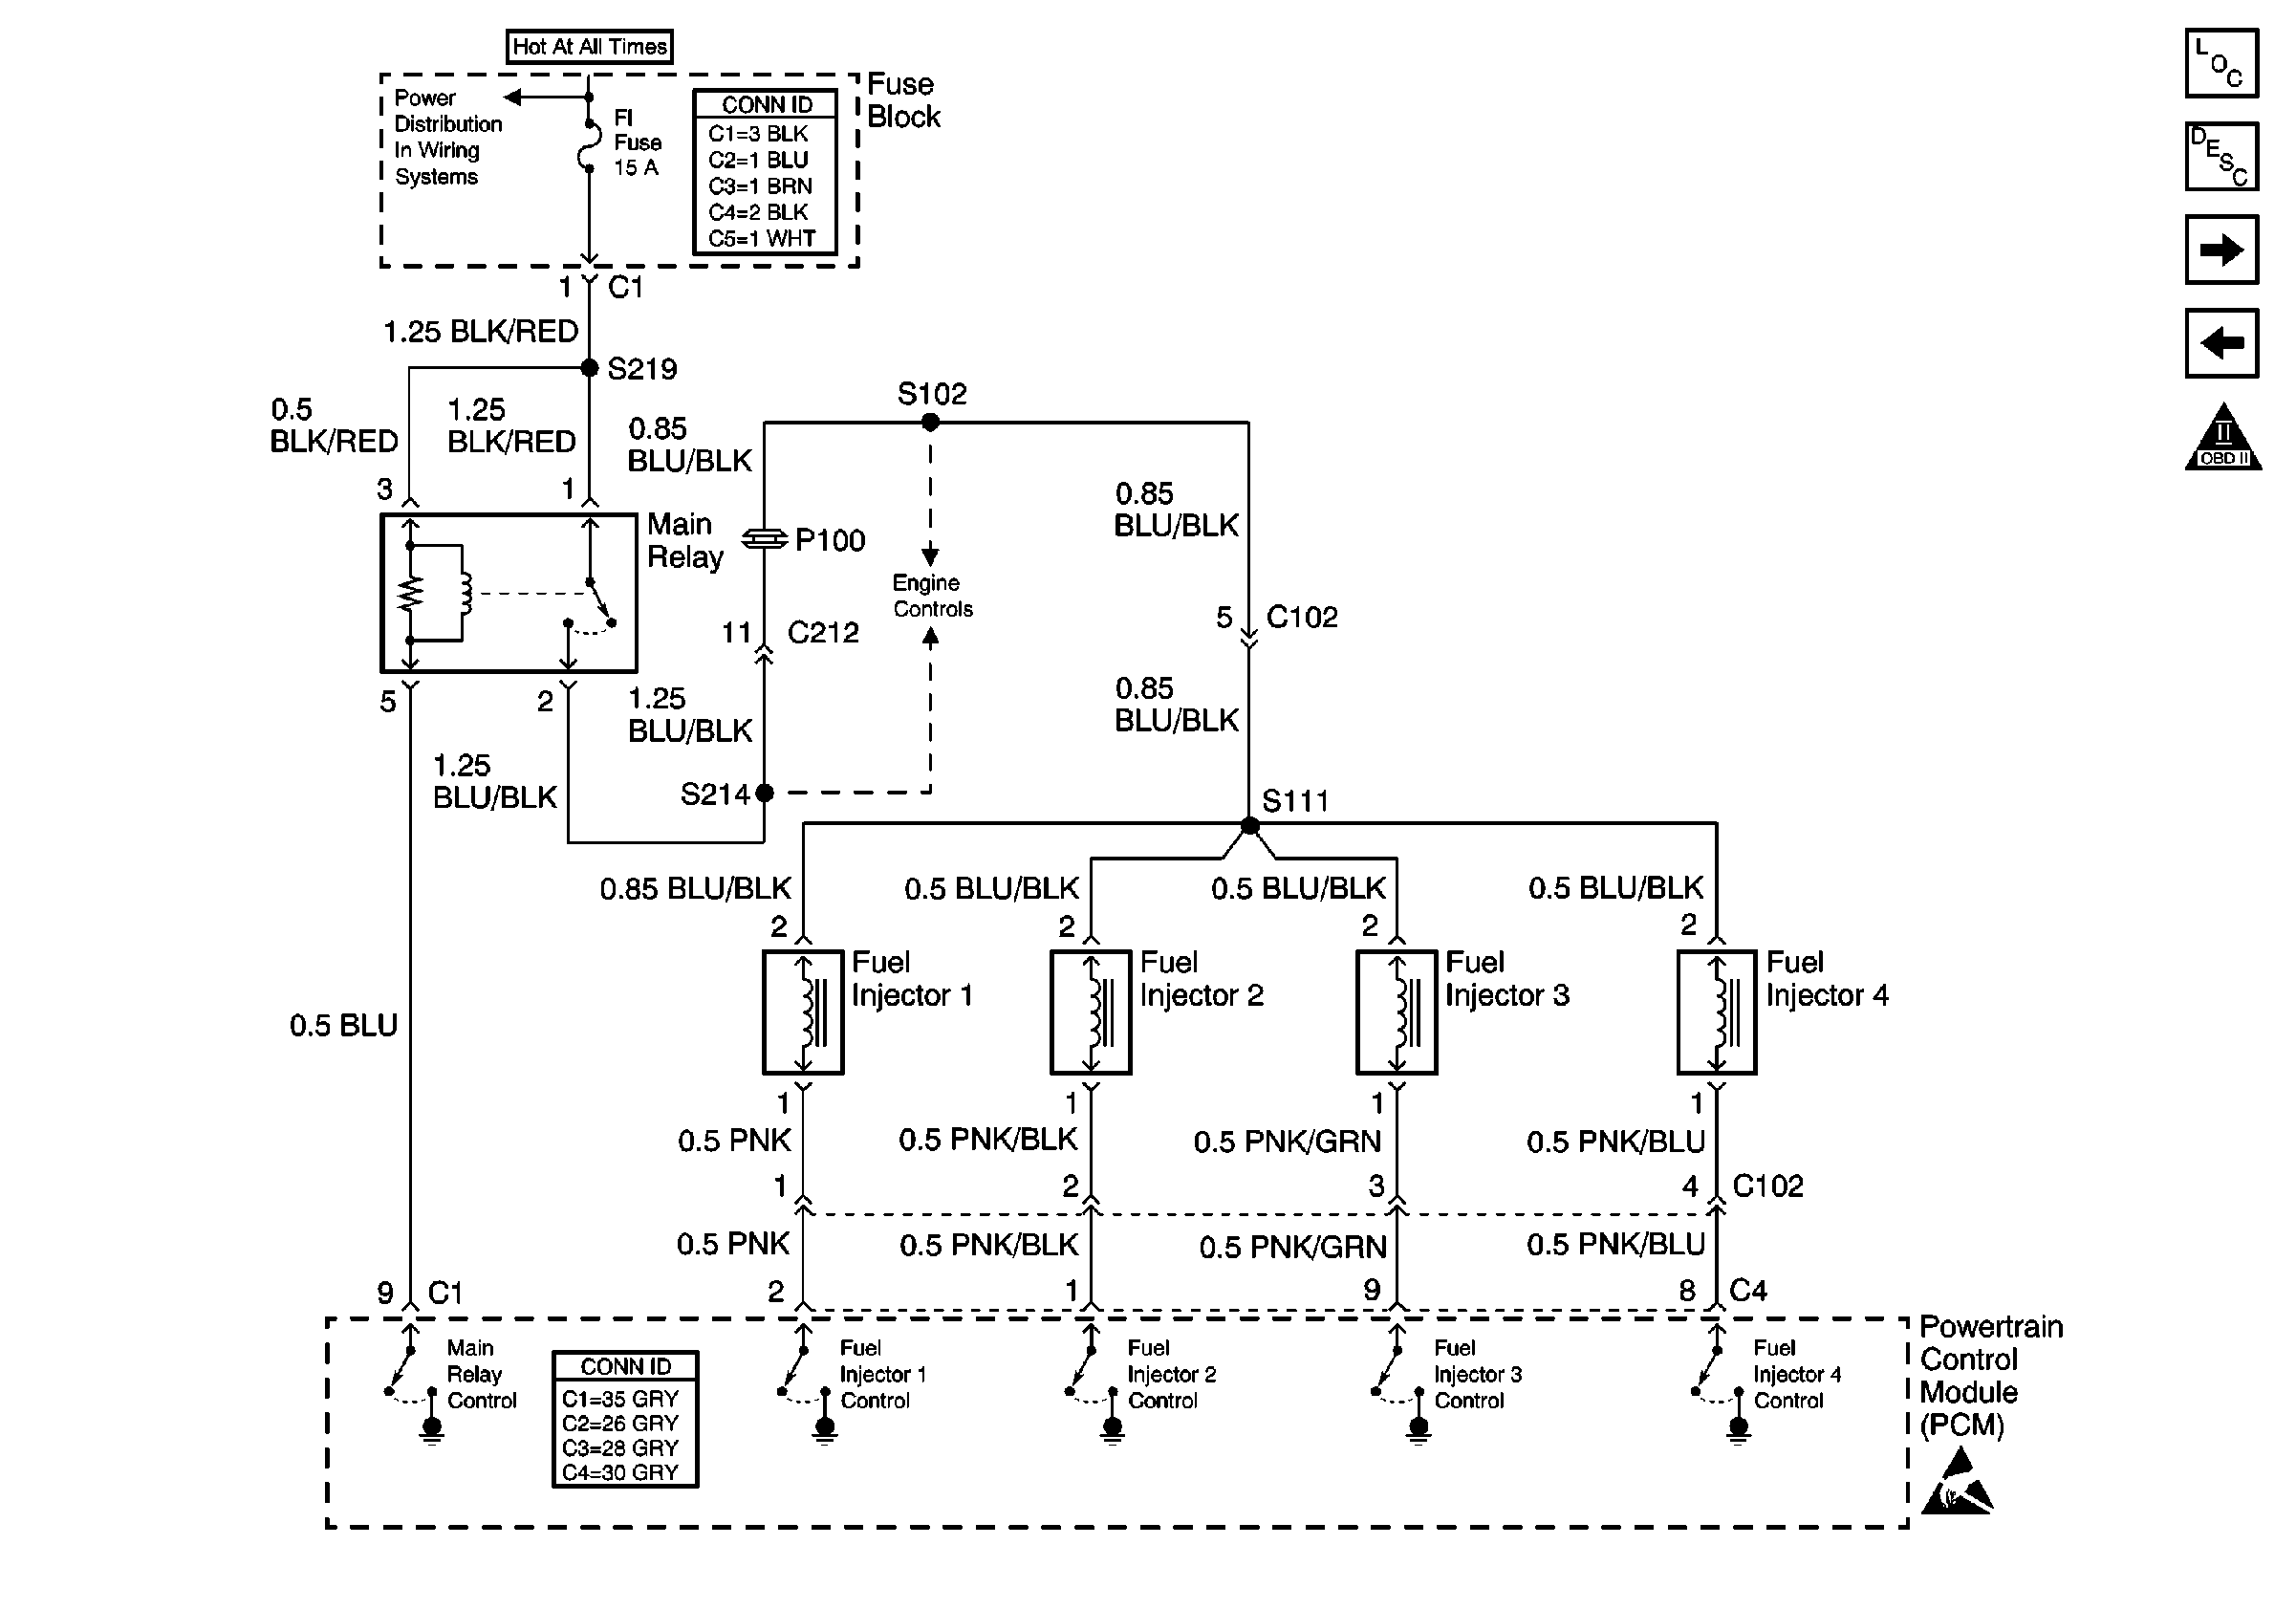
Circuit Description
The powertrain control module (PCM) controls each individual fuel injector sequentially. The PCM energizes the solenoid coil of the fuel injectors. When energized the fuel injector solenoid operates the solenoid plunger allowing pressurized fuel to be injected into the intake port of the cylinder. The fuel pump will pressurize the fuel rail and the fuel injectors as long as the engine is cranking, and the PCM is receiving ignition system reference pulses. The fuel pump will stop after 2 seconds if the PCM does not receive any ignition system reference pulses.
Diagnostic Aids
Check for any of the following conditions:
| • | Water, foreign material, or stale fuel can cause a no start or a hard start condition. |
| • | Erratic fuel pressure or a restricted fuel filter may cause a no start or a hard start condition. |
| • | Faulty fuel injectors -- There may be fuel spray at the fuel injectors, but it may not be enough to start the engine. Normal fuel injector resistance is 13-16 ohms at 20°C (68°F). If the fuel injectors and their circuits are OK, and fuel spray is detected, the fuel injector nozzle may be partly blocked or restricted. |
An intermittent malfunction may be caused by a fault in the fuel injector sensor circuit. Inspect the wiring harness and components for any of the following conditions:
| • | Backed out terminals |
| • | Improper mating of terminals |
| • | Broken electrical connector locks |
| • | Improperly formed or damaged terminals |
| • | Faulty terminal to wire connections |
| • | Physical damage to the wiring harness |
| • | A broken wire inside the insulation |
| • | Corrosion of electrical connections, splices, or terminals |
Test Description
The numbers below refer to the step numbers in the diagnostic table.
-
The Powertrain OBD System Check prompts the technician to complete some basic checks and store the Freeze Frame data on the scan tool if applicable. This creates an electronic copy of the data taken when the fault occurred. The information is then stored in the scan tool for later reference.
-
This step checks if the PCM is controlling the fuel injector signals.
-
This step checks for a short in the fuel injector control circuit.
-
This step checks for voltage at the fuel injector.
-
This step checks for an open in fuel injector control circuit or for a faulty PCM.
Step | Action | Value(s) | Yes | No |
|---|---|---|---|---|
Did you perform the Powertrain On-Board Diagnostic (OBD) System Check? | -- | |||
|
Important: This table assumes that the MIL and the DLC function normally. Check that MIL operation and DLC communication is OK before proceeding.
Did the injector test lamp flash for each injector while cranking the engine? | -- | |||
Was the injector test lamp illuminated all the time, for any injector circuit, while cranking the engine? | -- | |||
4 |
Was a repair necessary? | -- | ||
Did the test lamp illuminate? | -- | |||
Does the test lamp flash while cranking the engine? | -- | |||
7 | Repair the faulty electrical connections at the fuel injector harness connector. Refer to Wiring Repairs in Wiring Systems. Is the action complete? | -- | -- | |
8 | Repair the open in the ignition feed circuit between the fuel injector and the main relay. Refer to Wiring Repairs in Wiring Systems. Is the action complete? | -- | -- | |
9 |
Was a repair necessary? | -- | ||
10 | Replace the PCM. Refer to Powertrain Control Module Replacement/Programming . Is the action complete? | -- | -- | |
11 | Operate the vehicle within the conditions under which the original symptom was noted. Does the system now operate properly? | -- | System OK | Go to Diagnostic Aids |
