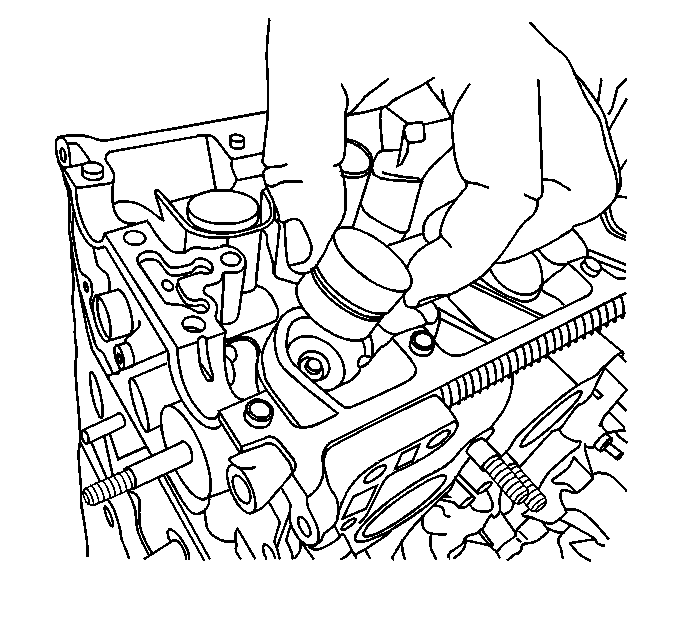
- Pour engine oil into the oil feed hole in the valve lifter bore in order to flush any debris from the gallery and to prelube the bore.
- Apply engine oil to the valve lifter and install the lifter to the cylinder head in the same bore from which it was removed.
- Line up the crankshaft keyway with the timing mark on the engine block.
- Rotate the crankshaft 90 degrees clockwise in order to prevent interference between the valves and the pistons.
- Apply engine oil to the camshaft journals and lobes.
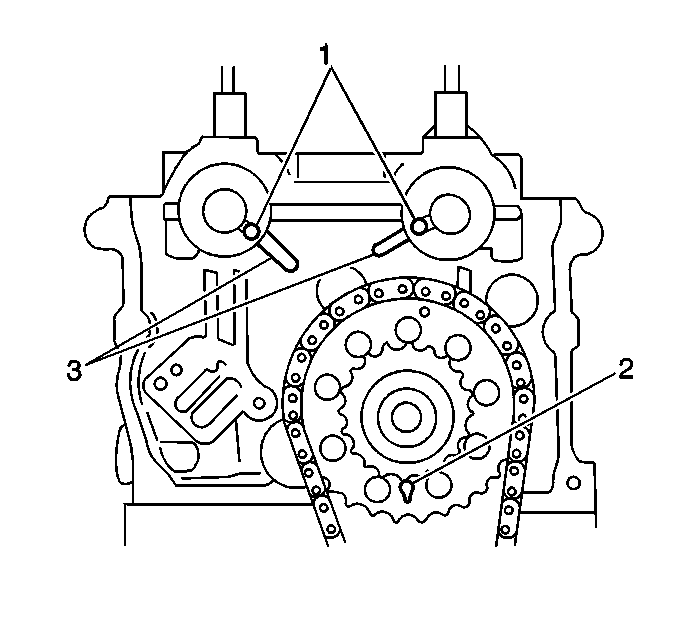
- Install the camshaft aligning the guide pins (1) with the notches (3) on the cylinder head. The exhaust camshaft rear end is slotted to mate with the camshaft position sensor.
- Install the dowel pins (1) to the cylinder head.
- Apply a bead of silicon sealant, GM P/N 12345997, Canadian P/N 12345997 or equivalent to the exhaust camshaft end housing (2).
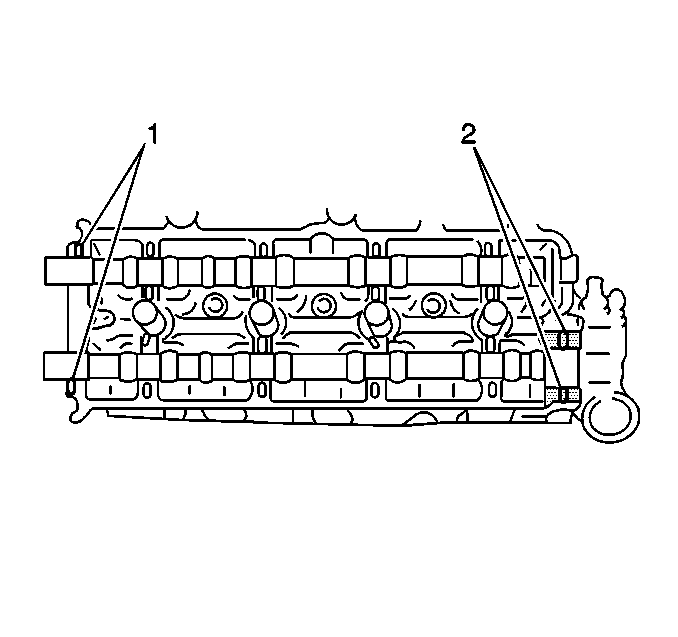
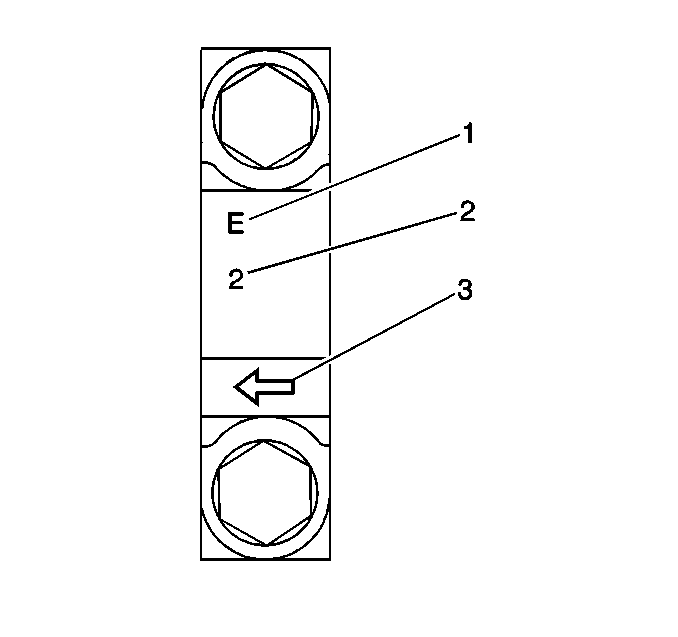
- Install the camshaft bearing caps. The caps are marked intake or exhaust (1), position away from the timing chain (2), and direction toward the timing chain (3).
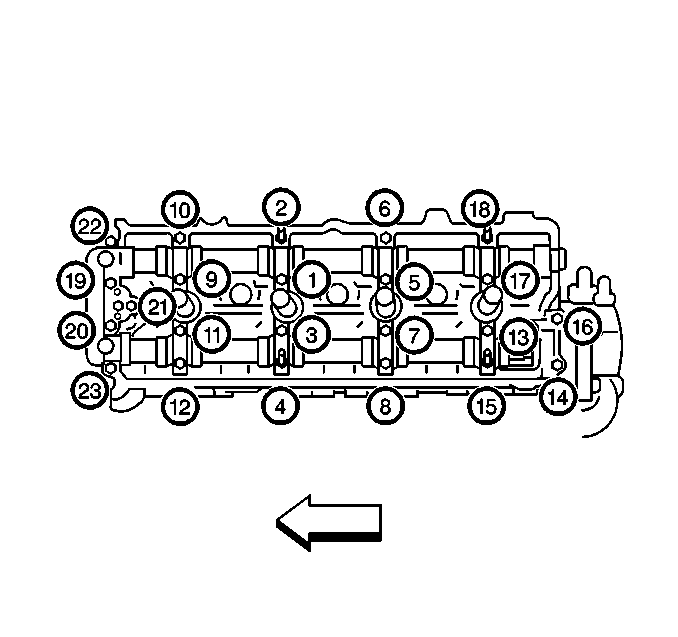
- Tighten the camshaft bearing caps.
Important:
• Do not turn the camshafts or start the engine for approximately 30 minutes
after replacing the valve lifters and camshafts. • Allow approximately 30 minutes for the valves to settle
in place. Operating the valves before this time may cause valve or piston damage. • The valves may make a tapping/ticking sound after replacement if air
is trapped in the valve lifter. Run the engine at 2000 RPM until the air
is purged from the lifter. • If the tapping/ticking does not stop, locate the defective lifter with
a stethoscope and replace. Or, remove the cylinder head cover with the engine
stopped and push the lifter down by hand with a force less than 20 kg
(44 lbs) when the camshaft is on the base circle. If clearance exists
between the camshaft and the lifter, the lifter is faulty and should be replaced.
Important: Cylinder head and camshaft damage may result if the bearing caps are incorrectly installed.
Notice: Use the correct fastener in the correct location. Replacement fasteners must be the correct part number for that application. Fasteners requiring replacement or fasteners requiring the use of thread locking compound or sealant are identified in the service procedure. Do not use paints, lubricants, or corrosion inhibitors on fasteners or fastener joint surfaces unless specified. These coatings affect fastener torque and joint clamping force and may damage the fastener. Use the correct tightening sequence and specifications when installing fasteners in order to avoid damage to parts and systems.
Tighten
Tighten the camshaft bearing caps in 3 progressive steps in the sequence shown
to 11 N·m (97 lb in).
