Tools Required
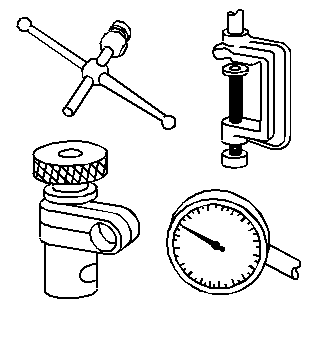
| • | J 26900-2 Combimike Micrometer |
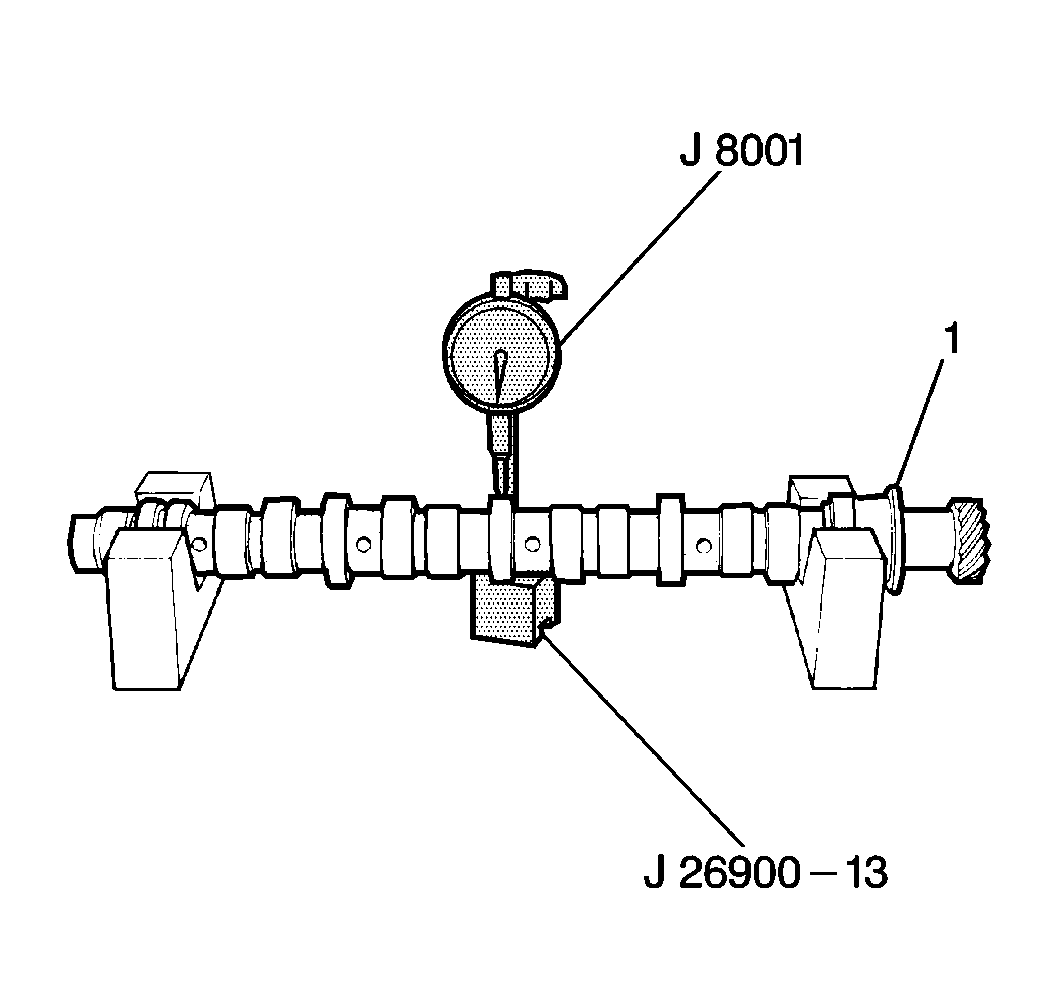
| • | J 8001 Dial Indicator Set |
| • | J 26900-13 Magnetic Indicator Base |
- Measure the camshaft lobe height using the J 26900-2 . Replace the camshaft if any lobe is below the minimum.
- Place the camshaft onto V-blocks. Measure the camshaft runout using the J 8001 with the J 26900-13 . Replace the camshaft if the runout exceeds specifications.
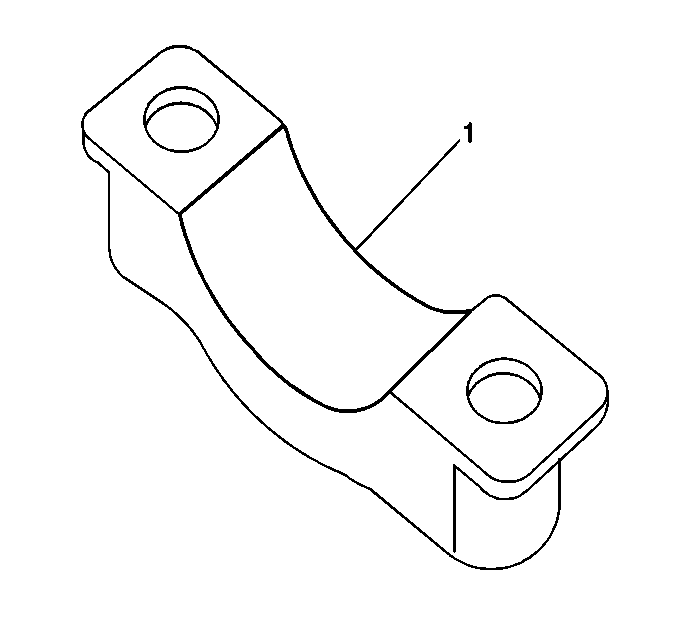
- Inspect the camshaft bearing caps (1) for wear, cracks and scoring.
- Inspect the camshaft bearing journals in the cylinder head for wear, cracks and scoring.
- If excessive wear or scoring is present, or if the cylinder head is cracked, replace the cylinder head (with bearing caps).
- Clean the journals of the camshaft and the cylinder head.
- Do not install the valve lifters.
- Install the camshafts. The rear end of the exhaust camshaft is slotted to mate with the camshaft position sensor.
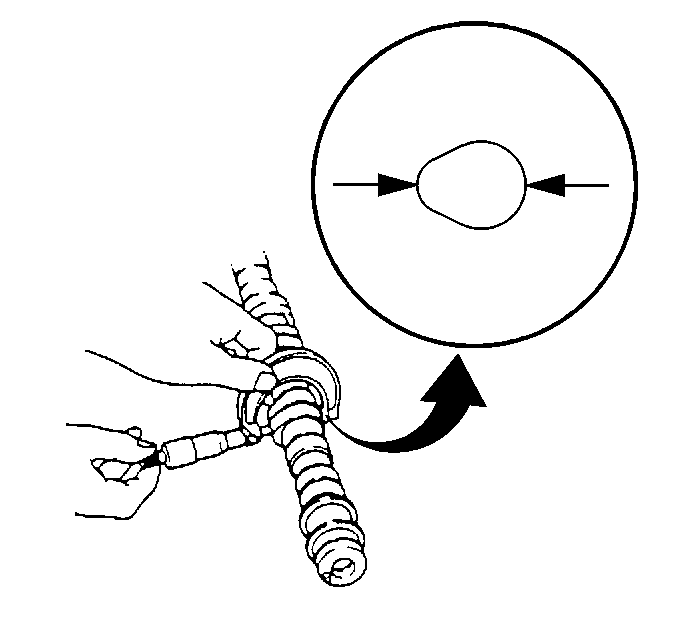
- Place a piece of gaging plastic across the full width of each camshaft journal.
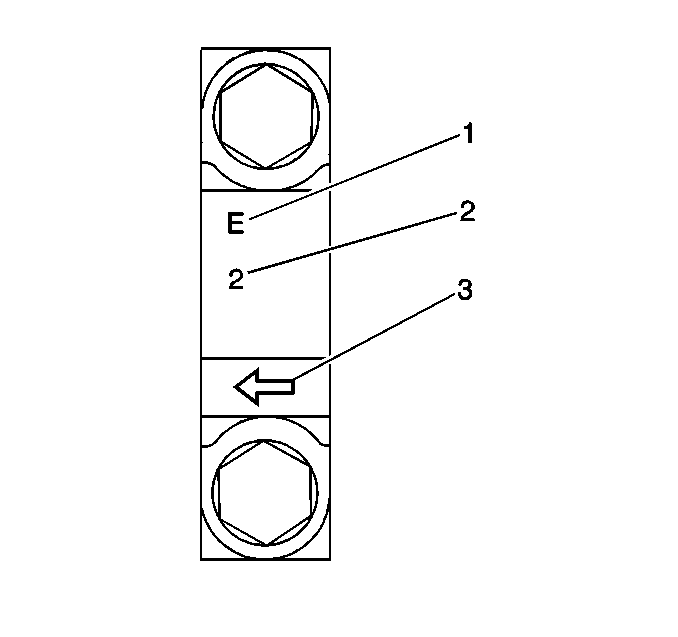
- Install the camshaft bearing caps. The caps are marked intake or exhaust (1), position away from the timing chain (2), and direction toward the timing chain (3).
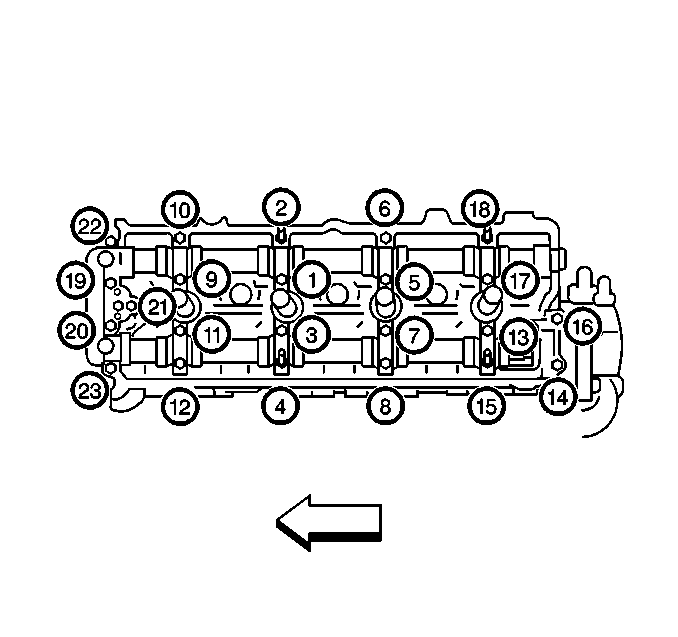
- Use 3 progressive steps to tighten the camshaft bearing cap bolts in sequence.
- Remove the camshaft bearing caps.
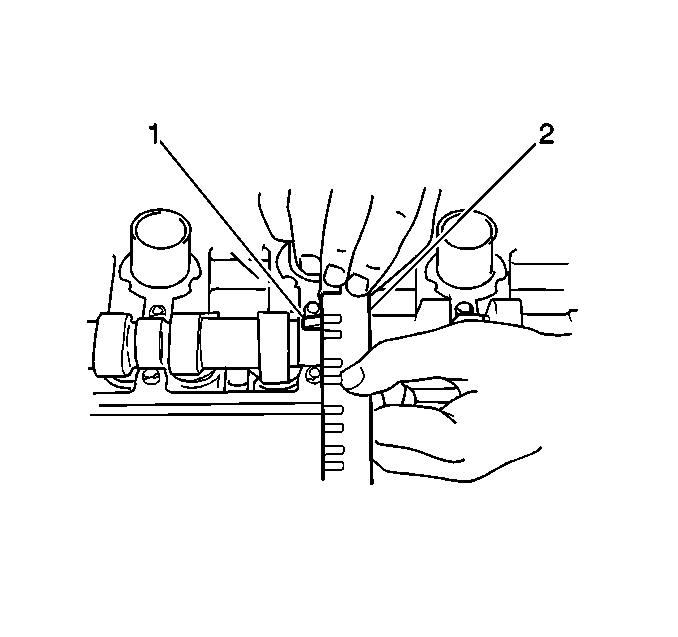
- Measure the gaging plastic (1) at its widest point.
- If the clearance is greater than the maximum perform the following:
- Replace the component (camshaft or cylinder head with caps) that has the greatest difference from specification.
Standard Intake Camshaft Lobe Height
40.402-40.562 mm (1.5906-1.5969 in)
Minimum Intake Camshaft Lobe Height
40.202 mm (1.5827 in)
Standard Exhaust Camshaft Lobe Height
39.921-40.081 mm (1.5717-1.5780 in)
Minimum Exhaust Camshaft Lobe Height
39.721 mm (1.5638 in)
Camshaft Runout
0.10 mm (0.0039 in)
Important: Do not turn the camshafts while the gaging plastic is installed.
Important: Cylinder head and camshaft damage may result if the bearing caps are incorrectly installed. The oil clearance measurement will also be incorrect.
Notice: Use the correct fastener in the correct location. Replacement fasteners must be the correct part number for that application. Fasteners requiring replacement or fasteners requiring the use of thread locking compound or sealant are identified in the service procedure. Do not use paints, lubricants, or corrosion inhibitors on fasteners or fastener joint surfaces unless specified. These coatings affect fastener torque and joint clamping force and may damage the fastener. Use the correct tightening sequence and specifications when installing fasteners in order to avoid damage to parts and systems.
Tighten
Tighten the bolts to 11 N·m (8 lb ft).
Standard Oil Clearance
0.020-0.074 mm (0.0008-0.0029 in)
Maximum Oil Clearance
0.12 mm (0.0047 in)
| 14.1. | Remove the camshaft. |
| 14.2. | Measure the camshaft journal outside diameter with the J 26900-2 . |
Intake and Exhaust Camshaft Journal OD
25.959-25.980 (1.0220-1.0228 in)
| 14.3. | Install the camshaft bearing caps and torque to 11 N·m (97 lb in). |
| 14.4. | Measure the camshaft journal inside (bore) diameter. |
Intake and Exhaust Camshaft Bore ID
26.000-26.033 (1.0236-1.0249 in)
