Checks
| Action
|
DEFINITION: Most
fluid leaks can be solved by first visually locating the leak, repairing
or replacing the component, or by resealing the gasket surface. Once
the leak is identified, determine the cause of the leak. Repair the cause
of the leak as well as the leak itself.
|
Visual Inspection Method
|
- Operate the vehicle for several miles at varying speeds until
it reaches normal operating temperature.
- Park the vehicle on a level surface, over a large sheet of paper
or other clean surface.
- Wait 15 minutes and check for drippings.
- Identify the type of fluid (engine oil, automatic transmission
fluid, coolant etc.) and the approximate location of the leak.
- Visually inspect the suspected area. Use a small mirror to assist
in looking at hard to see areas.
- Check for leaks at sealing surfaces, fittings, or from cracked
or damaged components.
- If the leak cannot be found it may be necessary to completely
clean the suspected area or components and perform the visual inspection method
again.
- If the leak still cannot be located, use the powder method or
the black light and dye method in order to locate the leak.
- See possible causes for leaks.
|
Powder Method
|
- Completely clean the entire engine and surrounding components.
- Apply an aerosol-type powder (baby powder, foot powder, etc.)
to the suspected area.
- Operate the vehicle for several miles at varying speeds until
it reaches normal operating temperature.
- Visually inspect the suspected area. Use a small mirror to assist
in looking at hard to see areas.
- Trace the leak path over the white powder surface to the source.
- Identify the type of fluid (engine oil, automatic transmission
fluid, coolant etc.) and the approximate location of the leak from the discolorations
in the powder surface.
- See possible causes for leaks.
|
Black Light and Dye
Method
|
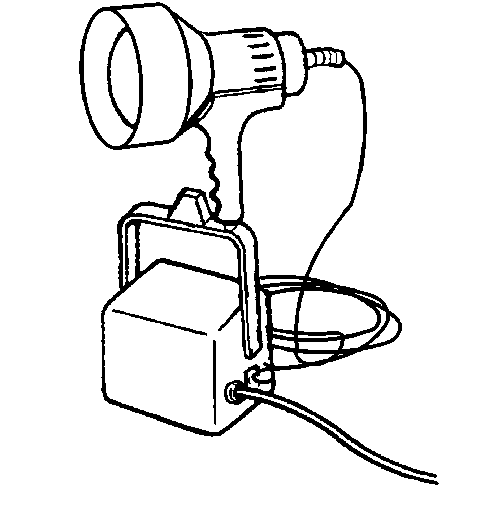
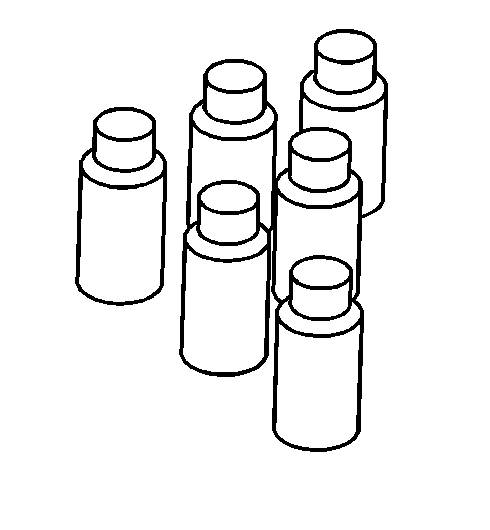
- A J 28428-E
High Intensity Black Light and J 28431-6
Fluorescent Oil Additive are available for finding fluid leaks.
- Follow the manufacturer's instructions that are included with
the J 28431-6
.
- Pour the specified amount of J 28431-6
into the leaking component. Refer to the manufacturer's instructions
for the proper amount of oil additive.
- Operate the vehicle for several miles at varying speeds until
it reaches normal operating temperature.
- Shine the J 28428-E
onto the suspected area. The J 28431-6
fluid will appear as a yellow path leading to the source
of the oil leak.
- Visually inspect the suspected area. Use a small mirror to assist
in looking at hard to see areas.
- See possible causes for leaks.
|
Possible Causes for
Leaks
| Inspect
for the following conditions:
| • | Higher than recommended fluid levels |
| • | Higher than recommended fluid pressures |
| • | Plugged or malfunctioning fluid filters or pressure bypass valves |
| • | Malfunctions in the crankcase ventilation system |
| • | Improperly tightened fasteners |
| • | Dirty or damaged threads on the fasteners |
| • | Warped flanges or sealing surfaces |
| • | Scratches, burrs or other damage to the sealing surface |
| • | A damaged or worn gasket |
| • | Cracking or porosity of the component |
| • | A loose or worn bearing |
|
