Removal Procedure
Caution: Gasoline or gasoline vapors are highly flammable. A fire could occur if an ignition source is present. Never drain or store gasoline or diesel fuel in an open container, due to the possibility of fire or explosion. Have a dry chemical (Class B) fire extinguisher nearby.
Caution: Always wear safety goggles when working with fuel in order to protect the eyes from fuel splash.
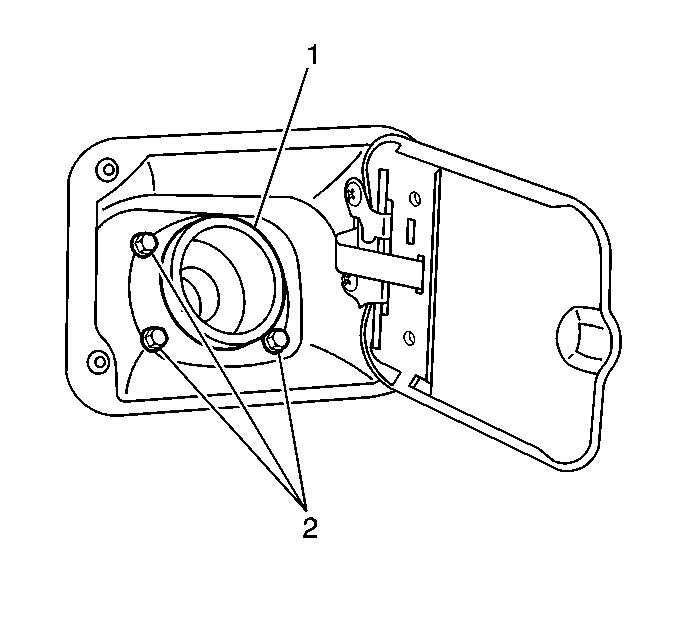
- Remove the fuel filler cap.
- Remove the 3 fuel filler pipe bolts (2) located behind the fuel filler door.
- Raise and suitably support the vehicle. Refer to Lifting and Jacking the Vehicle in General Information.
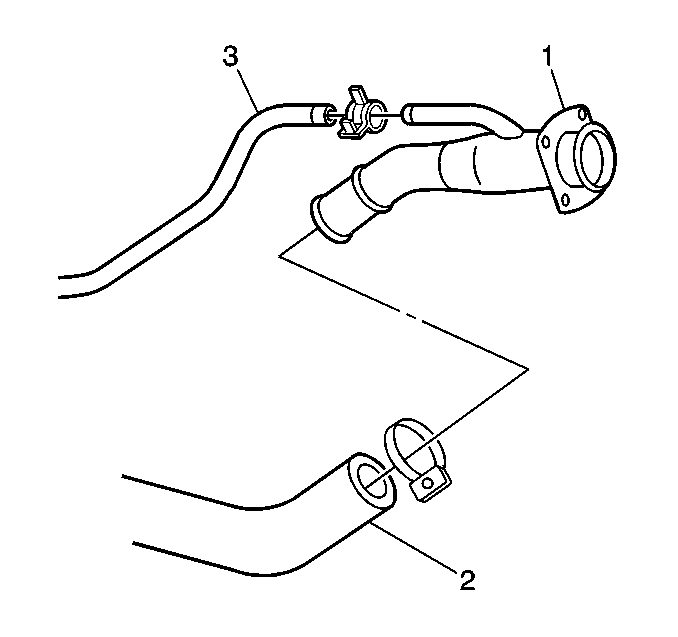
- Disconnect the fuel tank filler hose (2) from the fuel filler pipe (1).
- Disconnect the fuel tank breather hose (3) from the fuel filler pipe (1).
- Remove the fuel filler pipe and the gasket from the vehicle.
Caution: To avoid any vehicle damage, serious personal injury or death when major components are removed from the vehicle and the vehicle is supported by a hoist, support the vehicle with jack stands at the opposite end from which the components are being removed and strap the vehicle to the hoist.
Installation Procedure
- Connect the fuel tank breather hose (3) to the fuel filler pipe (1).
- Connect the fuel tank filler hose (2) to the fuel filler pipe (1).
- Install the fuel filler pipe (1) and gasket up into the fuel filler door compartment.
- Lower the vehicle.
- Secure the fuel tank filler pipe (1) to the opening in the fuel filler door compartment with the 3 bolts (2).
- Install the fuel filler cap.
Notice: Use the correct fastener in the correct location. Replacement fasteners must be the correct part number for that application. Fasteners requiring replacement or fasteners requiring the use of thread locking compound or sealant are identified in the service procedure. Do not use paints, lubricants, or corrosion inhibitors on fasteners or fastener joint surfaces unless specified. These coatings affect fastener torque and joint clamping force and may damage the fastener. Use the correct tightening sequence and specifications when installing fasteners in order to avoid damage to parts and systems.
Tighten
Tighten the bolts to 3.5 N·m (26 lb in).
