For 1990-2009 cars only
Removal Procedure
- Raise and suitably support the vehicle. Refer to Lifting and Jacking the Vehicle .
- Remove the transfer case shield, if equipped. Refer to Transfer Case Shield Replacement .
- Remove the rear propeller shaft. Refer to Rear Propeller Shaft Replacement .
- Remove the front propeller shaft. Refer to Front Propeller Shaft Replacement .
- Drain the fluid from the transfer case.
- Support the transmission with a suitable jack stand.
- Remove the transmission mount nuts and bolts.
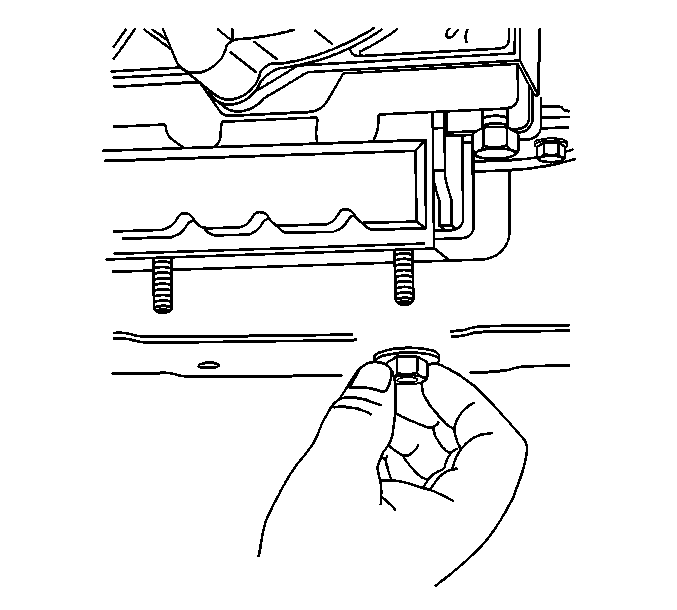
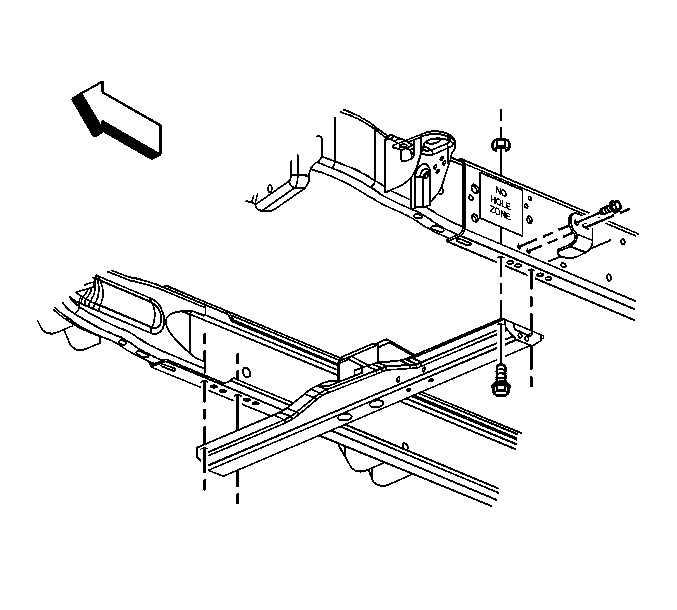
- Remove the crossmember bolts.
- Remove the crossmember.
- Remove the transmission mount.
- Install a suitable transmission jack to the transfer case.
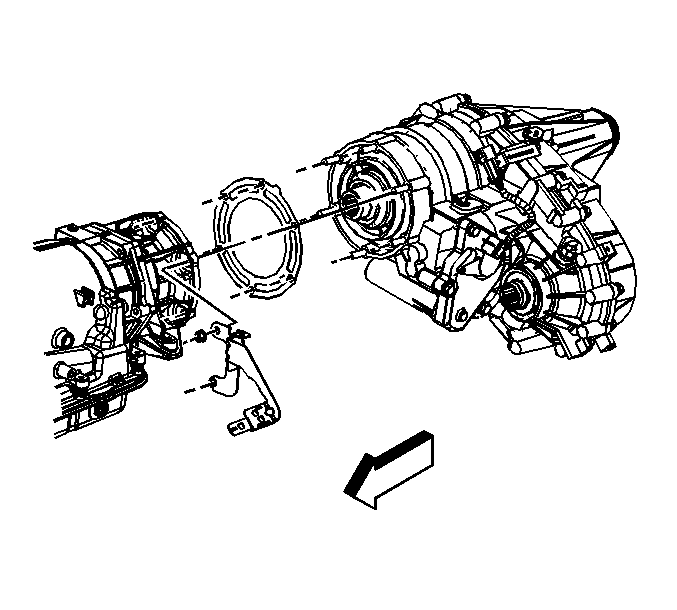
- Remove the transfer case adapter nuts.
- Remove the fuel pipe bracket from the studs.
- Remove the transfer case from the adapter.
- Rotate the transfer case so that it is perpendicular to the torsion bar mounting bracket.
- Lower the transfer case.
- Remove the gasket from the transfer case.
- Remove the transfer case from the transmission jack.
Important: Pull straight back on the transfer case in order to position the transfer case so that it can be rotated parallel to the transmission.
Installation Procedure
- Install the transfer case onto a suitable transmission jack.
- Install a NEW transfer case gasket.
- Rotate the transfer case so that it is parallel to the torsion bar mounting bracket.
- Raise the transfer case into position.
- Rotate the transfer case so that it is aligned with the adapter.
- Install the transfer case to the adapter.
- Install the fuel pipe bracket onto the studs.
- Install the transfer case adapter nuts.
- Install the transmission mount.
- Position the crossmember.
- Install the crossmember bolts.
- Install the transmission mount nuts and bolts.
- Remove the jack stand from the transmission.
- Install the front propeller shaft. Refer to Front Propeller Shaft Replacement .
- Install the rear propeller shaft. Refer to Rear Propeller Shaft Replacement .
- Fill the transfer case with fluid.
- Install the transfer case shield, if equipped. Refer to Transfer Case Shield Replacement .
- Lower the vehicle.
Important: When installing a new transfer case gasket, the gasket must be installed with the tab oriented up, and the yellow printing towards to front of the vehicle. Install the gasket without the use of any type of sealant or of lubricant.
Notice: Refer to Fastener Notice in the Preface section.
Important: Ensure that the gasket is flush to the transmission prior to installing the nuts.
Tighten
Tighten the nuts to 50 N·m (37 lb ft).
Tighten
Tighten the bolts to 70 N·m (52 lb ft).
Tighten
Tighten the nuts and bolts to 40 N·m (30 lb ft).
