HVAC Whistle Noise/Blower Motor Stalls or Vibrates (Reattach Adhesive Foam to Recirculation Door/Air Inlet Valve)

| Subject: | HVAC Whistle Noise/Blower Motor Stalls or Vibrates (Reattach Adhesive Foam to Recirculation Door/Air Inlet Valve) |
| Models: | 2006 Cadillac Escalade Models |
| 2006 Chevrolet Avalanche, Suburban, Tahoe |
| 2006-2007 Chevrolet Silverado (Classic) |
| 2006 GMC Yukon Models |
| 2006-2007 GMC Sierra (Classic) |
| with Delphi Built HVAC Cases Only |
| Attention: | This bulletin only applies to Delphi-built HVAC cases, which can be easily identified by visually inspecting the HVAC case from under the passenger instrument panel. The Visteon case is bolted together at the case halves and the bolts are silver in color. The Delphi case will be heat staked together at the HVAC case halves. If prior work has been performed on the Delphi case, the procedure is to bolt the case back together, so you may find bolts of many different colors. If there is any question, check the repair history and drop down the HVAC sound insulator panel to inspect the blower motor assembly. The Visteon blower motor will be bolted into the case. The Delphi blower motor turns inside the case and will have a plastic lock tab on the motor. |
This bulletin is being revised to update the statement above regarding how to identify a Delphi or Visteon HVAC case. Please discard Corporate Bulletin Number 06-01-39-011 (Section 01 - HVAC).
Condition
Some customers may comment on a whistle sound when the blower motor is on and the heating, ventilation and air conditioning (HVAC) control is put into recirculation mode. Other customers may comment that the blower motor stalls out or vibrates or that a "sticky" noise is present during air recirculation door operation.
Cause
The adhesive foam used on the air recirculation door (air inlet valve) may not be properly secured, causing some of the foam to contact other HVAC components. The foam could potentially come in contact with the blower motor fan and/or the foam may stick to the inner HVAC case walls, causing the door to stick or hang up.
Correction
Locate the loose foam and reattach the adhesive foam to the recirculation door using the steps below:
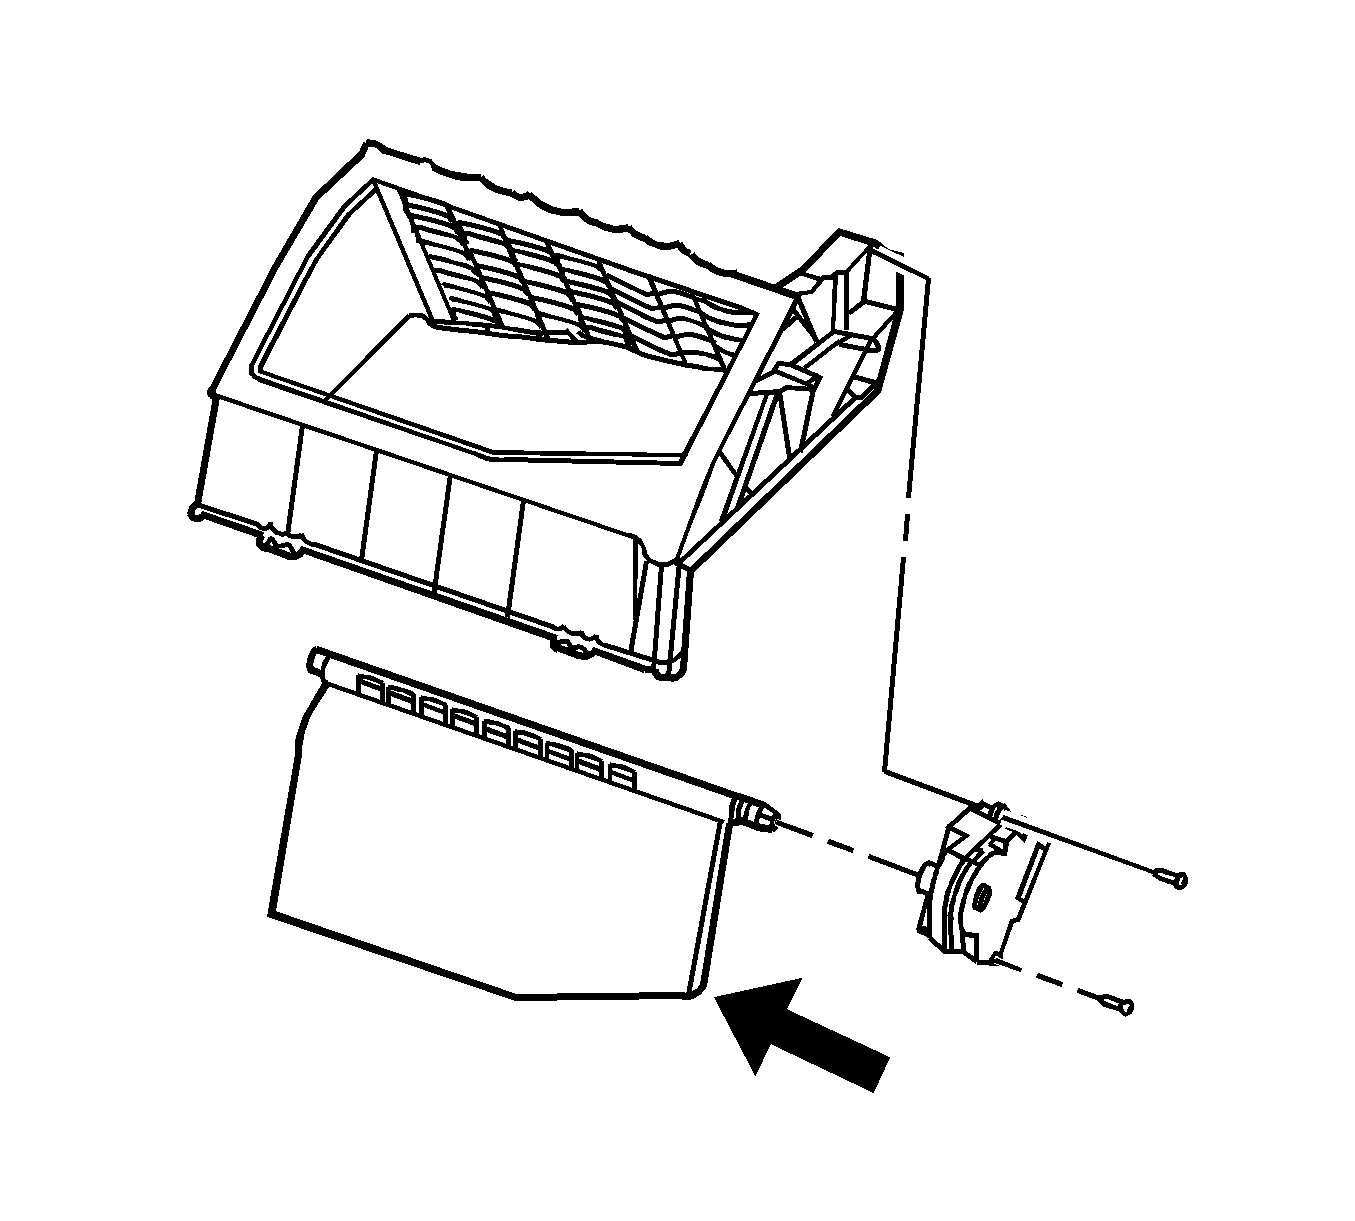
- Remove two screws from the right side HVAC sound insulator panel (hush panel).
- Drop down the insulator panel.
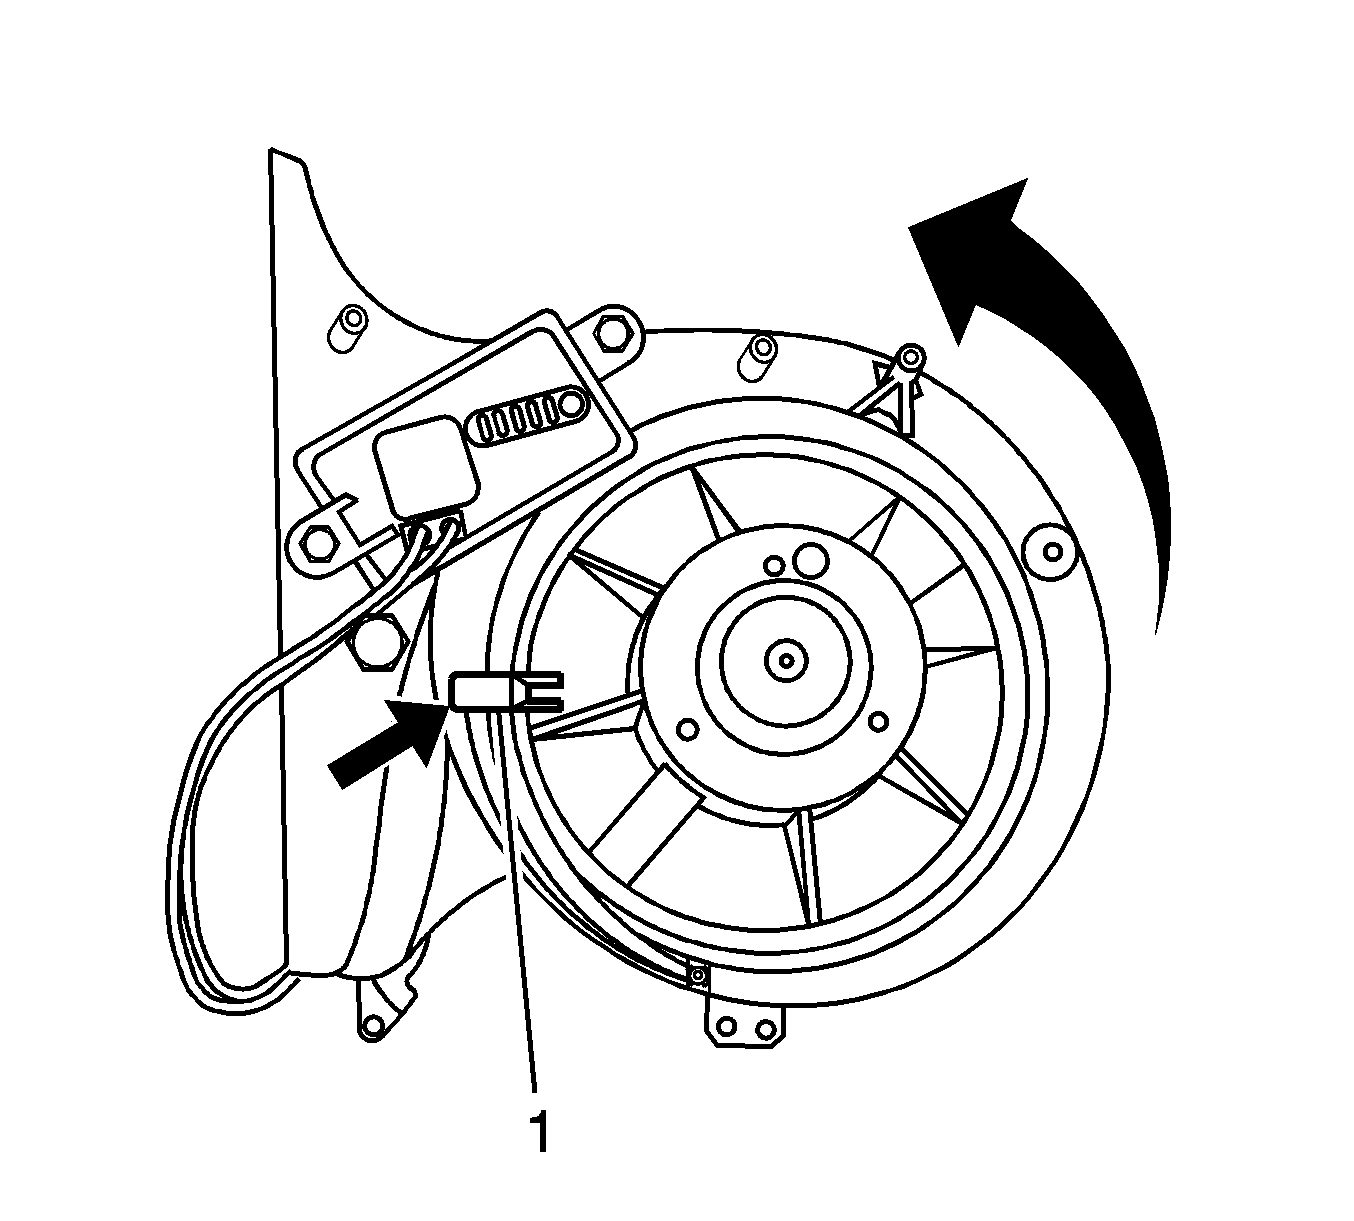
- Disconnect the electrical connector from the blower motor.
- Unlock the blower motor retaining tab, referring to graphic above, by pulling the retaining tab (1) down while turning the blower motor counterclockwise in order to disengage the blower motor from the HVAC case.
- Remove the blower motor.
- Locate the partially loose foam from inside the HVAC case with a flashlight.
- If the foam is damaged, refer to Recirculation Door Replacement (Delphi) or Air Inlet Assembly Replacement in SI and do not proceed with the following steps.
- If the foam is not damaged, reach into the HVAC case and reattach the loose foam to the air recirculation door by using your hand to apply firm pressure to the foam and door.
- Confirm that the foam has been secured to the door by cycling between recirculation and outside air positions on the control head three times. Once cycled then observe from the blower motor opening in the HVAC case to see if the foam is secure. Refer to the graphic above.
- Install the blower motor into the HVAC case by turning the blower assembly clockwise until the retaining tab locks into place.
- Connect the electrical connector to the blower motor.
- Reinstall the insulator panel and two screws.
- Verify that the customer's concern has been fixed.
Important: It may be necessary to cycle the air inlet door by placing the ignition switch into the run position and selecting the buttons on the HVAC control head from outside air to recirculation mode.
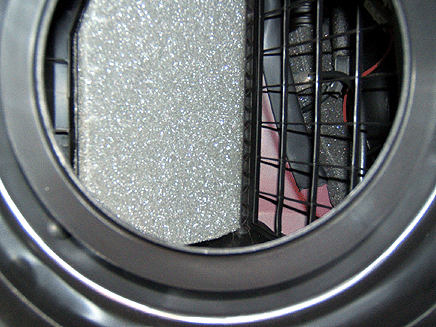
Important: The recirculation door should have foam on both sides of the door to seal properly. Refer to the above graphic.
Tip
If the foam is not secure, you may apply a small amount of 3M™ Super 77
Spray Adhesive, or equivalent, to an acid brush and apply the adhesive to the door
and reattach the loose foam.
Tighten
Tighten the screws to 1.6 N·m (14 lb in).
Warranty Information
For vehicles repaired under warranty, use:
Labor Operation | Description | Labor Time |
|---|---|---|
D9730* | Reattach foam to recirculation door/Air Inlet Valve | 0.5 hr |
*This is a unique labor operation number for bulletin use only. The number will not be published in the Labor Time Guide. | ||
