4L60-E/4L65-E/4L70-E Automatic Transmission/Torque Converter Clutch (TCC) Shudder, Water in Transmission (Repair Transmission and Seal Cowl Area)

| Subject: | 4L60-E/4L65-E/4L70-E Automatic Transmission/Torque Converter Clutch (TCC) Shudder, Water In Transmission (Repair Transmission and Seal Cowl Area) |
| Models: | 2004-2006 Cadillac Escalade Models |
| 2004-2006 Chevrolet Avalanche, Silverado, Suburban, Tahoe Models |
| 2004-2006 GMC Sierra, Yukon Models |
| with 4L60-E (RPO M30), 4L65-E (RPO M32) or 4L70-E (RPO M70) Automatic Transmission |
This bulletin is being revised to add additional model years, the 4L70-E transmission and clarify usage of Labor Operation B9758. Please discard Corporate Bulletin Number 05-07-30-017A (Section 07 -- Transmission/Transaxle).
Condition
Some customers may comment on a shudder condition at approximately 64-80 km/h (40-50 mph) when the TCC engages.
Cause
This condition may be caused by water in the automatic transmission fluid (ATF). Water may enter the transmission by dripping from the cowl area onto the handle of the transmission fluid level indicator.
Indications of water in the ATF may include:
| • | Visible water in the oil pan |
| • | A milky white substance inside the pan area |
| • | Spacer plate gaskets that appear to be glued to the spacer plate, valve body or case |
| • | Rust on internal transmission iron/steel components |
Important: For vehicles suspected of having a leaking transmission oil cooler that would cause contamination of the transmission fluid with coolant, the following check should be performed before deciding to replace the radiator.
• Remove the surge tank cap and examine the coolant for signs of contamination with transmission fluid (the coolant will have a milky, not clear appearance). • If the coolant has a normal, clear appearance, the radiator should not be replaced. • The cooler can also be tested by following the Coolant System Leak Test procedure. Do NOT replace a radiator without verifying that the transmission oil cooler is leaking.
Correction
Two steps are required to repair the vehicle. First, repair the transmission and second, seal the cowl area to prevent repeat water contamination of the ATF. This bulletin is focused on repairing the second step.
Transmission Repair
- Remove the transmission. Refer to the appropriate SI procedure.
- Disassemble and inspect the transmission. Refer to Unit Repair Automatic Transmission - 4L60-E/4L65-E or 4L70-E.
Important: If water or coolant is found in the transmission, the following steps must be performed:
Important: If water or coolant is found in the transmission, the following components MUST be replaced.
• Replace all of the rubber type seals. • Replace all of the composition-faced clutch plate assemblies including the band. • Replace all of the nylon parts. • Replace the torque converter. • Thoroughly clean and rebuild the transmission, using new gaskets and oil filter. • Flush and flow check the transmission oil cooler using J 45096. Refer to Corporate Bulletin Number 02-07-30-052D or newer - Automatic Transmission Oil Cooler Flush and Flow Test Essential Tool J 45096 TransFlow .
Seal the Cowl
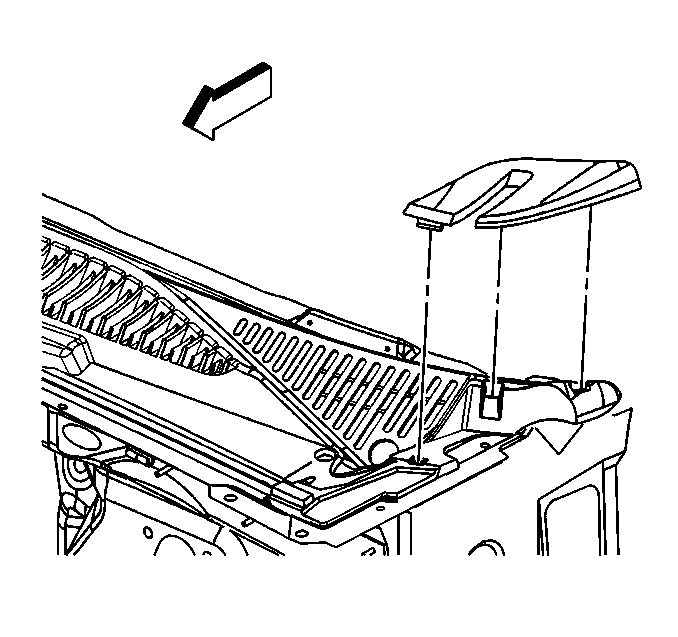
- Open the hood and install fender covers.
- Remove both air inlet grille caps by pulling up on the caps.
- Loosen the sheet metal screws, one on each end of the air inlet grille panel.
- Remove the four attaching clips running along the edges of the center air inlet grille panel.
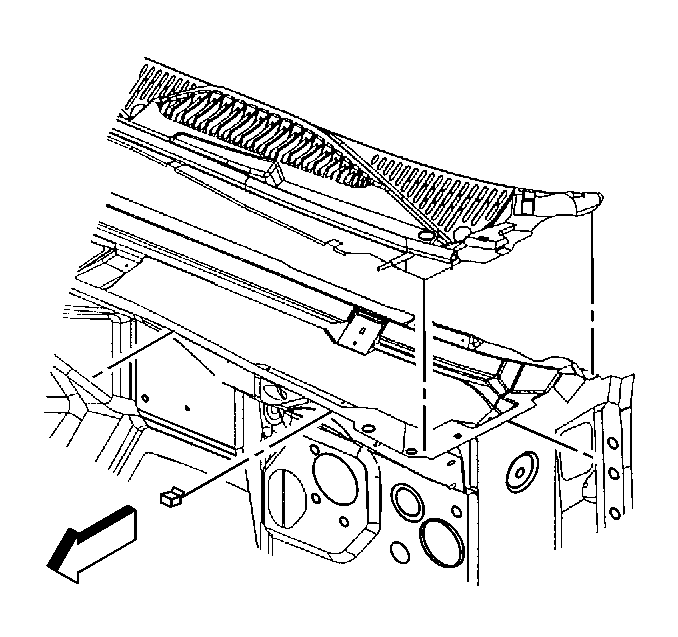
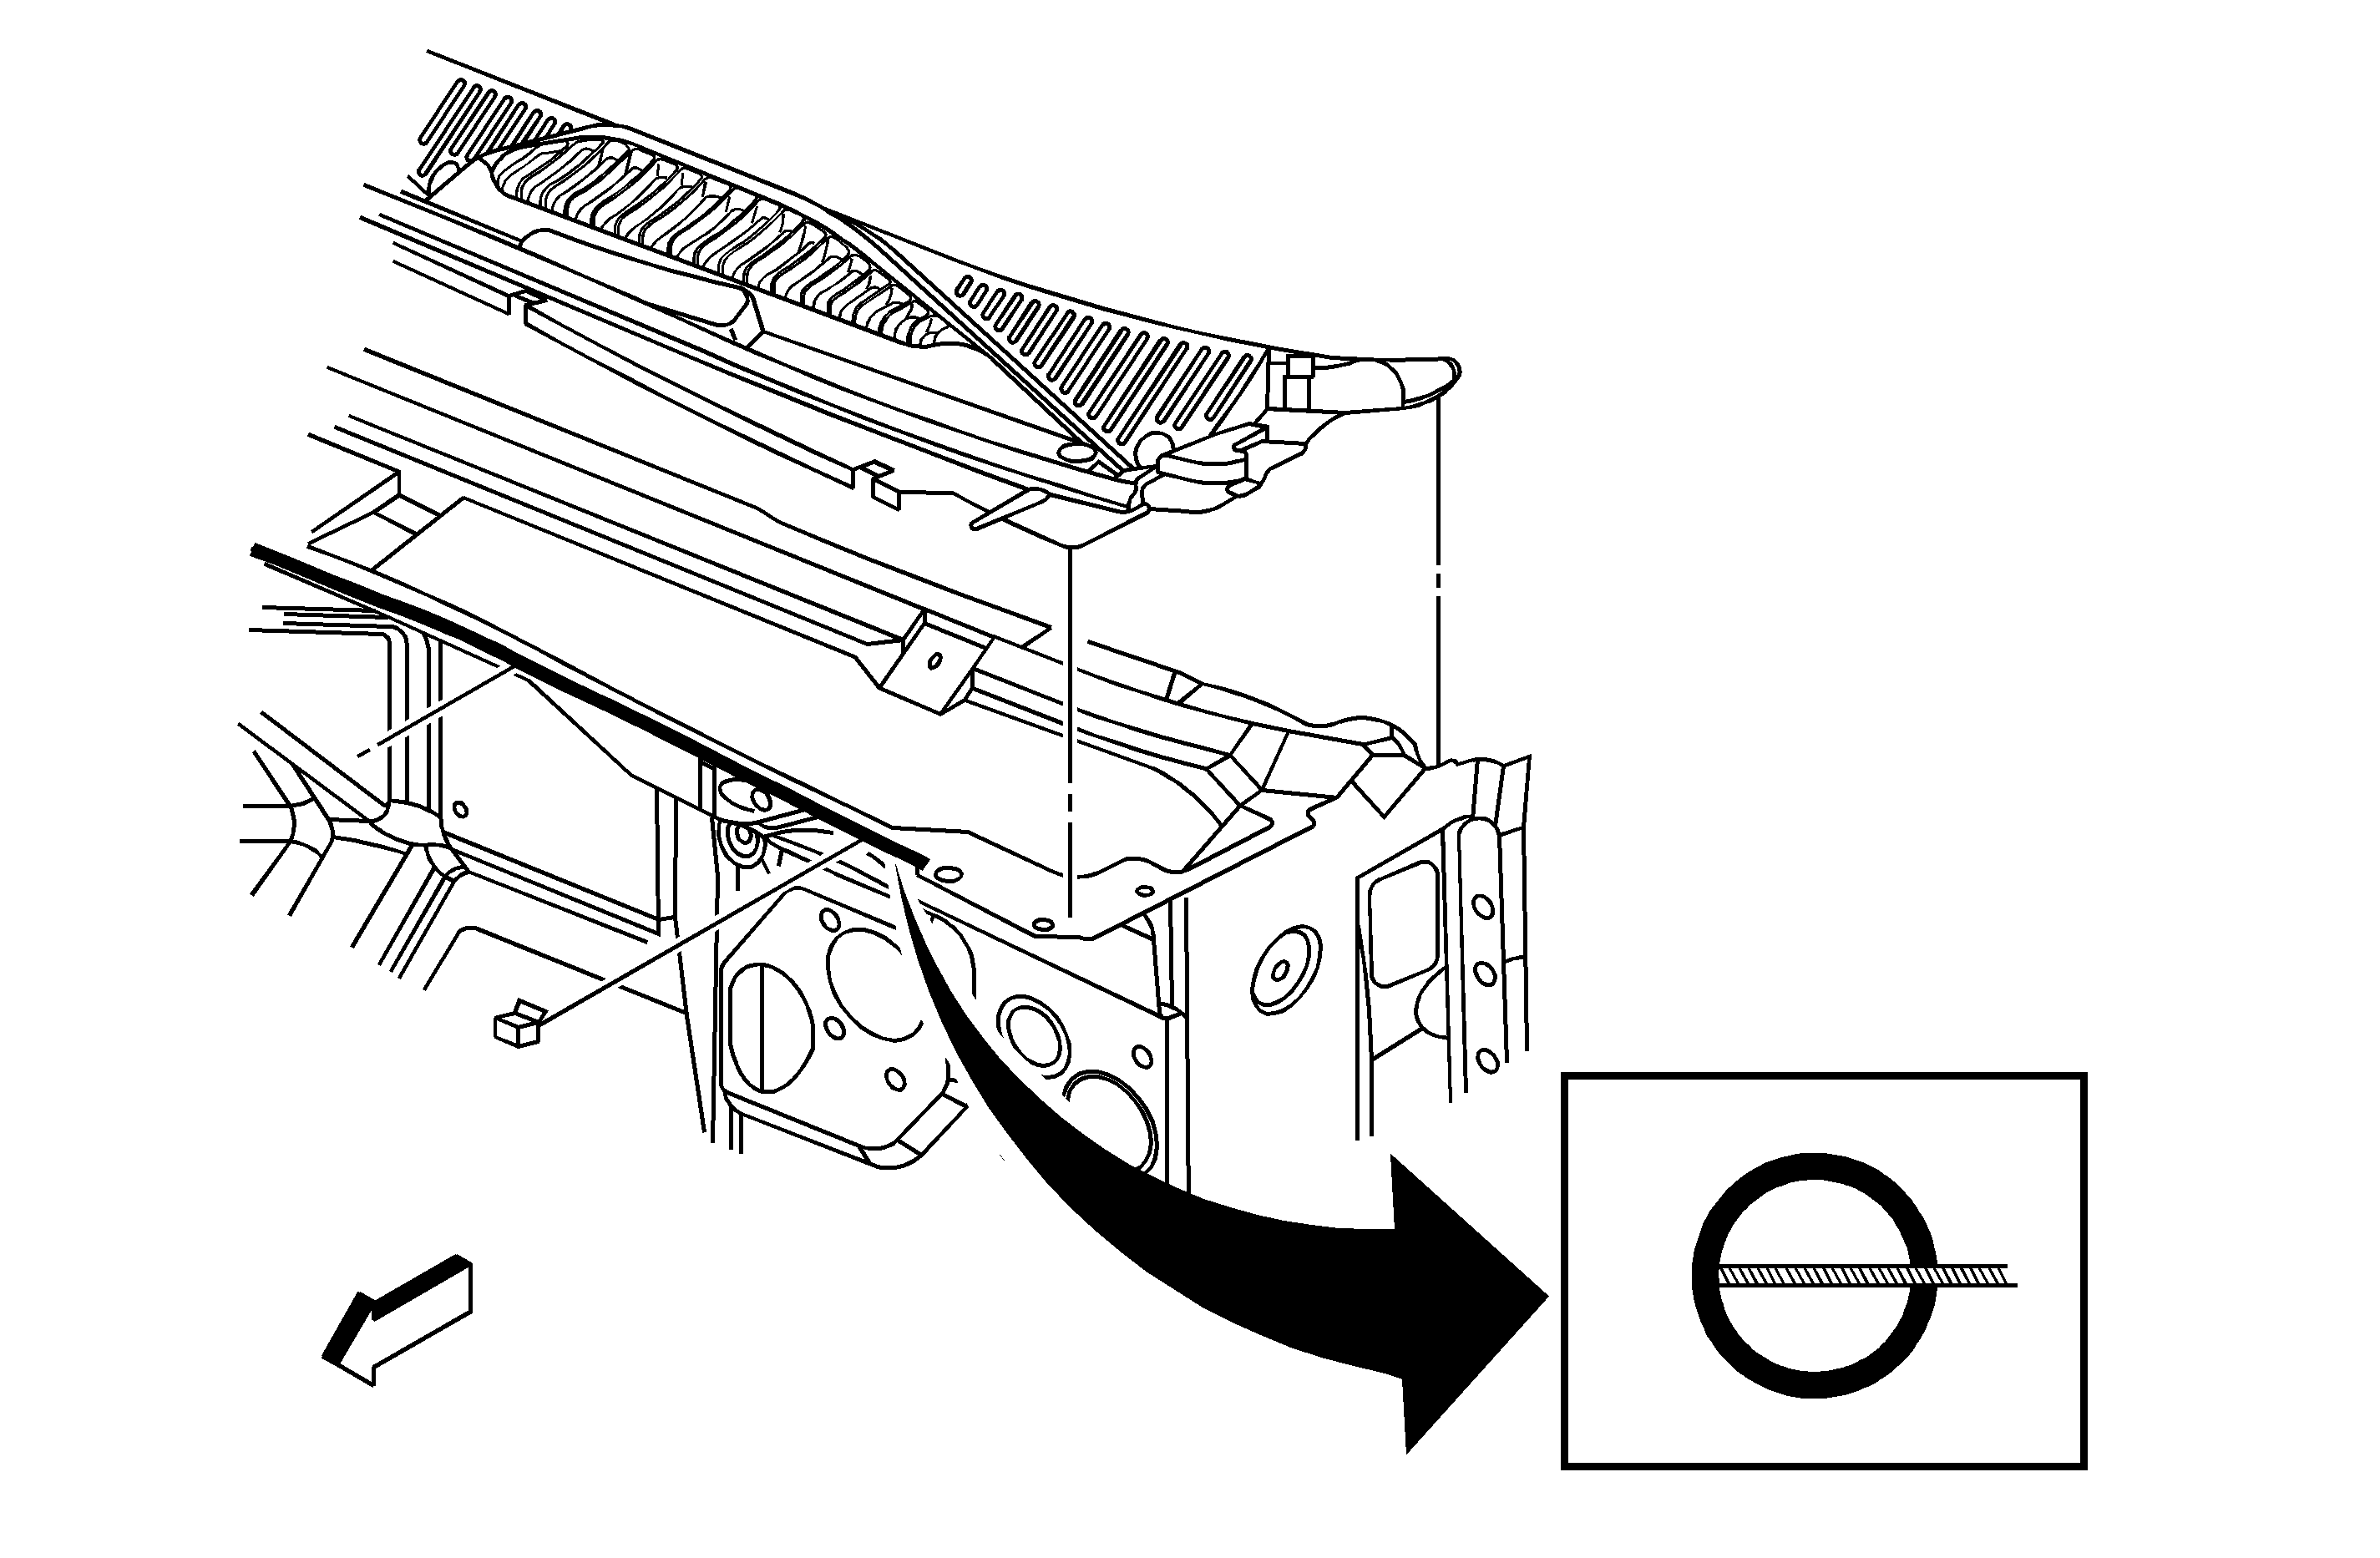
- Measure and cut a piece of 7/64 inch hose, P/N 14033569 or equivalent, 1.27 meters (50 inch) long.
- With an appropriate sharp cutting tool, cut down the center of the hose, splitting the hose into a C shape, allowing the hose to be installed over the cowl seam.
- Apply a thin layer of Weather-strip Adhesive, P/N 12345097 (in Canada use 10953479) or equivalent, into the center of the cut hose.
- Lift up on the air inlet grille panel in order to expose the cowl area metal edge.
- Place the 7/64 inch hose over the cowl metal edge between the two inner fender brace bolts. Make sure that the hose is long enough to be retained by the two most outer air inlet retaining clips.
- Push back, towards the windshield, on the air inlet grille and install the four retaining clips.
- Push back, towards the windshield, on the air inlet grille and tighten the end screws.
- Install the two air inlet grille end caps.
- Close the hood.
- Place the vehicle in an area that a water test can be performed.
- Turn OFF the vehicle.
- Open the hood.
- Place a shop rag over the top of the transmission dipstick.
- Close the hood.
- Spray and/or run water over the windshield and cowl area for three minutes.
- Open the hood.
- Inspect the shop rag for signs of water leaking on top of the transmission dipstick area.
Tighten
Tighten the sheet metal screws to 2 N·m (18 lb in).
| • | If NO water is present, close the hood and NO additional repairs are required. |
| • | If water IS present, repeat steps 1-20. |
Warranty Information
Important:
• DO NOT submit a transmission repair (labor and parts) on Labor Operation B9758. • Use the appropriate transmission repair labor operation in conjunction with B9758.
For vehicles repaired under warranty, use:
Labor Operation | Description | Labor Time |
|---|---|---|
B9758 | Install 7/64 Hose - Cowl Water Deflector | 0.5 hr |
