For 1990-2009 cars only
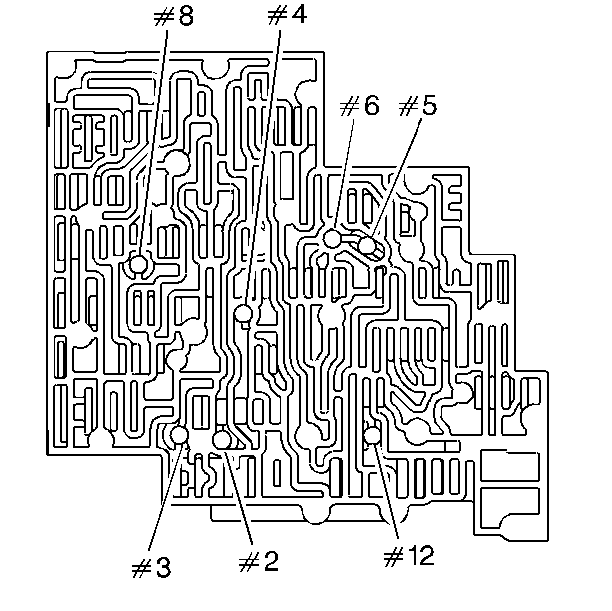
- Install the check balls in the valve body and retain check balls with Transjel™ or an equivalent.
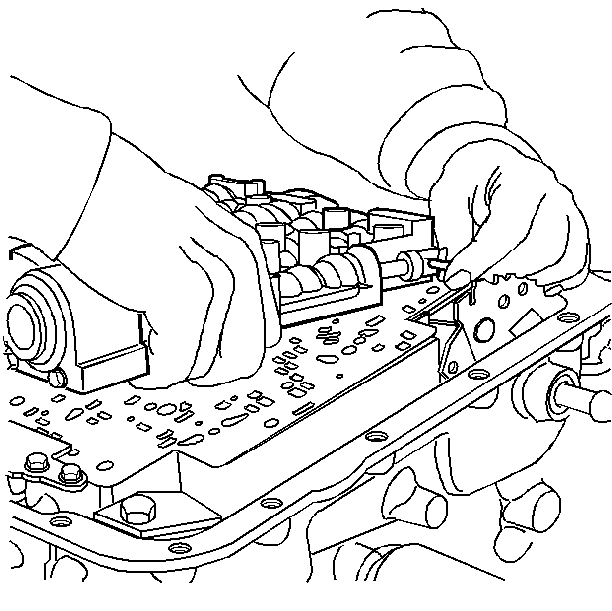
- Install the valve body and connect the manual valve link to the inside detent lever.
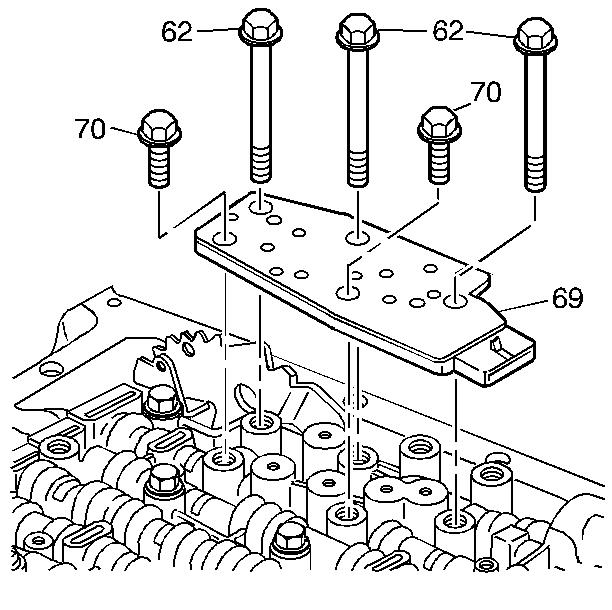
- Install the fluid level indicator stop bracket and the valve body bolts that are shown only.
- Finger tighten the bolts.
- Inspect the transmission pressure switch assembly for the following defects:
- Install the transmission pressure switch assembly and bolts.
- Inspect the wiring harness solenoid assembly for the following defects:
- Install the transmission wiring harness on the valve body.
- Install the TCC solenoid and bolts to hold the wiring harness.
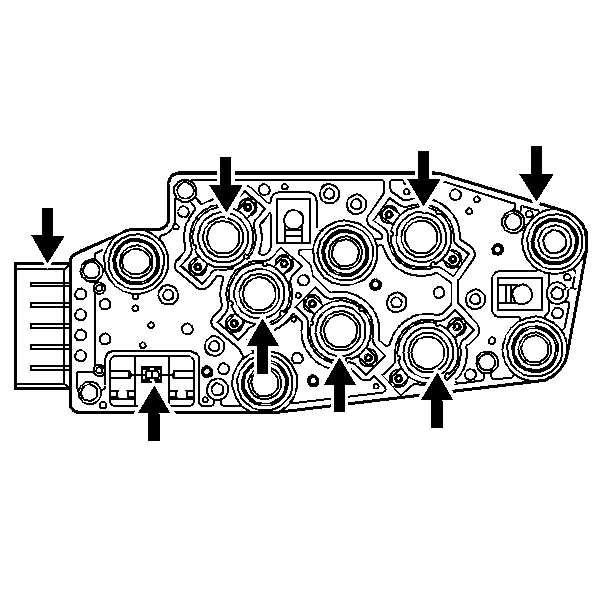
- Tighten the bolts in the order shown.
- Install the TCC PWM solenoid and the solenoid retainer.

| • | Damage |
| • | Debris |
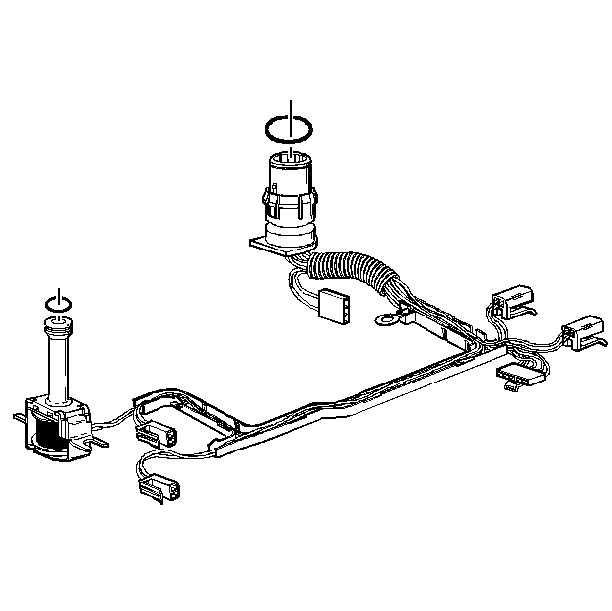
| • | Damage |
| • | Cracked connectors |
| • | Exposed wires |
| • | Loose pins |
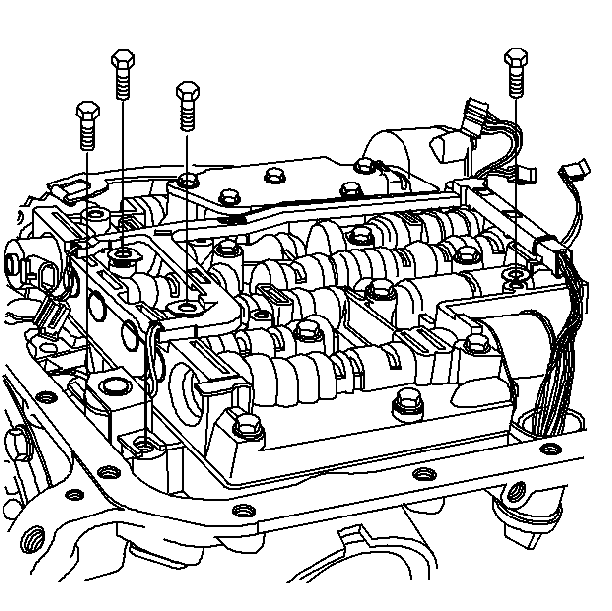
Important: You must tighten certain bolts in a spiral pattern as indicated by the arrows. If you tighten these bolts at random you may distort valve bores. This will inhibit valve operation.

Tighten
Tighten the bolts to 11 N·m (8 lb ft).
Each numbered bolt refers to its bolt size, as indicated by the following chart:
| • | 1 - M6 x 1.0 x 65.0 |
| • | 2 - M6 x 1.0 x 54.4 |
| • | 3 - M6 x 1.0 x 47.5 |
| • | 4 - M6 x 1.0 x 35.0 |
| • | 5 - M8 x 1.25 x 20.0 |
| • | 6 - M6 x 1.0 x 12.0 |
| • | 7 - M6 x 1.0 x 18.0 |

