Removal Procedure
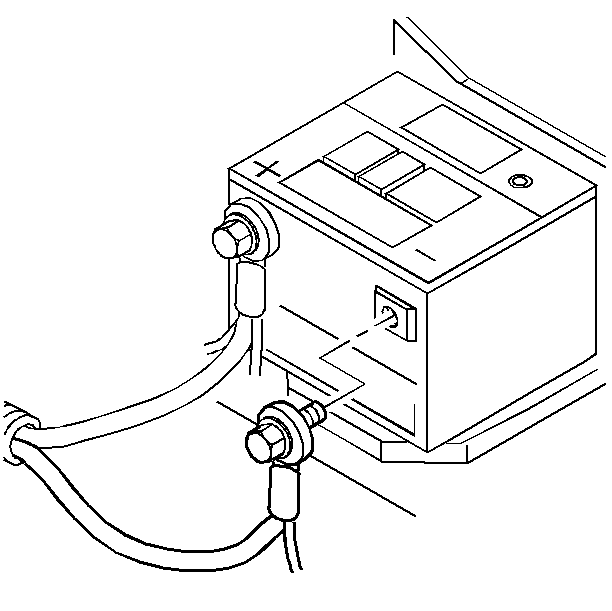
- Disconnect the battery negative cable assembly from the battery negative
terminal. Refer to
Caution: Unless directed otherwise, the ignition and start switch must be in the OFF or LOCK position, and all electrical loads must be OFF before servicing any electrical component. Disconnect the negative battery cable to prevent an electrical spark should a tool or equipment come in contact with an exposed electrical terminal. Failure to follow these precautions may result in personal injury and/or damage to the vehicle or its components.
in General Information. - Remove the transmission fluid and the fluid filter. Refer to Automatic Transmission Fluid/Filter Changing .
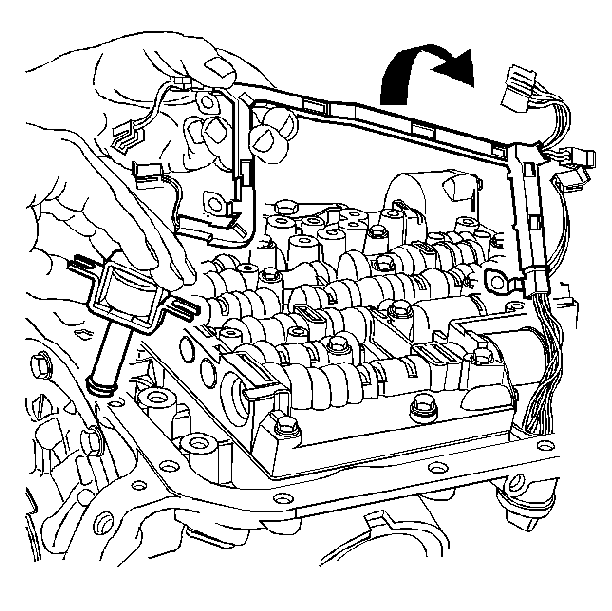
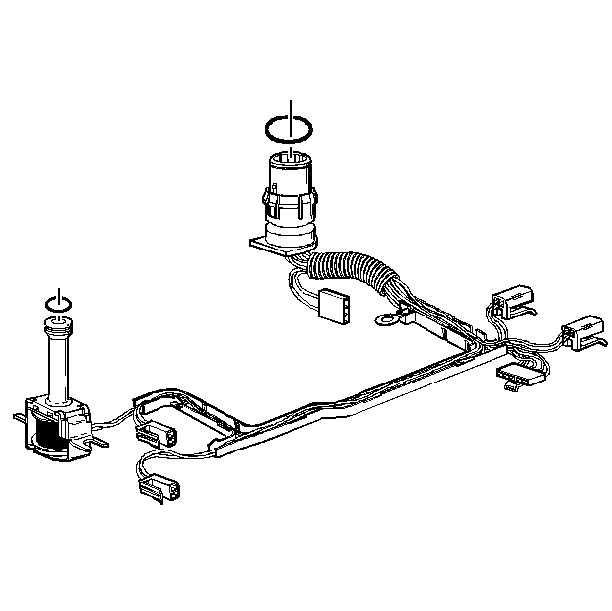
- Disconnect all electrical connectors from the electrical components.
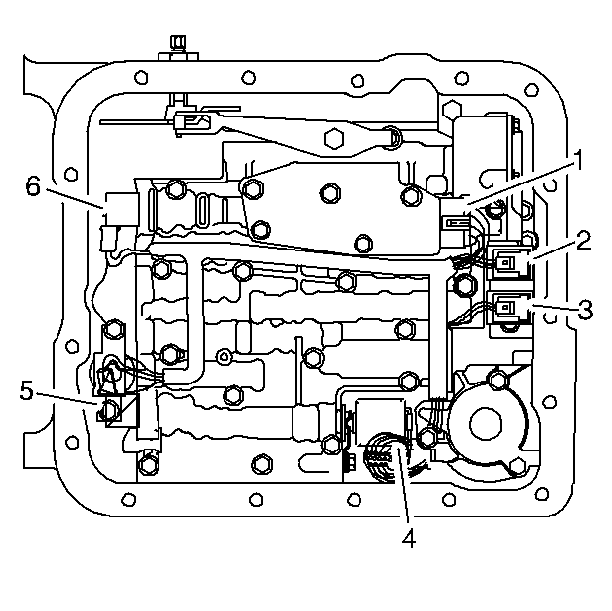
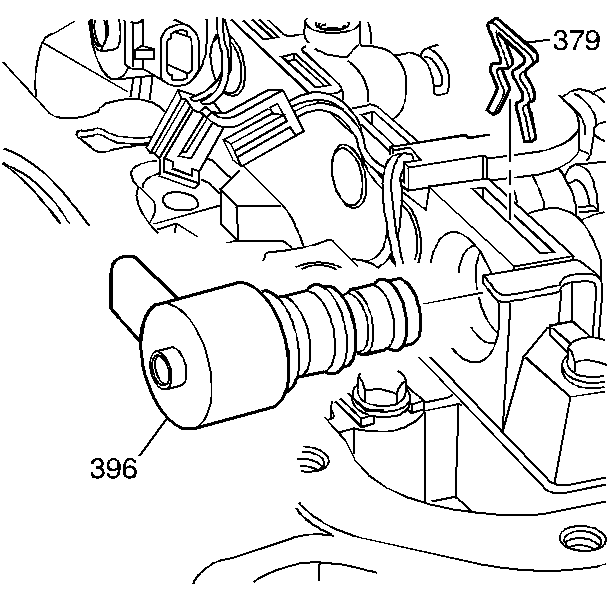
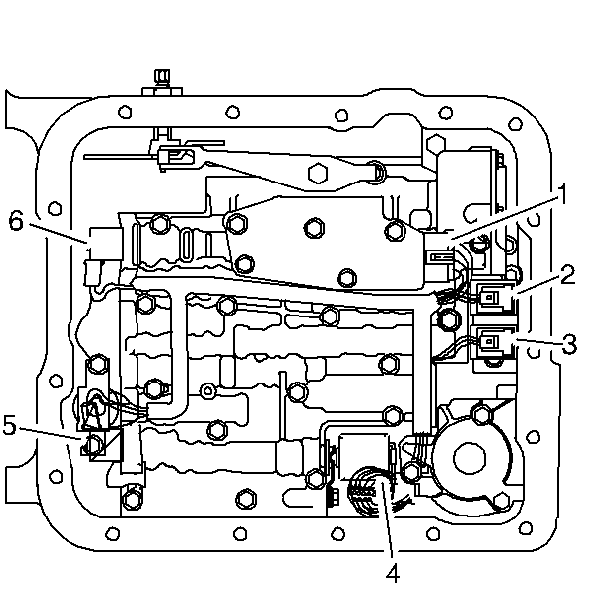
- Remove the TCC PWM retainer clip.
- Remove the TCC PWM solenoid.
- Remove the TCC solenoid bolts; and remove the valve body bolts that hold the wiring harness down.
- Remove the TCC solenoid and the wiring harness.
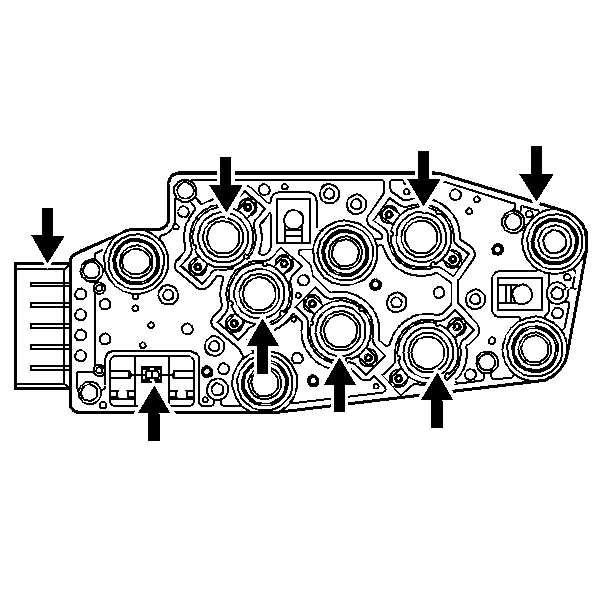
- Remove the pressure switch assembly bolts.
- Remove the pressure switch assembly.
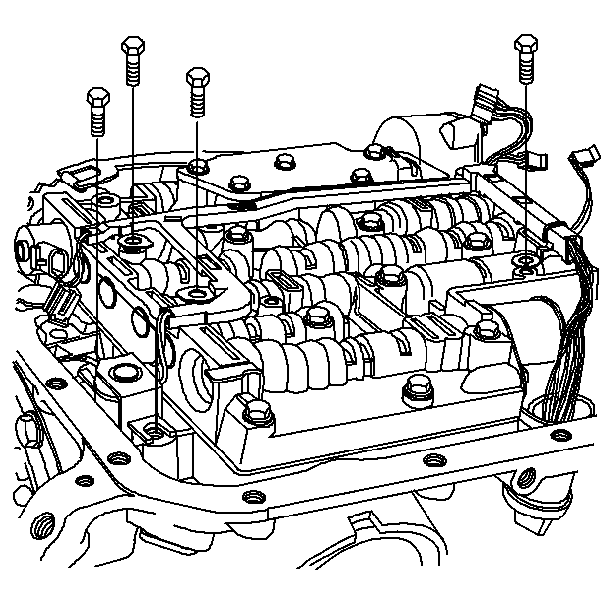
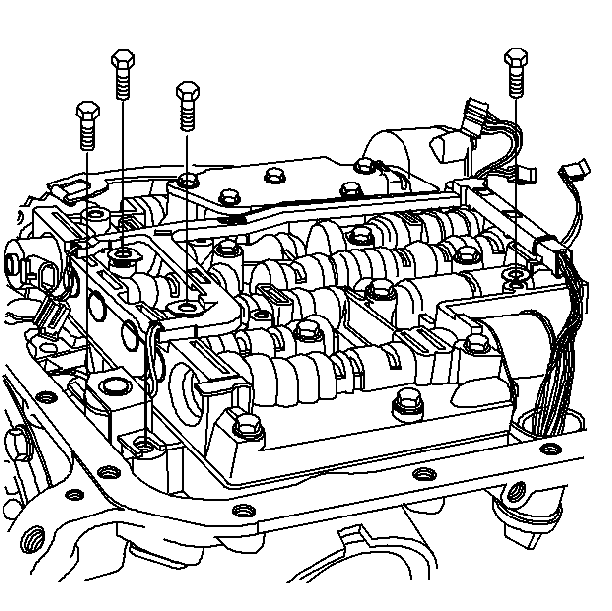
- Remove all valve body bolts.
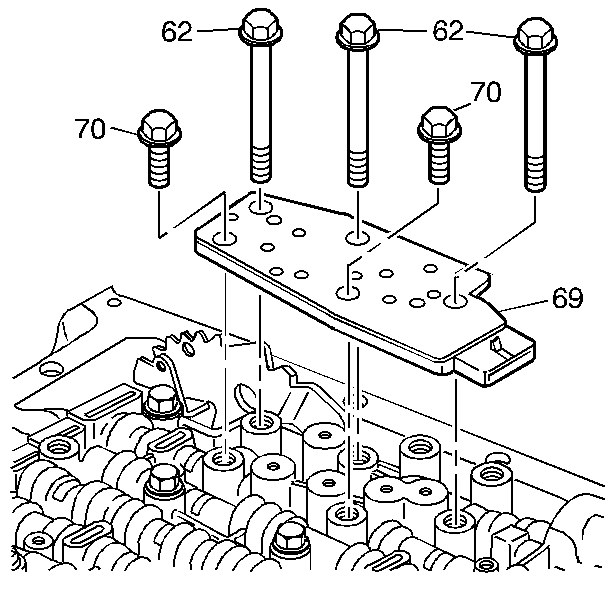
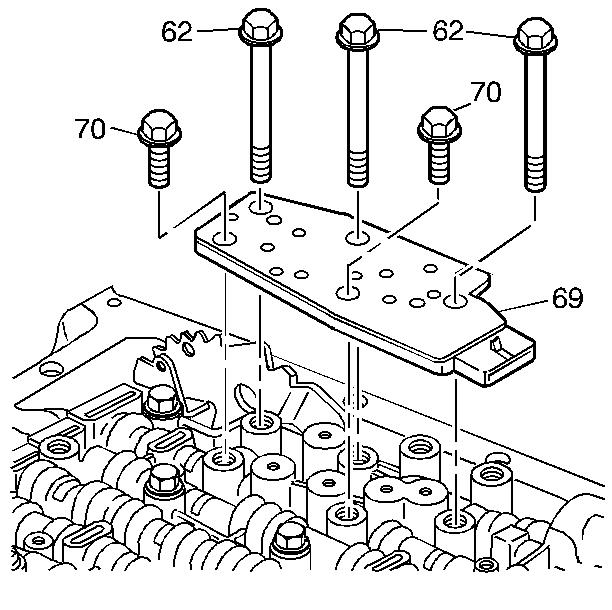
- Remove the oil level indicator gauge stop bracket.
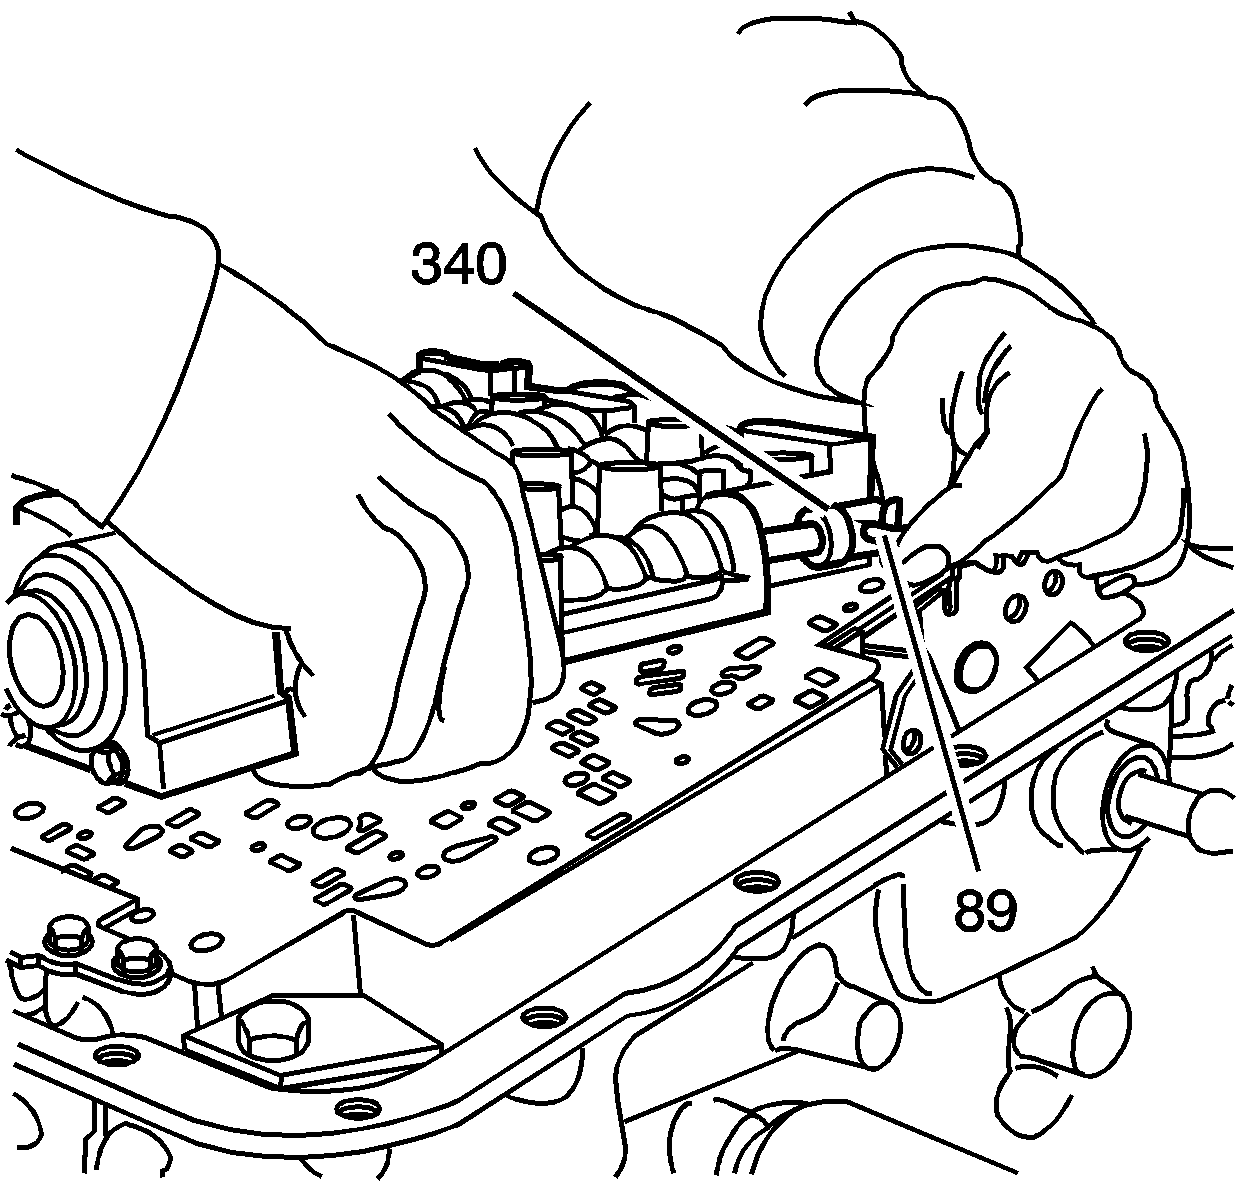
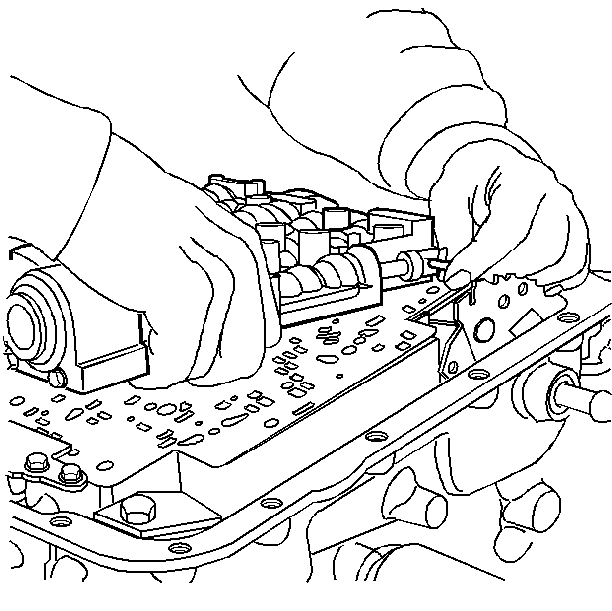
- Lower the valve body carefully so that the checkballs remain on the spacer plate in the correct location. While lowering the valve body, disconnect the manual valve link from the transmission manual valve.
- Remove the following seven valve body checkballs.
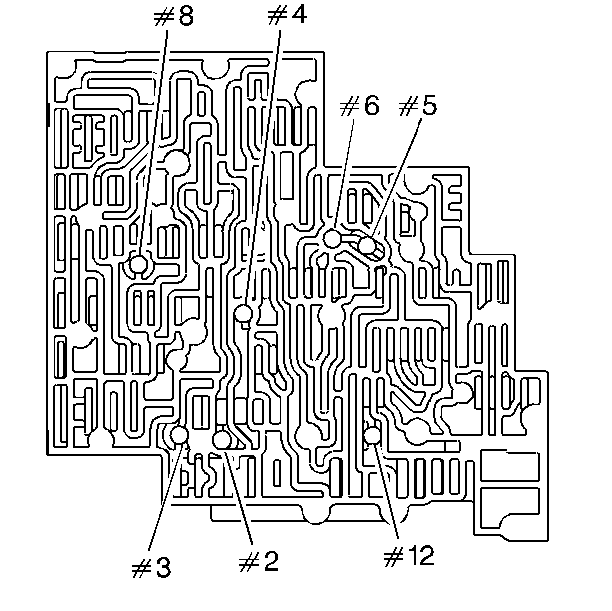
| • | 1-2 Upshift (8) |
| • | 3-4 Clutch Exhaust (4) |
| • | Overrun Clutch Control (6) |
| • | Overrun Clutch Feed (5) |
| • | Forward Clutch Control (12) |
| • | 3rd Accumulator (2) |
| • | Reverse Input (3) |
Installation Procedure
Tools Required
J 36850 Transjel® Transmission Assembly Lubricant
- Install the seven check balls in the valve body and retain check balls with J 36850 or the equivalent.
- Install the valve body and connect the manual valve link to the inside detent lever.
- Install the oil level indicator gauge stop bracket and the valve body bolts that are shown only.
- Finger tighten the bolts.
- Inspect the transmission pressure switch assembly for the following defects:
- Install the transmission pressure switch assembly and bolts.
- Inspect the wiring harness solenoid assembly for the following defects:
- Install the transmission wiring harness on the valve body.
- Install the TCC solenoid and bolts to hold the wiring harness.
- Install the remaining valve body attaching bolts.
- Install the TCC PWM solenoid.
- Install the TCC PWM retainer clip.
- Connect all the electrical connectors to all the electrical components.
- Install the oil pan, the oil filter, and the oil pan gasket. Refer to Automatic Transmission Fluid/Filter Changing .
- Remove the safety stands.
- Lower the vehicle.
- Connect the battery negative cable assembly to the battery negative terminal.
- Add new transmission fluid. Refer to Fluid Capacity and to Transmission Fluid Check .
| • | 1-2 Upshift (8) |
| • | 3-4 Clutch Exhaust (4) |
| • | Overrun Clutch Control (6) |
| • | Overrun Clutch Feed (5) |
| • | Forward Clutch Control (12) |
| • | 3rd Accumulator (2) |
| • | Reverse Input (3) |

| • | Damage |
| • | Debris |
| • | Damage |
| • | Cracked connectors |
| • | Exposed wires |
| • | Loose pins |

Notice: Torque valve body bolts in a spiral pattern starting from the center. If the bolts are torqued at random, valve bores may be distorted and inhibit valve operation.
Tighten
Tighten the valve body bolts to 11 N·m (8 lb ft).
Notice: Use the correct fastener in the correct location. Replacement fasteners must be the correct part number for that application. Fasteners requiring replacement or fasteners requiring the use of thread locking compound or sealant are identified in the service procedure. Do not use paints, lubricants, or corrosion inhibitors on fasteners or fastener joint surfaces unless specified. These coatings affect fastener torque and joint clamping force and may damage the fastener. Use the correct tightening sequence and specifications when installing fasteners in order to avoid damage to parts and systems.

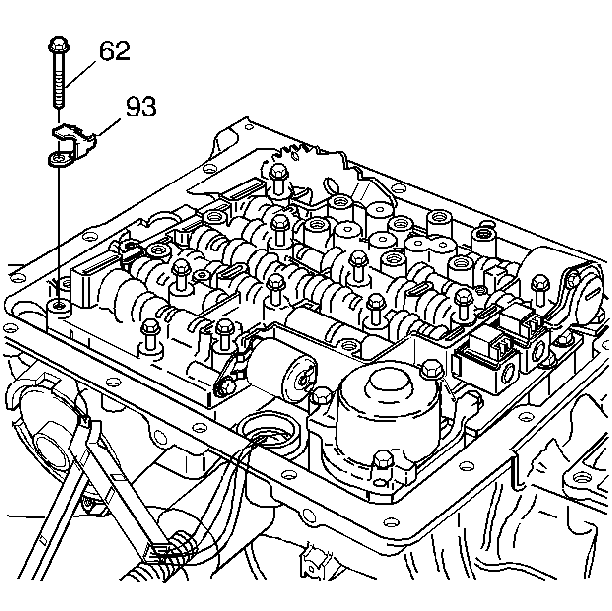
Tighten
Tighten the terminal bolt to 15 N·m (11 lb ft).
