High Mount Stop Lamp Replacement Utility
Removal Procedure
- Ensure the headlamp switch is in the OFF position.
- Remove the upper garnish molding at the headliner. Refer to Rear Upper Garnish Molding Replacement in Interior Trim.
- Remove the right and left side rear window garnish molding.
- Lower the rear of the headliner in order to access the electrical connector.
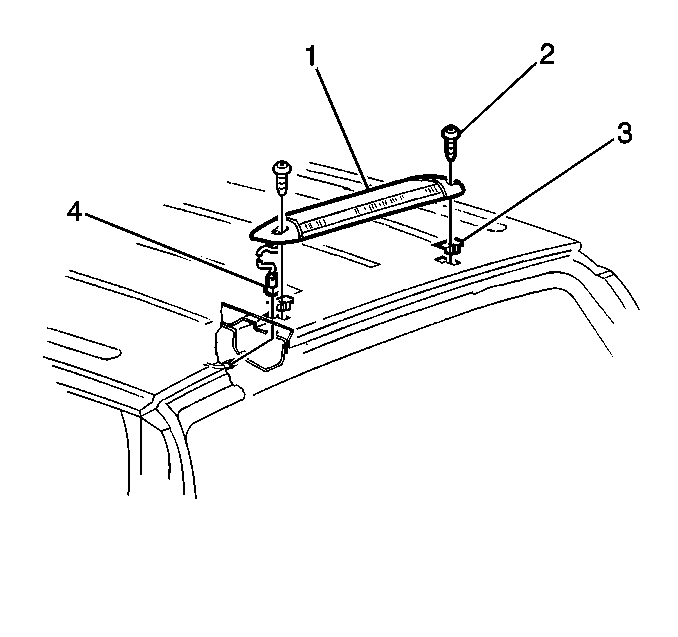
- Disconnect the electrical connector (4).
- Attach a short piece of wire to the high mounted stop lamp connector in order to assist the guiding of the harness through the body.
- Remove the high mounted stop lamp screws (2).
- Remove the high mounted stop lamp (1) from the vehicle.
Installation Procedure
- Attach the harness to the guide wire.
- Using the guide wire, pull the lamp wire through the hole in the roof panel.
- Remove the guide wire.
- Install the high mounted stop lamp (1) to the vehicle with the screws (2).
- Connect the electrical connector (4).
- Install the headliner.
- Install the left and right side rear window garnish molding.
- Install the rear upper garnish molding. Refer to Rear Upper Garnish Molding Replacement in Interior Trim.
Notice: Refer to Fastener Notice in the Preface section.

Tighten
Tighten the screws to 2 N·m (17 lb in).
High Mount Stop Lamp Replacement Cadillac
Removal Procedure
- Raise the lift gate window.
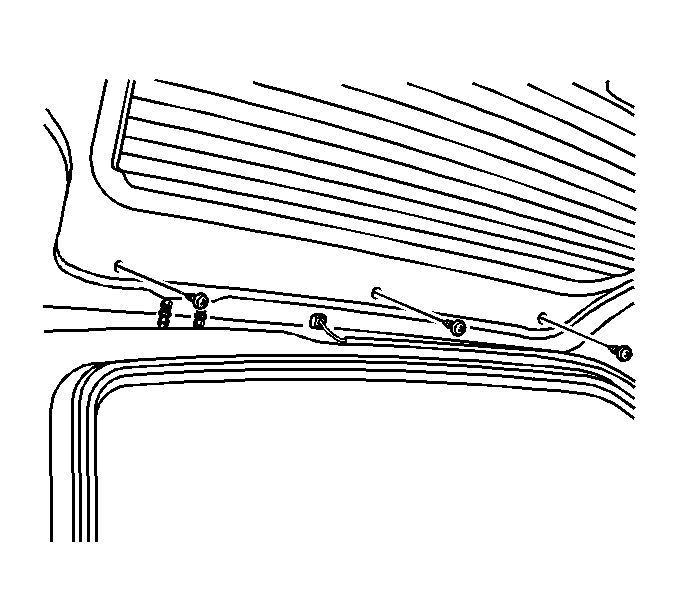
- Remove the retainers from the stop lamp.
- Lower the lift gate window.
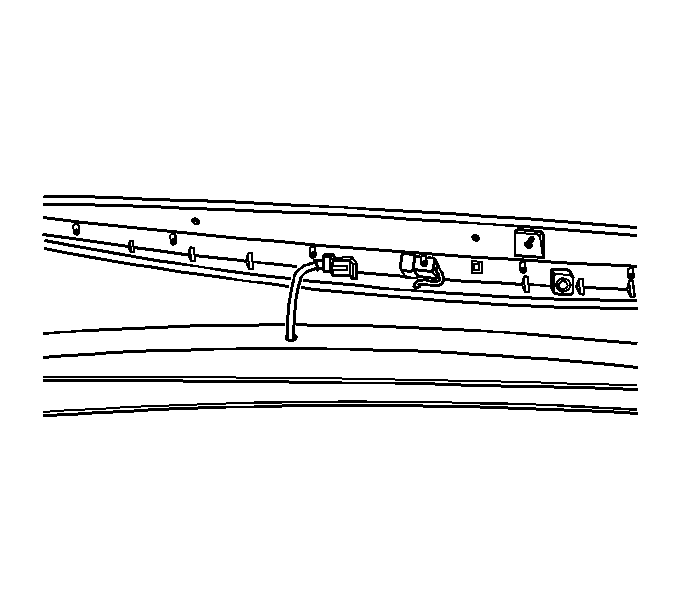
- Raise the stop lamp to disconnect the electrical connector from the lamp.
- Remove the center high-mounted stop lamp from the vehicle.
Installation Procedure
- Connect the electrical harness to the stop lamp.
- Install the center high-mounted stop lamp onto the vehicle.
- Raise the lift gate window.
- Install the retainers into the holes.
- Close the lift gate window.

Notice: Use the correct fastener in the correct location. Replacement fasteners must be the correct part number for that application. Fasteners requiring replacement or fasteners requiring the use of thread locking compound or sealant are identified in the service procedure. Do not use paints, lubricants, or corrosion inhibitors on fasteners or fastener joint surfaces unless specified. These coatings affect fastener torque and joint clamping force and may damage the fastener. Use the correct tightening sequence and specifications when installing fasteners in order to avoid damage to parts and systems.

Tighten
Tighten the retainers to 1.2 N·m (10 lb in).
High Mount Stop Lamp Replacement Escalade EXT
Removal Procedure
- Ensure the headlamp switch is in the OFF position.
- Remove the rear compartment cover assembly.
- Remove the cargo box bridge center bar. Refer to Cargo Box Bridge Cross Bar Replacement in Exterior Trim.
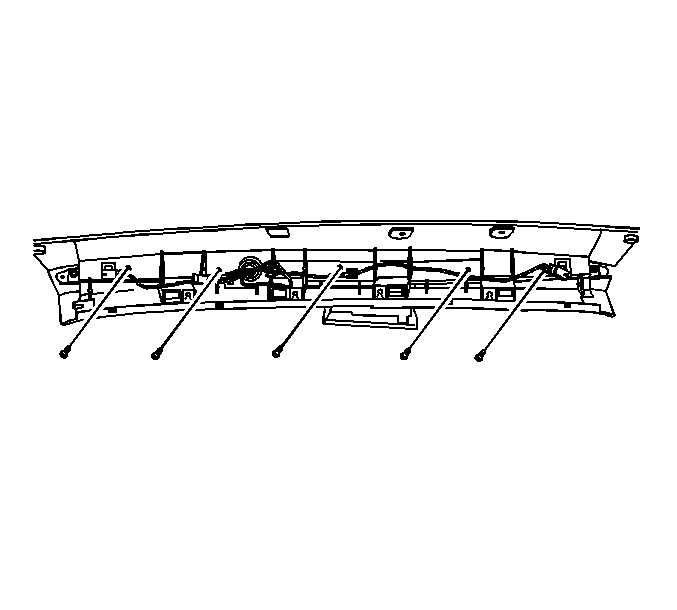
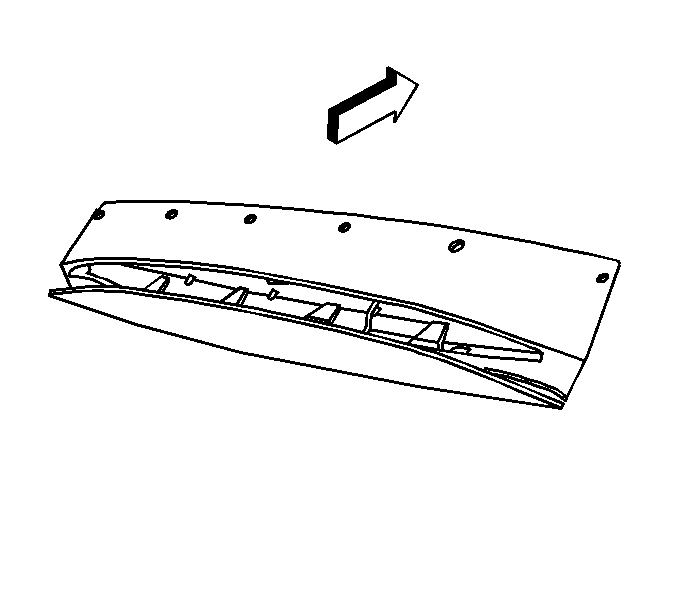
- Remove the stop lamp retaining screws.
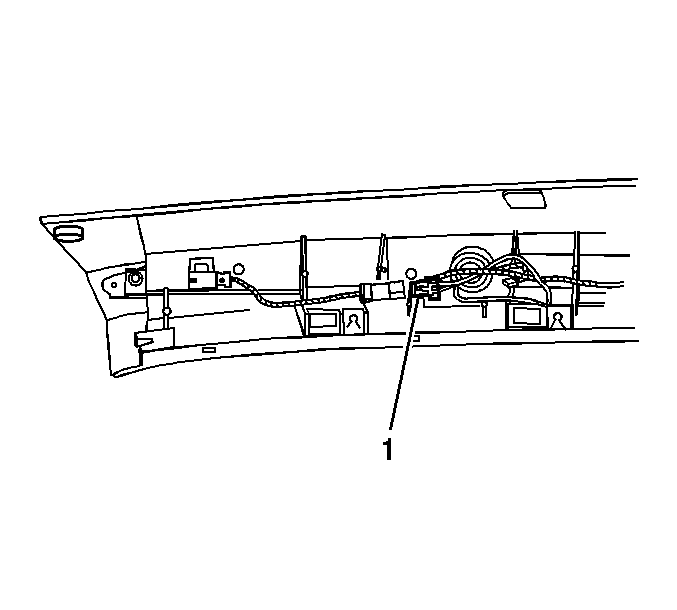
- Disconnect the electrical connector (1).
- Remove the stop lamp from the cargo box bridge center bar.
Installation Procedure
- Install the stop lamp to the cargo box bridge center bar.
- Connect the electrical connector (1).
- Install the cargo box bridge center bar. Refer to Cargo Box Bridge Cross Bar Replacement in Exterior Trim.
- Inspect the operation.
- Install the rear compartment cover assembly.


High Mount Stop Lamp Replacement Avalanche
Removal Procedure
- Ensure the headlamp switch is in the OFF position.
- Remove the rear compartment cover assembly.
- Remove the cargo box bridge center bar . Refer to Cargo Box Bridge Cross Bar Replacement in Exterior Trim.
- Remove the panel assembly from the vehicle.
- Disconnect the electrical connector from the high mounted stop lamp. Refer to High Mount Stop Lamp Replacement .
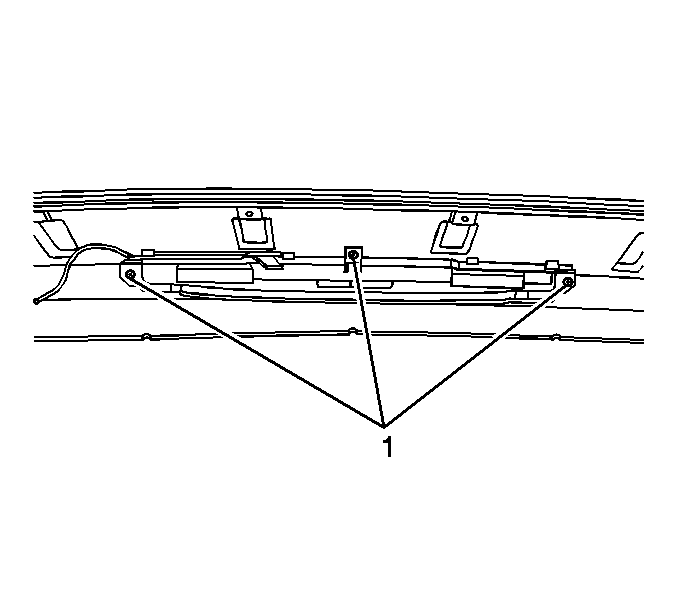
- Remove the fastener (1).
Installation Procedure
- Install the stop lamp to the cargo box bridge center bar.
- Install the fastener (1).
- Connect the electrical connector.
- Install the panel assembly to the vehicle.
- Install the cargo box bridge center bar. Refer to Cargo Box Bridge Cross Bar Replacement in Exterior Trim.
- Install the rear compartment cover assembly.

