Differential Replacement 10.5 Inch Axle
Tools Required
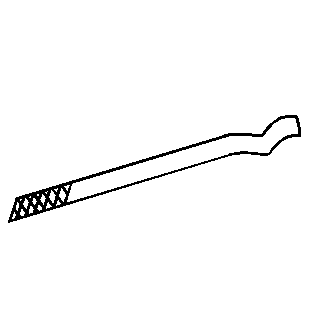
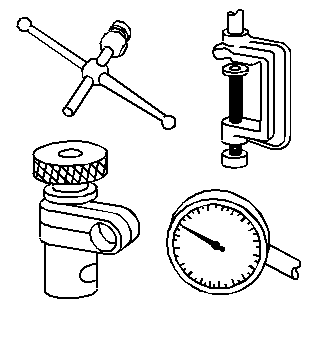
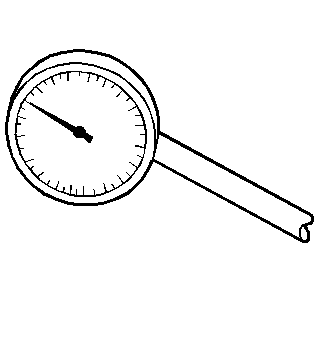
J 24429 Side Bearing Backlash Spanner
Removal Procedure
- Raise the vehicle. Refer to Lifting and Jacking the Vehicle in General Information.
- Remove the axle shafts. Refer to Rear Axle Shaft and/or Gasket Replacement .
- Remove the rear axle housing cover. Refer to Rear Axle Housing Cover and Gasket Replacement .
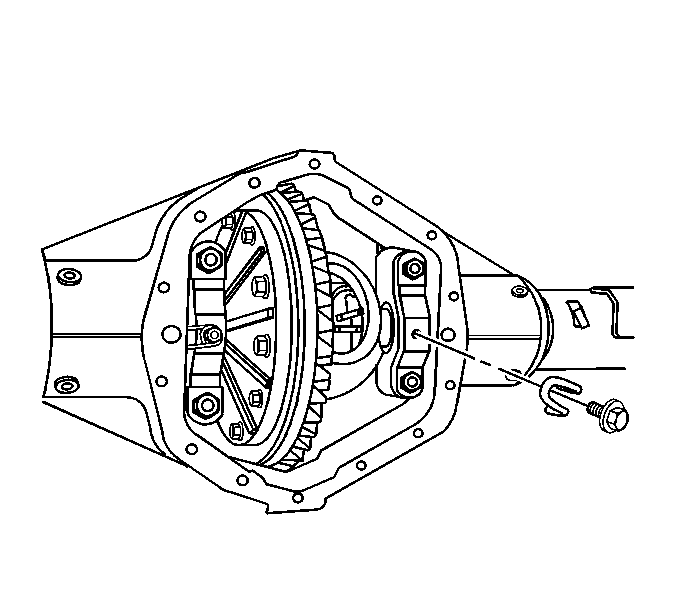
- Remove the differential bearing adjuster nut retainers.
- Remove the bearing cap bolts.
- Remove the bearing caps. Mark the bearing caps left and right.
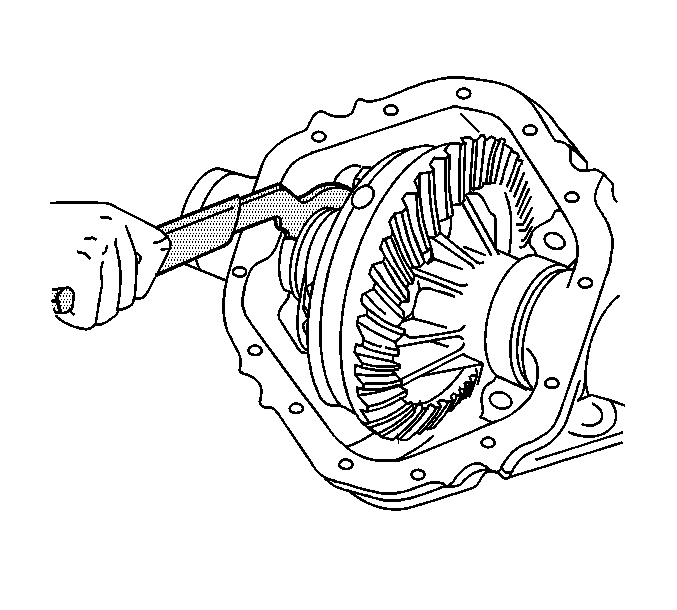
- Loosen the adjusters using the J 24429 .
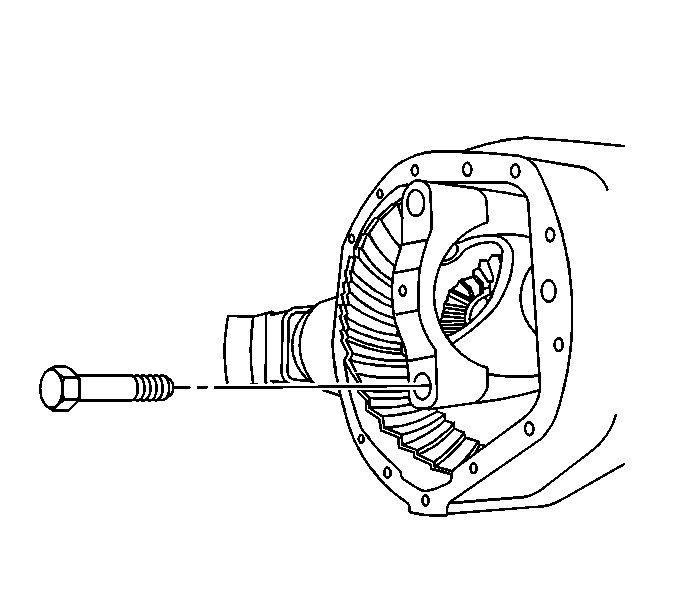
- Remove the differential assembly.
- Remove the bearing cups.
- Remove the differential side bearings, if necessary. Refer to Differential Side Bearings Replacement .
- Remove the ring gear, if necessary. Refer to Drive Pinion and Ring Gear Replacement .
Caution: Refer to Differential Case Removal Caution in the Preface section.
Notice: Refer to Differential Housing Cover and Gasket Removal Notice in the Preface section.
Mark the cups left and right. Place the cups with the bearing caps.
Installation Procedure
- Install the ring gear, if necessary. Refer to Drive Pinion and Ring Gear Replacement .
- Install the differential side bearings, if necessary. Refer to Differential Side Bearings Replacement .
- Lubricate the differential side bearings with axle lubricant. Use the proper fluid. Refer to Fluid and Lubricant Recommendations in Maintenance and Lubrication.
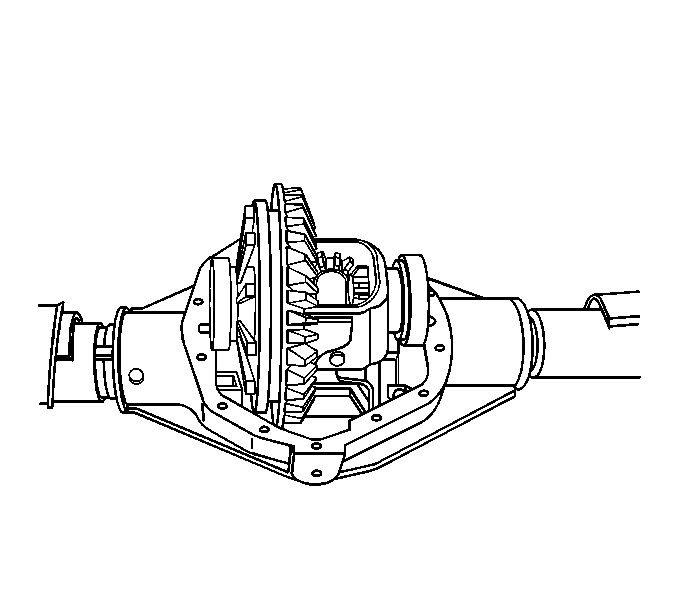
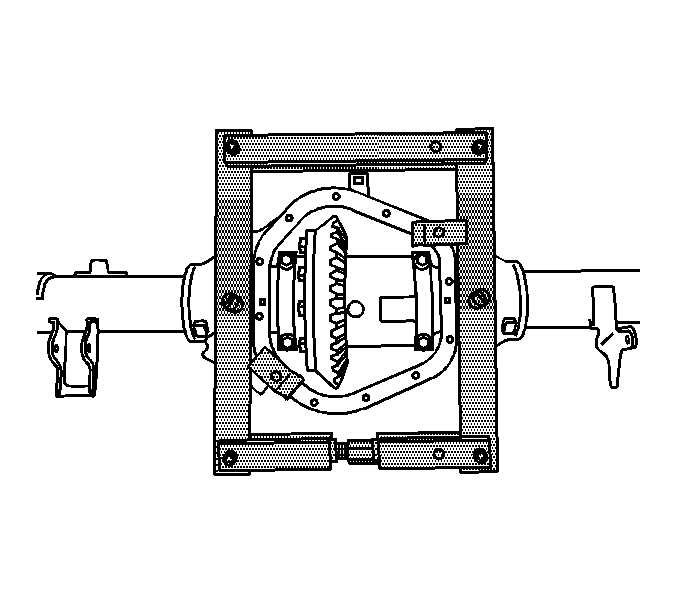
- Place the case, with the bearing cups installed, into the axle housing.
- Install the bearing caps and the bolts.
- Turn the adjusters evenly on each side using the J 24429 until snug against the differential.
- Adjust the differential side bearing preload. Refer to Differential Carrier Bearing Preload Adjustment .
- Adjust the backlash. Refer to Backlash Adjustment .
- Perform a gear tooth contact pattern check. Refer to Gear Tooth Contact Pattern Inspection .
- Tighten the bearing cap bolts.
- Install the axle shafts. Refer to Rear Axle Shaft and/or Gasket Replacement .
- Install the rear axle housing cover. Refer to Rear Axle Housing Cover and Gasket Replacement .
- Fill the axle with the proper lubricant. Refer to Approximate Fluid Capacities and Fluid and Lubricant Recommendations in Maintenance and Lubrication.
- Lower the vehicle.
Support the case in order to keep the case from falling out of the axle housing.
Do not torque the bearing cap bolts at this time.
Notice: Refer to Fastener Notice in the Preface section.
Tighten
Tighten the bearing cap bolts to 185 N·m (136 lb ft).
Differential Replacement 9.75 Inch Axle
Tools Required
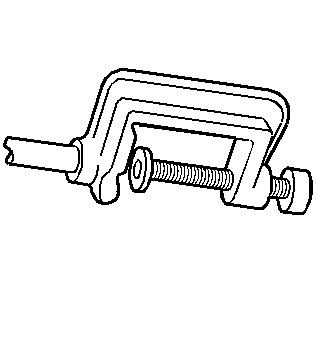
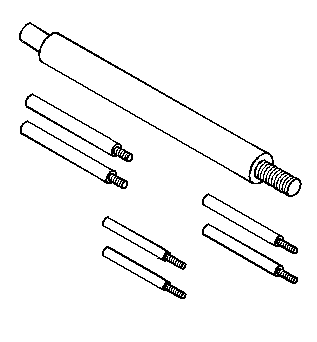
| • | J 24385-C Axle Housing Spreader |
| • | J 25025 Guide Pins |
| • | J 34178 Spreader Gage Adapter |
| • | J 8001 Dial Indicator Set |
Removal Procedure
- Raise the vehicle. Refer to Lifting and Jacking the Vehicle in General Information.
- Remove the axle shafts. Refer to Rear Axle Shaft Replacement .
- Loosen the bearing cap bolts.
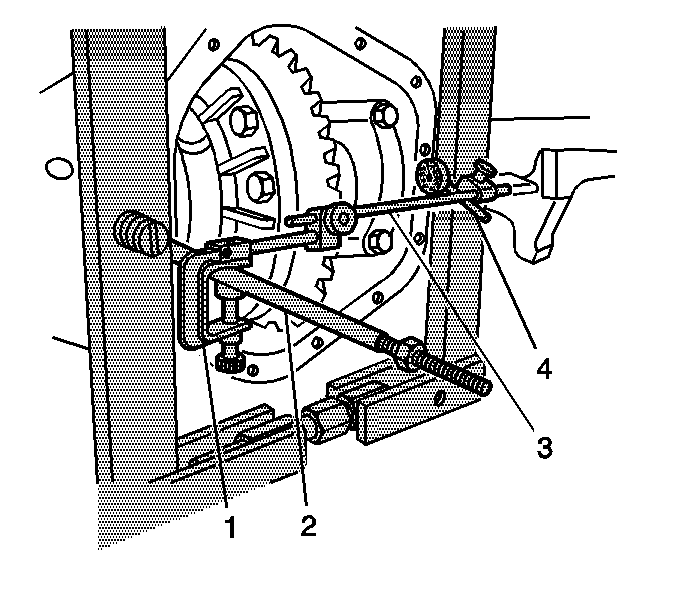
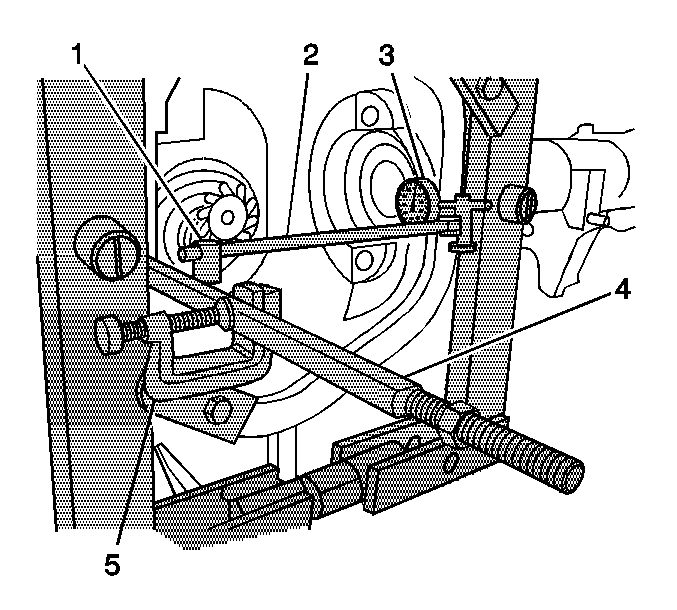
- Install the J 24385-C onto the axle housing as shown.
- Install the J 25025 (2), the J 8001-1 and the J 8001-2 (1), the J 34178 (3), and the J 8001-3 and the J 8001-4 (4) onto the axle housing as shown.
- Preload the dial of the J 8001-3 by pushing the J 8001-3 against the edge of the J 24385-C until the needle of the J 8001-3 has moved approximately 3/4 of a turn clockwise.
- Rotate the indicator housing to align the indicator needle of the J 8001-3 and the dial indicator face to ZERO.
- Spread the axle housing by turning the clevis screw of the J 24385-C clockwise while observing theJ 8001 .
- Remove the J 25025-B , the J 8001-1 , the J 8001-2 , the J 34178 , the J 8001-3 and the J 8001-4 from the axle housing.
- Remove the bearing cap bolts.
- Remove the bearing caps.
- Remove the differential assembly.
- Remove the J 24385-C .
- Remove the ring gear. Refer to Drive Pinion and Ring Gear Replacement .
- Remove the differential side bearings, if necessary. Refer to Differential Side Bearings Replacement .
Do not remove the bearing cap bolts at this time.
Notice: Do not spread the axle housing more than 0.38 mm (0.015 inch). Overspreading the housing may result in component damage.
Spread the housing just enough to remove the differential assembly.
Caution: Refer to Differential Case Removal Caution in the Preface section.
Important: Corresponding letters are stamped on the bearing caps and axle housing. The bearing caps must be reassembled in the same position as removed.
Installation Procedure
- Install the ring gear. Refer to Drive Pinion and Ring Gear Replacement .
- Determine the total shim pack size for the differential assembly. Refer to Determining Total Shim Pack Size .
- Install the differential side bearings, if necessary. Refer to Differential Side Bearings Replacement .
- Install the J 24385-C onto the axle housing.
- Install the J 25025-B (4), the J 8001-1 and the J 8001-2 (5, 1), the J 34178 (2), and the J 8001-3 and the J 8001-4 (3) onto the axle housing as shown.
- Preload the dial of the J 8001-3 by pushing the J 8001-3 against the edge of the J 24385-C until the needle of the J 8001-3 has moved approximately 3/4 of a turn clockwise.
- Rotate the indicator housing to align the indicator needle of the J 8001-3 and the dial indicator face to ZERO.
- Spread the axle housing by turning the clevis screw of the J 24385-C clockwise while observing theJ 8001 .
- Remove the J 25025-B , the J 8001-1 , the J 8001-2 , the J 34178 , the J 8001-3 and the J 8001-4 from the axle housing.
- Install the differential assembly.
- Remove the J 24385-C .
- Install the bearing caps.
- Install the bearing cap bolts.
- Install the axle shafts. Refer to Rear Axle Shaft Replacement .
- Fill the axle with the proper lubricant. Refer to Rear Axle Lubricant Replacement .
- Lower the vehicle.
Notice: Do not spread the axle housing more than 0.38 mm (0.015 inch). Overspreading the housing may result in component damage.
Spread the housing just enough to install the differential assembly.
Important: Corresponding letters are stamped on the bearing caps and axle housing. The bearing caps must be reassembled in the same position as removed.
Notice: Refer to Fastener Notice in the Preface section.
Tighten
Tighten the bearing cap bolts to 109 N·m (80 lb ft).
Differential Replacement 8.6, 9.5, 9.5LD Inch Axles
Tools Required
J 24429 Side Bearing Backlash Spanner
Removal Procedure
Important: Group and mark the shims together as originally removed. If you remove or replace the ring and pinion gear set, perform the bearing preload, backlash, and gear tooth contact pattern check in order to ensure proper contact of the gears. If you reinstall or replace the differential carrier without replacing any other component (i.e. pinion and ring gear set, bearings. etc.) then you may reinstall the carrier with the original shims in their original locations. Always perform a gear tooth contact pattern check, even when you remove only the carrier.
- Raise the vehicle. Refer to Lifting and Jacking the Vehicle .
- Remove the axle shafts. Refer to Rear Axle Shaft Replacement .
- Remove the differential bearing adjuster nut lock (9.5/9.5LD inch axle - right side).
- Remove the bearing cap bolts.
- Remove the bearing caps. Mark the bearing caps left and right.
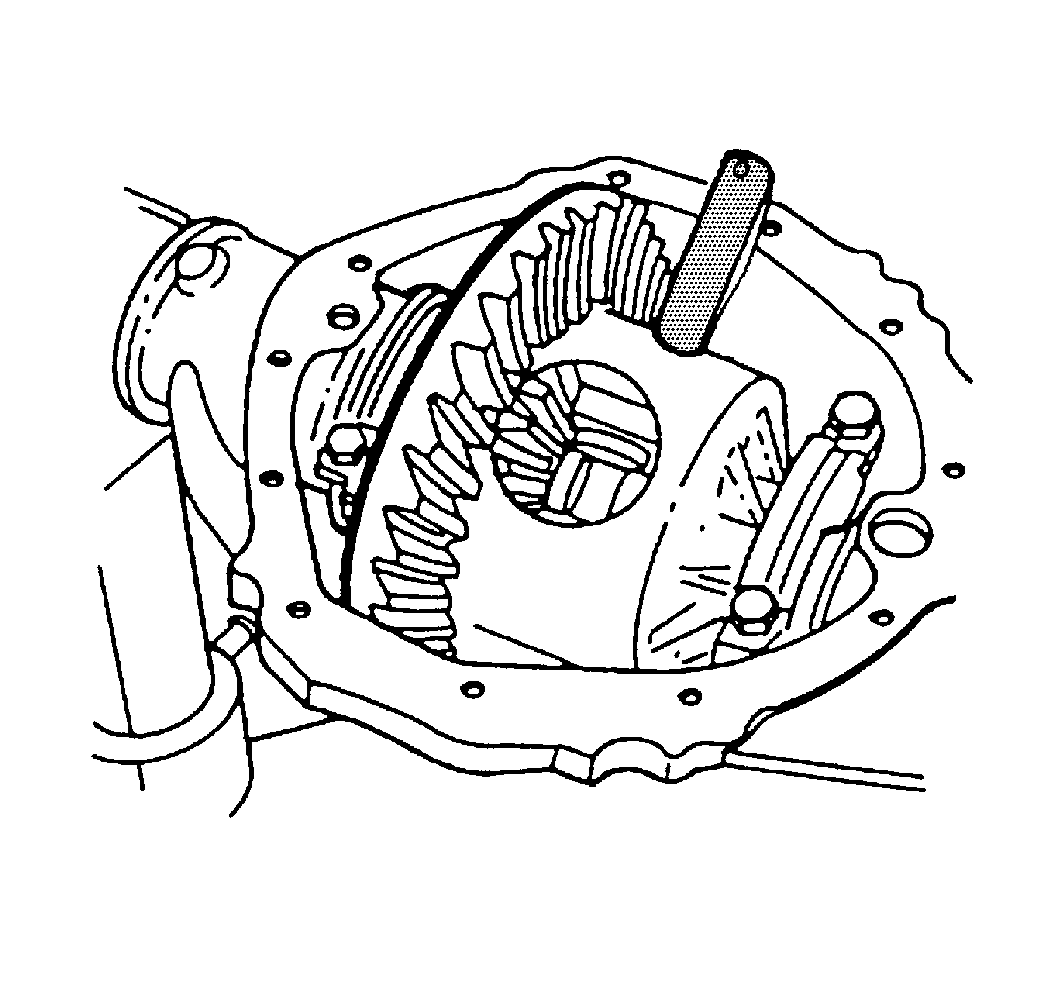
- For the 8.6 inch axle, install the pinion shaft into the differential case part way and rotate the differential assembly until the pinion shaft contact the top of the axle housing.
- For the 8.6 inch axle, rotate the drive pinion clockwise in order to force the differential assembly out of the axle housing.
- For the 9.5/9.5LD inch axle, loosen the differential bearing adjuster nut using the J 24429 .
- Remove the differential assembly.
- Remove the bearing cups, the shims, and the spacers as necessary.
- Remove the differential side bearings, if necessary. Refer to Differential Side Bearings Replacement .
- Remove the ring gear, if necessary. Refer to Drive Pinion and Ring Gear Replacement .
Caution: Refer to Differential Case Removal Caution in the Preface section.
Notice: Refer to Differential Housing Cover and Gasket Removal Notice in the Preface section.
Mark the cups and shims left and right and in the proper order as necessary. Place the cups and the shims with the bearing caps.
Installation Procedure
- Install the ring gear, if necessary. Refer to Drive Pinion and Ring Gear Replacement .
- Install the differential side bearings, if necessary. Refer to Differential Side Bearings Replacement .
- Lubricate the differential side bearings with axle lubricant. Use the proper fluid. Refer to Fluid and Lubricant Recommendations .
- Place the case, with the bearing cups installed, into the axle housing.
- Install the bearing caps and the bolts. Do not torque the bearing cap bolts at this time.
- Adjust the differential side bearing preload. Refer to Differential Carrier Bearing Preload Adjustment .
- Adjust the backlash. Refer to Backlash Adjustment .
- Perform a gear tooth contact pattern check. Refer to Gear Tooth Contact Pattern Inspection .
- Tighten the bearing cap bolts.
- Install the axle shafts. Refer to Rear Axle Shaft Replacement .
- Fill the axle with the proper lubricant. Refer to Rear Axle Lubricant Replacement .
- Lower the vehicle.
Support the case in order to keep the case from falling out of the axle housing.
Notice: Refer to Fastener Notice in the Preface section.
Tighten
| • | For the 8.6 inch axle, tighten the bearing cap bolts to 75 N·m (55 lb ft). |
| • | For the 9.5/9.5LD inch axle, tighten the bearing cap bolts to 85 N·m (63 lb ft). |
