Radiator Outlet Hose Replacement 4.8L, 5.3L, and 6.0L Engines
Removal Procedure
- Drain the cooling system. Refer to Cooling System Draining and Filling .
- Loosen the air cleaner outlet duct clamps at the following locations:
- Remove the air cleaner outlet duct.
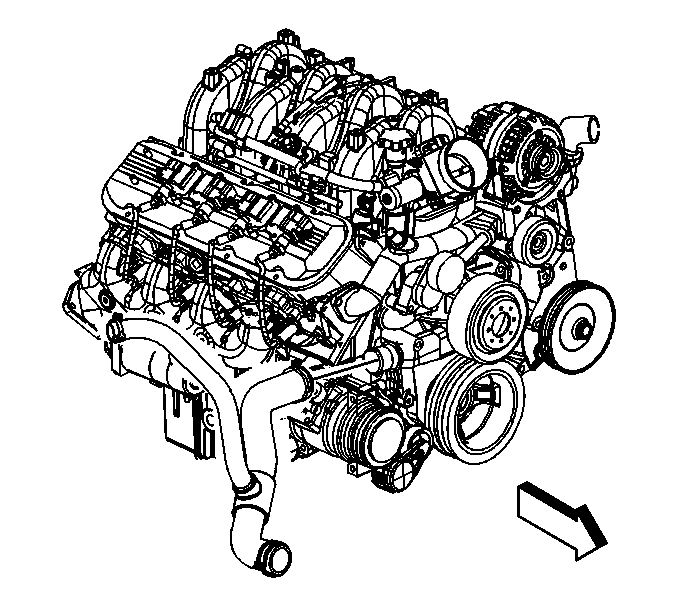
- Reposition the outlet hose clamp from the water pump.
- Remove the outlet hose from the water pump.
- Reposition the outlet hose clamp from the radiator.
- Remove the outlet hose from the radiator.
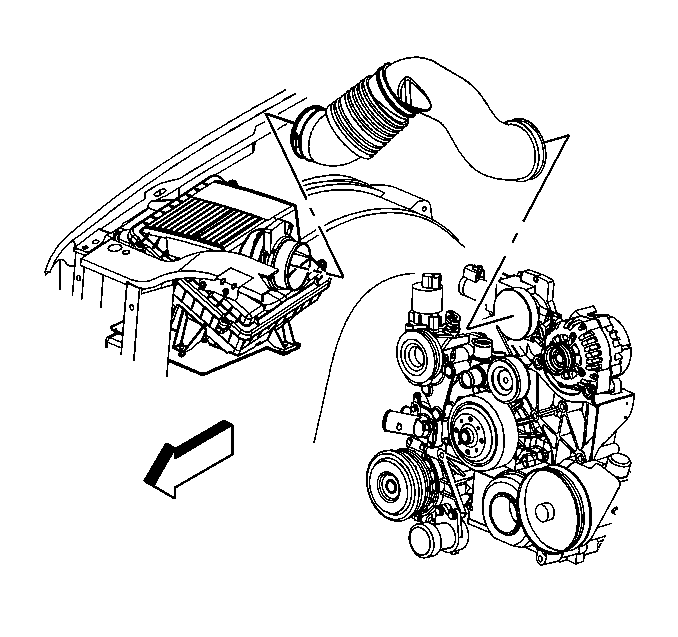
| • | Throttle body |
| • | Mass airflow/intake air temperature (MAF/IAT) sensor |
Installation Procedure
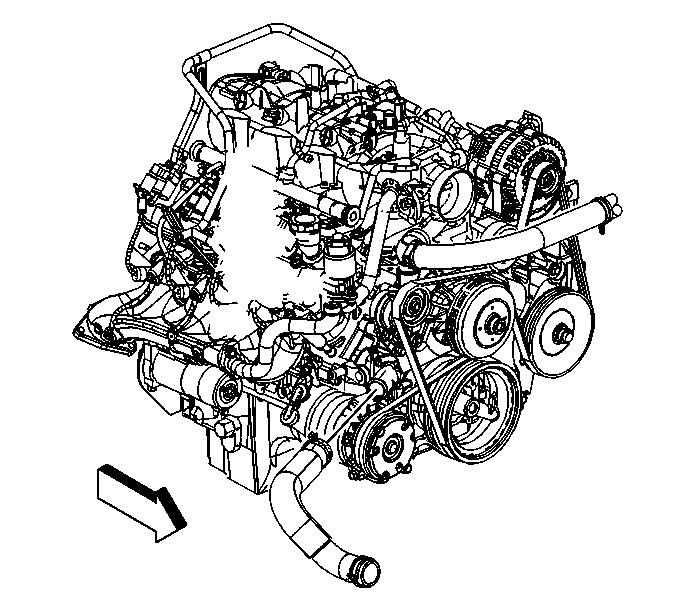
- Install the outlet hose to the radiator.
- Reposition the outlet hose clamp to the radiator.
- Install the outlet hose to the water pump.
- Reposition the outlet hose clamp to the water pump.
- Install the air cleaner outlet duct.
- Install the radiator inlet hose clip to the outlet duct.
- Tighten the air cleaner outlet duct clamps at the following locations:
- Fill the cooling system. Refer to Cooling System Draining and Filling .
Important: Align the arrow at the throttle body end of the duct with the throttle body attaching stud.
Notice: Refer to Fastener Notice in the Preface section.
| • | Throttle body |
| • | MAF/IAT sensor |
Tighten
Tighten the air cleaner outlet duct clamp screws to 7 N·m (62 lb in).
Radiator Outlet Hose Replacement Utility 8.1L Engine
Removal Procedure
- Drain the cooling system. Refer to.
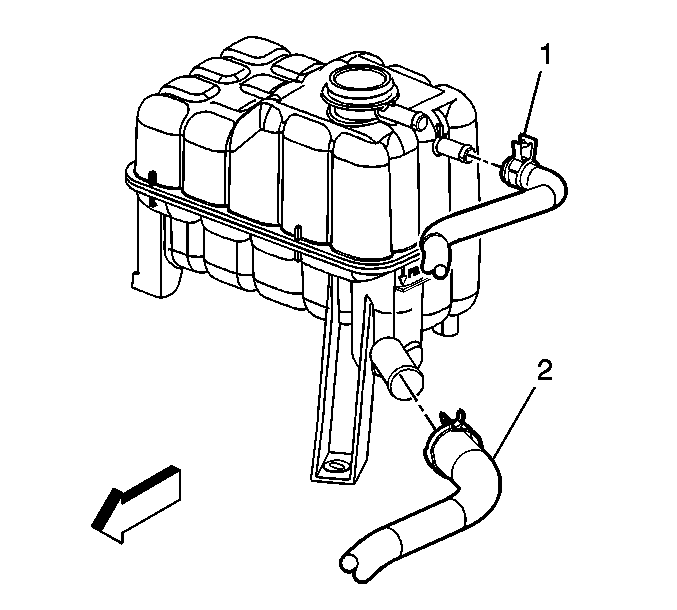
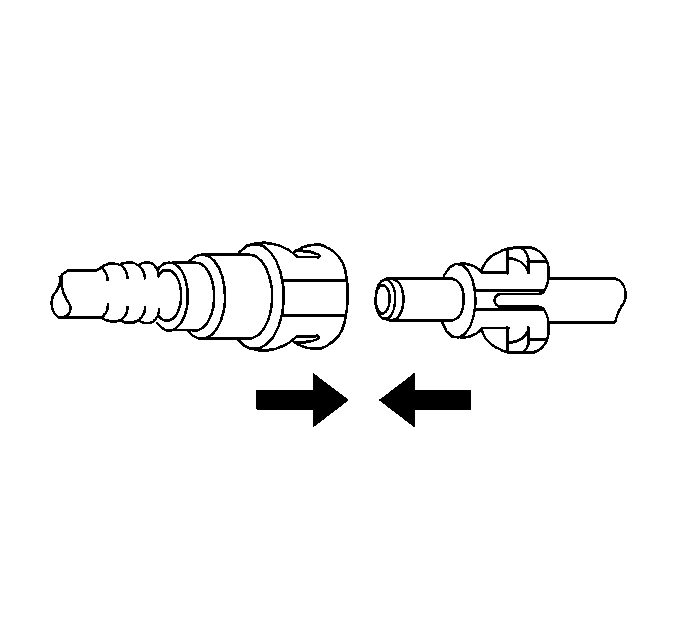
- Remove the heater and surge tank hoses from the mounting clip.
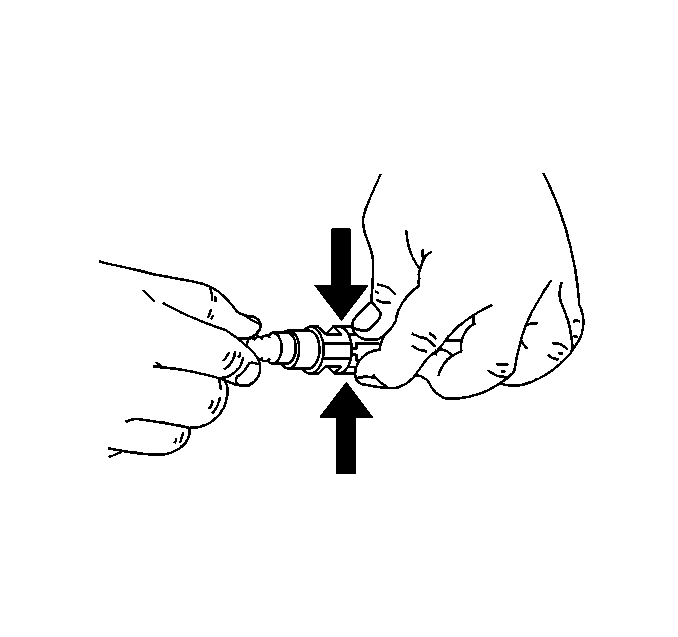
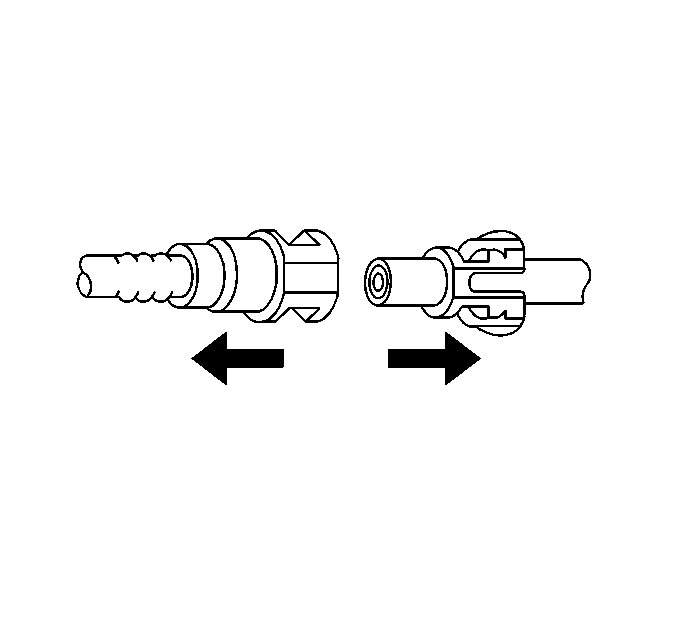
- Squeeze the plastic retainer release tabs.
- Pull the connection apart.
- Reposition the surge tank outlet hose clamp at the surge tank.
- Remove the surge tank outlet hose (2) from the surge tank.
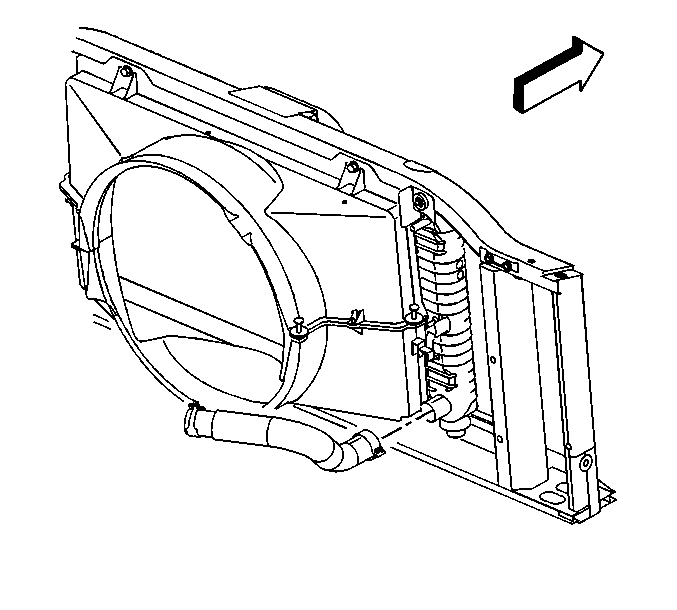
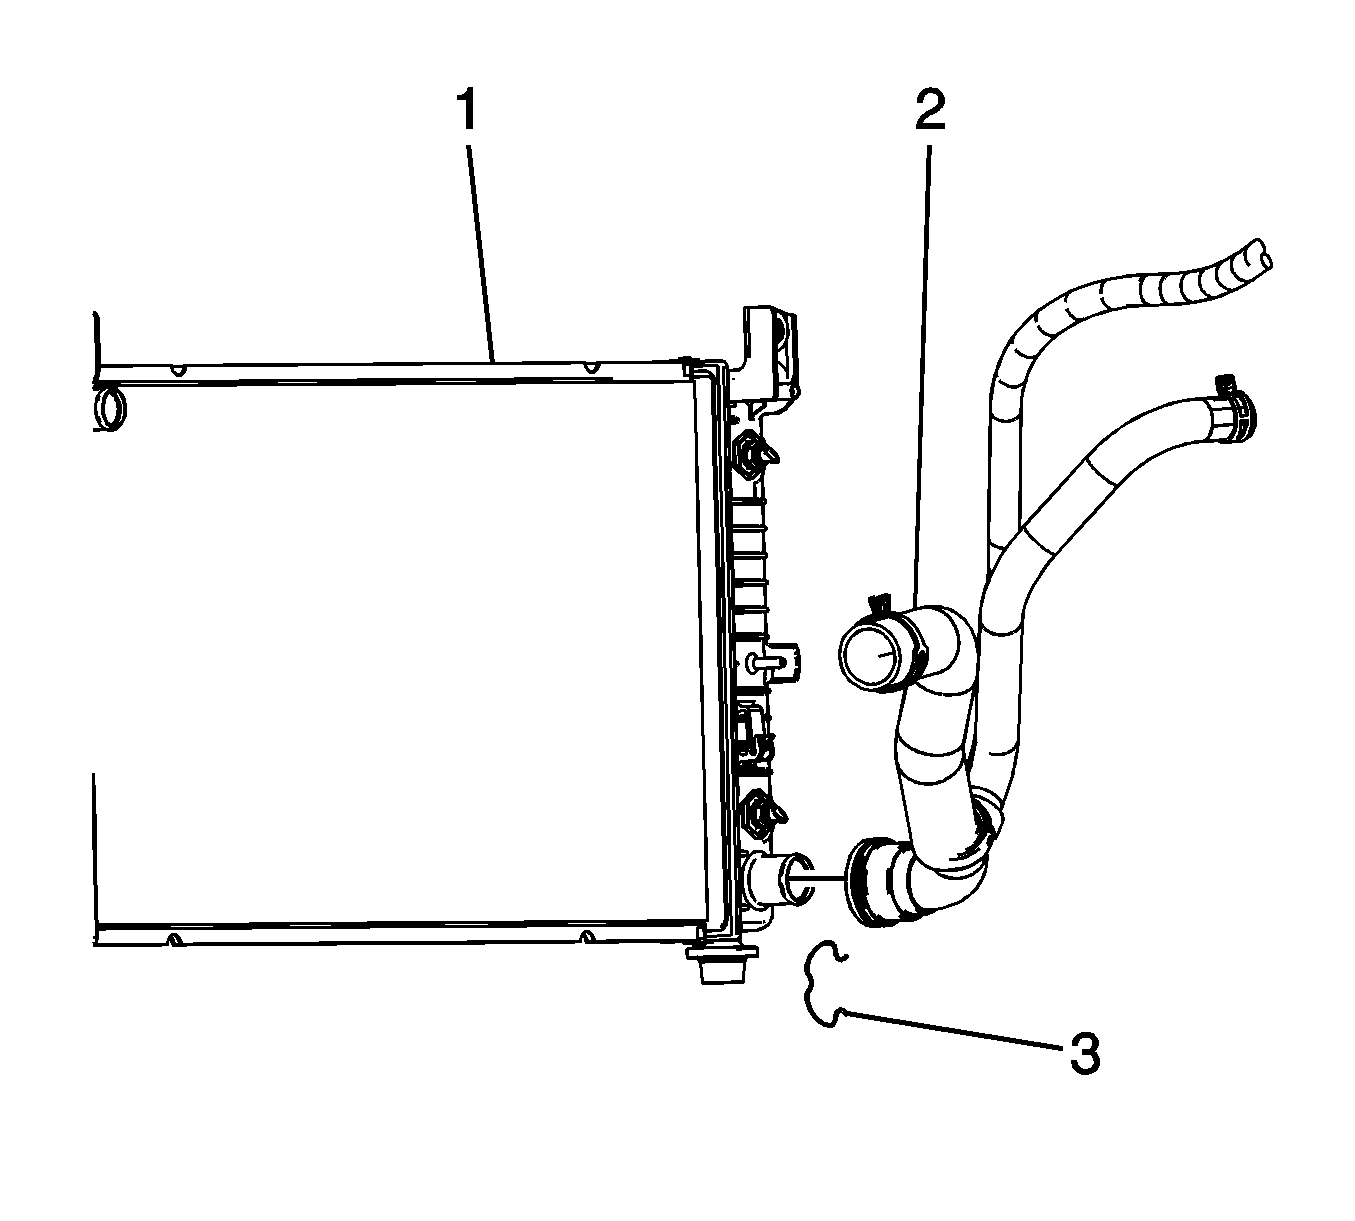
- Remove the radiator outlet hose from the radiator. Refer to .
- Reposition the outlet hose clamp the water pump.
- Remove the outlet hose from the water pump.
Installation Procedure
- Install the outlet hose to the water pump.
- Position the outlet hose clamp to the water pump.
- Install the surge tank outlet hose (2) from the surge tank.
- Position the surge tank outlet hose clamp to the surge tank.
- Install the radiator outlet hose to the radiator. Refer to .
- Connect the heater and surge tank hoses to the heater core.
- Pull the heater outlet hose to ensure the connection.
- Install the heater and surge tank hoses to the mounting clip.
- Fill the cooling system. Refer to.
Important: Firmly push the quick connect onto the heater core pipe until you hear an audible click.
Radiator Outlet Hose Replacement Avalanche/XLT 8.1L
Tools Required
J 43181 Quick Connect Connector Removal Tool
Removal Procedure
Important: Most truck models use a spring-type hose clamp at the hose connections. When using this type of clamp, install the radiator hoses on dry, non-painted surfaces in order to ensure proper sealing. Reusing the spring-type clamps on aftermarket hoses is not recommended.
- Drain the cooling system. Refer to Cooling System Draining and Filling .
- Remove the radiator outlet hose from the radiator. Refer to Radiator Hose Quick Connect Fitting .
- Using the J 43181 disconnect the heater hoses from the heater core outlet.
- Reposition the surge tank outlet hose clamp at the surge tank.
- Remove the surge tank outlet hose (2) from the surge tank.
- Reposition the outlet hose clamp the water pump.
- Remove the outlet hose from the water pump.
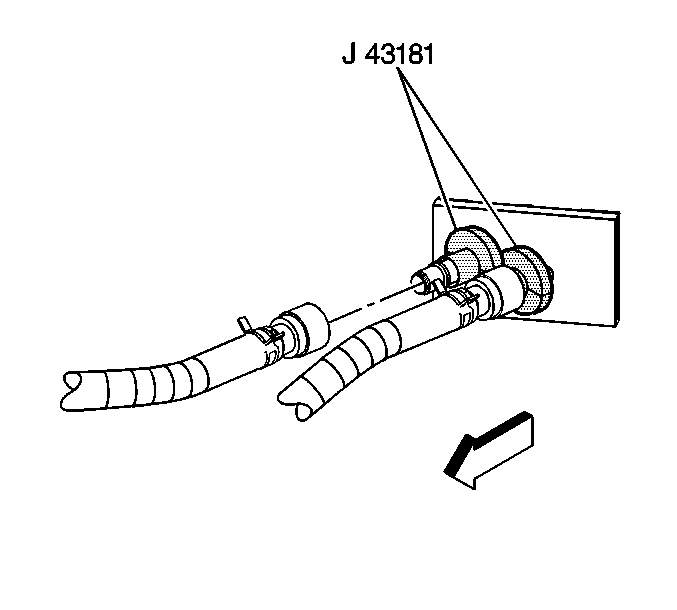
| 3.1. | Install the J 43181 to the heater core pipe. |
| 3.2. | Close the tool around the heater core pipe. |
| 3.3. | Firmly pull the tool into the quick connect end of the heater hose. |
| 3.4. | Firmly grasp the heater hose. Pull the heater hose forward in order to disengage the hose from the heater core. |
Installation Procedure
- Install the outlet hose to the water pump.
- Position the outlet hose clamp to the water pump.
- Install the surge tank outlet hose (2) from the surge tank.
- Position the surge tank outlet hose clamp to the surge tank.
- Connect the heater and surge tank hoses to the heater core.
- Install the radiator outlet hose to the radiator. Refer to Radiator Hose Quick Connect Fitting .
- Fill the cooling system. Refer to Cooling System Draining and Filling .
Firmly push the quick connect onto the heater core pipe until you hear an audible click.
