Removal Procedure
Important: The intake manifold, throttle body, fuel rail, and injectors may be
removed as an assembly. If not servicing the individual components, remove
the manifold as a complete assembly.
- Remove the engine sight shield and retainer.
Refer to
Upper Intake Manifold Sight Shield Replacement
.
- Relieve the fuel system pressure. Refer to
Fuel Pressure Relief
in Engine Controls - 4.8L, 5.3L, and 6.0L.
- Disconnect the cruise control cable from the throttle blade stud.
- Remove the cruise control cable from the bracket.
- Remove the accelerator control cable
from the throttle blade.
- Remove the accelerator control cable from the bracket.
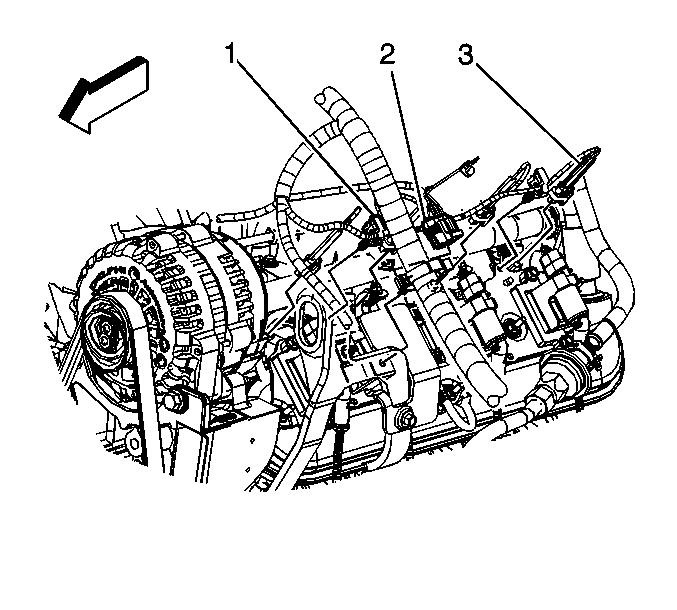
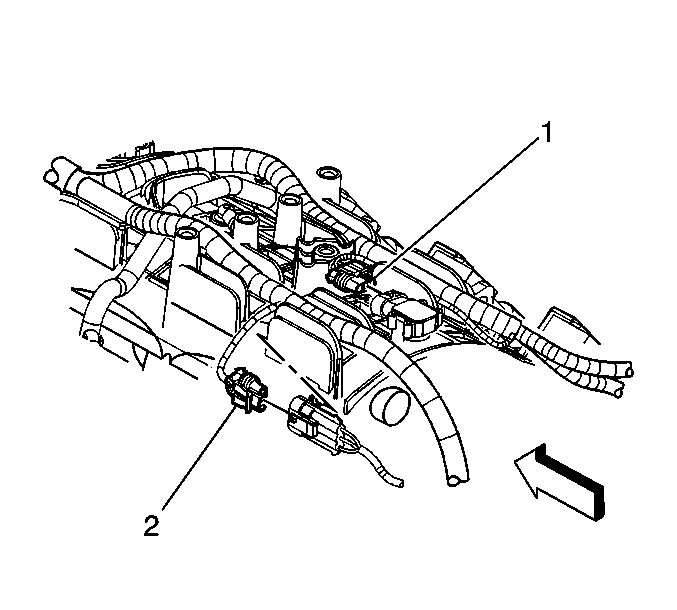
- Disconnect the following electrical connectors:
| • | Main ignition coil harness (2). |
- Disconnect the wiring harness clips (1) from the fuel rail.
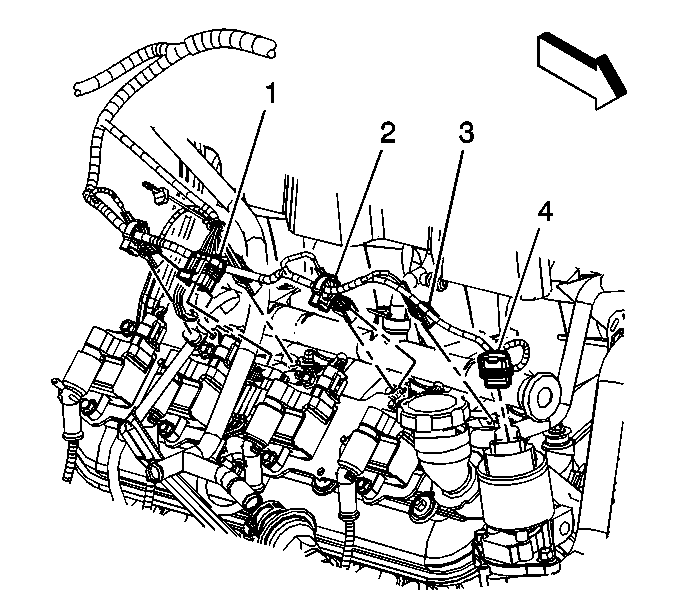
- Disconnect the following electrical connectors:
| • | Main ignition coil harness (1) |
| • | Exhaust gas recirculation (EGR) valve (4) |
- Disconnect the harness clips (2) from the fuel rail.
- Disconnect the following
electrical connectors:
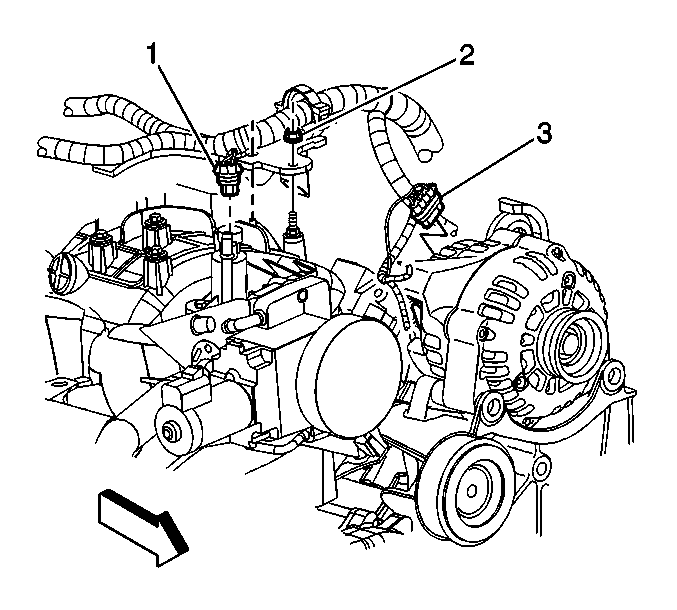
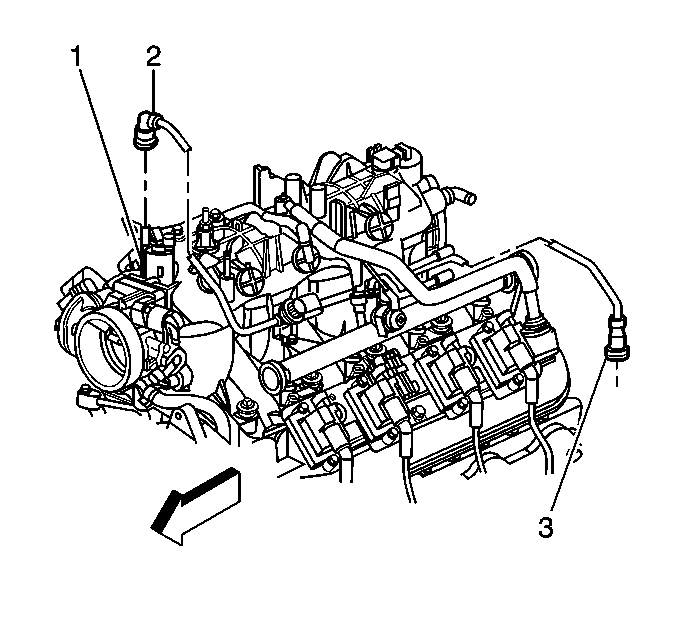
| • | Manifold absolute pressure (MAP) sensor (1) |
- Remove the knock sensor harness electrical connector from the
intake manifold.
- Set the electrical harness aside.
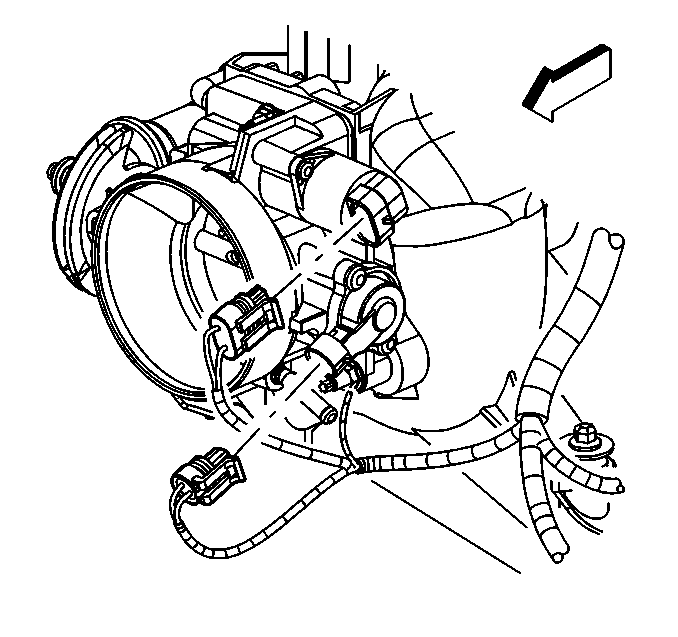
- Disconnect the following electrical connectors:
| • | Throttle position (TP) sensor, if equipped |
| • | Electronic throttle control (ETC) motor, if equipped |
| • | Idle air control (IAC) valve |
- Disconnect the following electrical connectors:
- Remove the wiring harness bracket nut.
- Remove the harness bracket from the stud.
- Reposition the engine wiring harness.
- Reposition the coolant air bleed hose
at the throttle body.
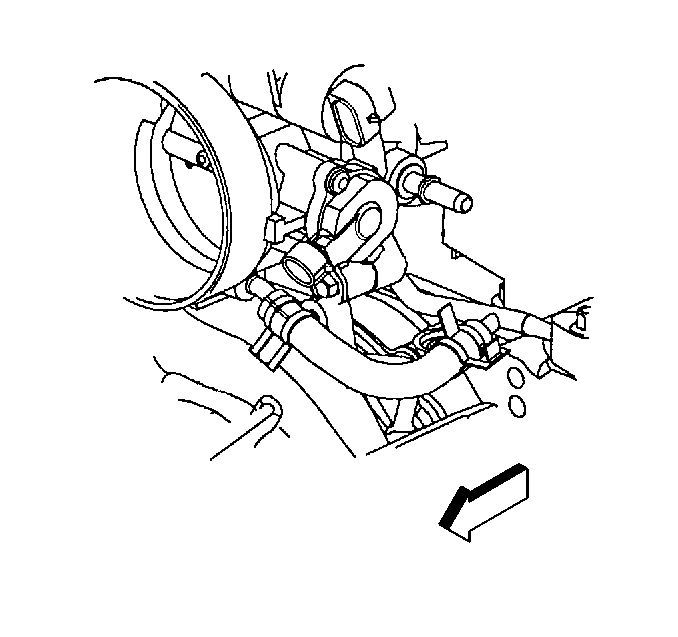
- Remove the coolant air bleed hose from the throttle body.
- Reposition the radiator vent inlet hose
clamp at the throttle body.
- Remove the radiator vent inlet hose from the throttle body.

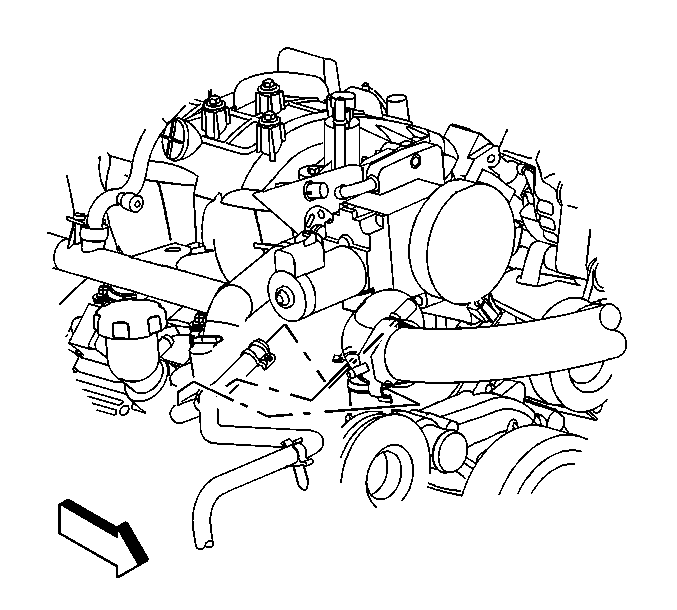
- Remove the positive crankcase ventilation
(PCV) hose from the throttle body and rocker arm cover.
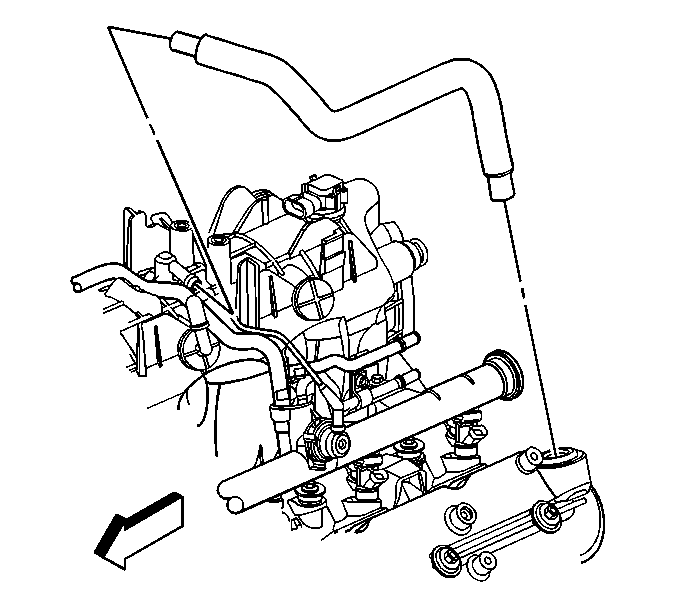
- Remove the PCV hose (with
valve) from the intake manifold and rocker arm cover.

- Remove the following EGR
pipe bolts:
- Remove the EGR pipe (with valve).
- Remove the EGR pipe gasket from the exhaust manifold.
- If equipped, remove the
vacuum brake booster hose from the rear of the intake manifold.
- Remove the evaporative
emission (EVAP) purge solenoid vent tube by performing the following:
| 29.1. | Remove the EVAP tube end (2) from the solenoid (1). |
| 29.2. | Squeeze the EVAP pipe quick connect fitting (3) retainer together. |
| 29.3. | Remove the EVAP tube end (3) from the vapor pipe. |
- Disconnect the fuel line quick connect fittings. Refer to
Metal Collar Quick Connect Fitting Service
or
Plastic Collar Quick Connect Fitting Service
in
Engine Controls - 4.8L, 5.3L, and 6.0L.
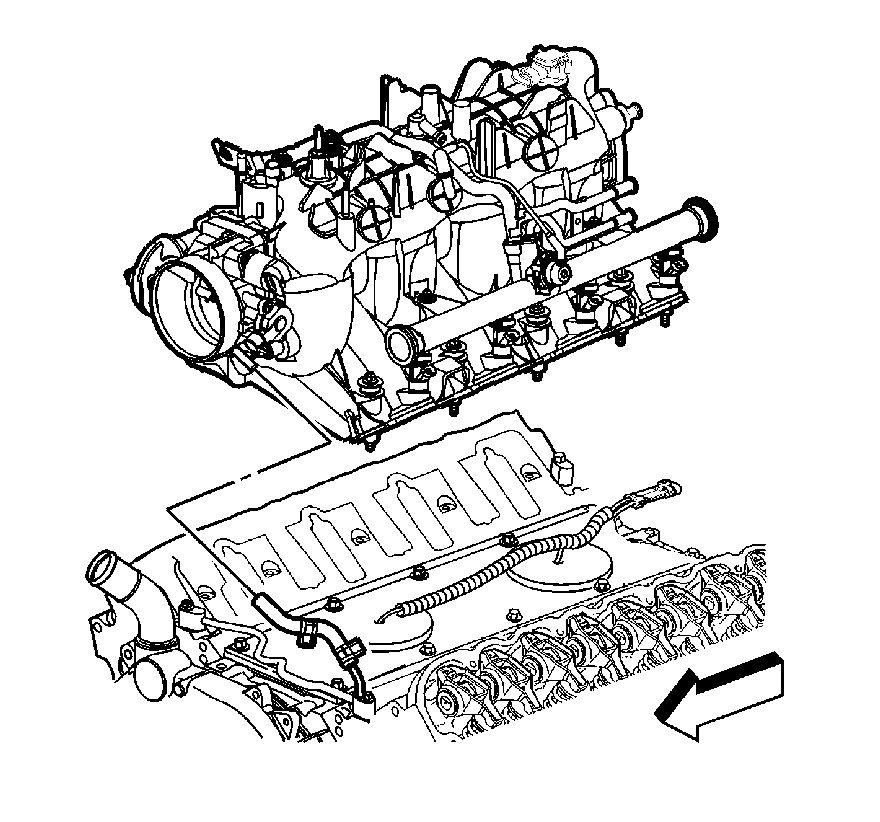
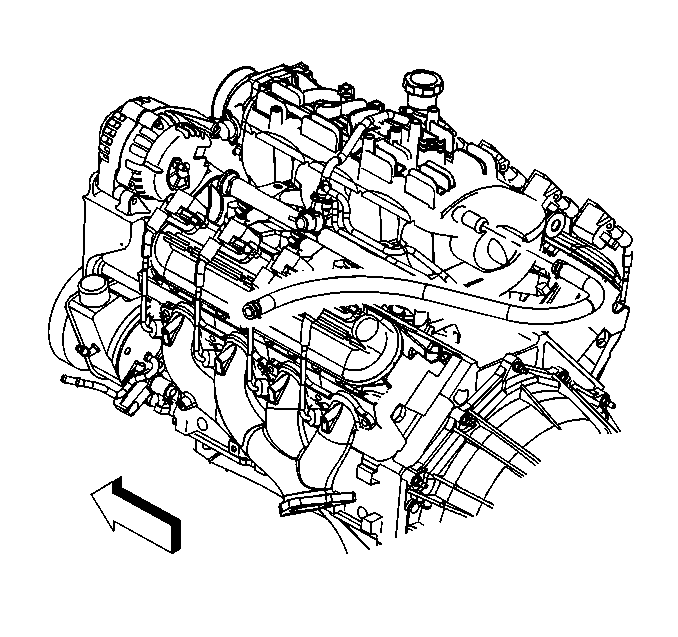
- Remove the intake manifold
bolts.
- Remove the intake manifold.
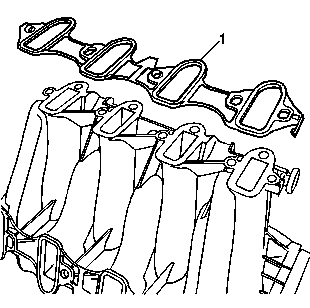
- Remove the intake manifold gaskets (1) from the intake manifold.
- Discard the old intake manifold gaskets.
- Clean the gasket surfaces of the EGR pipe and the exhaust manifold.
- If replacement of the intake manifold is required, remove the
following components:
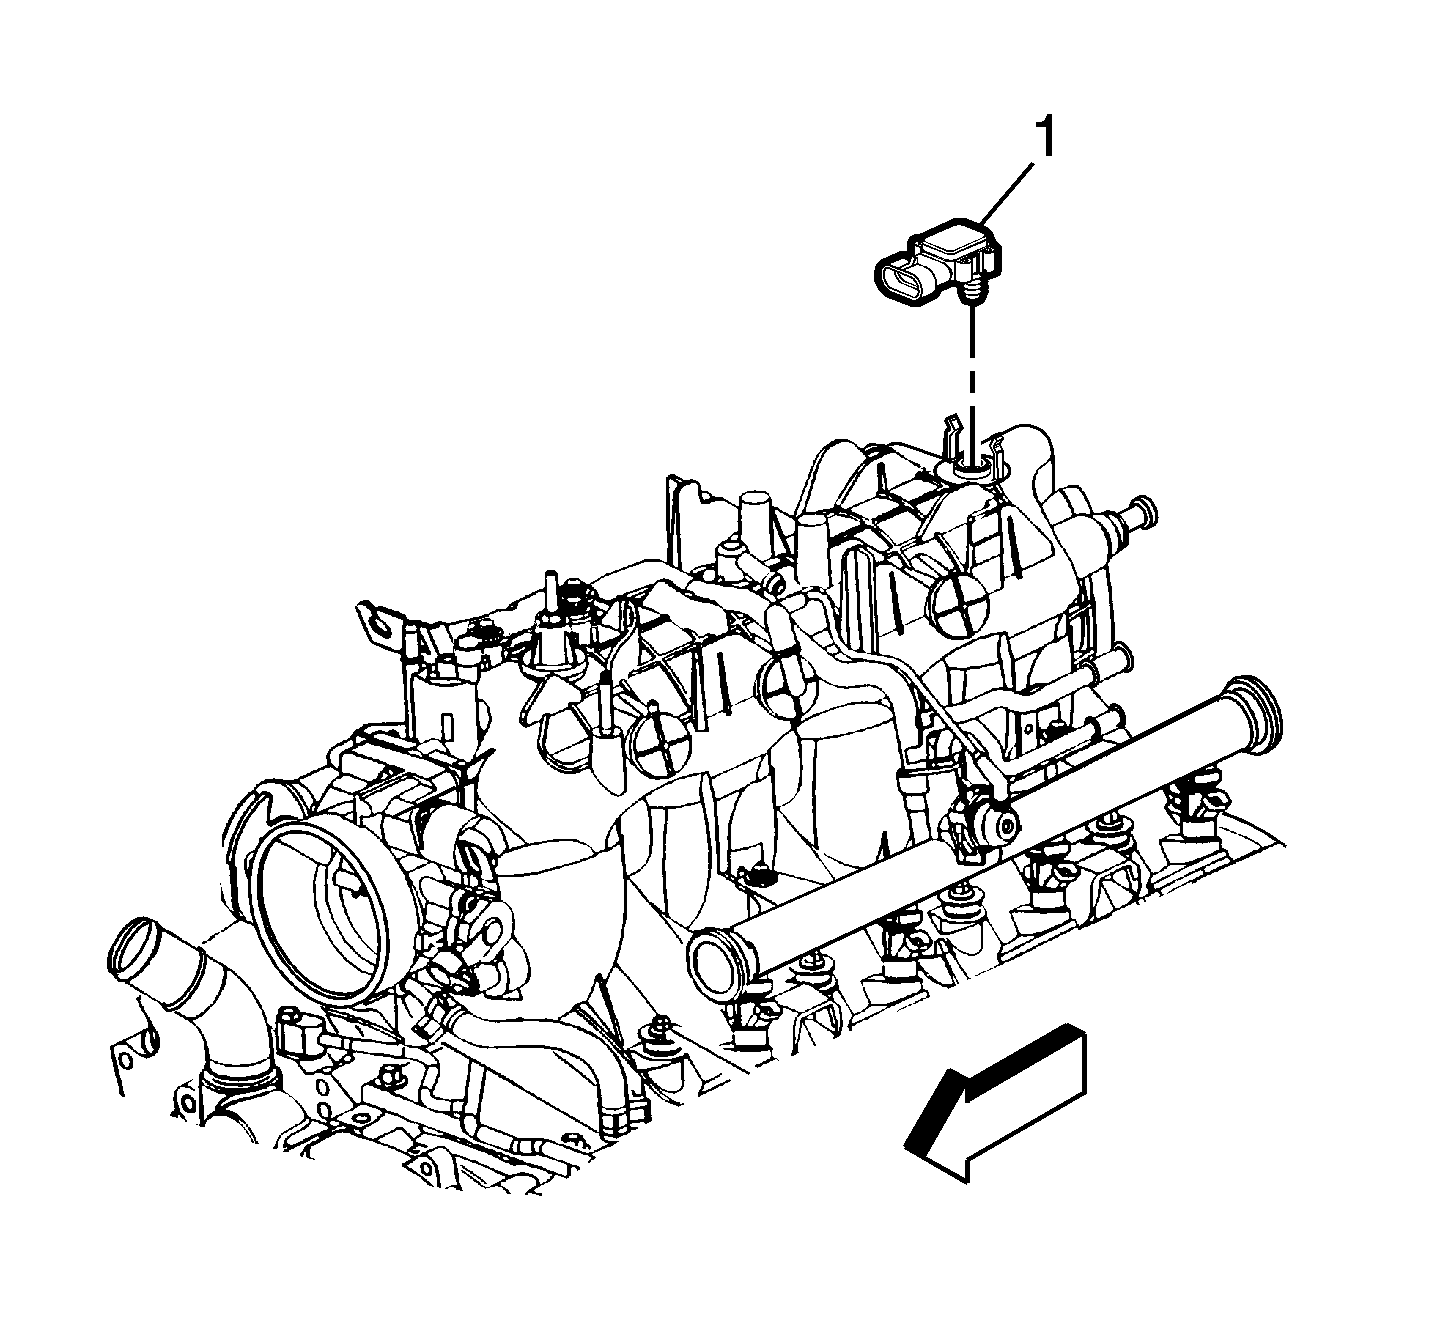
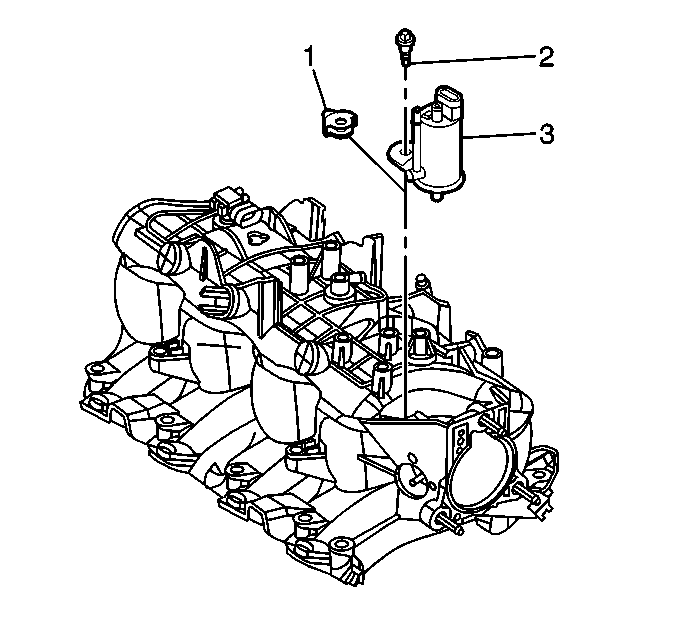
- If replacement of the intake manifold
is required, remove the MAP sensor (1).
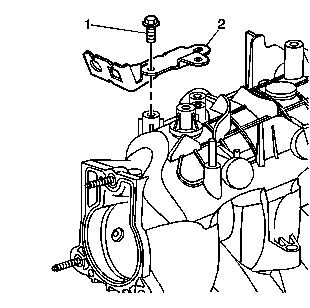
- If replacement of the intake manifold
is required, remove the accelerator control cable bracket bolts (1) and bracket
(2).
- If replacement of the intake manifold
is required, remove the EVAP solenoid bolt (2), solenoid (3) and isolator
(1).
Installation Procedure
Notice: Use the correct fastener in the correct location. Replacement fasteners
must be the correct part number for that application. Fasteners requiring
replacement or fasteners requiring the use of thread locking compound or sealant
are identified in the service procedure. Do not use paints, lubricants, or
corrosion inhibitors on fasteners or fastener joint surfaces unless specified.
These coatings affect fastener torque and joint clamping force and may damage
the fastener. Use the correct tightening sequence and specifications when
installing fasteners in order to avoid damage to parts and systems.
- If replacement of
the intake manifold was required, install the EVAP solenoid isolator (1),
solenoid (3) and bolt (2) to the NEW intake manifold.
Tighten
Tighten the EVAP solenoid bolt to 10 N·m (89 lb in).
- If replacement of the intake manifold
was required, install the accelerator control cable bracket (2) and bolts
(1) to the NEW intake manifold.
Tighten
Tighten the accelerator control cable bracket bolts to 10 N·m
(89 lb in).
- If replacement of the intake manifold
was required, install the MAP sensor (1) to the NEW intake manifold.
- If replacement of the intake manifold was required, install the
following components to the NEW intake manifold:
- Install NEW intake manifold gaskets (1) to the intake manifold.
- Install the intake manifold.
- Apply a 5 mm (0.20 in) band of threadlock GM P/N
12345382 or equivalent to the threads of the intake manifold bolts.
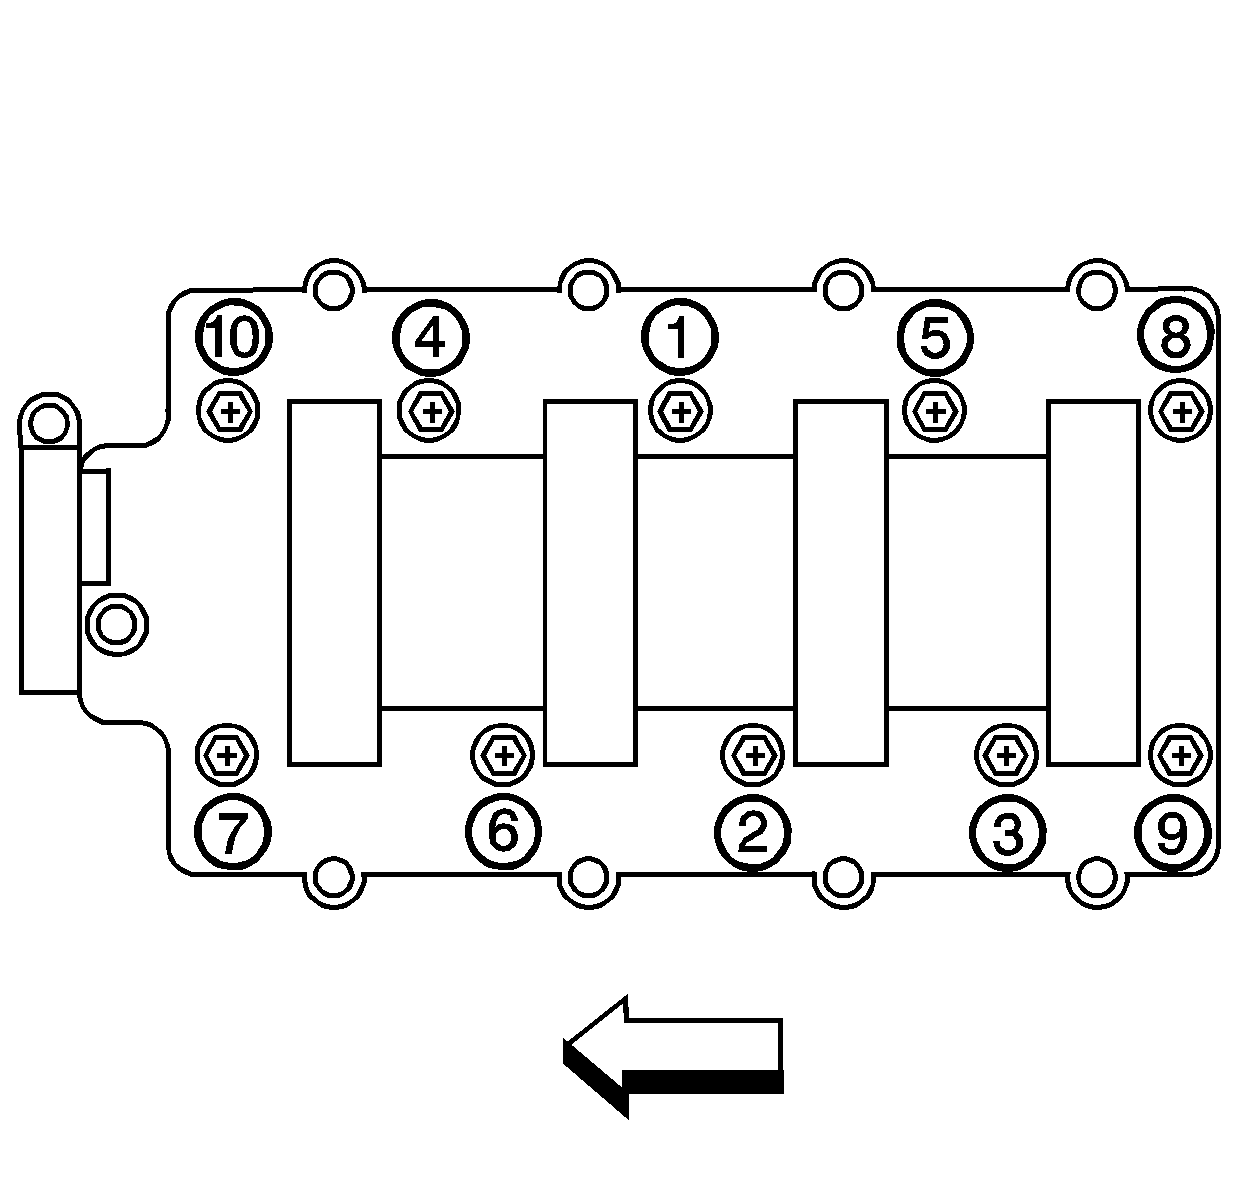
- Install the intake manifold bolts.
Tighten
- Tighten the intake manifold bolts a first pass in sequence to
5 N·m (44 lb in).
- Tighten the intake manifold bolts a final pass in sequence to
10 N·m (89 lb in).
- Install the PCV hose (with
valve).
- Install the vacuum brake
booster hose to the rear of the intake manifold, if equipped.
- Position a NEW EGR pipe
gasket on the exhaust manifold.
- Install the EGR pipe (with valve).
- Install the following EGR pipe bolts until snug:
- Tighten the EGR pipe bolts.
Tighten
| • | Tighten the EGR valve pipe-to-intake manifold bolts to 10 N·m
(89 lb in). |
| • | Tighten the EGR valve pipe-to-cylinder head bolts to 50 N·m
(37 lb ft). |
| • | Tighten the EGR valve pipe-to-exhaust manifold bolts to 30 N·m
(22 lb ft). |
- Route the electrical harness into position over the engine.
- Connect the knock sensor
harness electrical connector to the intake manifold.
- Connect the following electrical connectors.
- Connect the following electrical connectors:
| • | Main ignition coil harness (1) |
- Connect the harness clips (2) to the fuel rail.
- Connect the following electrical connectors:
| • | Main ignition coil harness (2). |
- Connect the wiring harness clips (1) to the fuel rail.
- Install the accelerator control cable
to the bracket.
- Install the accelerator control cable to the throttle blade.
- Install the cruise control cable to the
bracket.
- Connect the cruise control cable to the throttle blade stud.
- Install the engine sight shield and retainer. Refer to
Upper Intake Manifold Sight Shield Replacement
.
