Refer to Engine Controls Schematics
Fuel Pump Control--Single Tank
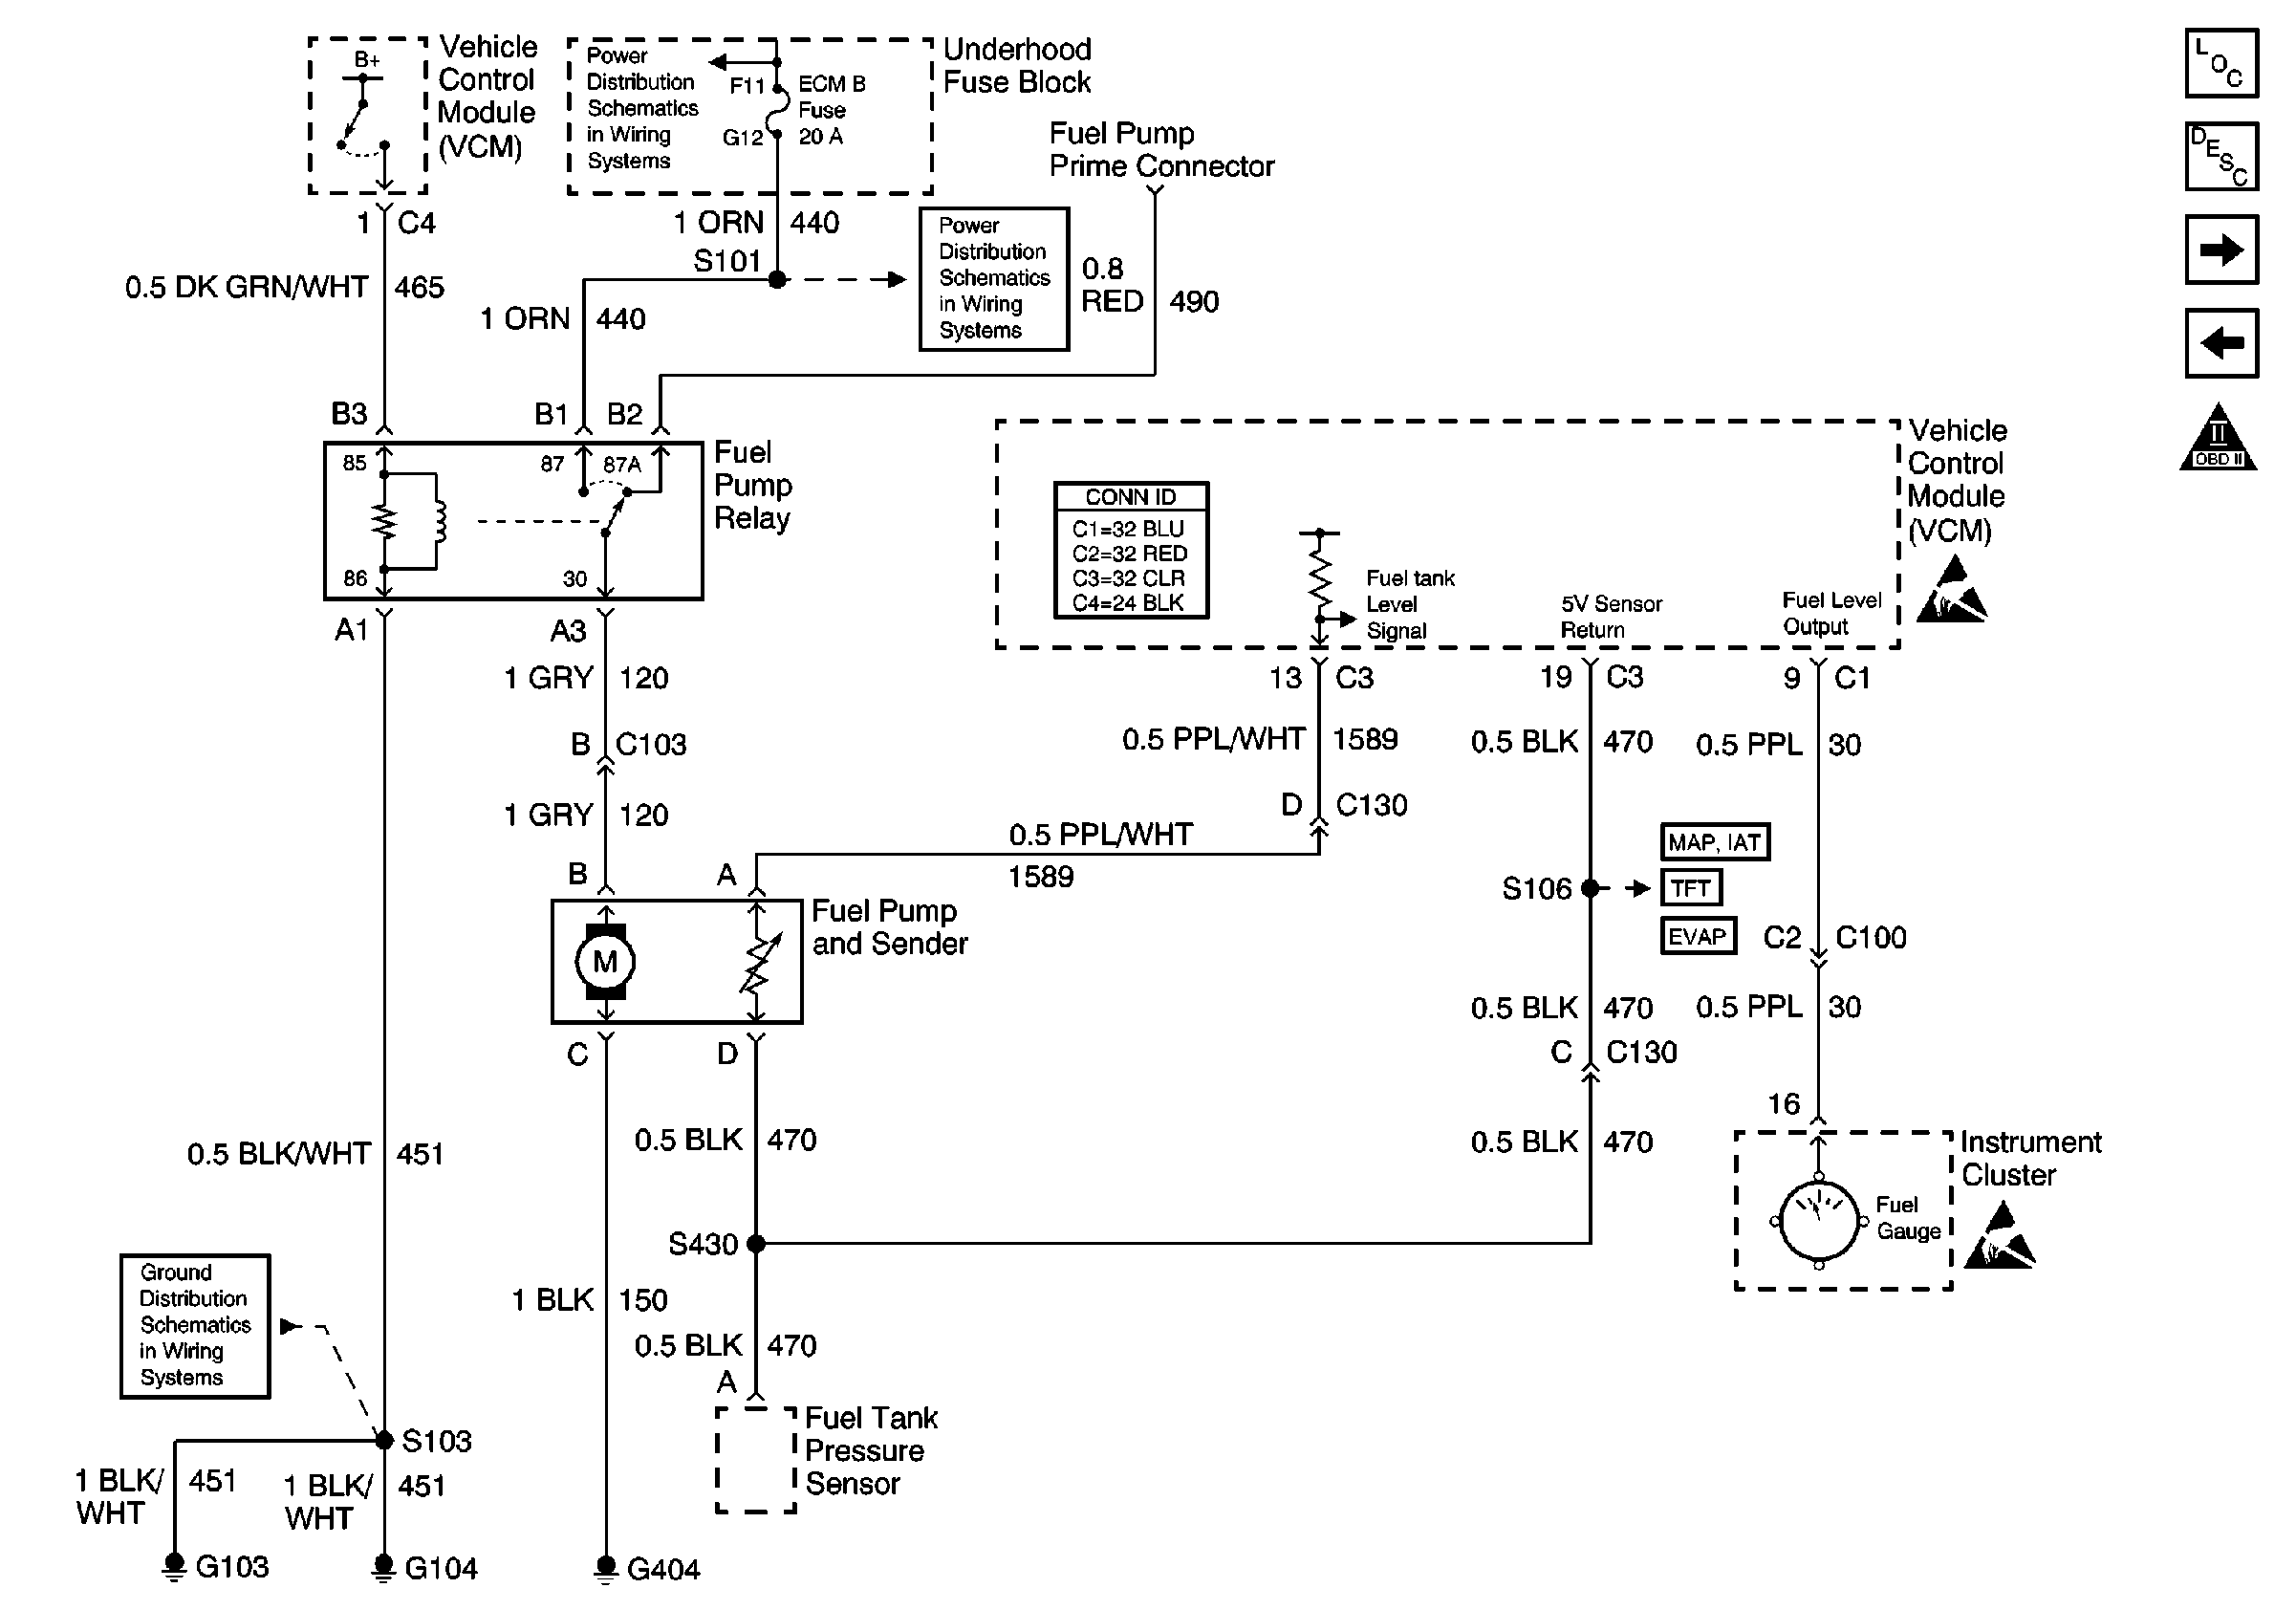
and
Fuel Pump Controls -- Dual Tanks

.
Circuit Description
When the ignition switch is turned ON, the vehicle control module (VCM) energizes the fuel pump relay which powers the in-tank fuel pump ON. The in-tank fuel pump remains ON as long as the engine is cranking or running and the VCM is receiving the distributor reference pulses. If there are no reference pulses, the VCM shuts the fuel pump OFF within 2 seconds after the ignition was turned ON or if the engine stops. The VCM will also turn ON the fuel pump for 2 seconds when the ignition is turned to the OFF position.
Diagnostic Aids
If the fuel pump relay circuit checks out OK, refer to Fuel System Diagnosis .
Excessive fuel may also cause long cranking times which is accompanied by the following conditions:
| • | A start that is not as fast as normal |
| • | A puff of black smoke at the tailpipe |
An improperly connected or faulty evaporative emission (EVAP) component can cause this problem. Refer to Evaporative Emission Control System Diagnosis .
One or more leaking poppet nozzles, or CSFI injectors, may also extend the cranking time. Perform the Injector Balance Test. Refer to Fuel Injector Balance Test with Tech 2 .
Test Description
The numbers below refer to the step numbers on the diagnostic table.
-
Command both the ON and OFF states. Repeat the commands as necessary.
-
This step determines if the condition is located on the coil side or the switch side of the circuit.
-
This step verifies that the VCM is providing voltage to the fuel pump relay.
-
This step tests for an open in the ground circuit to the fuel pump relay.
-
This step determines if a voltage is constantly being applied to the fuel pump relay.
-
To gain access to the fuel pump connector, the fuel tank may need to be removed, refer to Fuel Tank Replacement .
-
This step determines if the condition with the circuit is intermittent. If the fuse does not open, inspect the supply voltage circuit between the fuse and the fuel pump for an intermittent condition.
-
Use the same amperage fuse in the jumper as is used to protect the fuel pump circuit.
-
To gain access to the fuel pump connector, the fuel tank may need to be removed, refer to Fuel Tank Replacement .
-
Inspect the splice pack which contains the fuel pump ground and other ground circuits. Be certain all connections within the splice pack are clean and tight.
Step | Action | Yes | No |
|---|---|---|---|
1 | Did you perform the Powertrain On-Board Diagnostic (OBD) System Check? | Go to Step 2 | |
Does the fuel pump turn ON and OFF? | Go to Intermittent Conditions | Go to Step 3 | |
With a scan tool, command the fuel pump relay ON and OFF. Do you hear a click when you command the fuel pump relay ON and OFF? | Go to Step 9 | Go to Step 4 | |
Does the test lamp turn ON and OFF? | Go to Step 5 | Go to Step 6 | |
Does the test lamp turn ON and OFF? | Go to Step 19 | Go to Step 22 | |
Does the test lamp remain illuminated with each command? | Go to Step 7 | Go to Step 8 | |
7 |
Did you find and correct the condition? | Go to Step 27 | Go to Step 26 |
8 |
Did you find and correct the condition? | Go to Step 27 | Go to Step 20 |
9 | Turn ON the ignition, with the engine OFF. Does the fuel pump operate continuously? | Go to Step 10 | Go to Step 11 |
10 |
Does the fuel pump operate continuously? | Go to Step 21 | Go to Step 25 |
11 | Is the fuel pump fuse open? | Go to Step 12 | Go to Step 14 |
Did you find and correct the condition? | Go to Step 27 | Go to Step 13 | |
Is the fuel pump fuse open? | Go to Step 24 | Go to Testing for Electrical Intermittents in Wiring Systems | |
14 |
Does the test lamp illuminate? | Go to Step 15 | Go to Step 23 |
Connect a 20 amp fused jumper wire between the battery voltage circuit of the fuel pump relay switch and the supply voltage circuit of the fuel pump. Does the fuel pump operate? | Go to Step 19 | Go to Step 16 | |
Test the supply voltage circuit of the fuel pump for an open or high resistance between the fuel pump relay and the fuel pump. Refer to Circuit Testing and Wiring Repairs in Wiring Systems. Did you find and correct the condition? | Go to Step 27 | Go to Step 17 | |
|
Important: Visually and physically inspect the ground circuit for being tight, corrosion on terminals, or damage to the wiring harness. Test the ground circuit of the fuel pump for an open or high resistance. Refer to Circuit Testing and Wiring Repairs in Wiring Systems. Did you find and correct the condition? | Go to Step 27 | Go to Step 18 | |
18 | Inspect for poor connections at the fuel pump. Refer to Circuit Testing and Wiring Repairs in Wiring Systems. Did you find and correct the condition? | Go to Step 27 | Go to Step 24 |
19 | Inspect for poor connections at the fuel pump relay. Refer to Circuit Testing and Wiring Repairs in Wiring Systems. Did you find and correct the condition? | Go to Step 27 | Go to Step 25 |
20 | Inspect for poor connections at the harness connector of the VCM. Refer to Circuit Testing and Wiring Repairs in Wiring Systems. Did you find and correct the condition? | Go to Step 27 | Go to Step 26 |
21 | Repair the supply voltage circuit of the fuel pump for a short to voltage. Refer to Wiring Repairs in Wiring Systems. Did you complete the repair? | Go to Step 27 | -- |
22 | Repair the open fuel pump relay ground circuit. Refer to Wiring Repairs in Wiring Systems. Did you complete the repair? | Go to Step 27 | -- |
23 | Repair the battery voltage circuit of the fuel pump relay switch. Refer to Wiring Repairs in Wiring Systems. Did you complete the repair? | Go to Step 27 | -- |
24 |
Important: Inspect for poor connections at the fuel pump, within the fuel tank, before replacing the fuel pump.
Did you complete the replacement? | Go to Step 27 | -- |
25 | Replace the fuel pump relay. Did you complete the replacement? | Go to Step 27 | -- |
26 | Replace the VCM. Refer to VCM Replacement/Programming . Did you complete the replacement? | Go to Step 27 | -- |
27 | Operate the system in order to verify the repair. Did you correct the condition? | System OK | Go to Step 2 |
