For 1990-2009 cars only
Removal Procedure
- Disconnect the negative battery cable.
- Remove the drainage plug to drain the AT fluid.
- Remove the oil pan.
- Remove the connector from the solenoid.
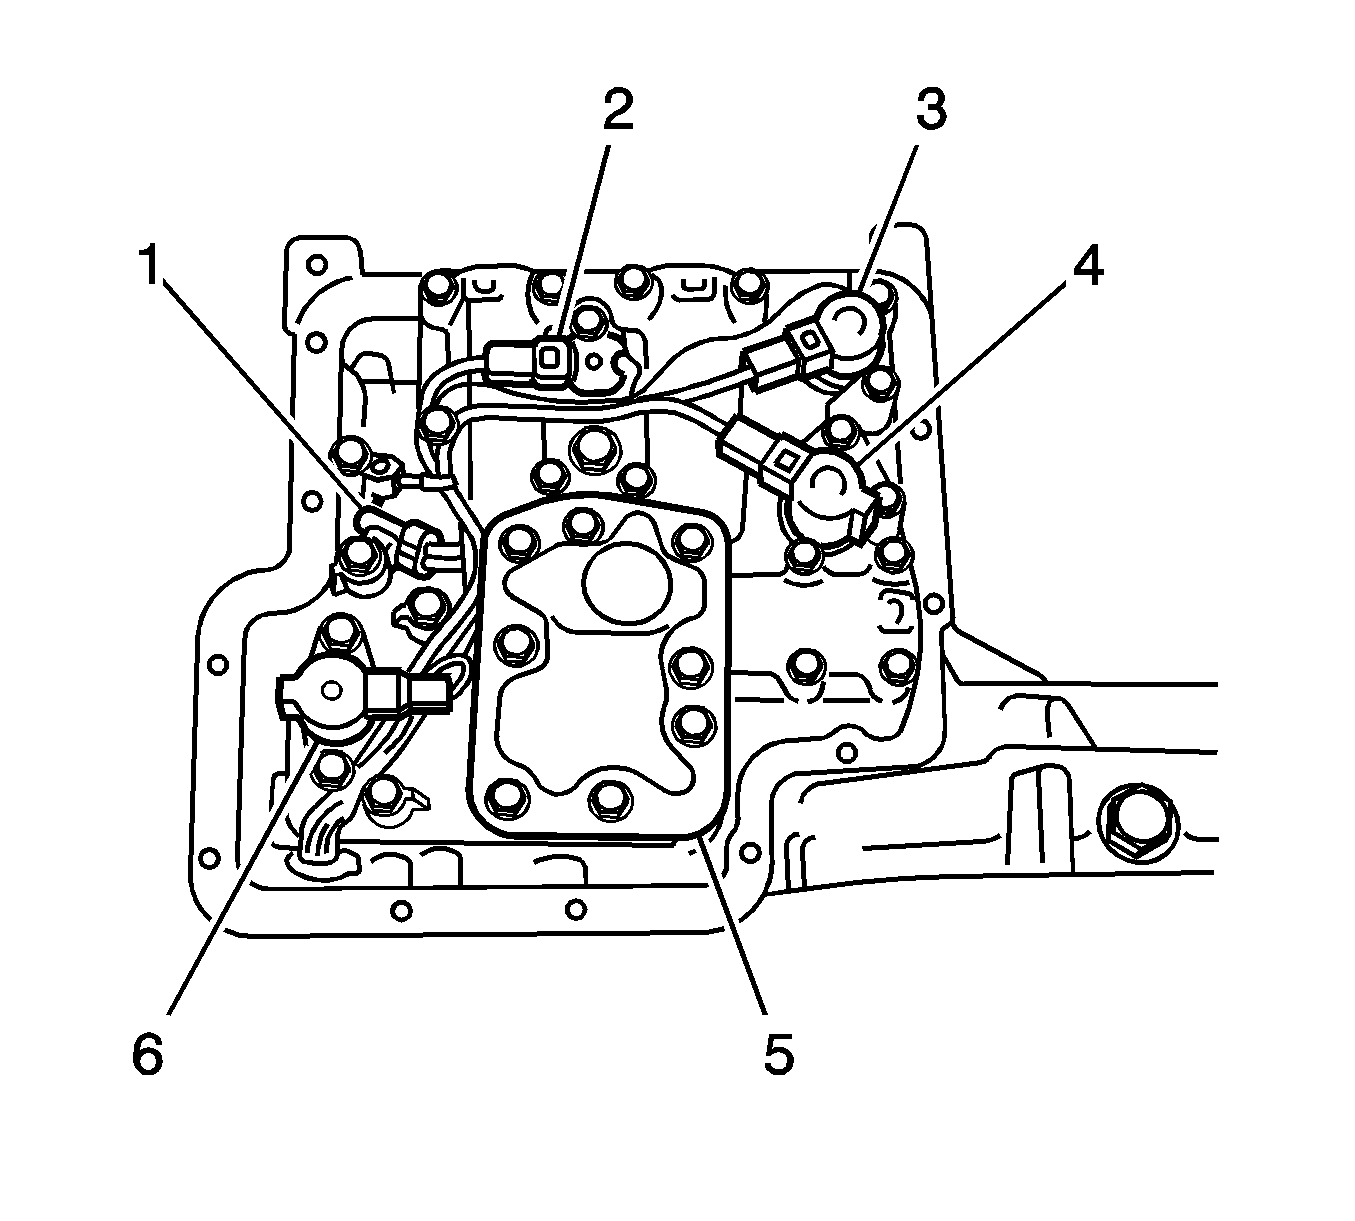
- Remove the ATF temperature sensor (1) bolt.
- Remove the filter (5).
- Remove the valve body assembly and shift solenoid.
Caution: Refer to Battery Disconnect Caution in the Preface section.
Important: Since AT fluid remains inside the assembly, place a drain pan under the transmission when removing the oil pan.
Installation Procedure
- Install the valve body assembly and the shift solenoid.
- Install the filter (5).
- Install the ATF temperature sensor (1) and bolt.
- Install the solenoid connector.
- Install the oil pan.
- Install the drain plug.
- Refill the transmission. Refer to Transmission Fluid Draining .
- Connect the negative battery cable.
Notice: Refer to Fastener Notice in the Preface section.
Tighten
| • | Tighten the shift solenoid bolt to 8 N·m (71 lb in). |
| • | Tighten the valve body bolts to 8 N·m (71 lb in). |
Tighten
Tighten the filter bolts to 8 N·m (71 lb in).
Tighten
Tighten the bolt to 8 N·m (71 lb in).
Tighten
Tighten the bolts to 13 N·m (115 lb in).
Tighten
Tighten the drain plug to 44 N·m (32 lb ft).
