For 1990-2009 cars only
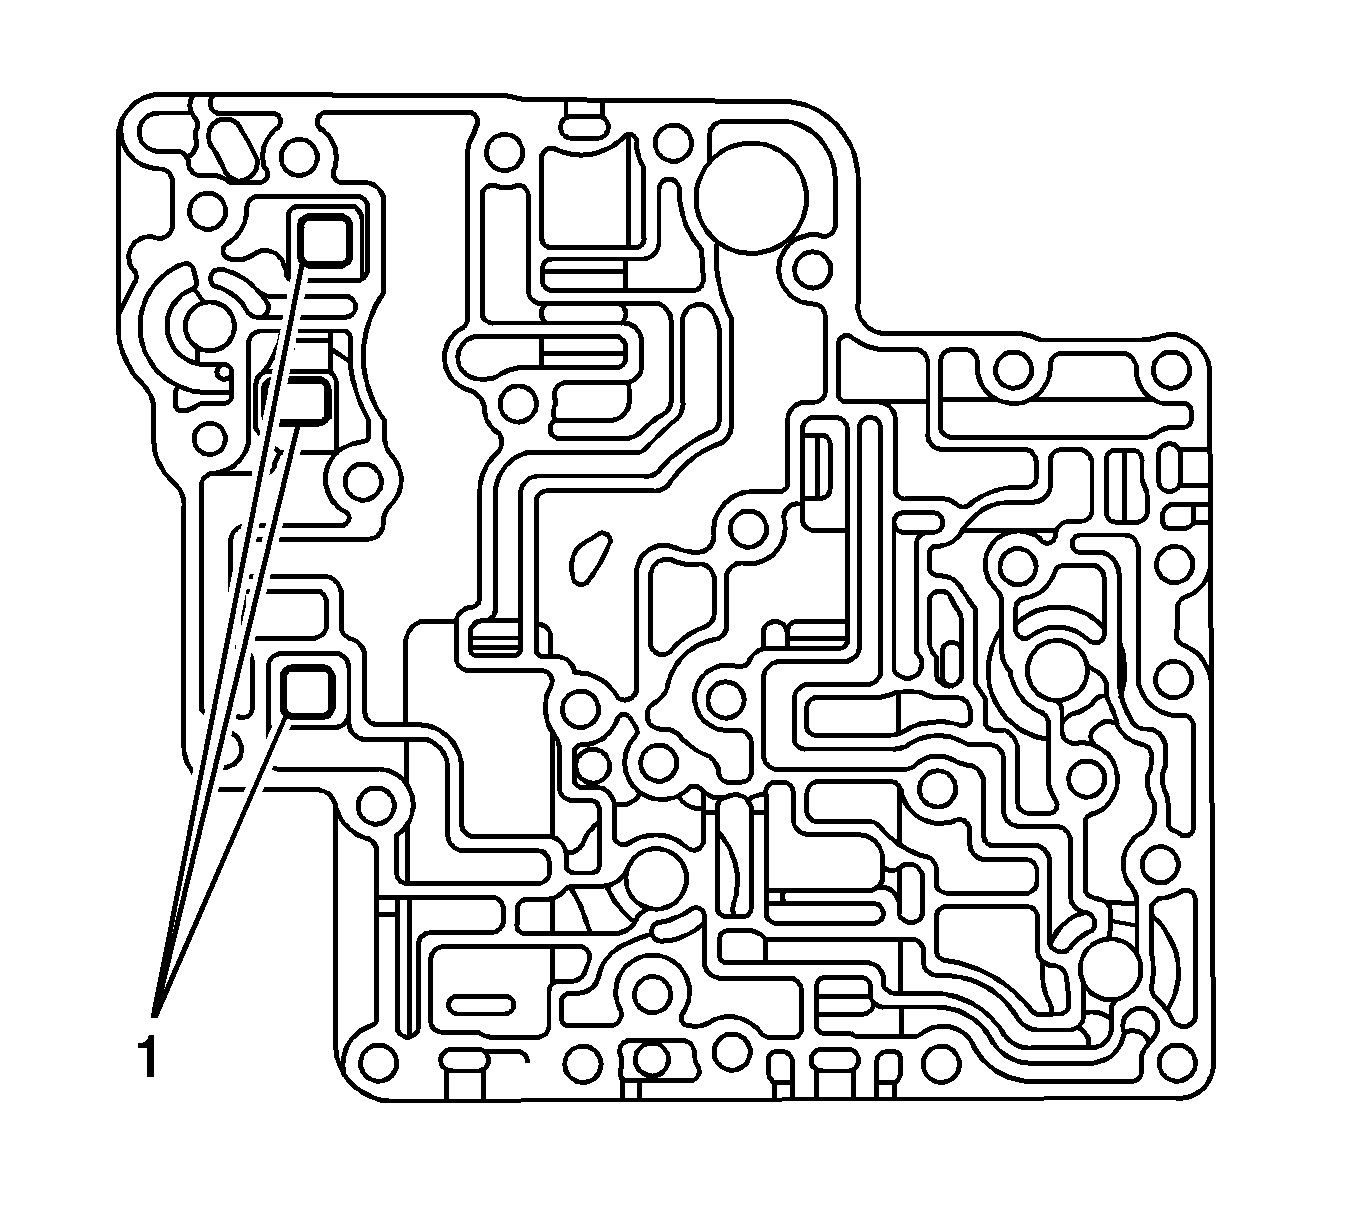
- Apply AT fluid to the oil filter (1) and install it in the lower control valve body.
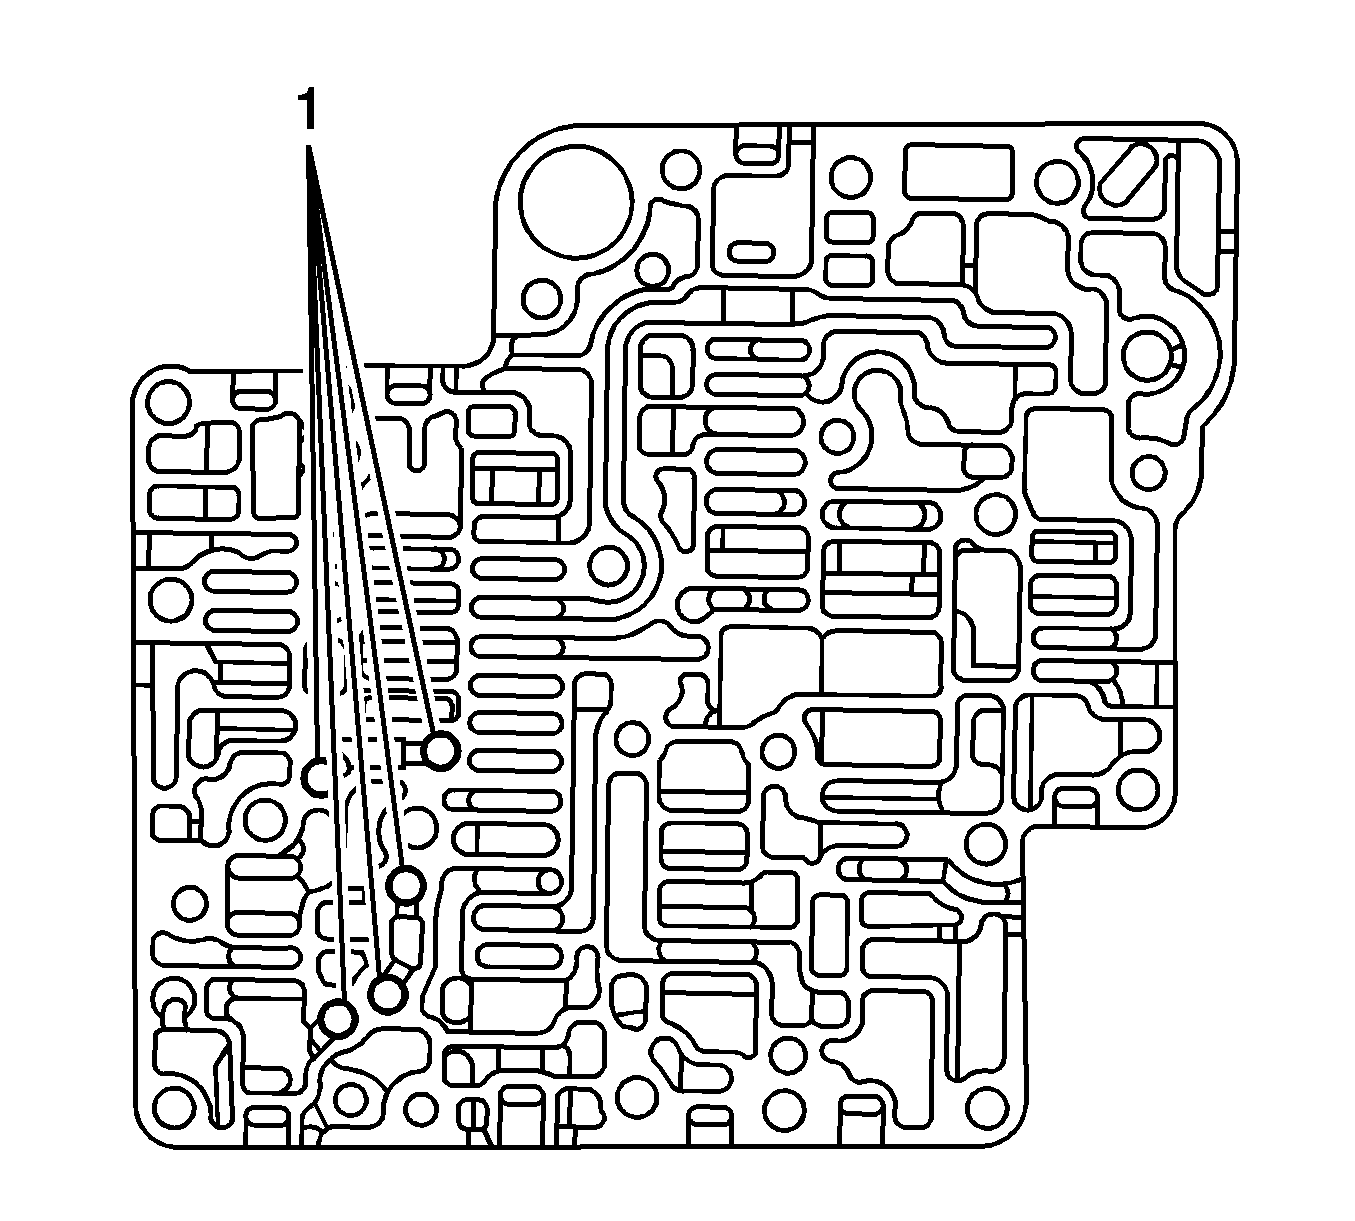
- Apply AT fluid to the steel ball (1) and the new separator plate B. Then install these items in the lower side of the intermediate control valve body.
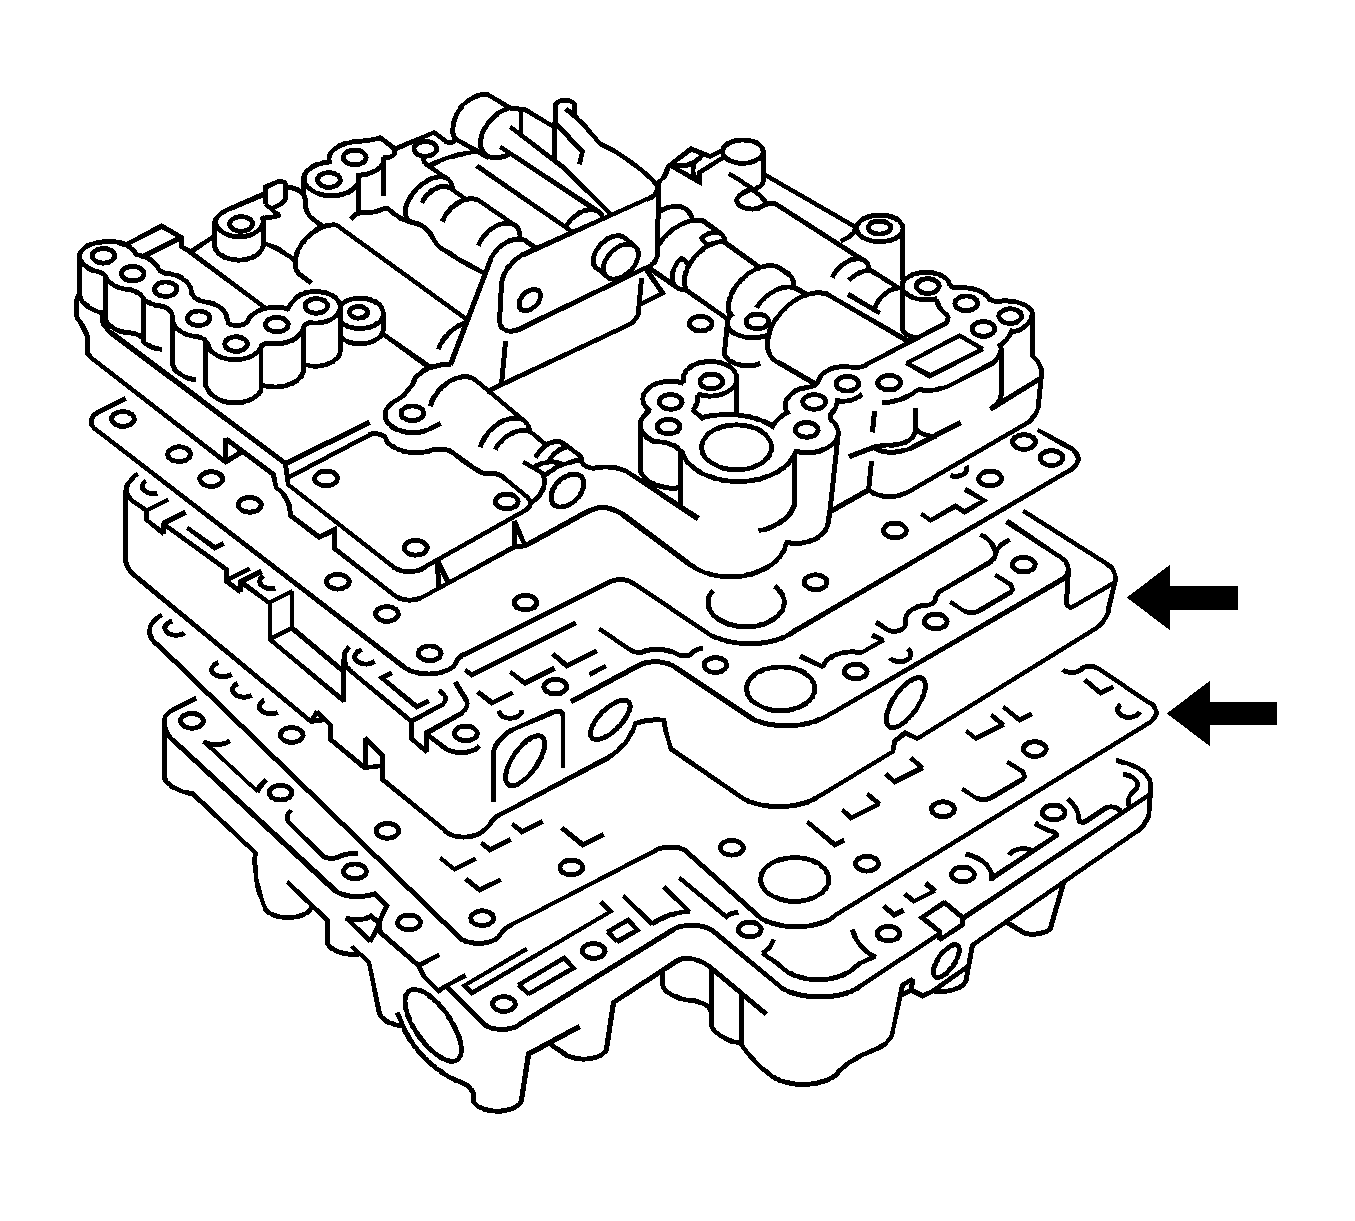
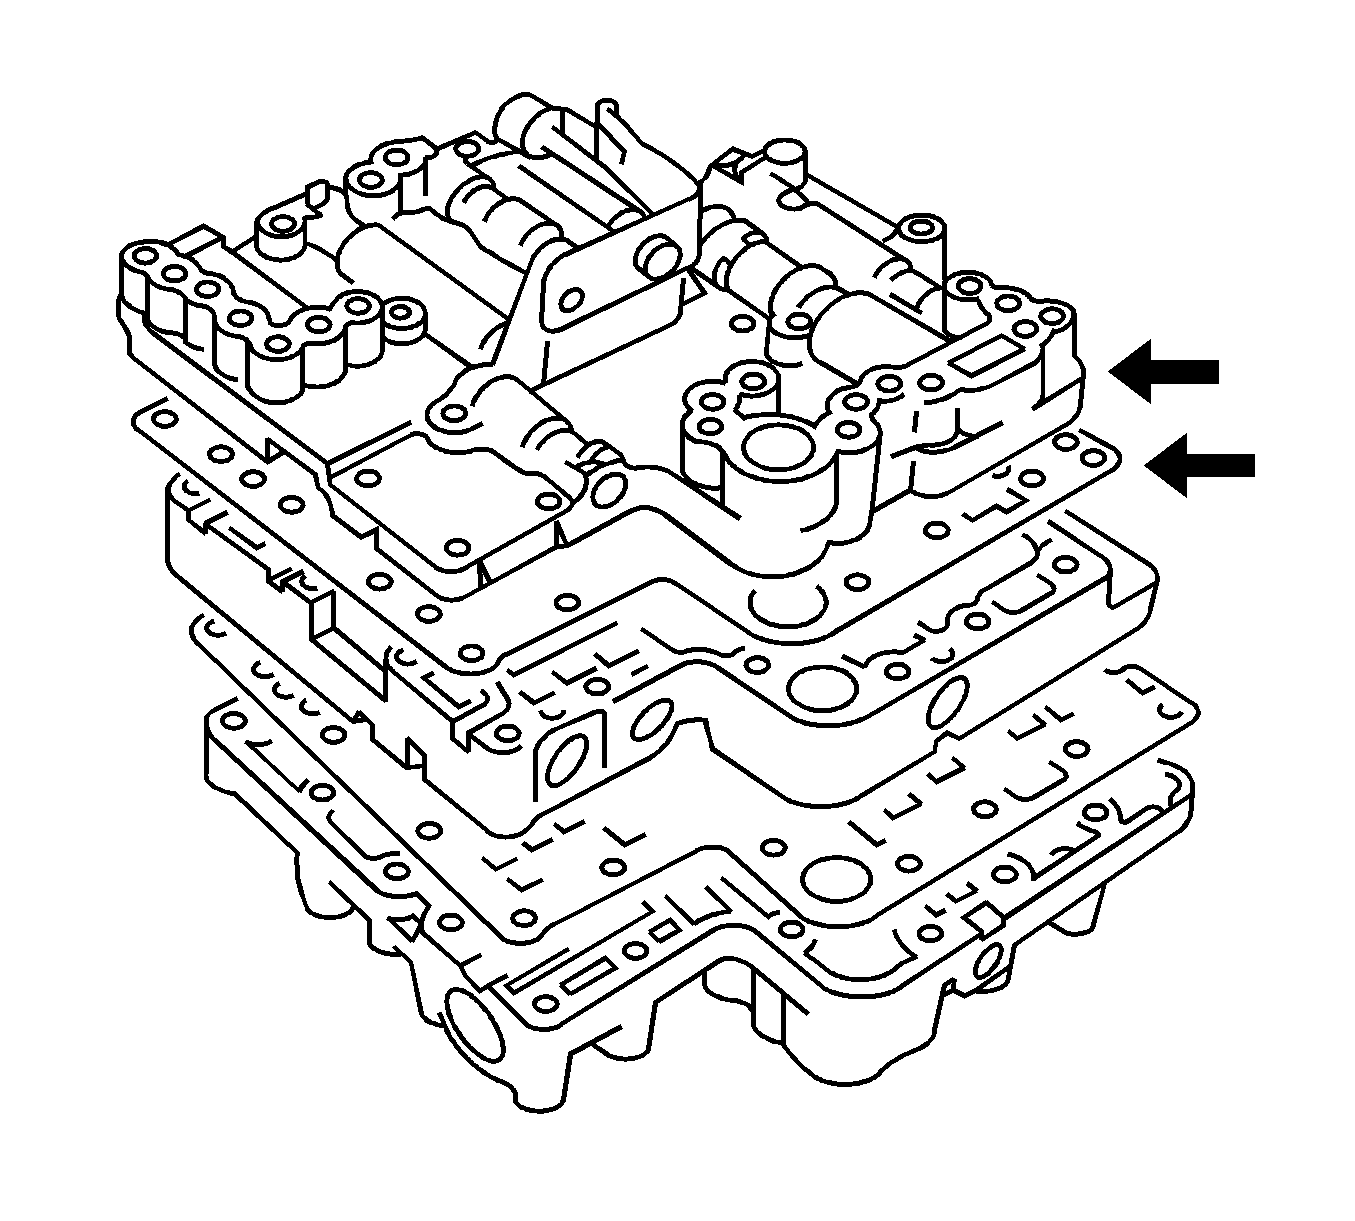
- Install the intermediate control valve body and the separator plate B as a unit in the lower control valve body.
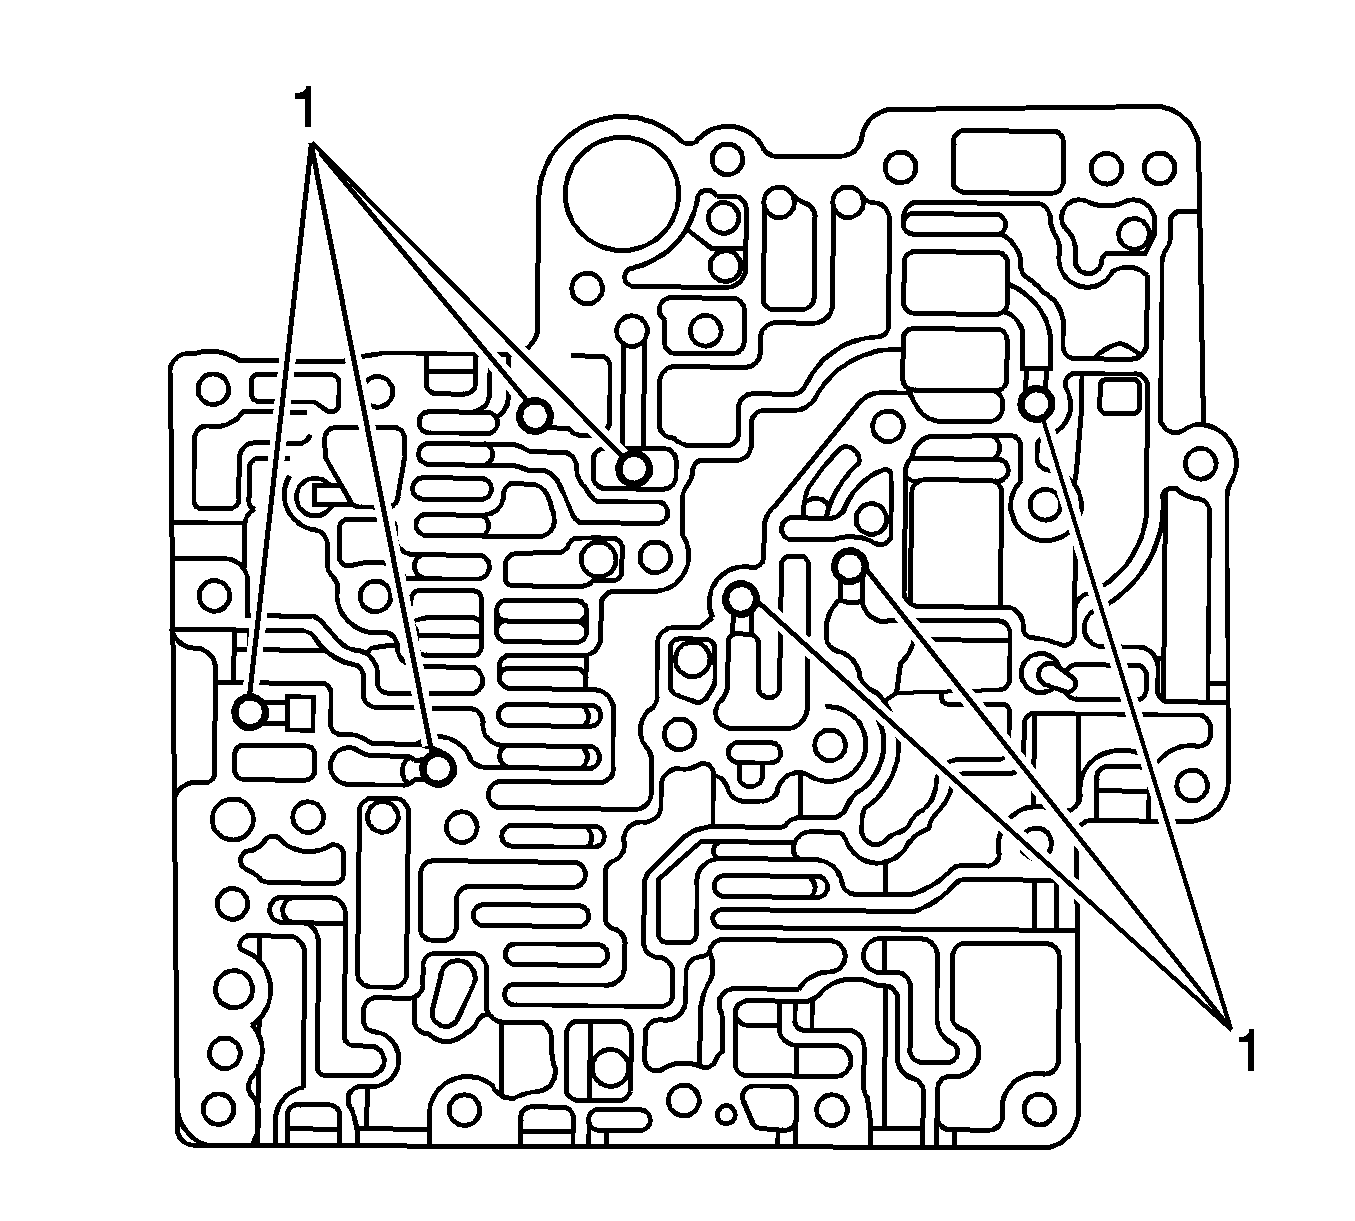
- Apply AT fluid to the steel balls (1) and the new separator plate. Then install these items in the upper control valve body.
- Install the upper control valve body and the separator plate as a unit in the upper side of the intermediate control valve body.
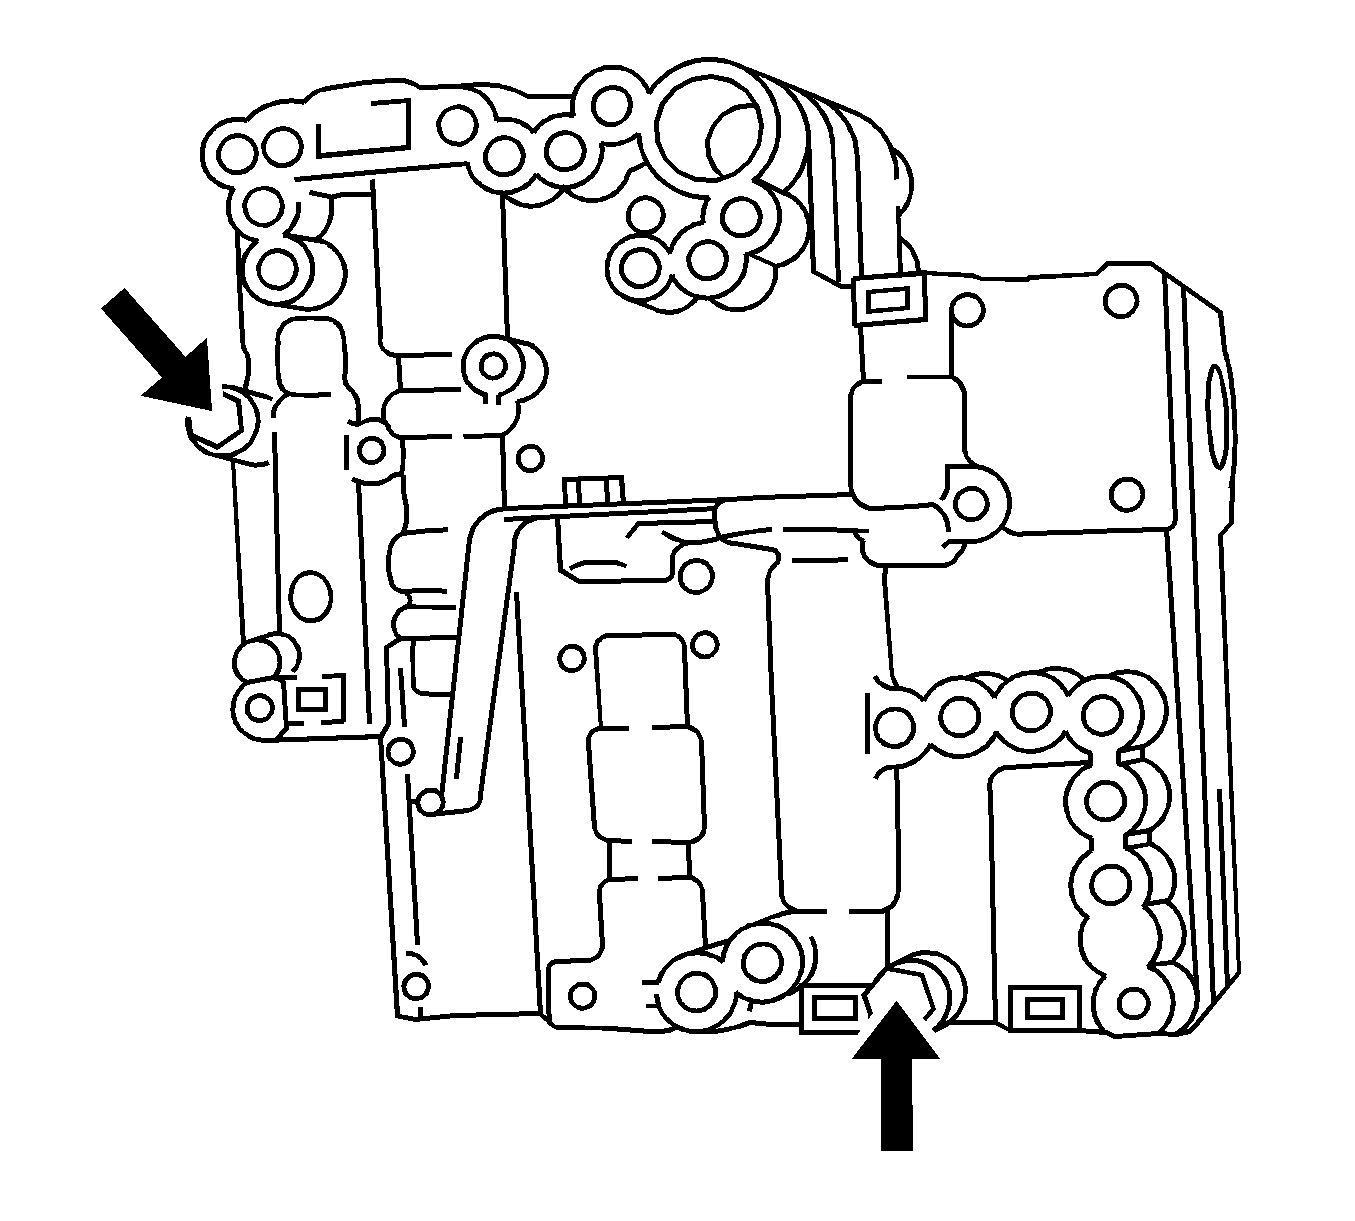
- With the upper control valve body facing upward, tighten the bolt and the nut.
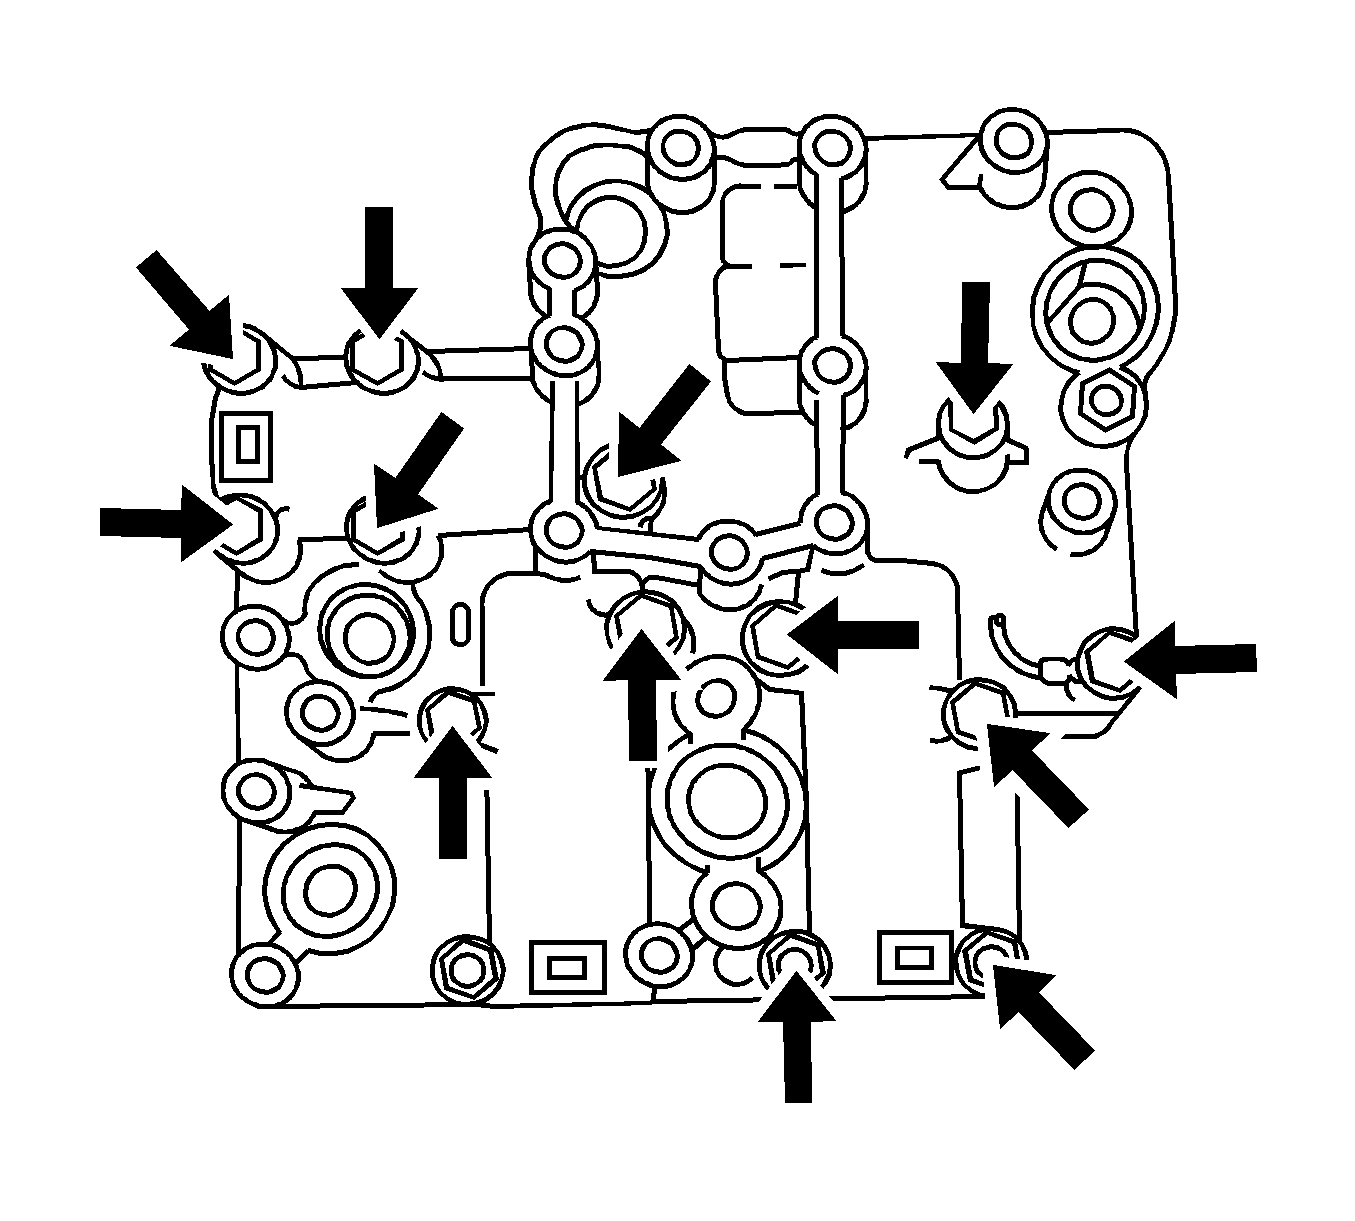
- Tighten the bolts on the side of the lower control valve body.
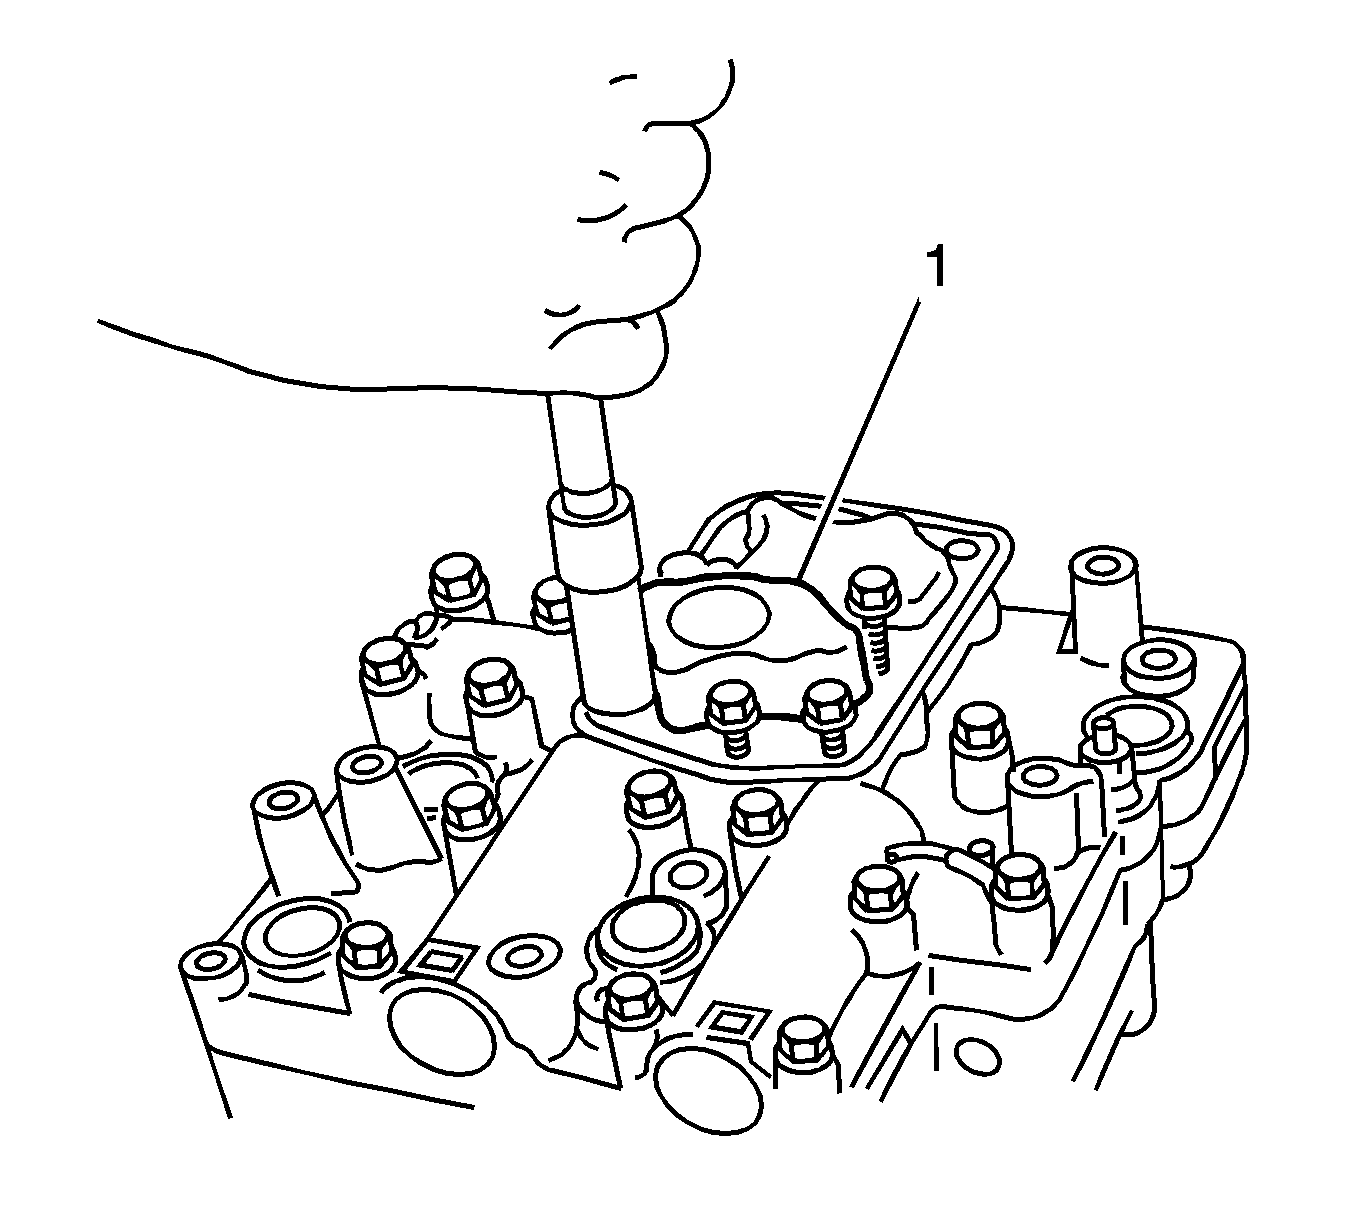
- Install the oil strainer (1) in the lower control valve body, and install bolts.
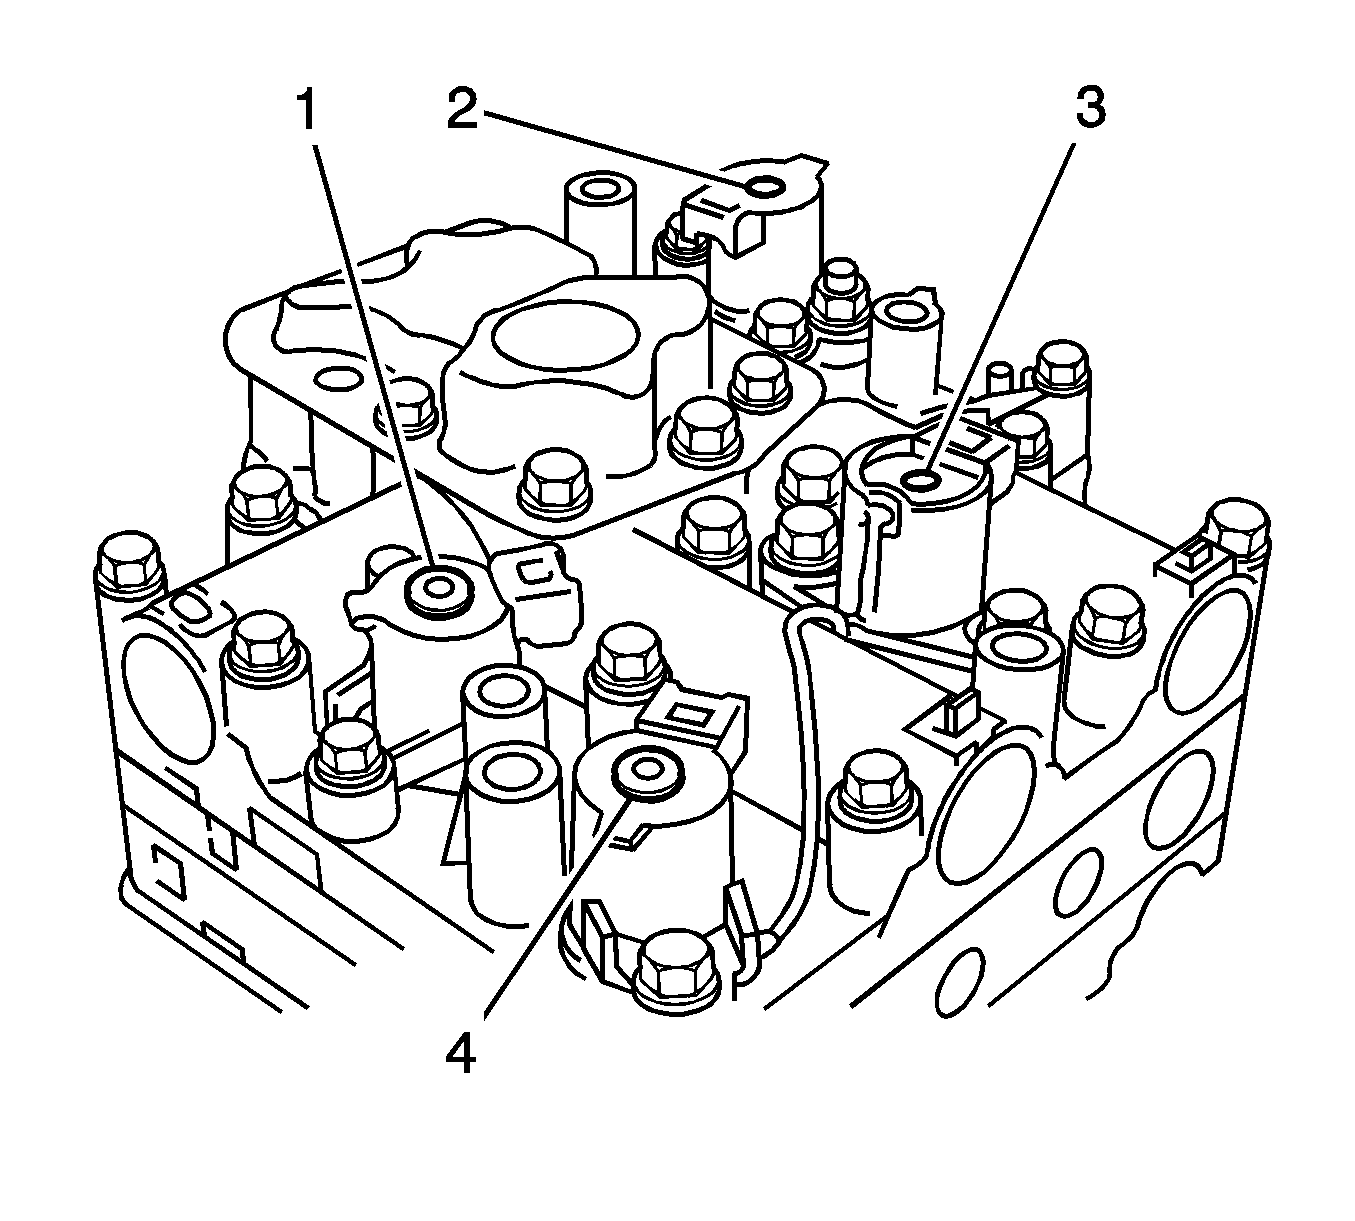
- Install the shift solenoid A (1), the shift solenoid B (4), the line pressure solenoid (3) and lock-up solenoid (2) in the lower control valve body.
Important:
• Before reassembly, ensure that all the components have been washed thoroughly. • Apply AT fluid to all of the components.
Notice: Refer to Fastener Notice in the Preface section.
Tighten
Tighten the bolt and nut 8 N·m (70 lb in).
Tighten
Tighten the bolts to 8 N·m (70 lb in).
Tighten
Tighten oil strainer bolts to 8 N·m (70 lb in).
Tighten
Tighten solenoid retaining bolts to 8 N·m (70 lb in).
