For 1990-2009 cars only
Tools Required
| • | DT 46496 (DW09940-53111) Gear, Bearing Installer |
| • | DT 46553 (DW220-010A) Transaxle Fixture |
- Remove the manual transaxle. Refer to Transmission Replacement .
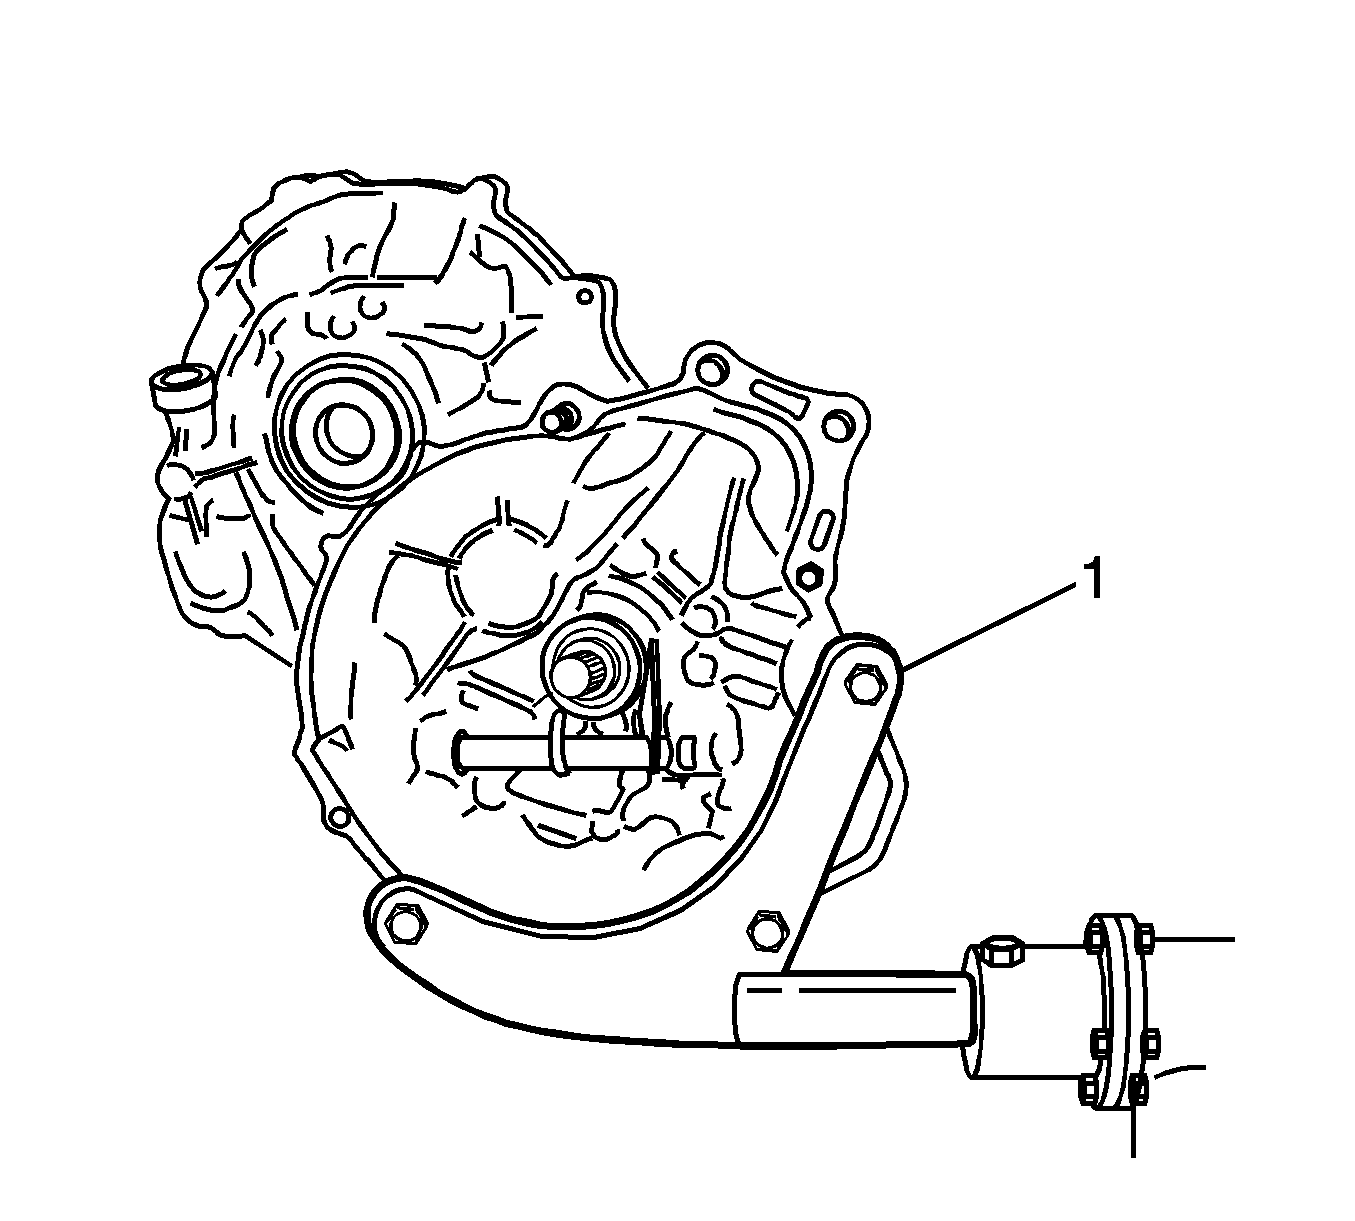
- Position the manual transaxle to a transaxle stand using DT 46553 (1).
- Remove the related clutch parts. Refer to Clutch, Pressure Plate, and Pilot Bearing Replacement .
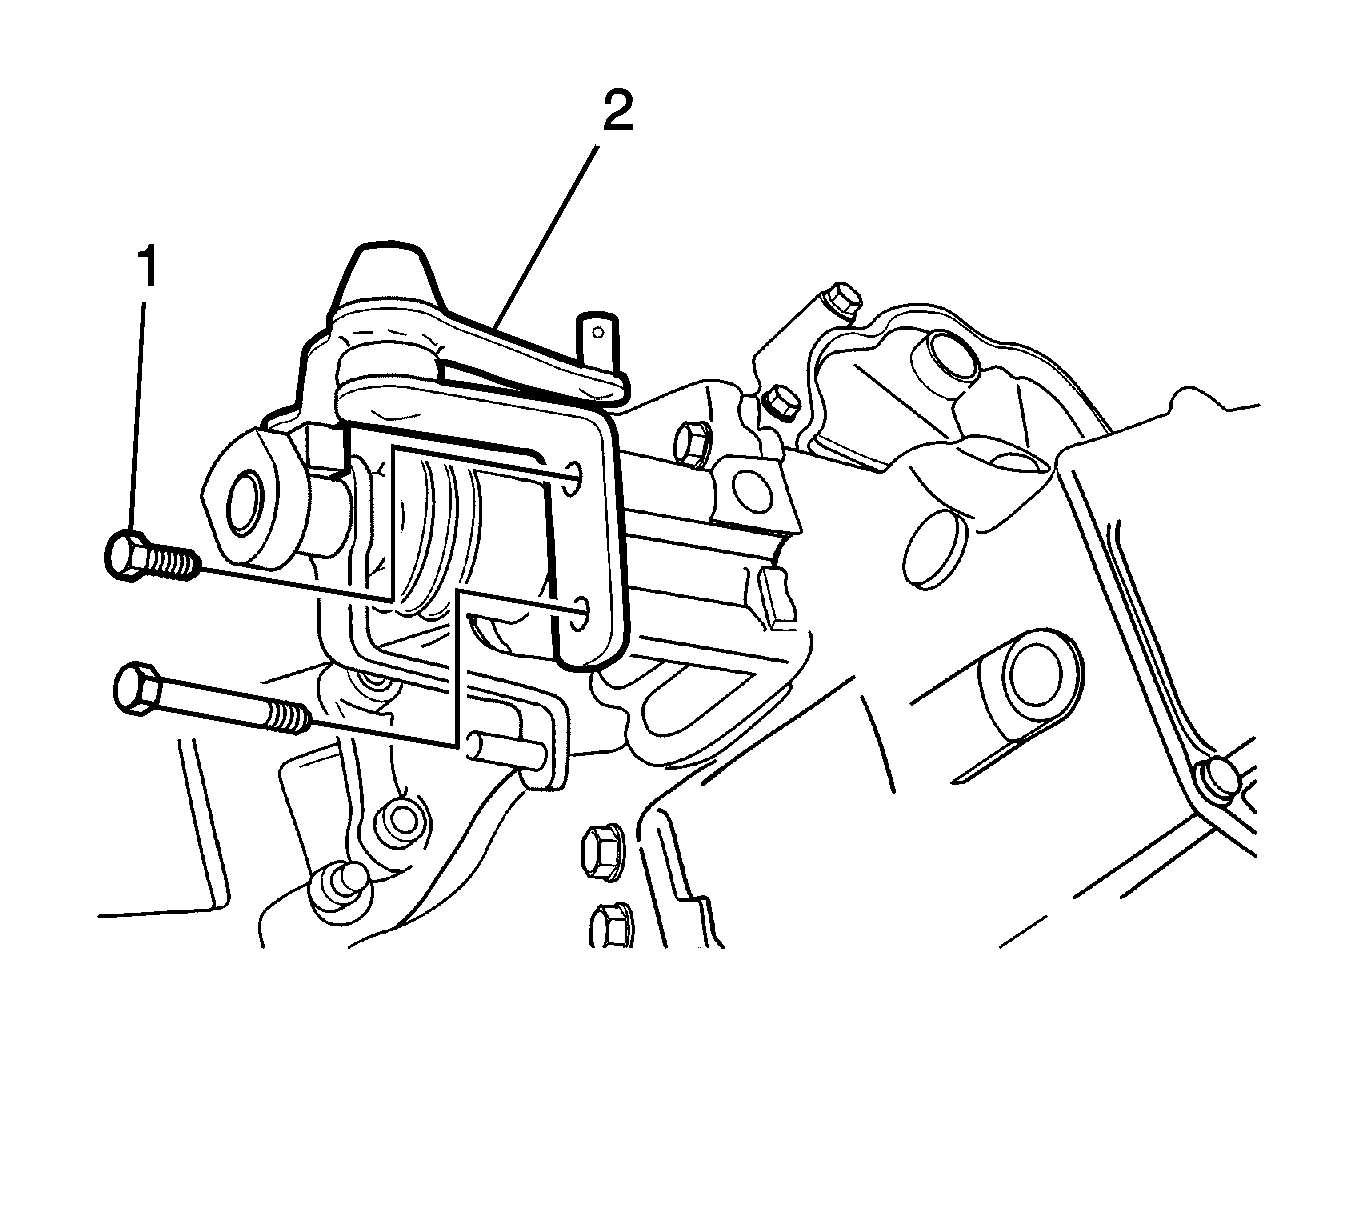
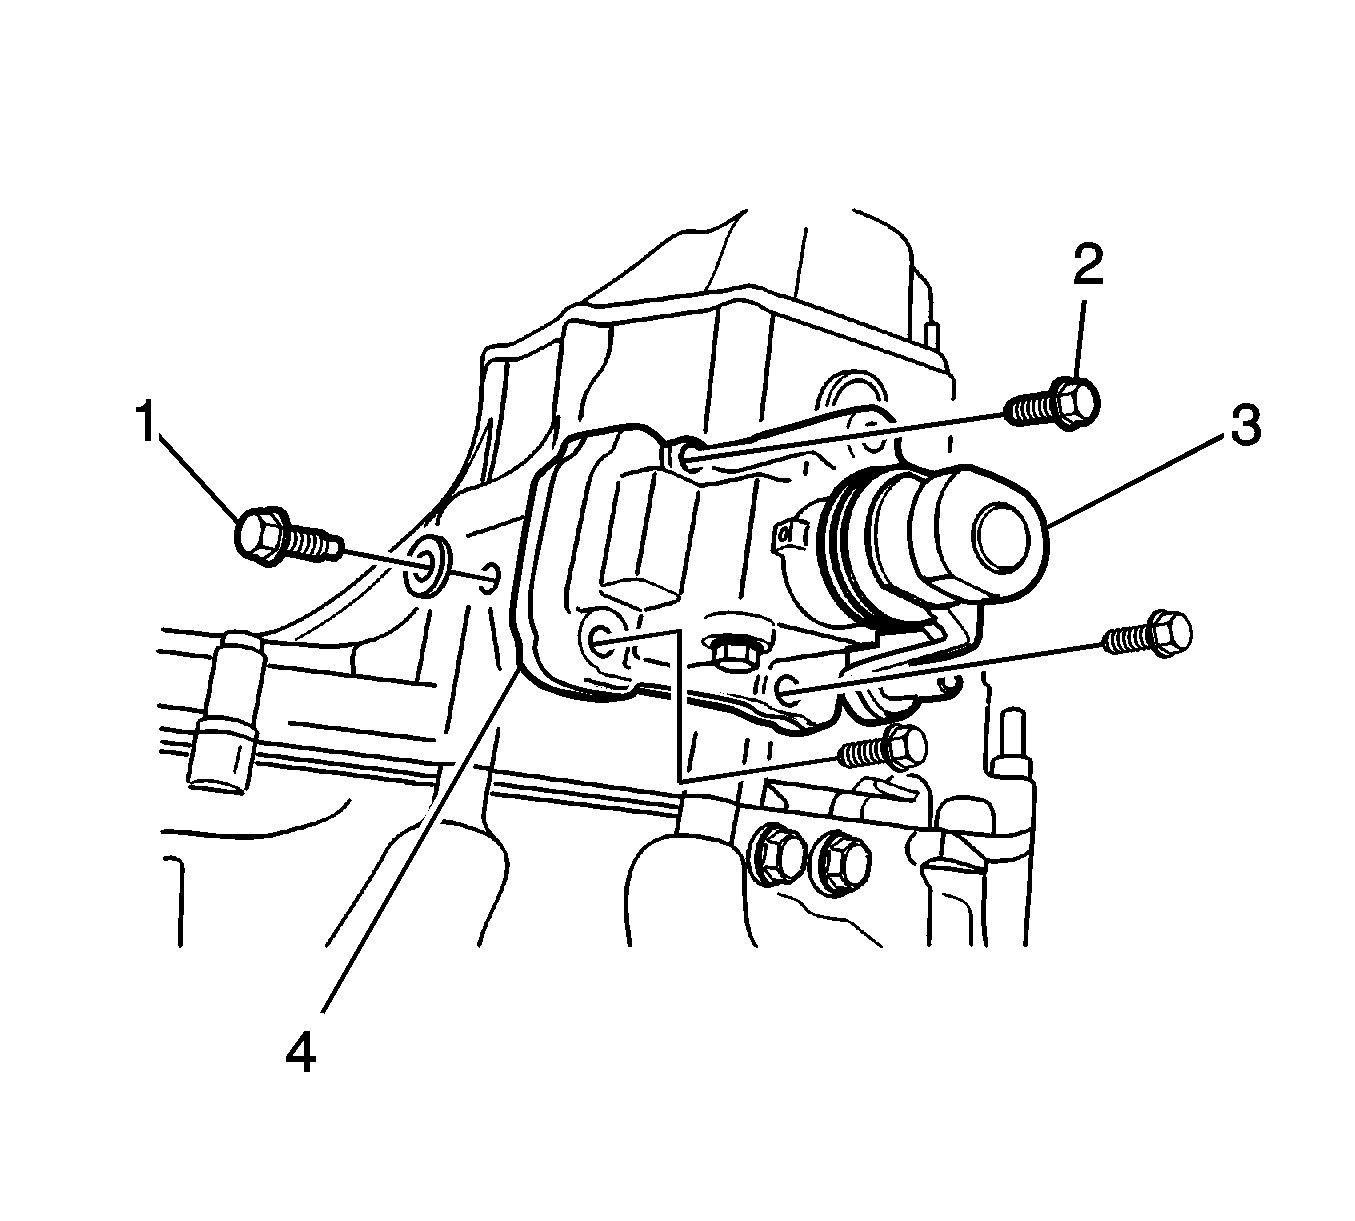
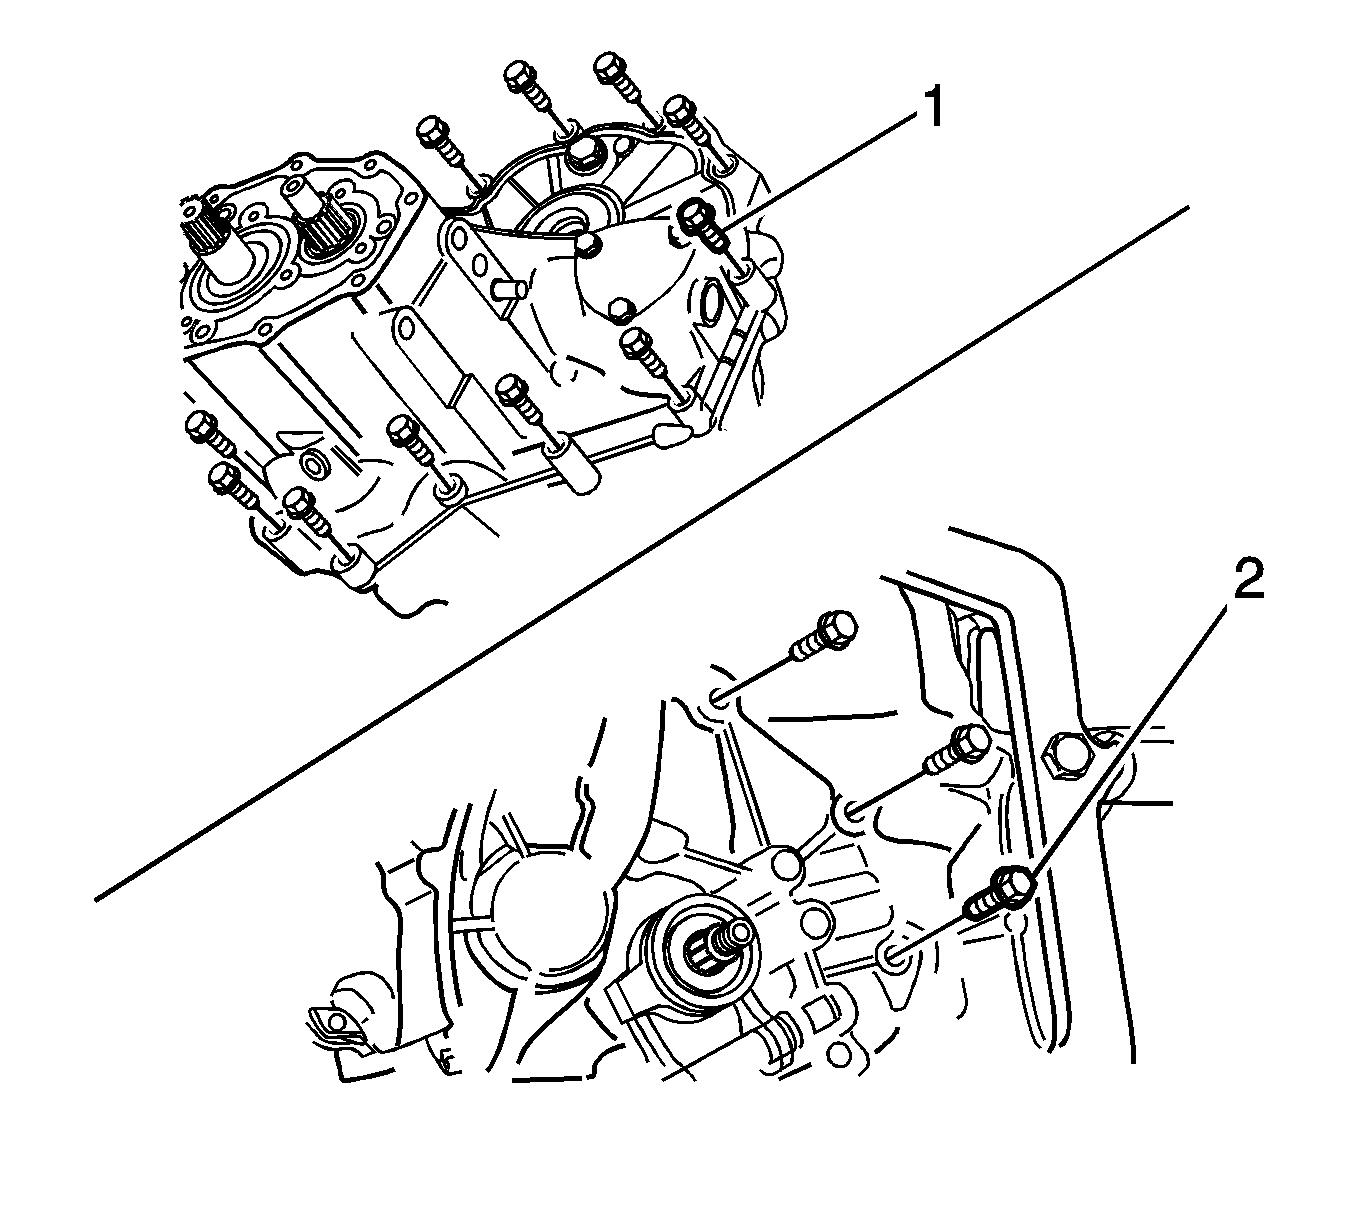
- Remove the manual transaxle mounting bracket bolts (1).
- Remove the manual transaxle mounting bracket nut (3).
- Remove the manual transaxle mounting bracket (2).
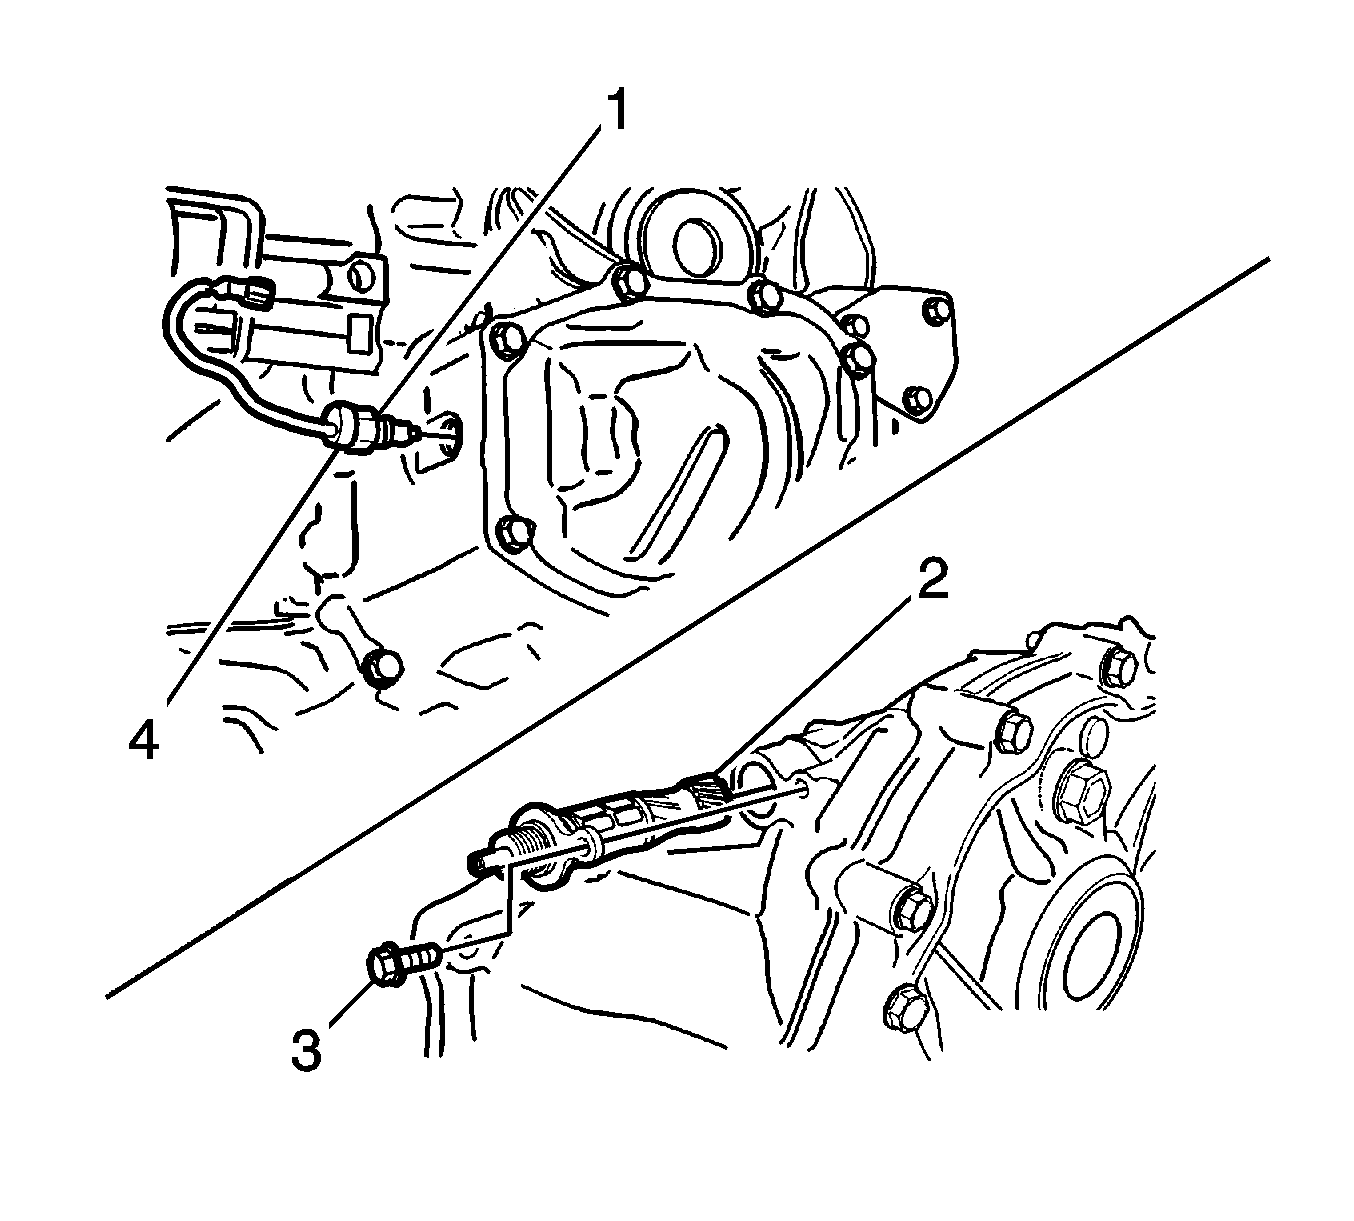
- Remove the backup light switch nut (1).
- Disconnect the backup light switch (4).
- Remove the speedometer driven gear assembly bolt (3).
- Remove the speedometer driven gear assembly (2).
- Remove the select lever bolt (1).
- Remove the select lever (2).
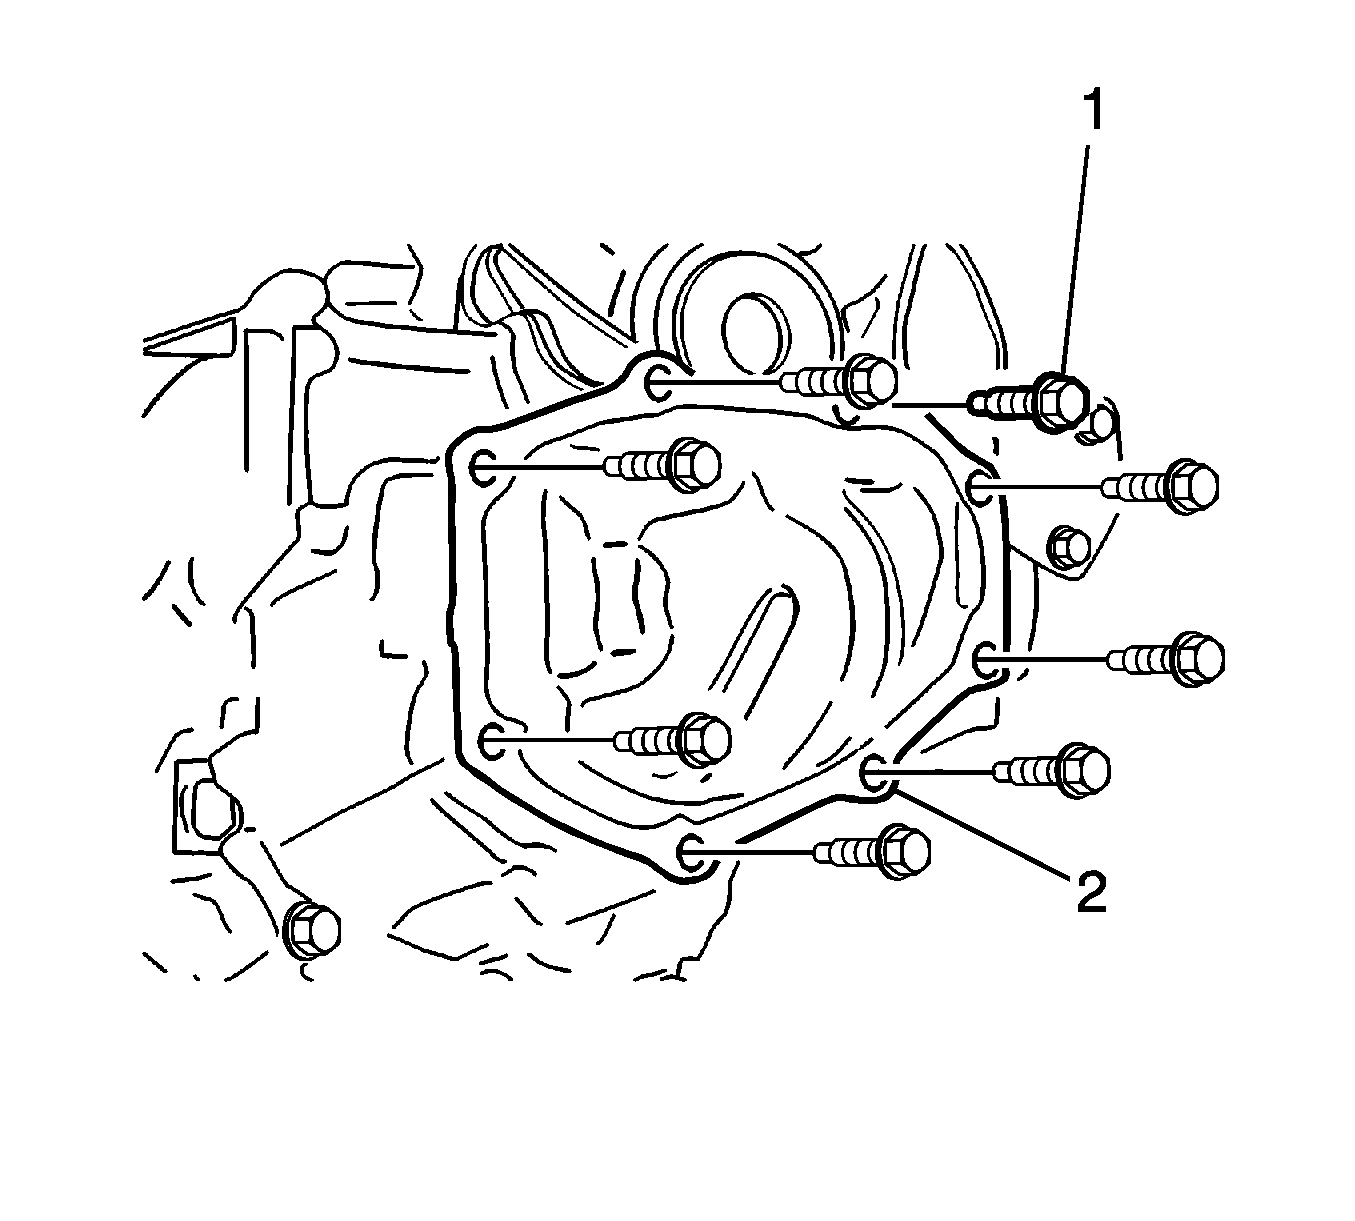
- Remove the gear shift control case assembly bolts (2).
- Remove the shift interlock bolt (1).
- Remove the gear shift control case assembly (3).
- Remove the gasket (4).
- Remove the side cover bolts (1).
- Remove the side cover using a rubber hammer (2).
- Remove the sealant on the side cover and the transaxle case.
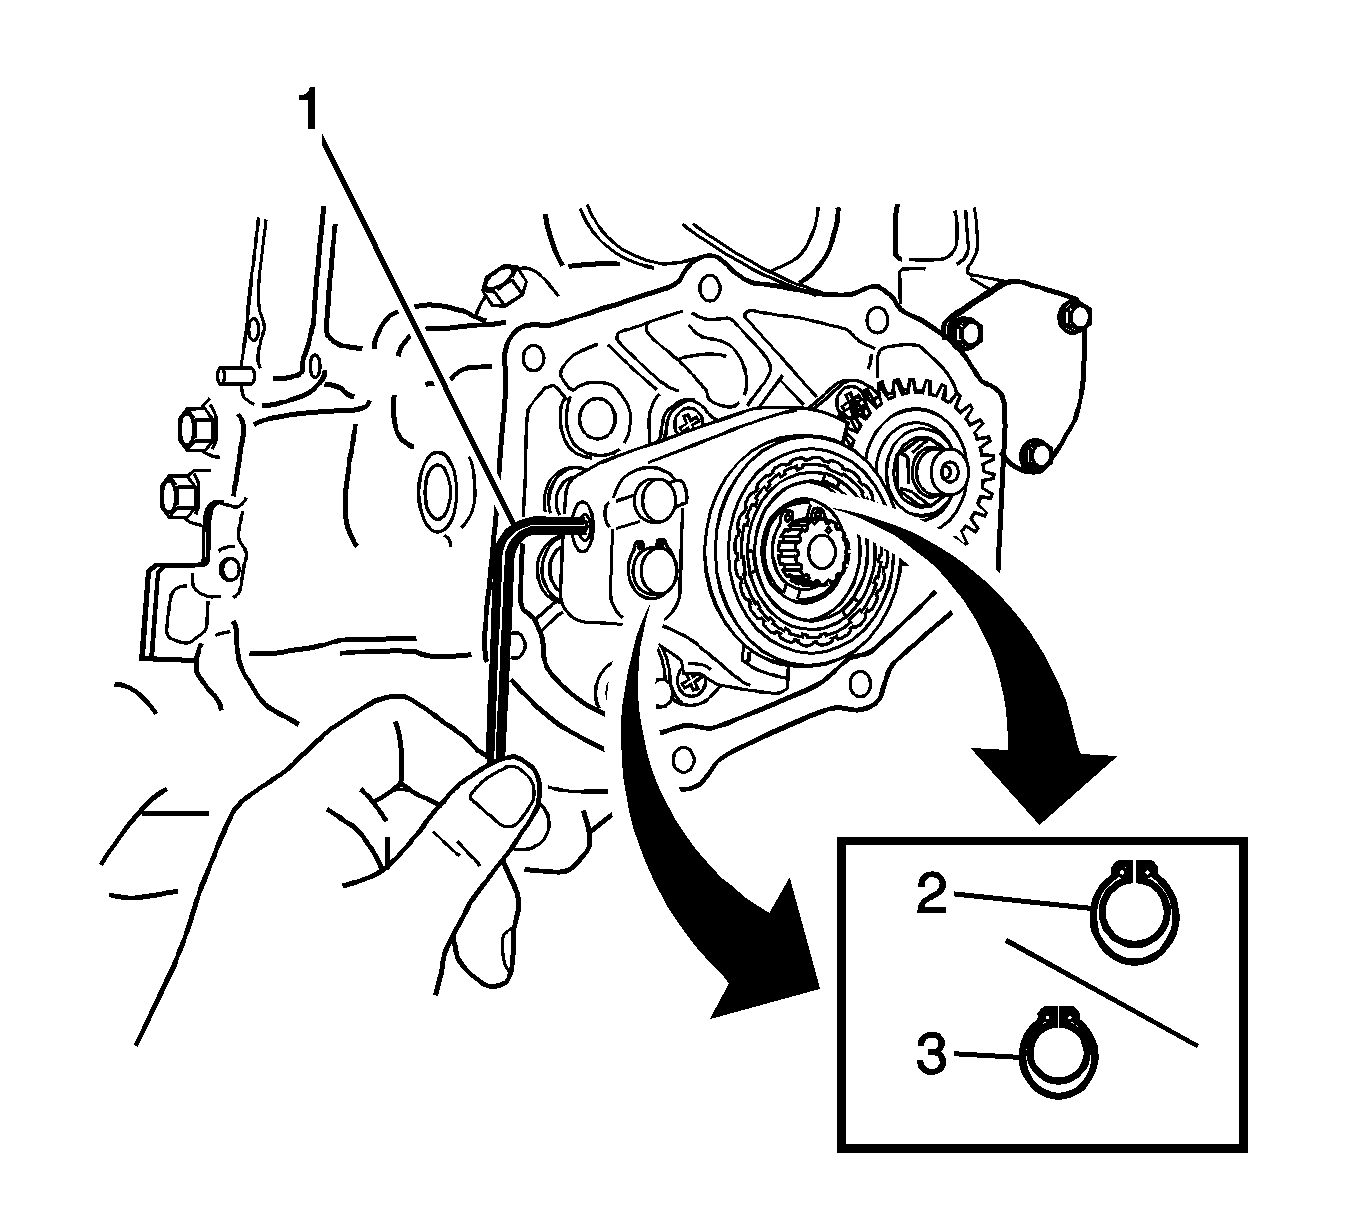
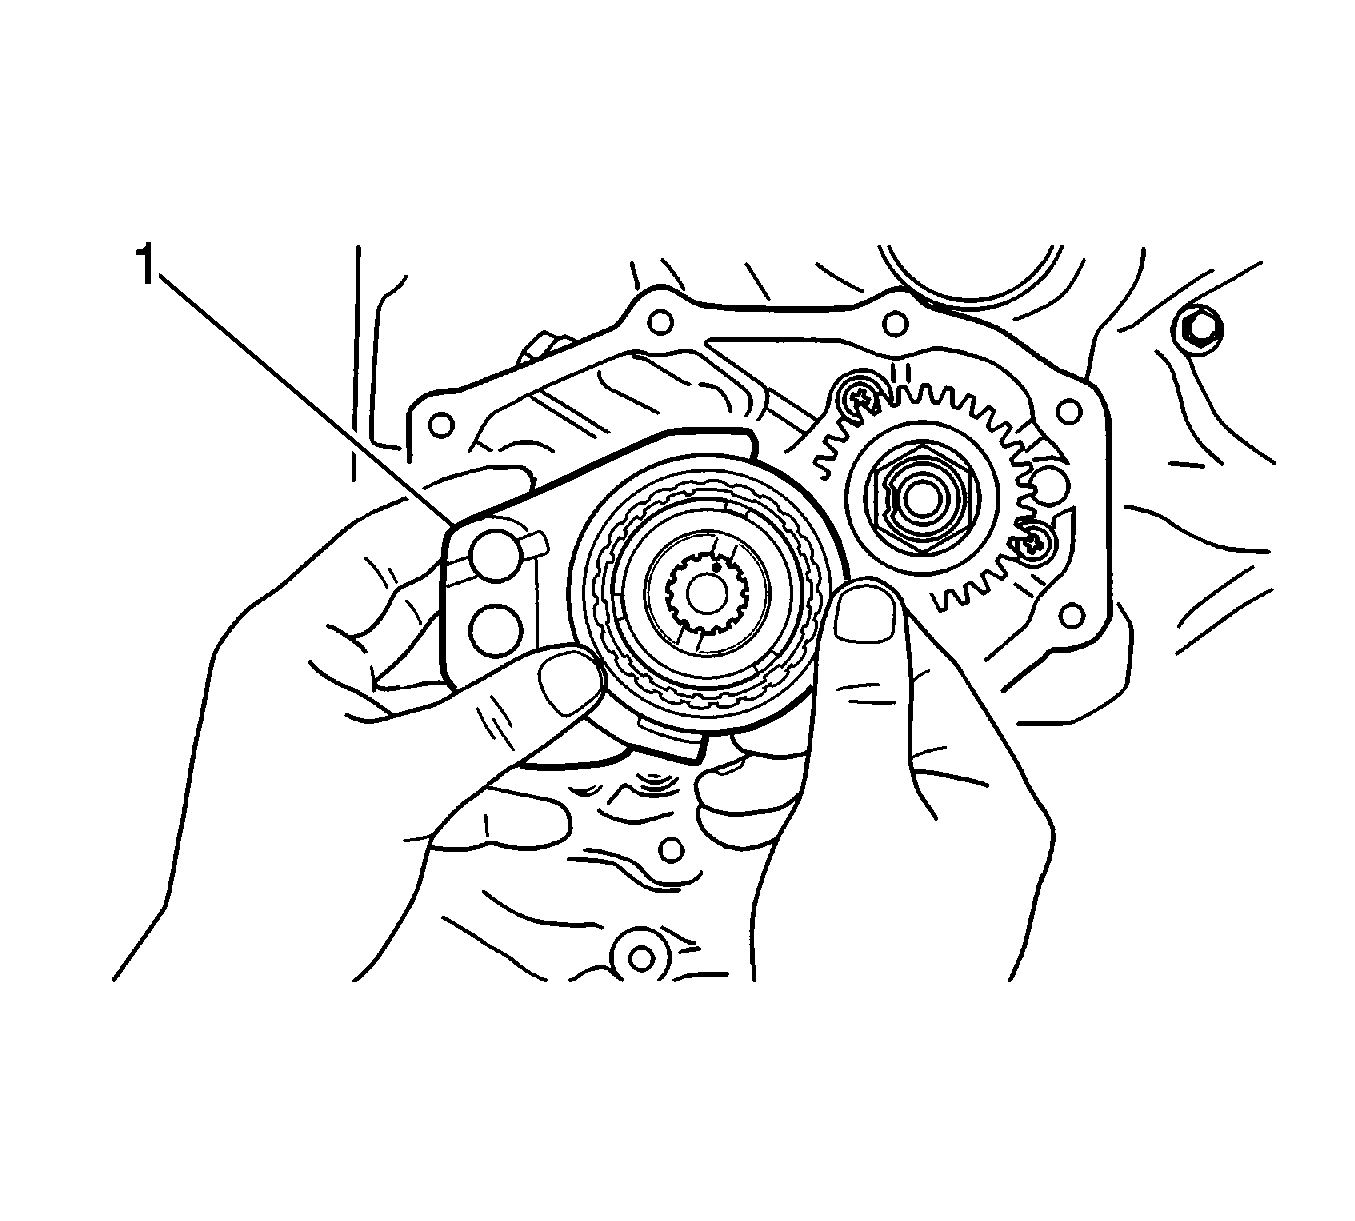
- Remove the 5th gear shift fork plug (1).
- Remove the 5th gear shift fork guide ball using a magnet.
- Remove the 5th gear shift fork snap ring (2).
- Remove the 5th gear snap ring (3).
- Remove the 5th gear synchronizer plate.
- Shift the shift fork to the 5th gear.
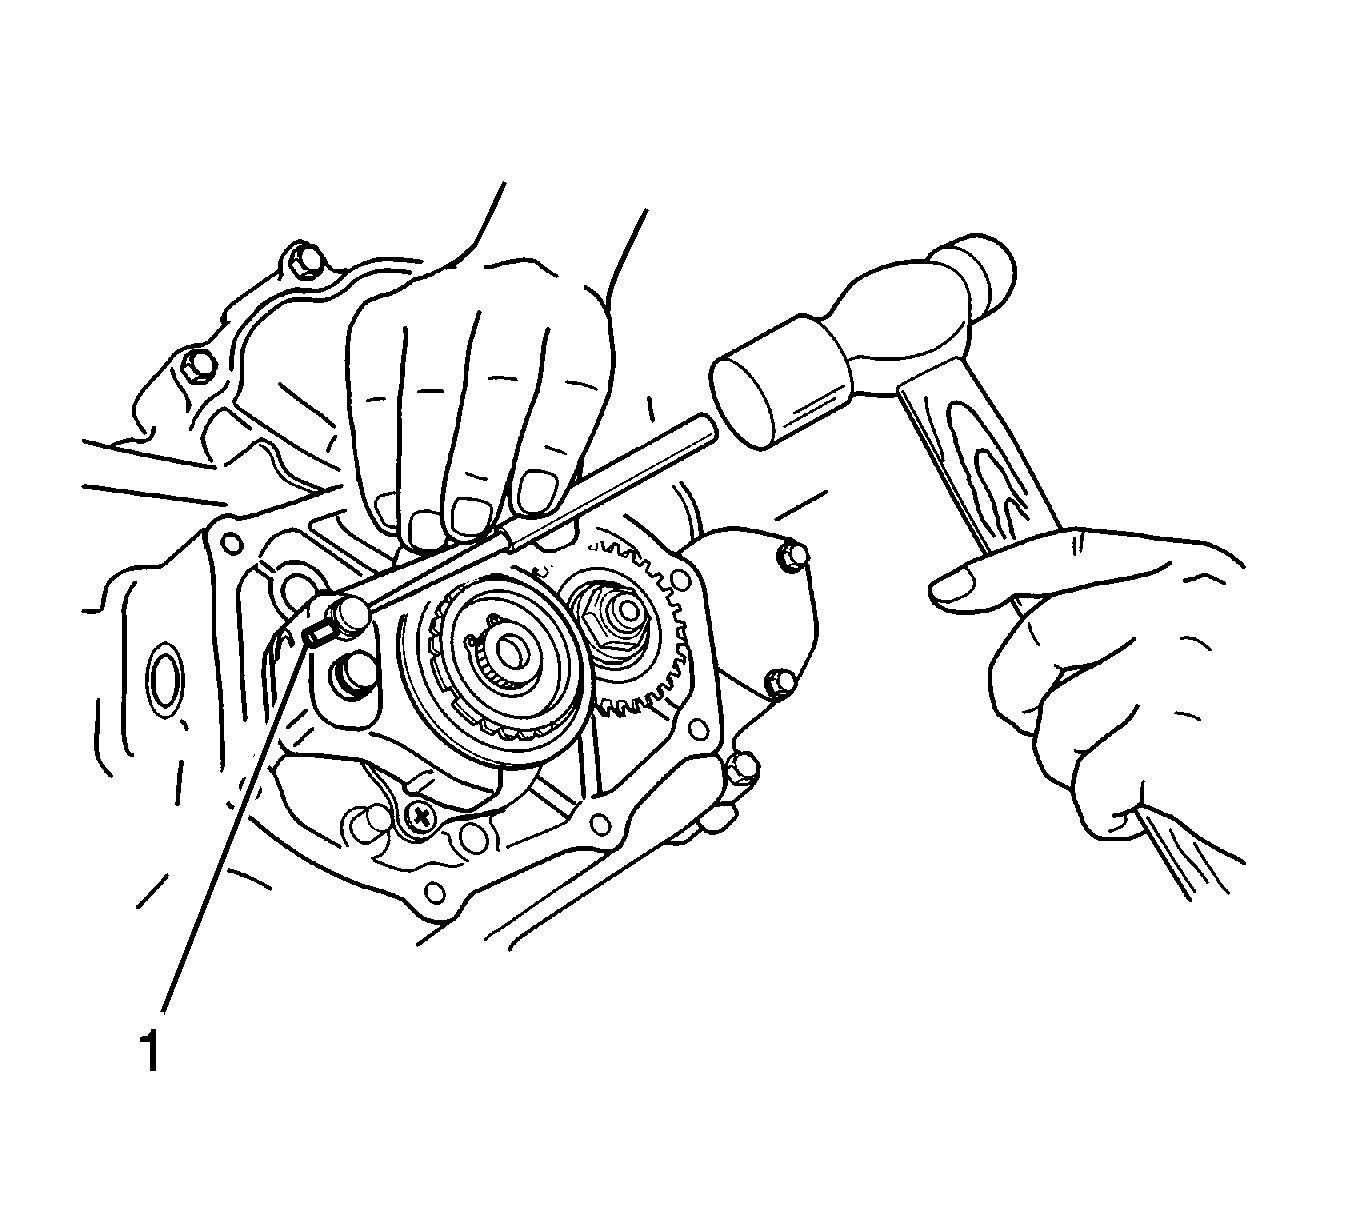
- Remove the fork pin using a pin punch and a hammer (1).
- Remove the 5th gear shift fork pin.
- Pull and remove the input shaft 5th gear fork and the synchronizer hub assembly together (1).
- Remove the sleeve, key and spring from the synchronizer hub assembly.
- Pull and remove the input shaft 5th gear, wave spring and synchronizer ring together (1).
- Remove the 5th gear bearing.
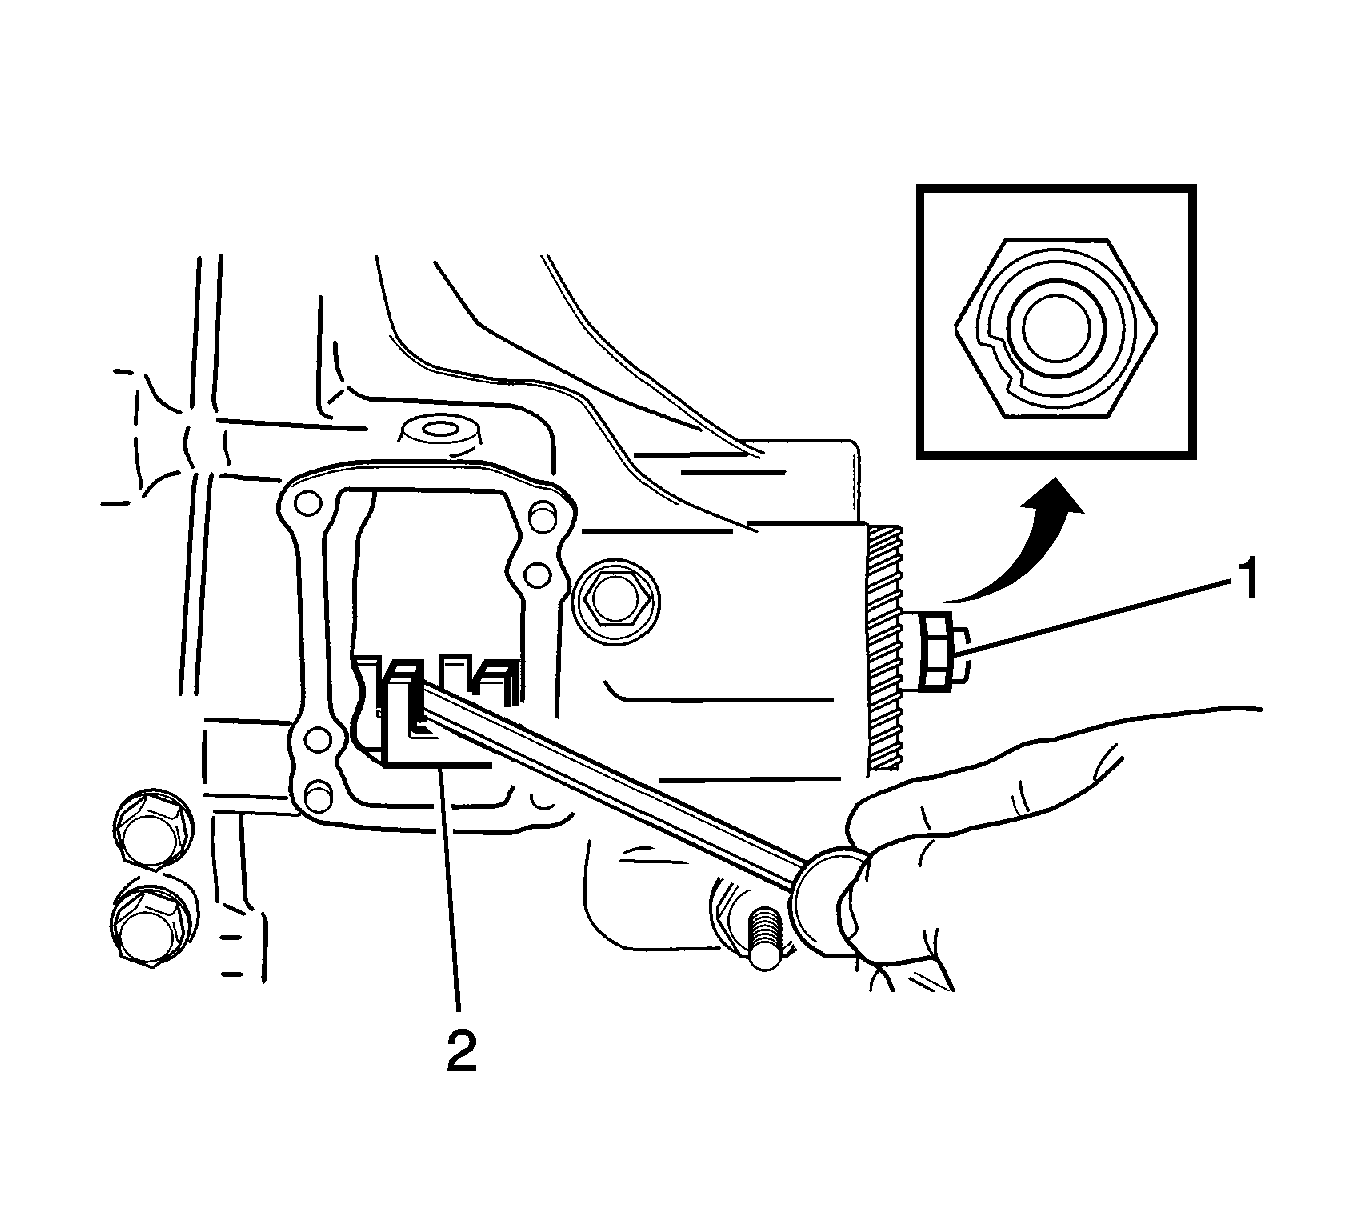
- Shift yoke using a driver to engage the 1st gear and the 3rd gear or the 2nd gear and the 4th gear (2).
- Remove the caulking and the nut. (1)
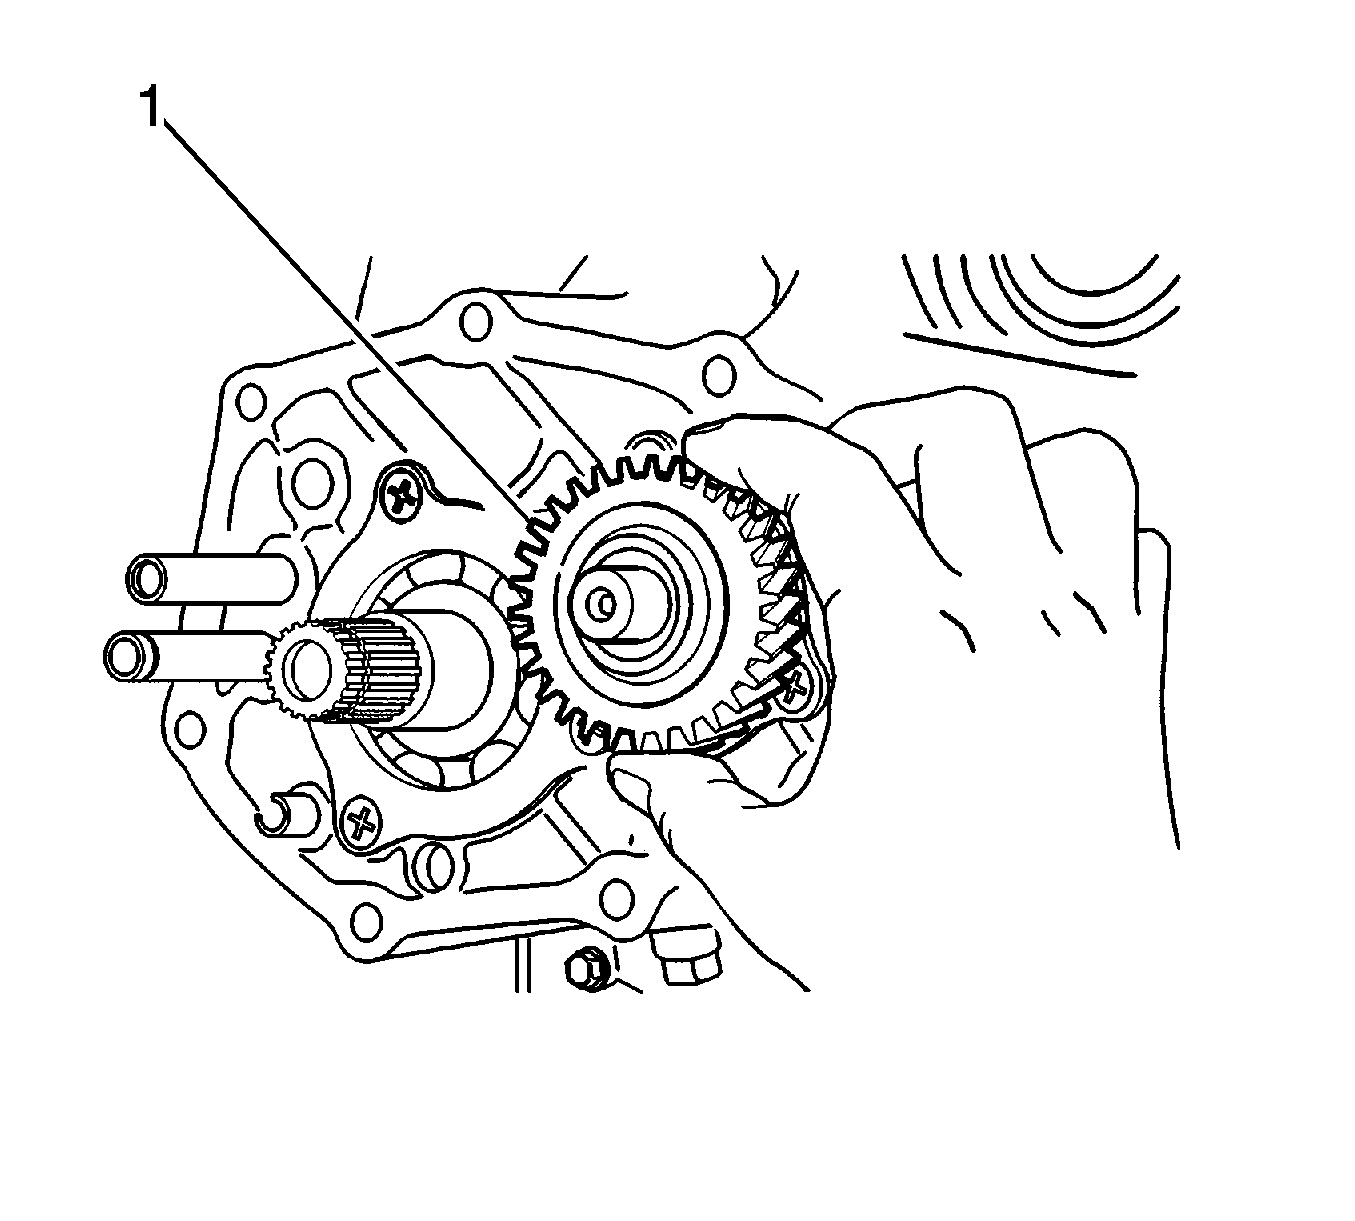
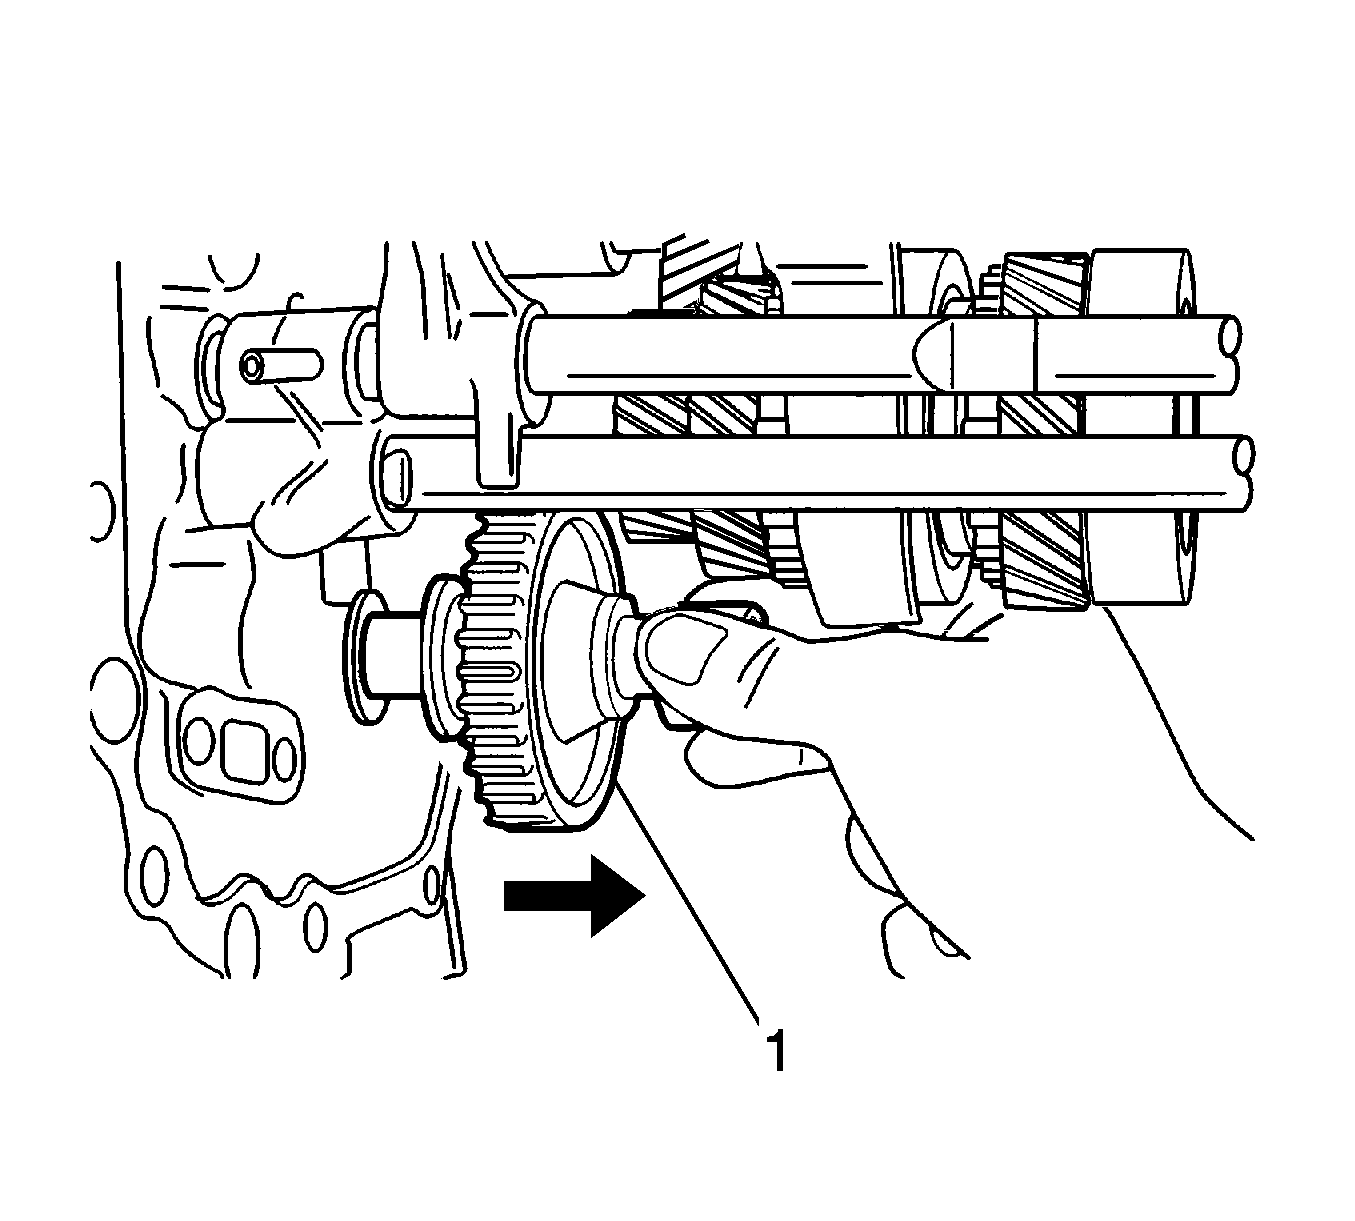
- Remove the countershaft 5th gear (1).
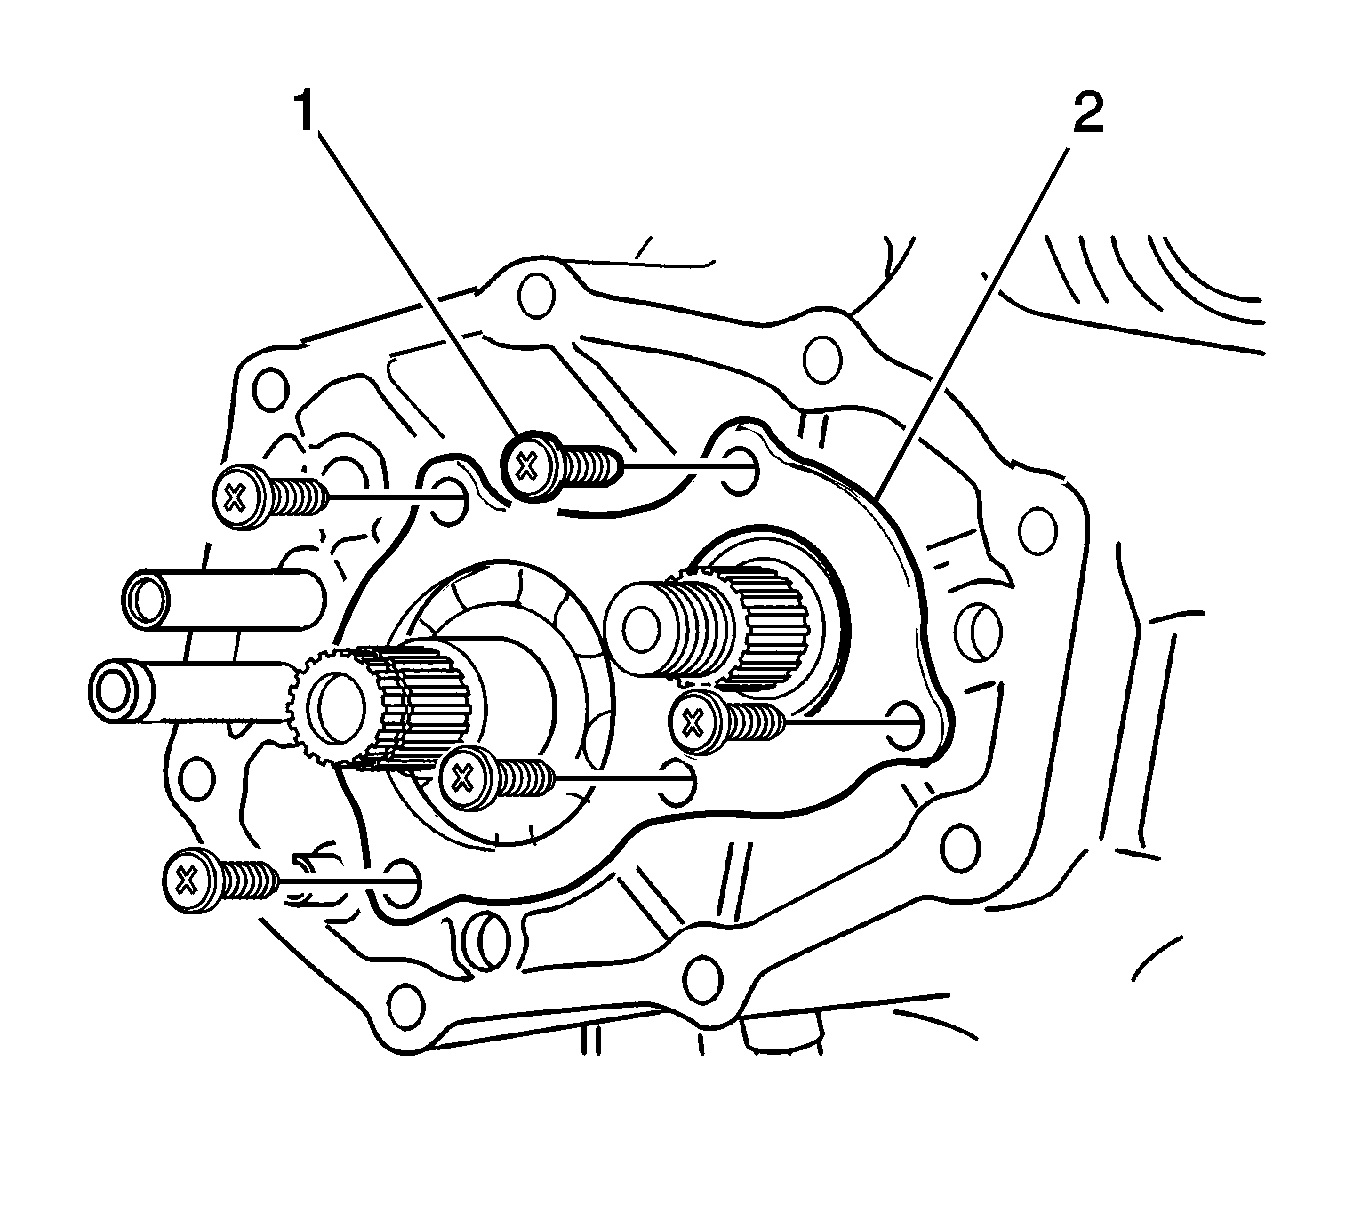
- Remove the side cover plate screws (1).
- Remove the side cover plate (2).
- Remove the counter shaft bearing shim.
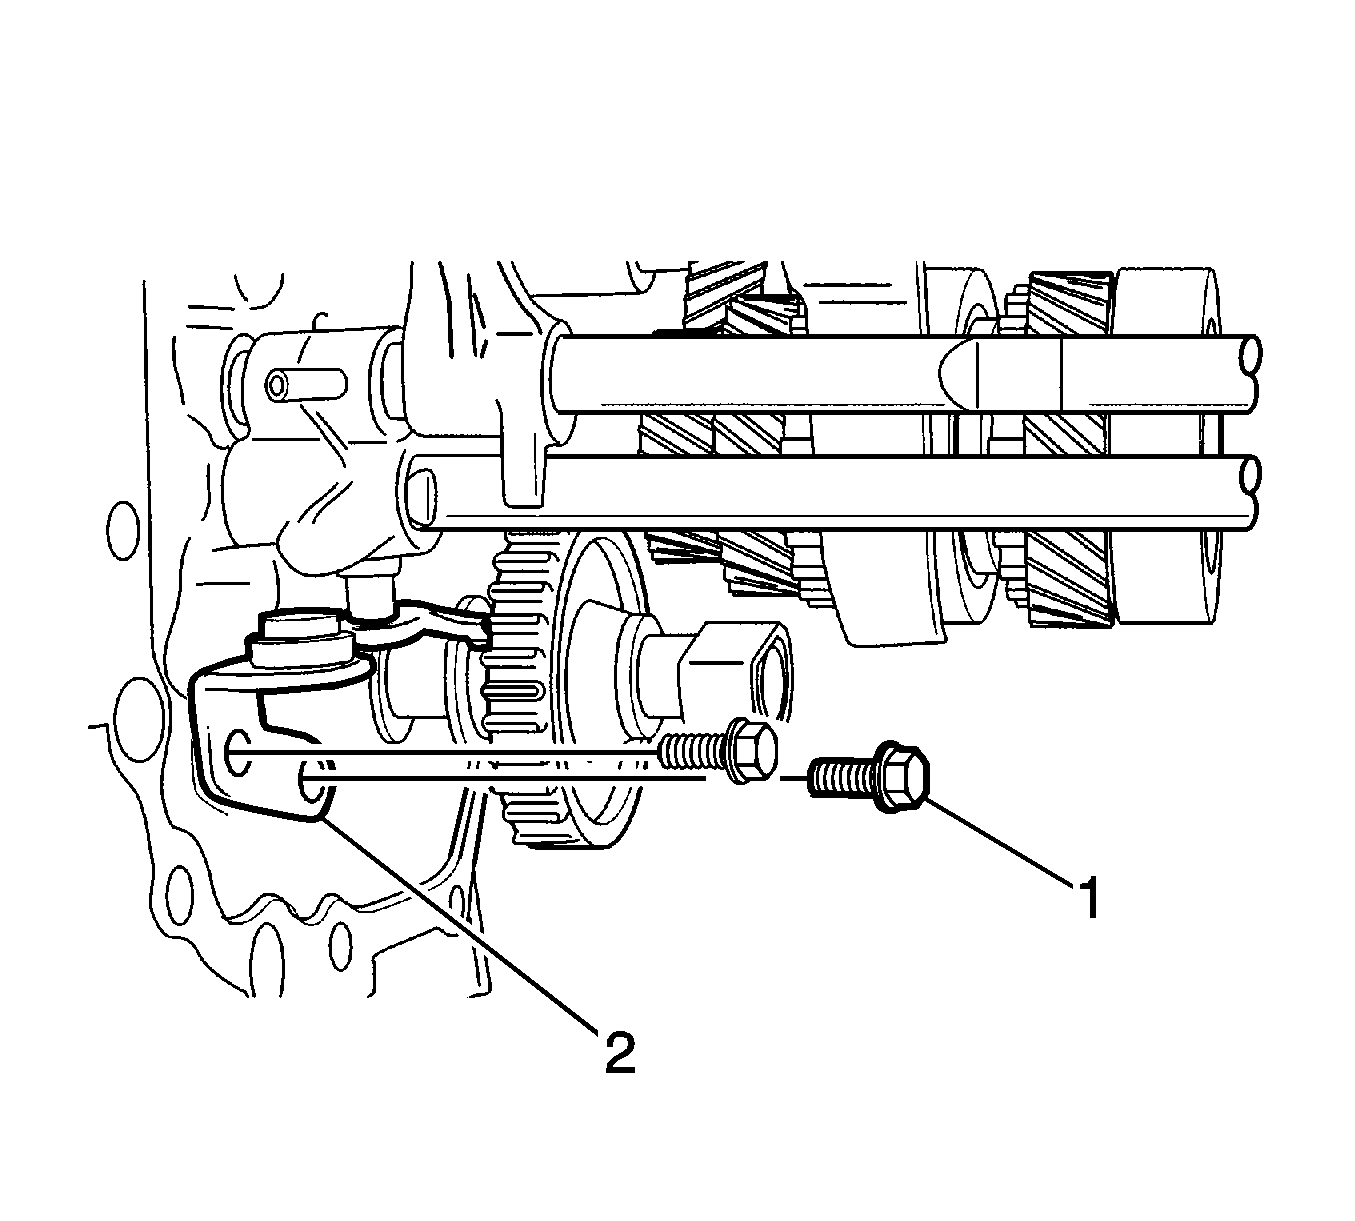
- Remove the bolt and remove the 5th reverse gear shift shaft spring and ball (3).
- Remove the bolt and remove the 3rd-4th gear shift shaft spring and ball (1).
- Remove the bolt and remove the 1st and 2nd gear shift shaft spring and ball (2).
- Remove the reverse idle gear shaft bolt.
- Remove the bolts from the left side case (1).
- Remove the bolts from the right side of case (2).
- Remove the left side case by hitting with a rubber hammer lightly.
- Remove the sealant on the case.
- Remove the transaxle case - left.
- Remove the bolts (1).
- Remove the reverse gear shift lever (2).
- Push the reverse idle gear toward the inner case.
- Pulling shaft and remove the reverse idle gear and shaft (1).
- Remove the reverse idle gear from the shaft assembly.
- Remove the 5th reverse gear shift shaft (1).
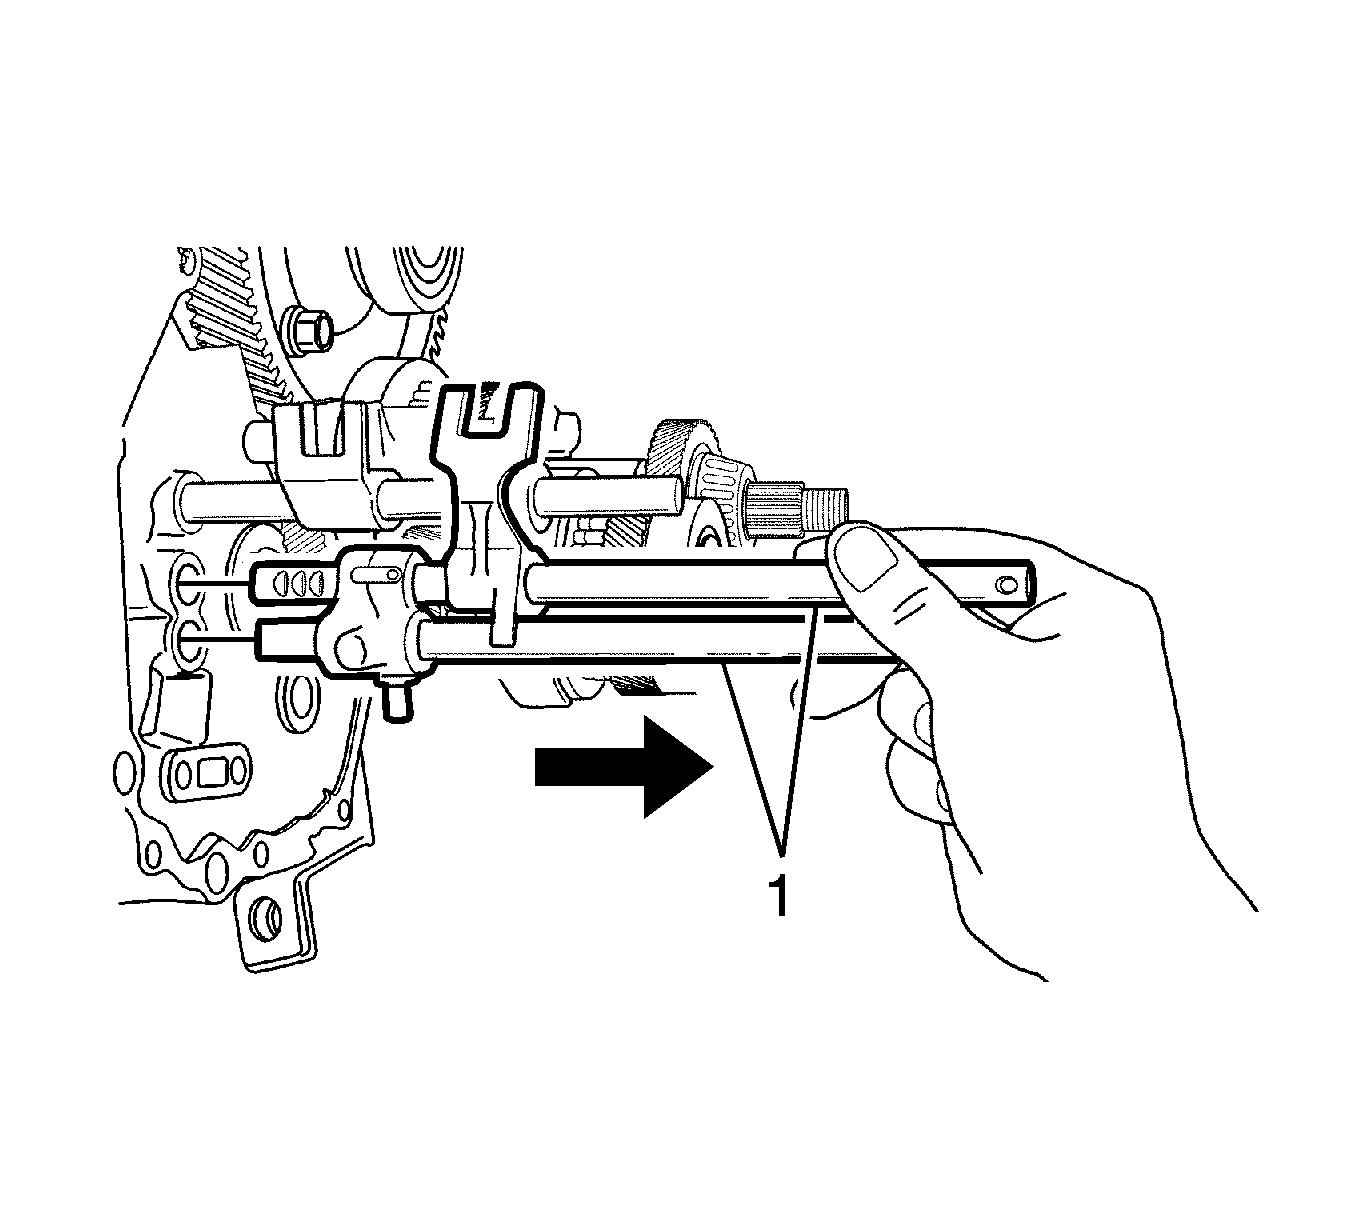
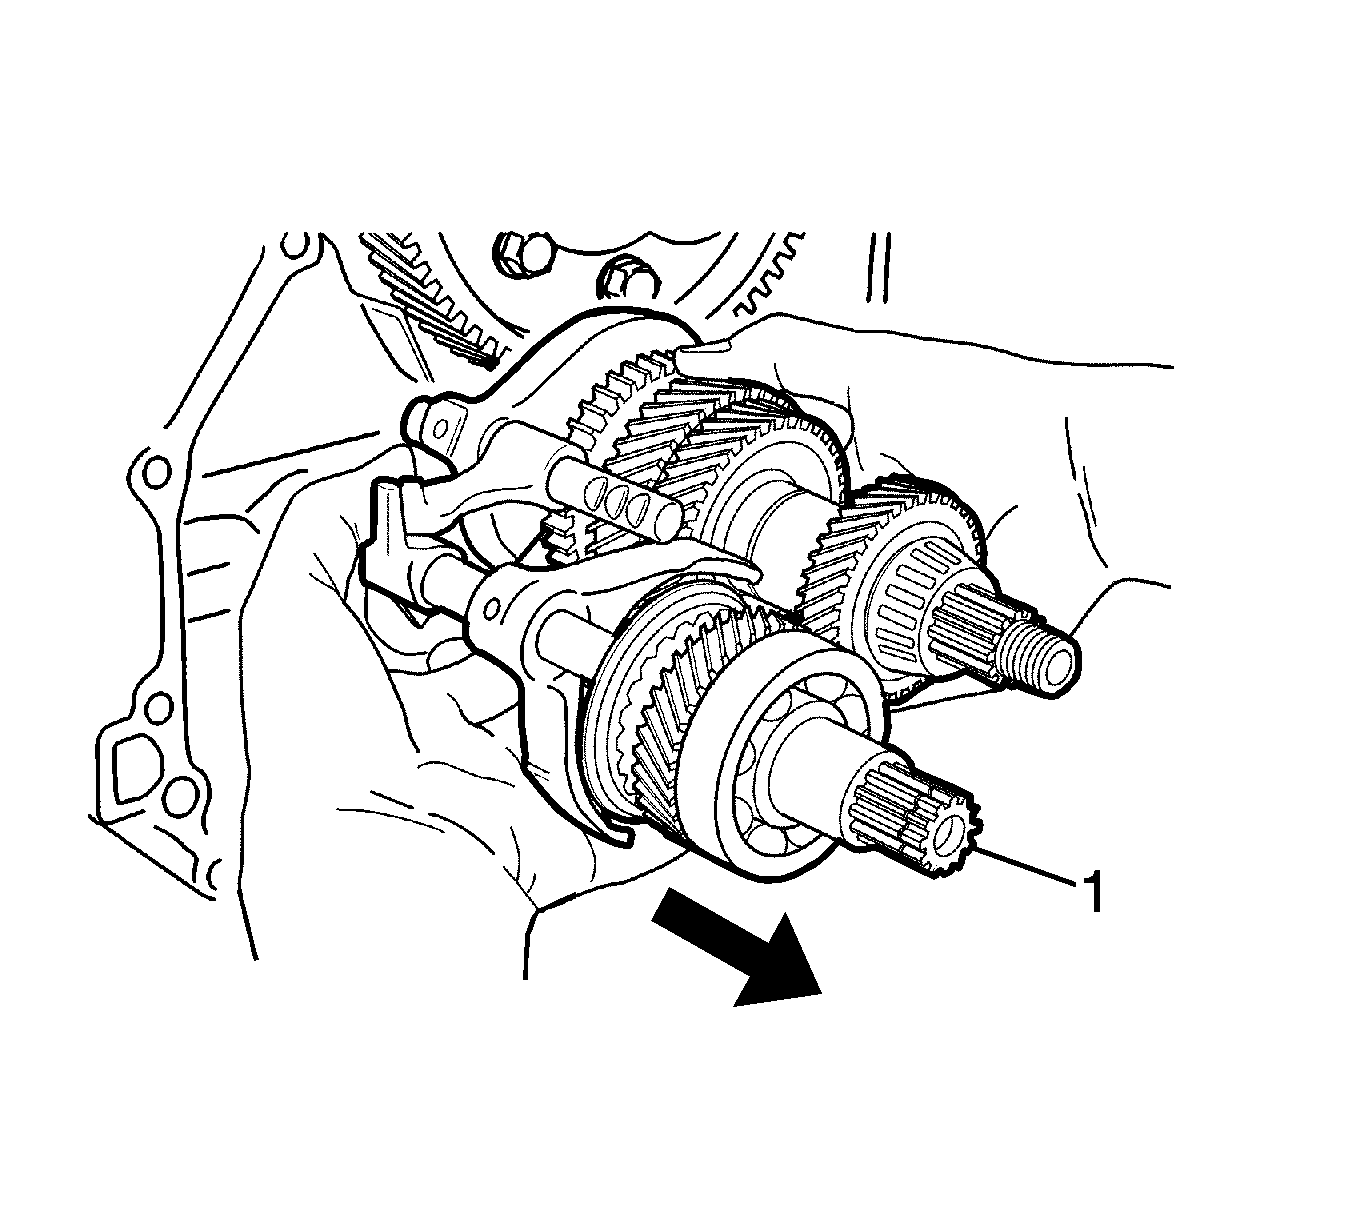
- Remove the gear unit and the shift shaft assembly together (1).
- Remove the high and the low speed shift shaft assembly from the gear unit.
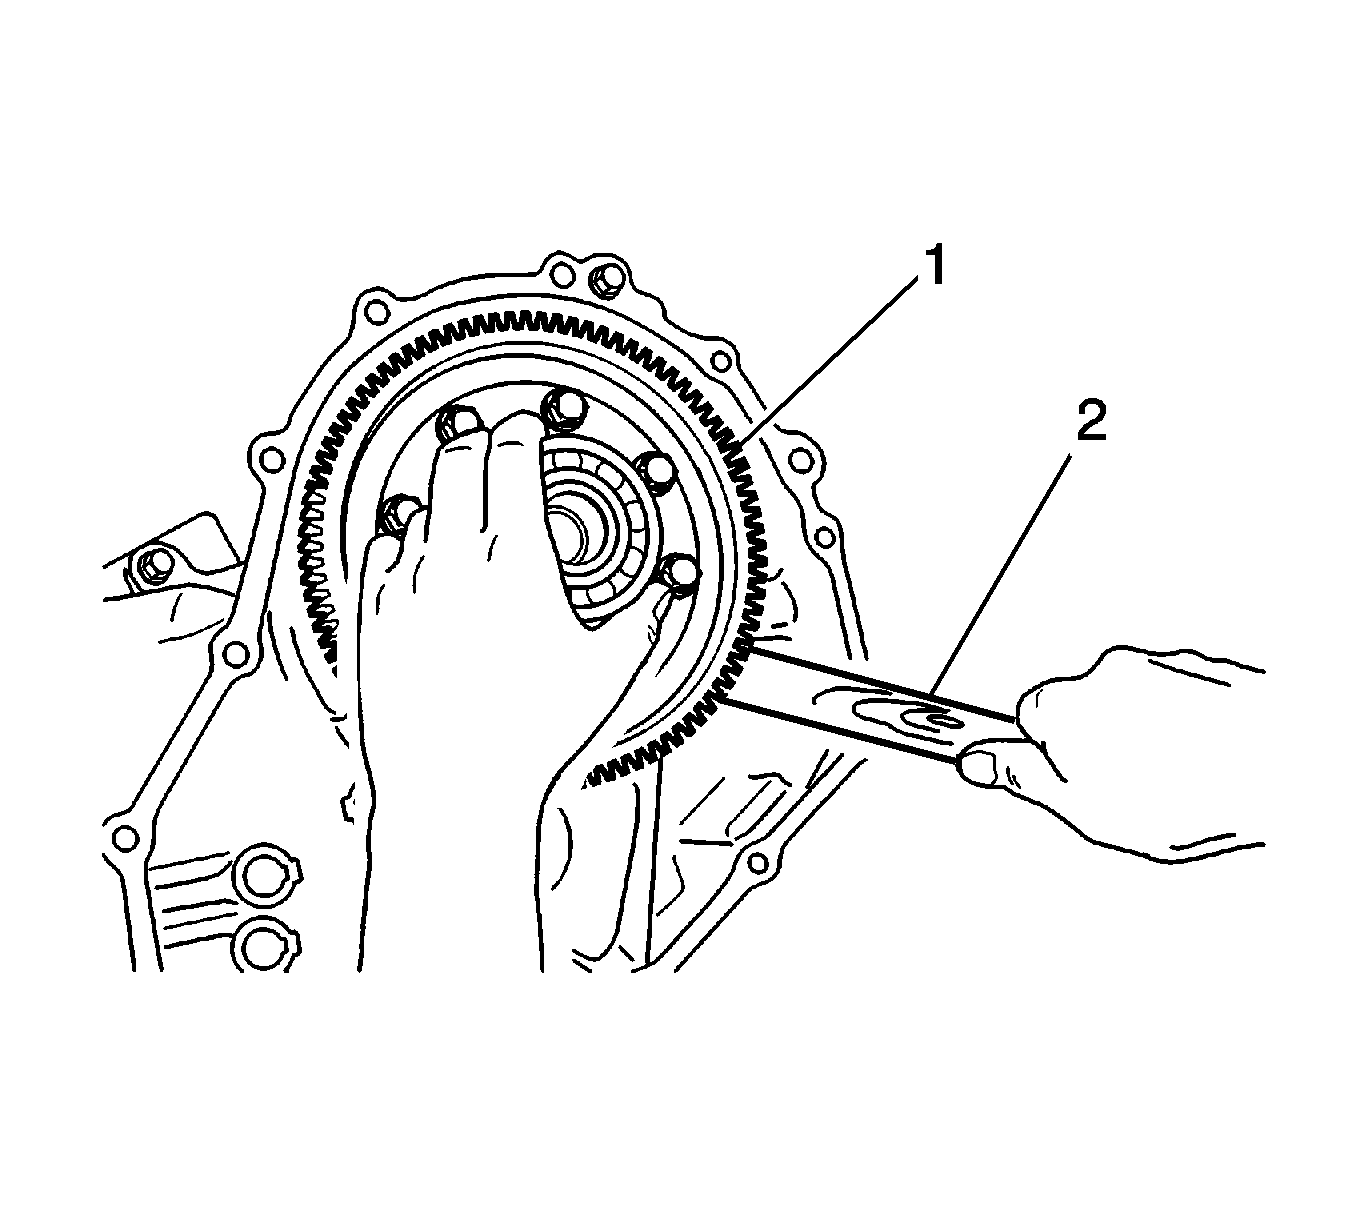
- Insert a wooden stick into the lower side of the differential (2).
- Remove the differential assembly by moving it right and left (1).
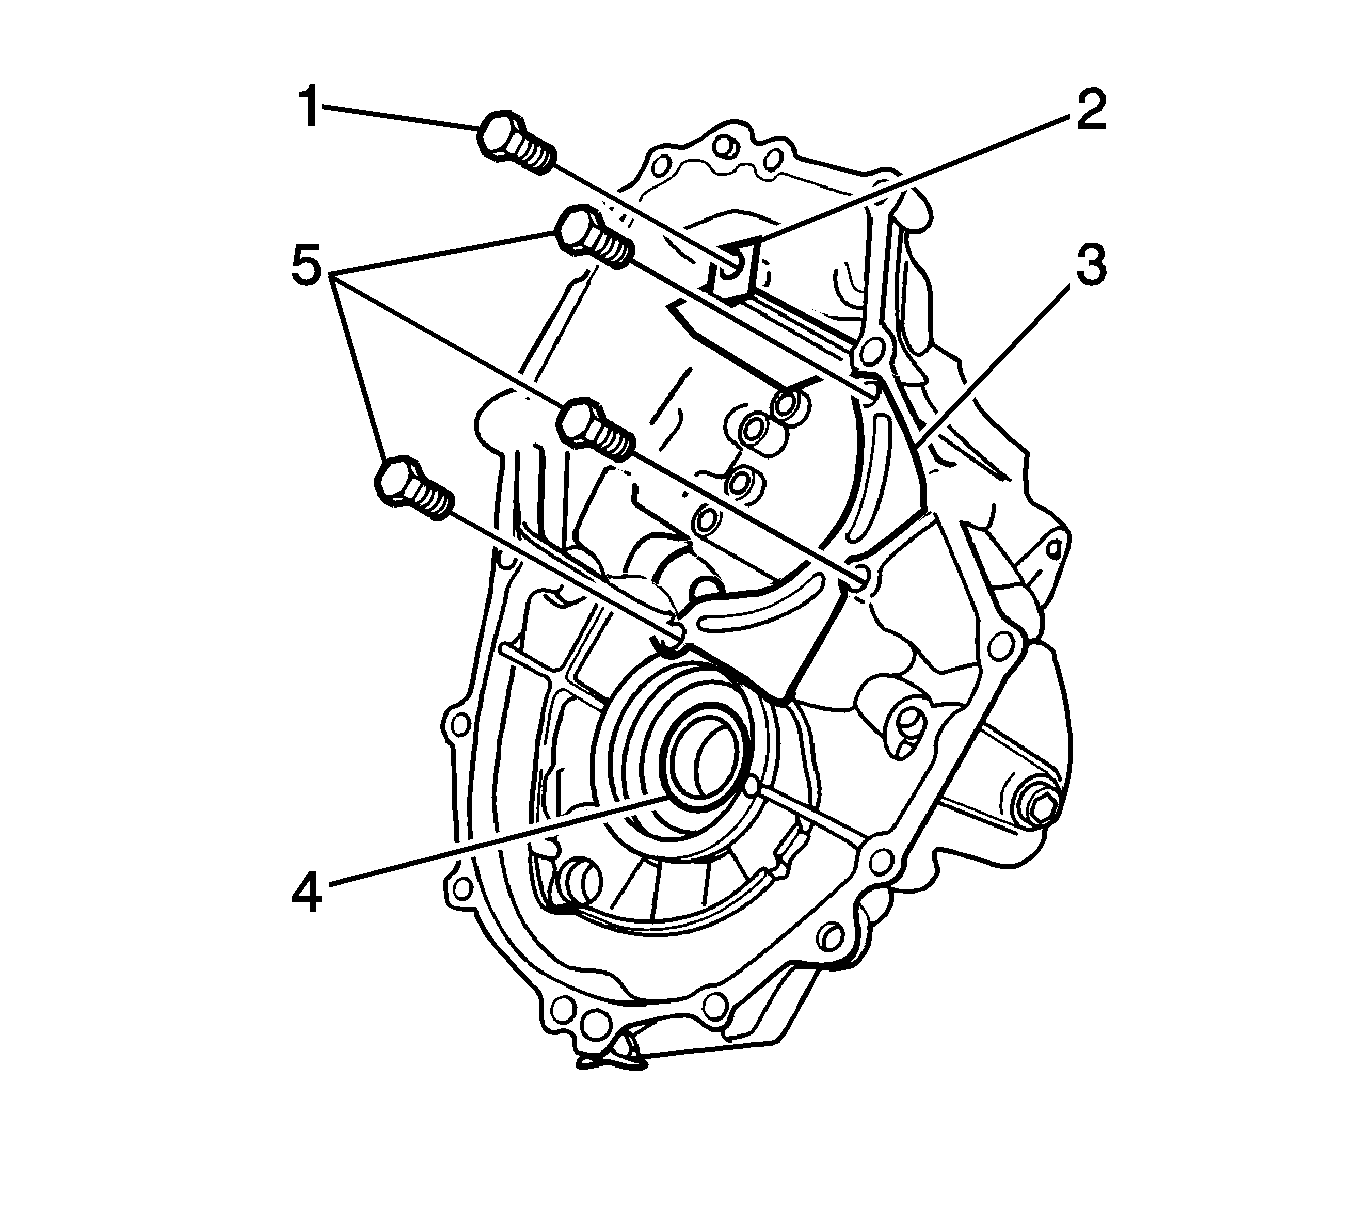
- Remove the bolt (1).
- Remove the oil gutter (2).
- Remove the bolts (5).
- Remove the oil plate (3).
- Remove the differential left side oil seal using a hammer and a copper chisel (4).
- Remove the related parts of the transaxle case - left side.
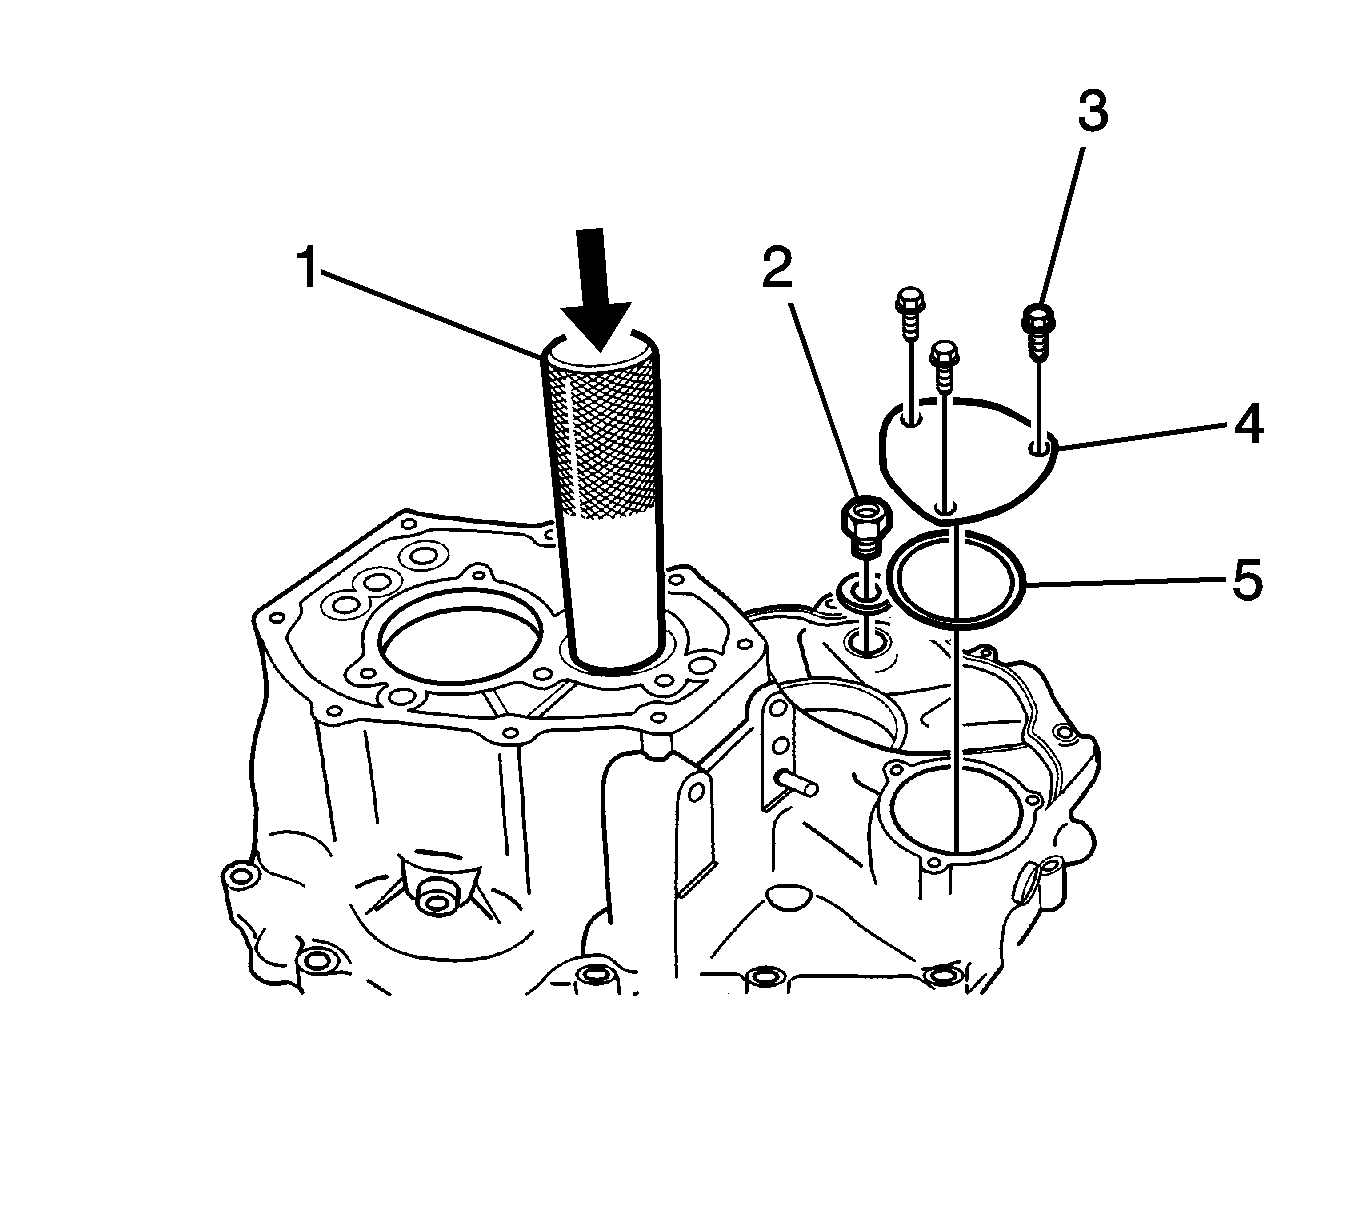
- Remove the bolts (3).
- Remove the case cap - left side (4).
- Remove the case cap O-ring - left side (5).
- Remove the oil level plug, including the steel gasket (2).
- Remove the counter shaft bearing outer race using a hammer and DT 46496 (1).
- Remove the related parts of the transaxle case - right side.
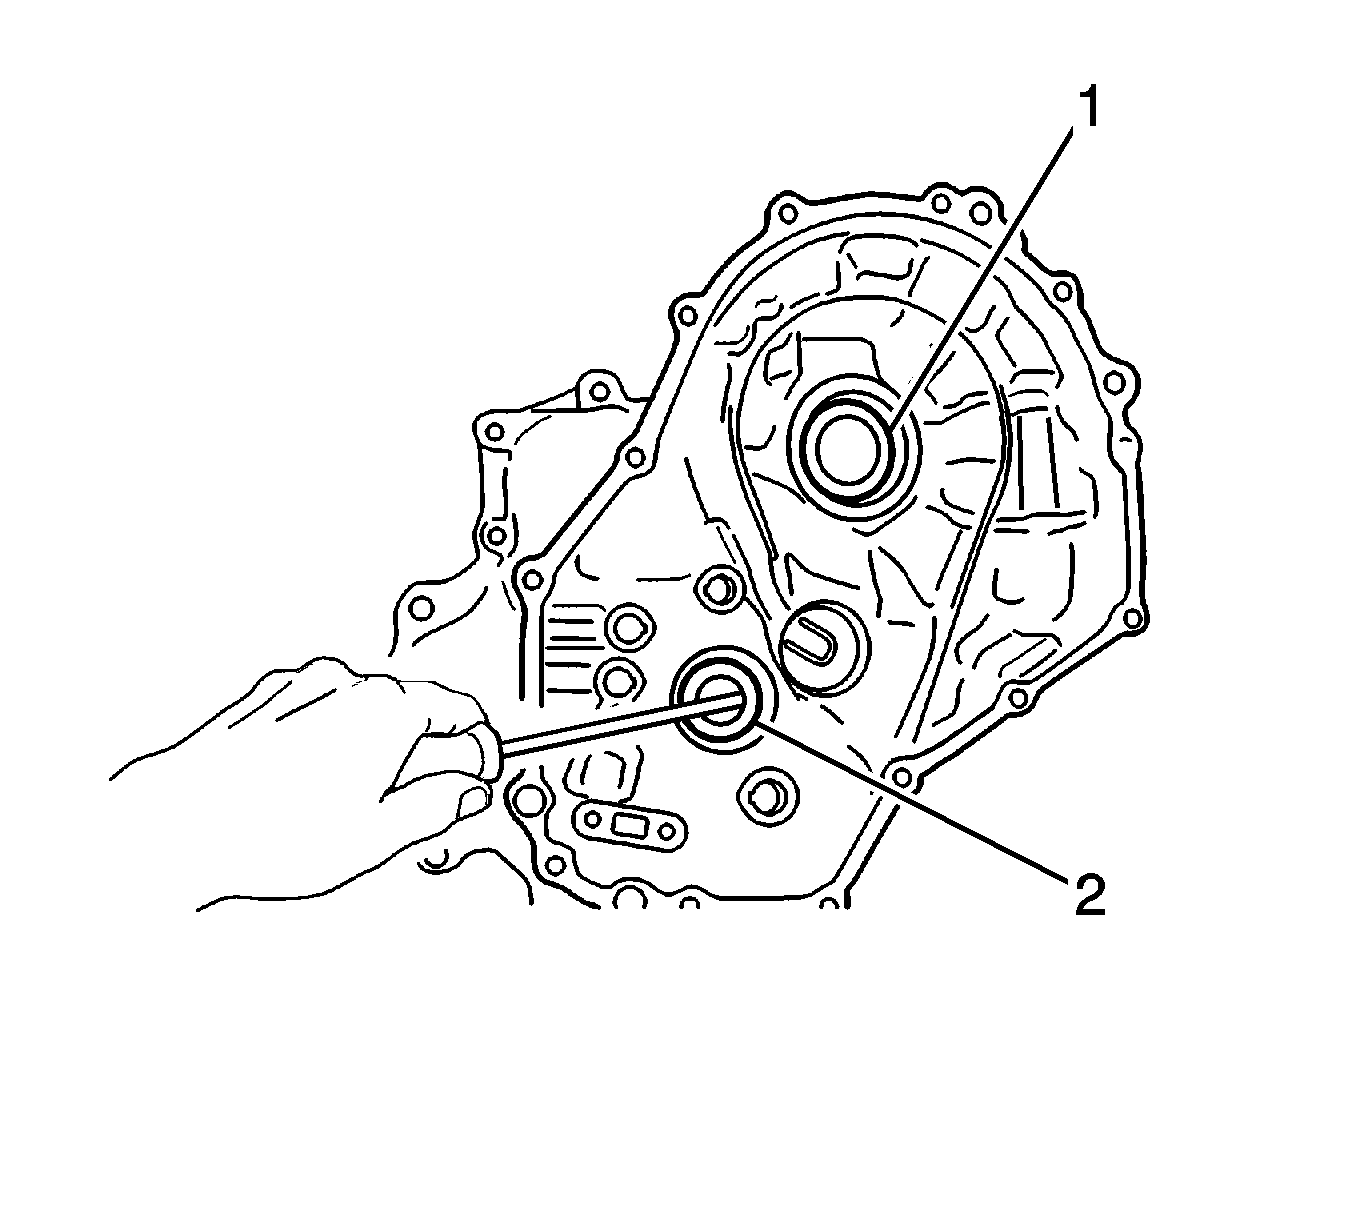
- Remove the input shaft oil seal using a screwdriver (2).
- Remove the differential left side oil seal using a hammer and a copper chisel (1).


Important: There is a difference between the 5th reverse gear shift shaft spring and the others. Mark it to distinguish easily when installing.

Important: Be careful not to damage the teeth of the counter shaft pinion and the differential ring gear.