Removal Procedure
- Cycle the rear sliding window to the halfway position.
- Remove the rear lower garnish molding. Refer to Rear Window Lower Garnish Molding Replacement .
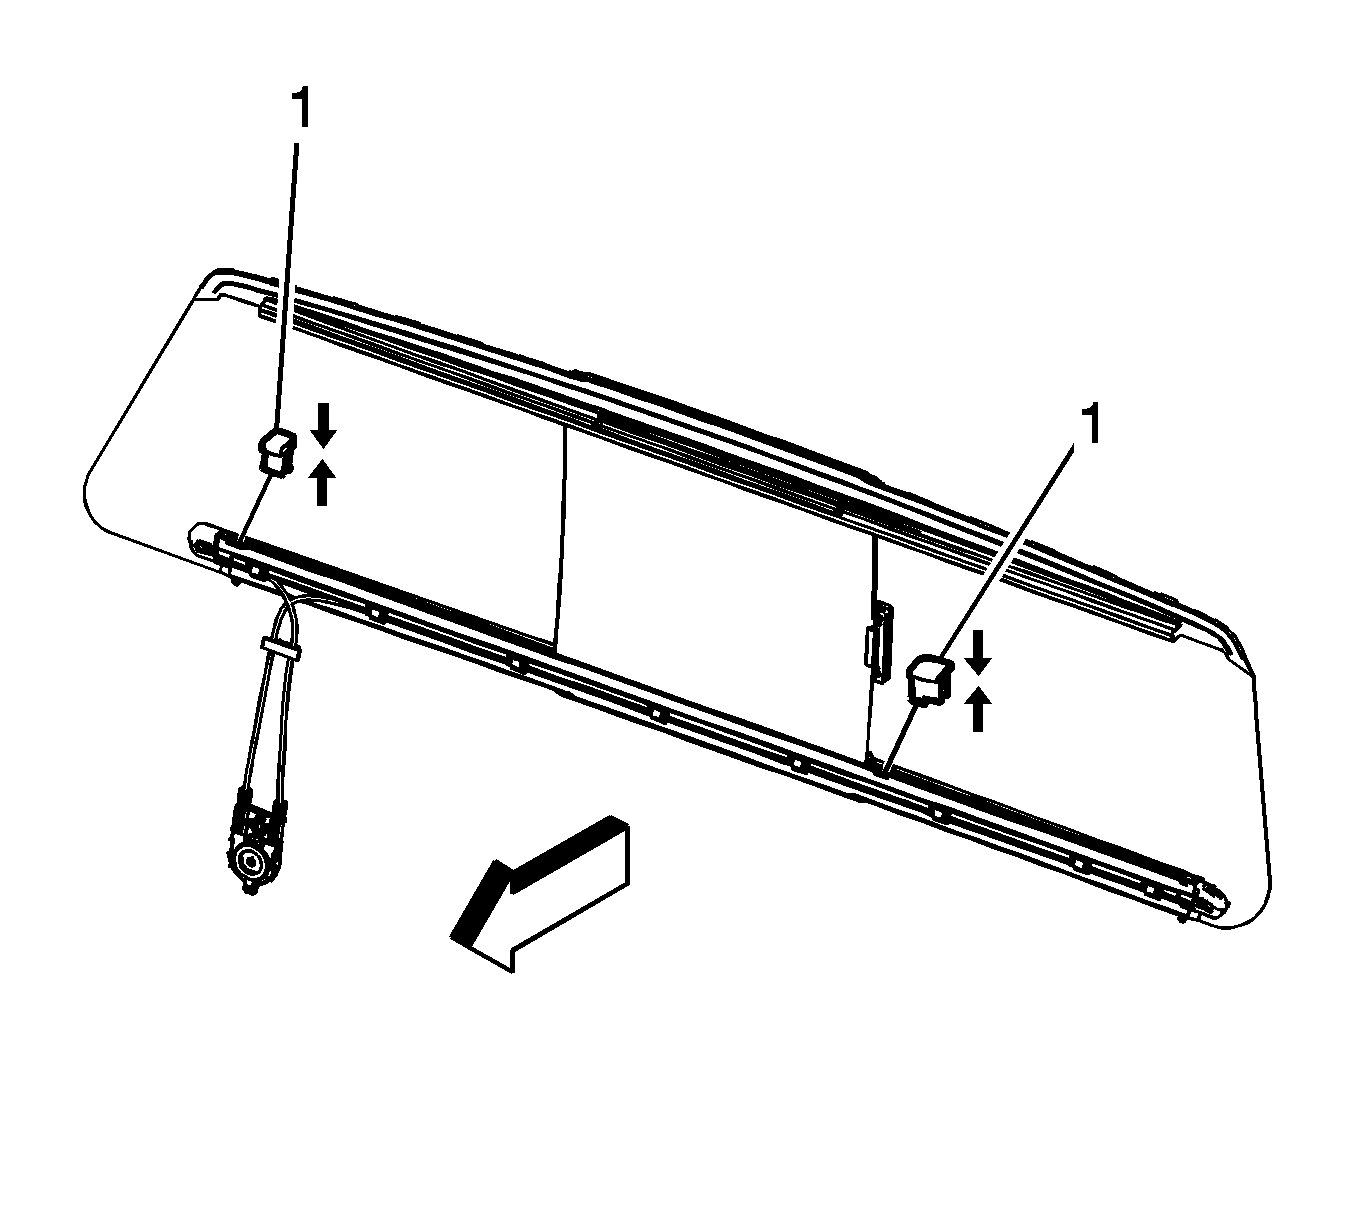
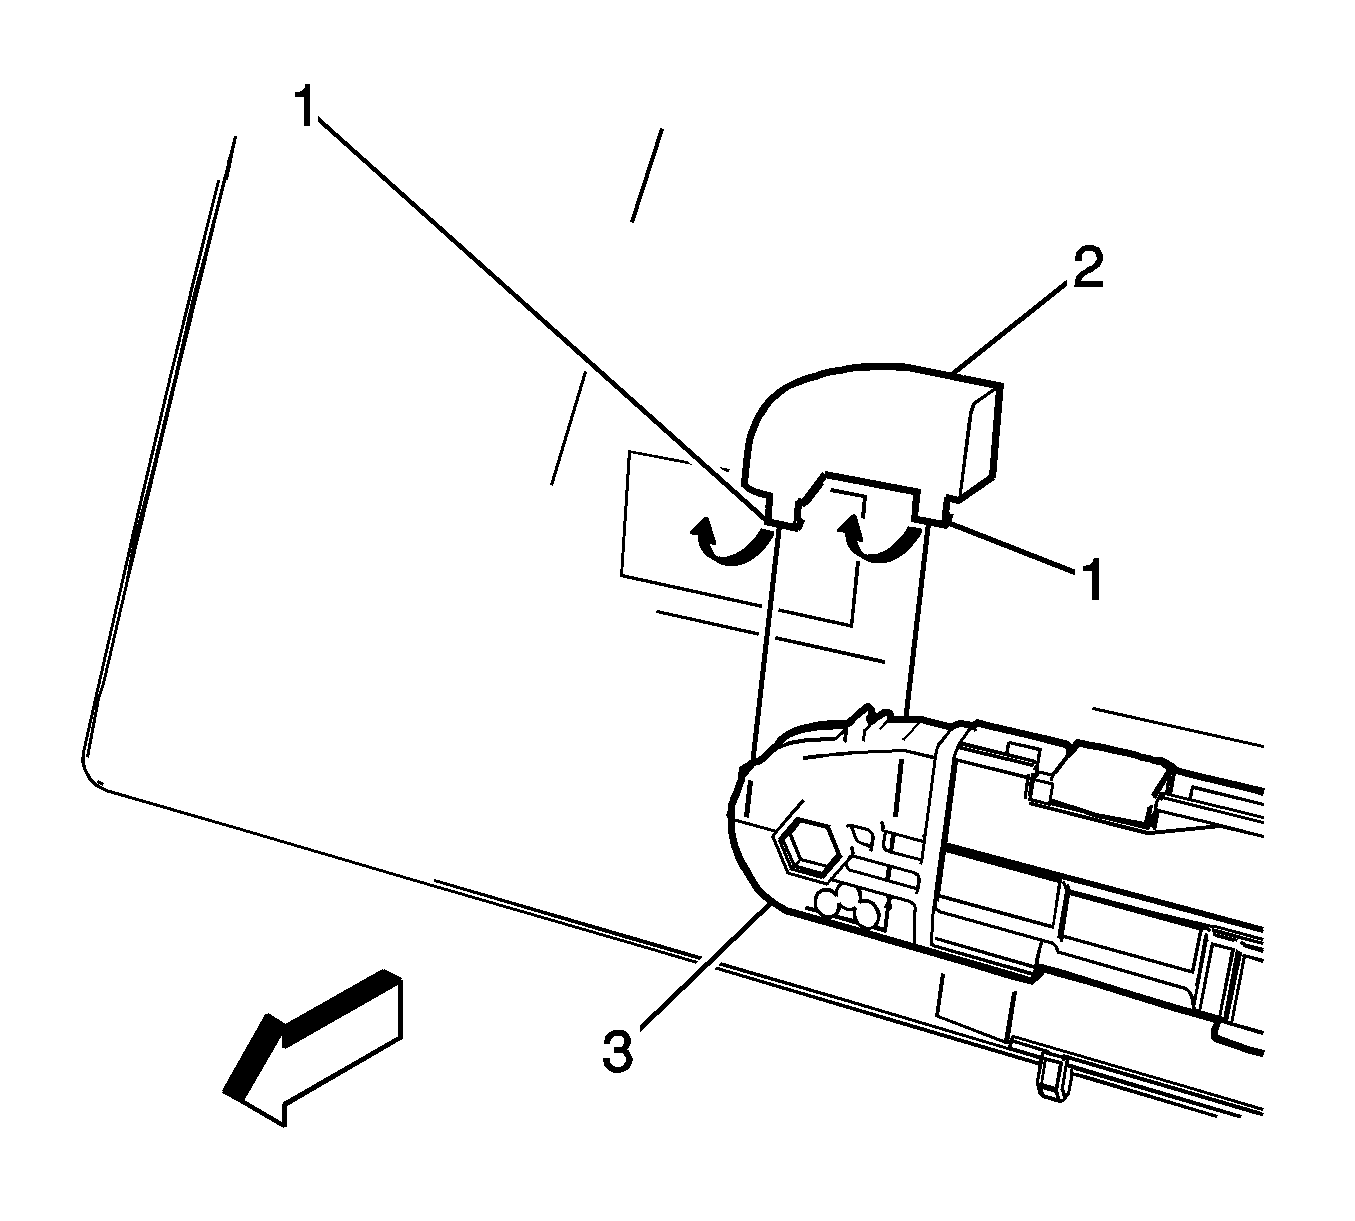
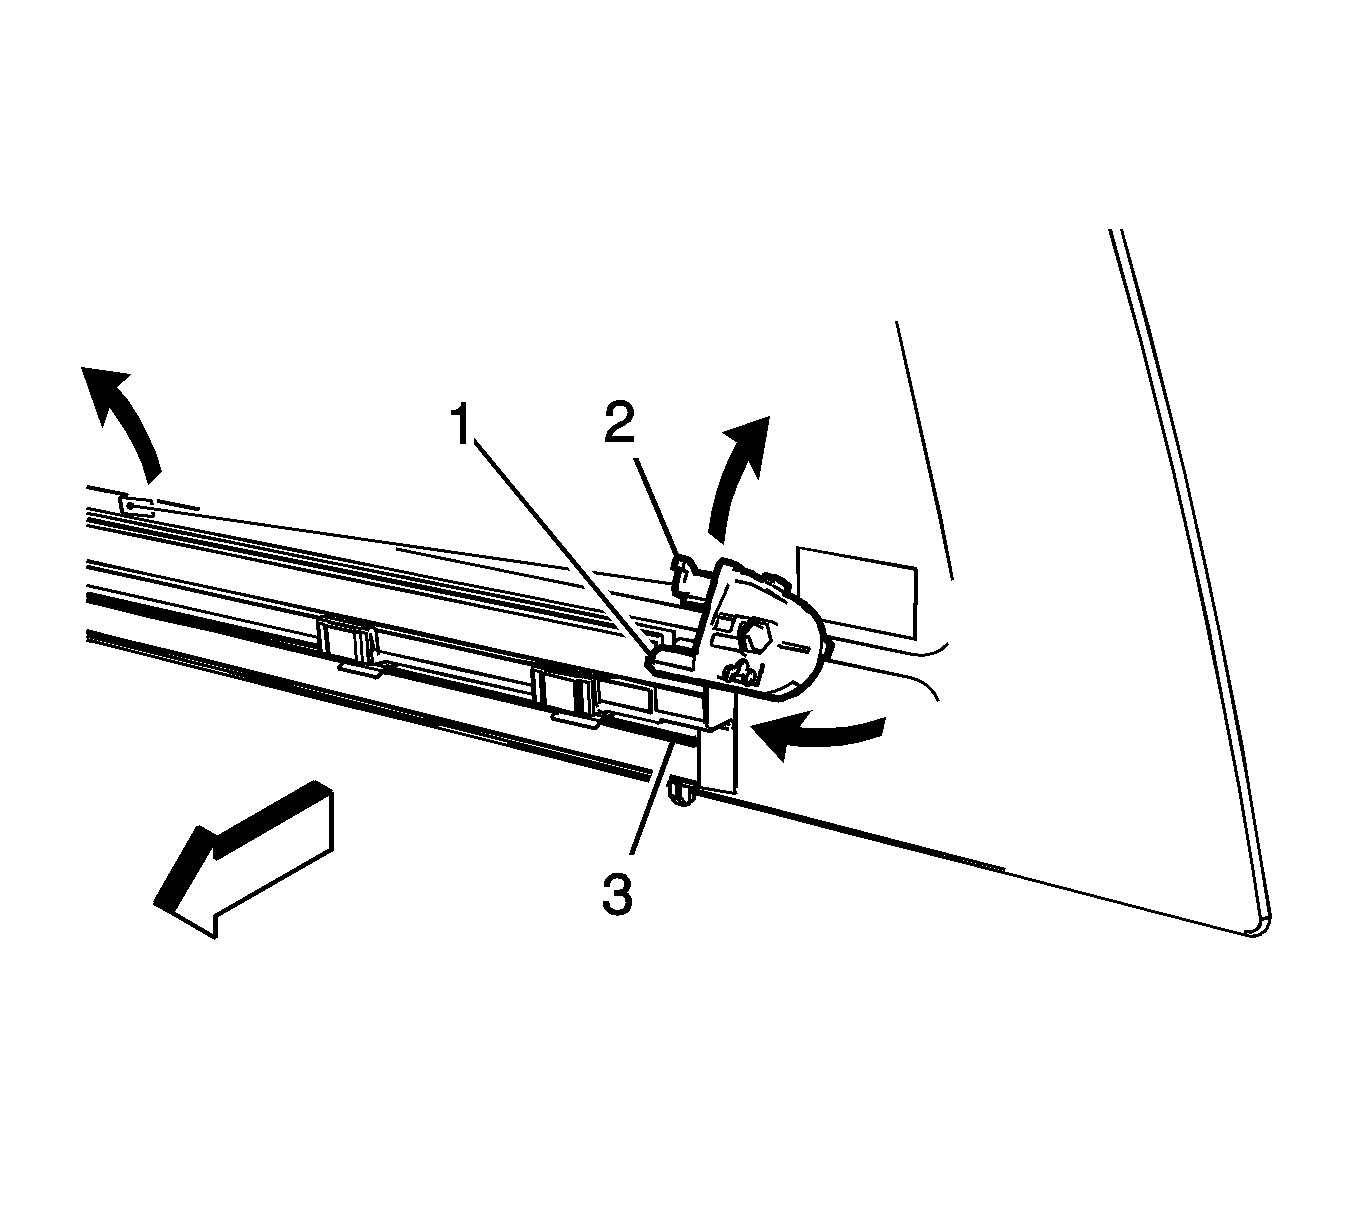
- Remove the rear sliding window stops (1).
- Remove the rear sliding window pulley covers (2).
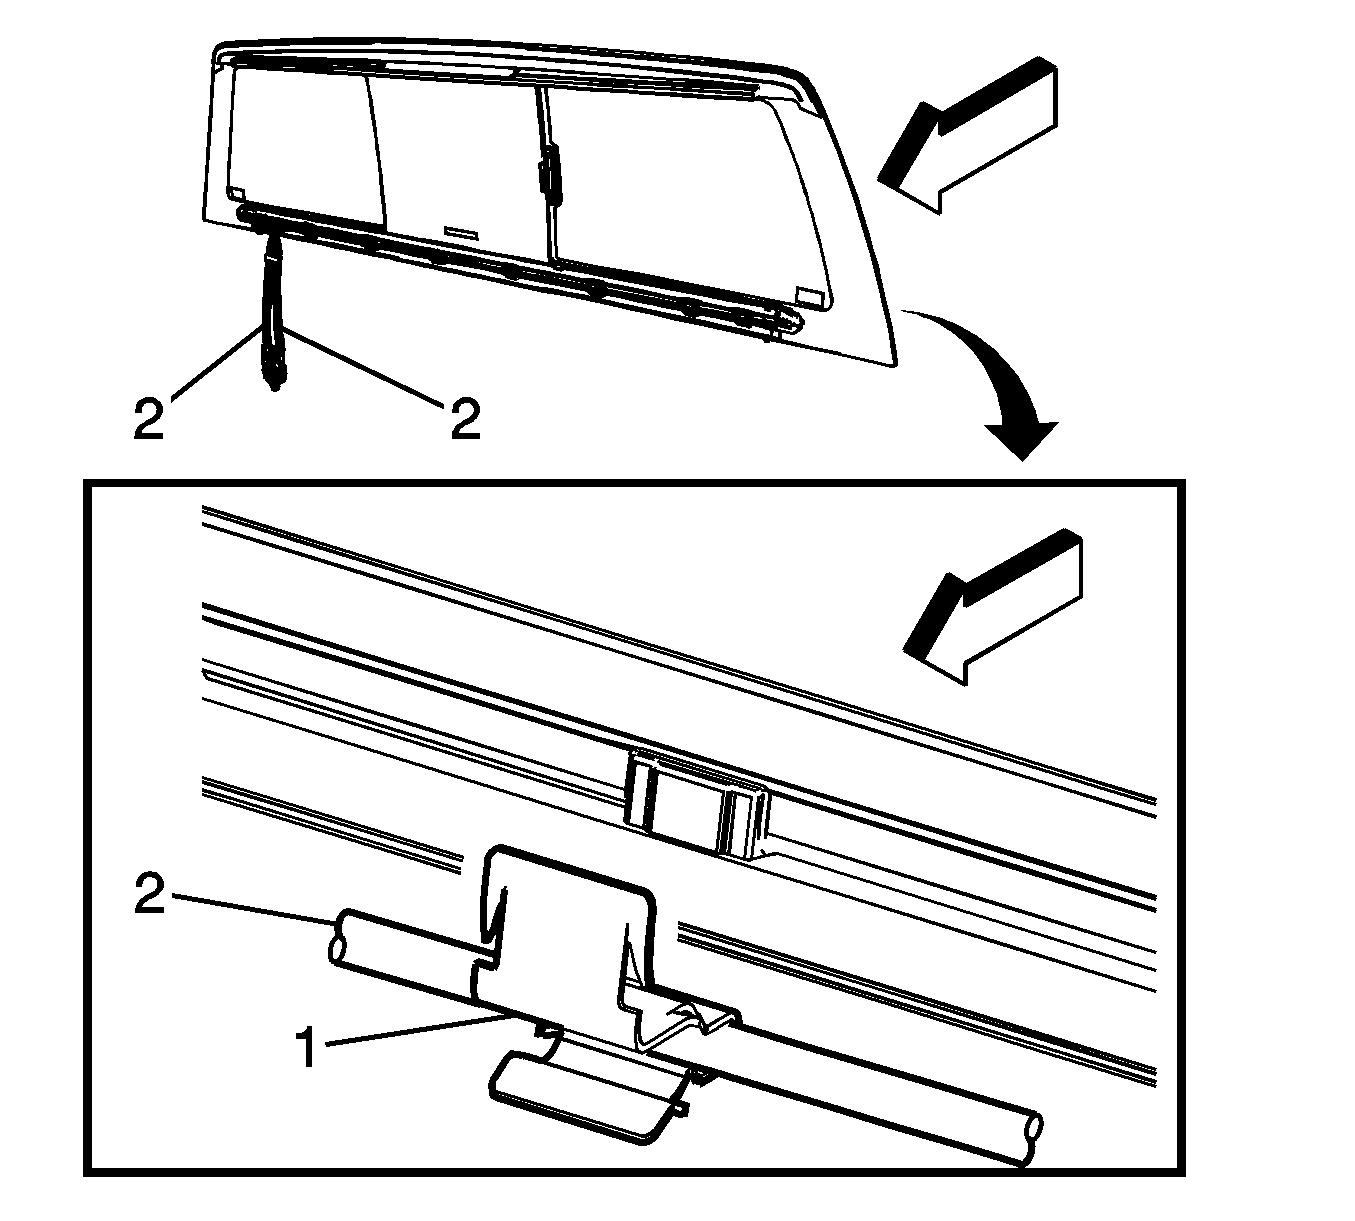
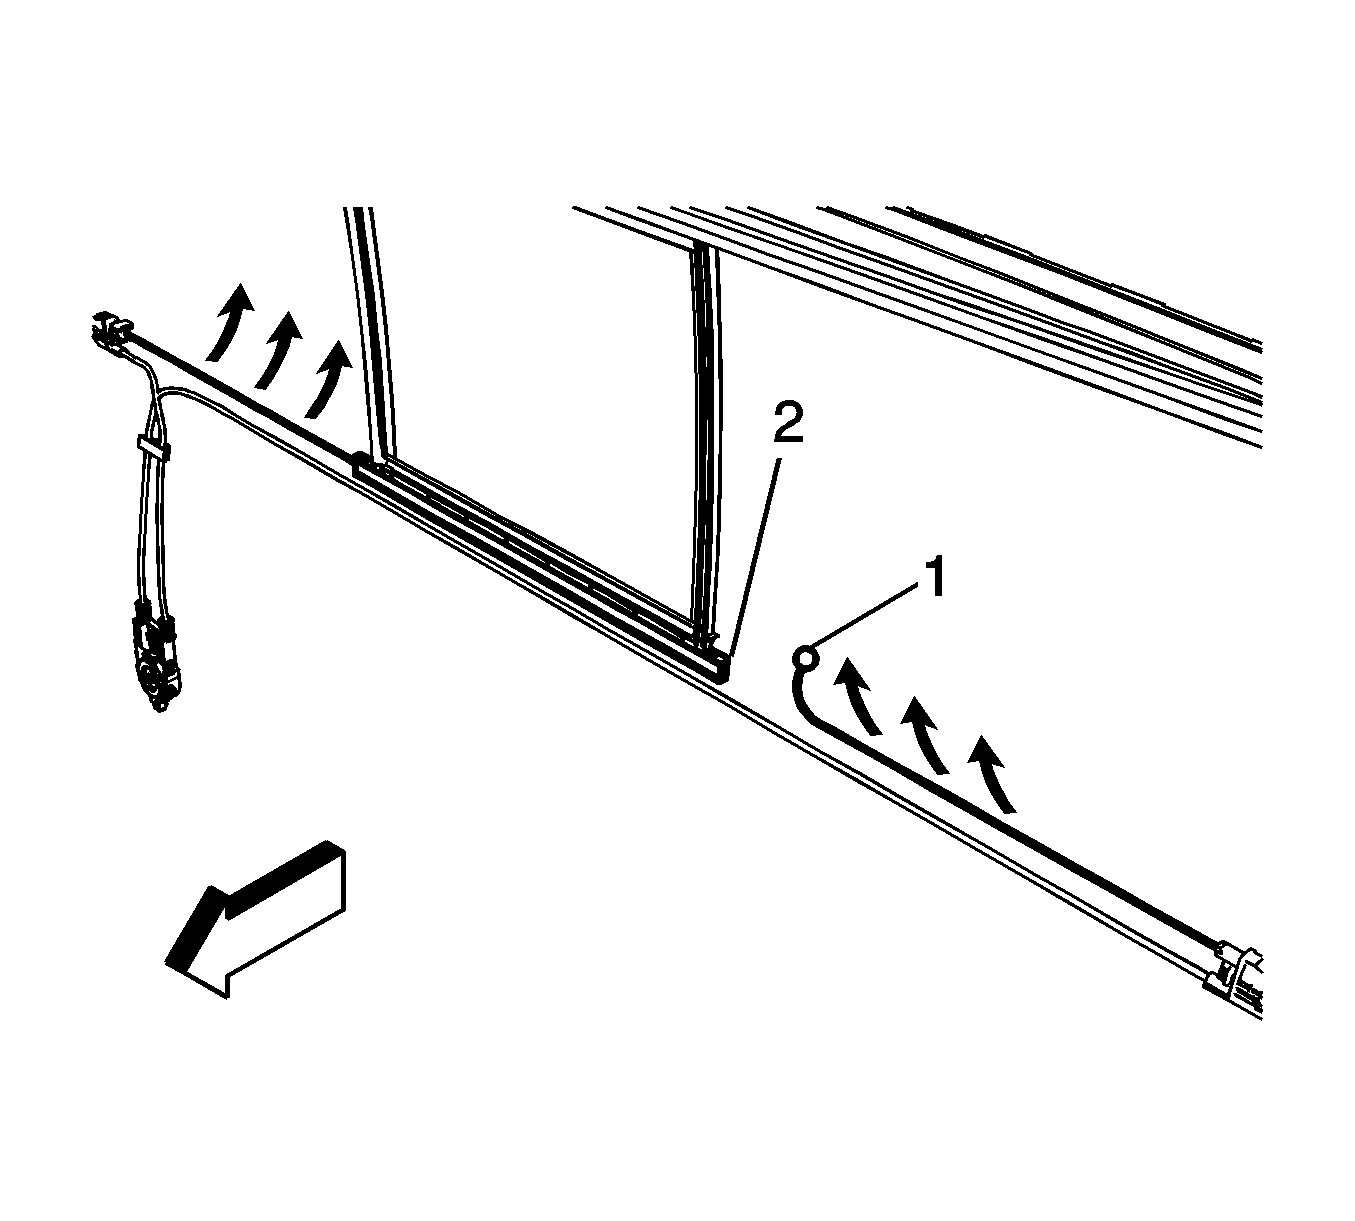
- Remove the regulator cables (2) from the retainers (1) located across the bottom edge of the window frame.
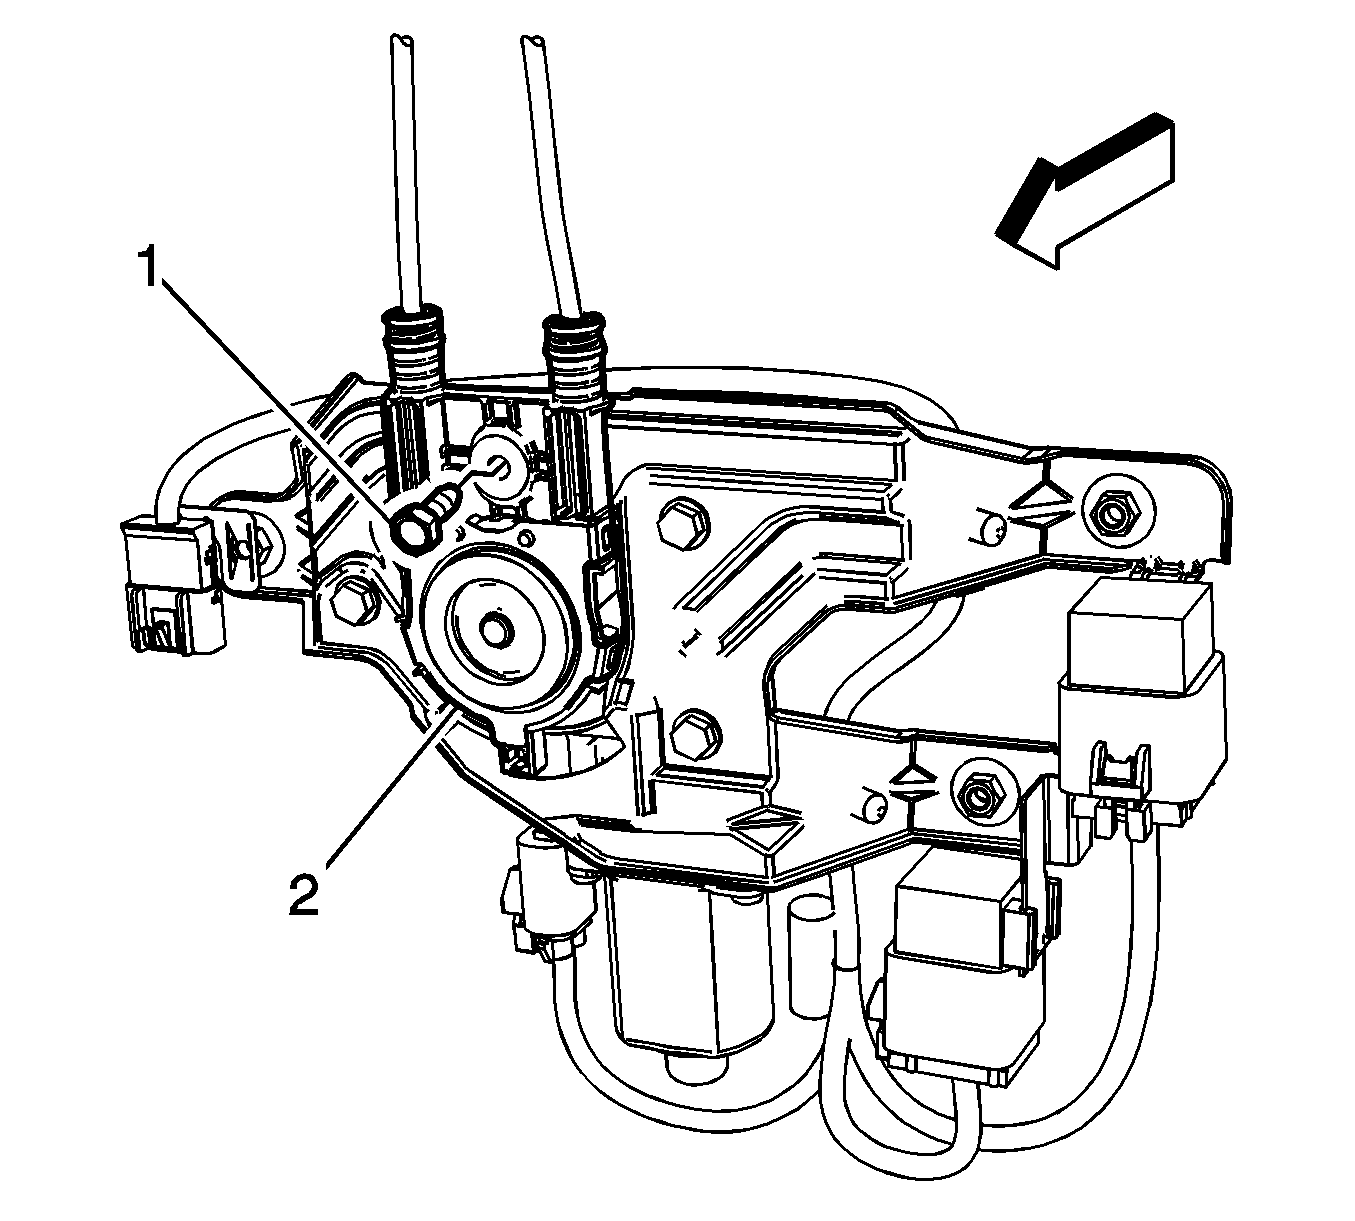
- Remove the screw (1) from regulator (2).
- Remove the regulator (2) from the motor/module.
- Remove the pulley (1) from the frame.
- Remove the cable ends (1) from the window guide (2) at each end of the window.
- Remove the regulator (1) and cables (2) from the vehicle.
Important: The new rear sliding window regulator and cables are serviced as an assembly.
Important: Use a suitable tool to lift upward on the rear sliding window stops (1) to remove.
Important: Use a suitable tool to release the tabs (1) from the rear sliding window pulley (3).
Important: When removing the tension from the cables, depress and hold spring on the regulator to remove tension from the cable before releasing the pulley from the frame. Once the pulley has been released, the spring can then be released.
| 8.1. | Lift the end of the tabs (2) out of the window frame (3). |
| 8.2. | Turn upward to release the pulley (1) from the frame (3). |

Installation Procedure
- Install the regulator (1) and cables (2) to vehicle.
- Install the cable ends (1) to the window guide (2) at each end of the window.
- Install the regulator (2) to the motor/module.
- Install the screw (1) to the motor/module.
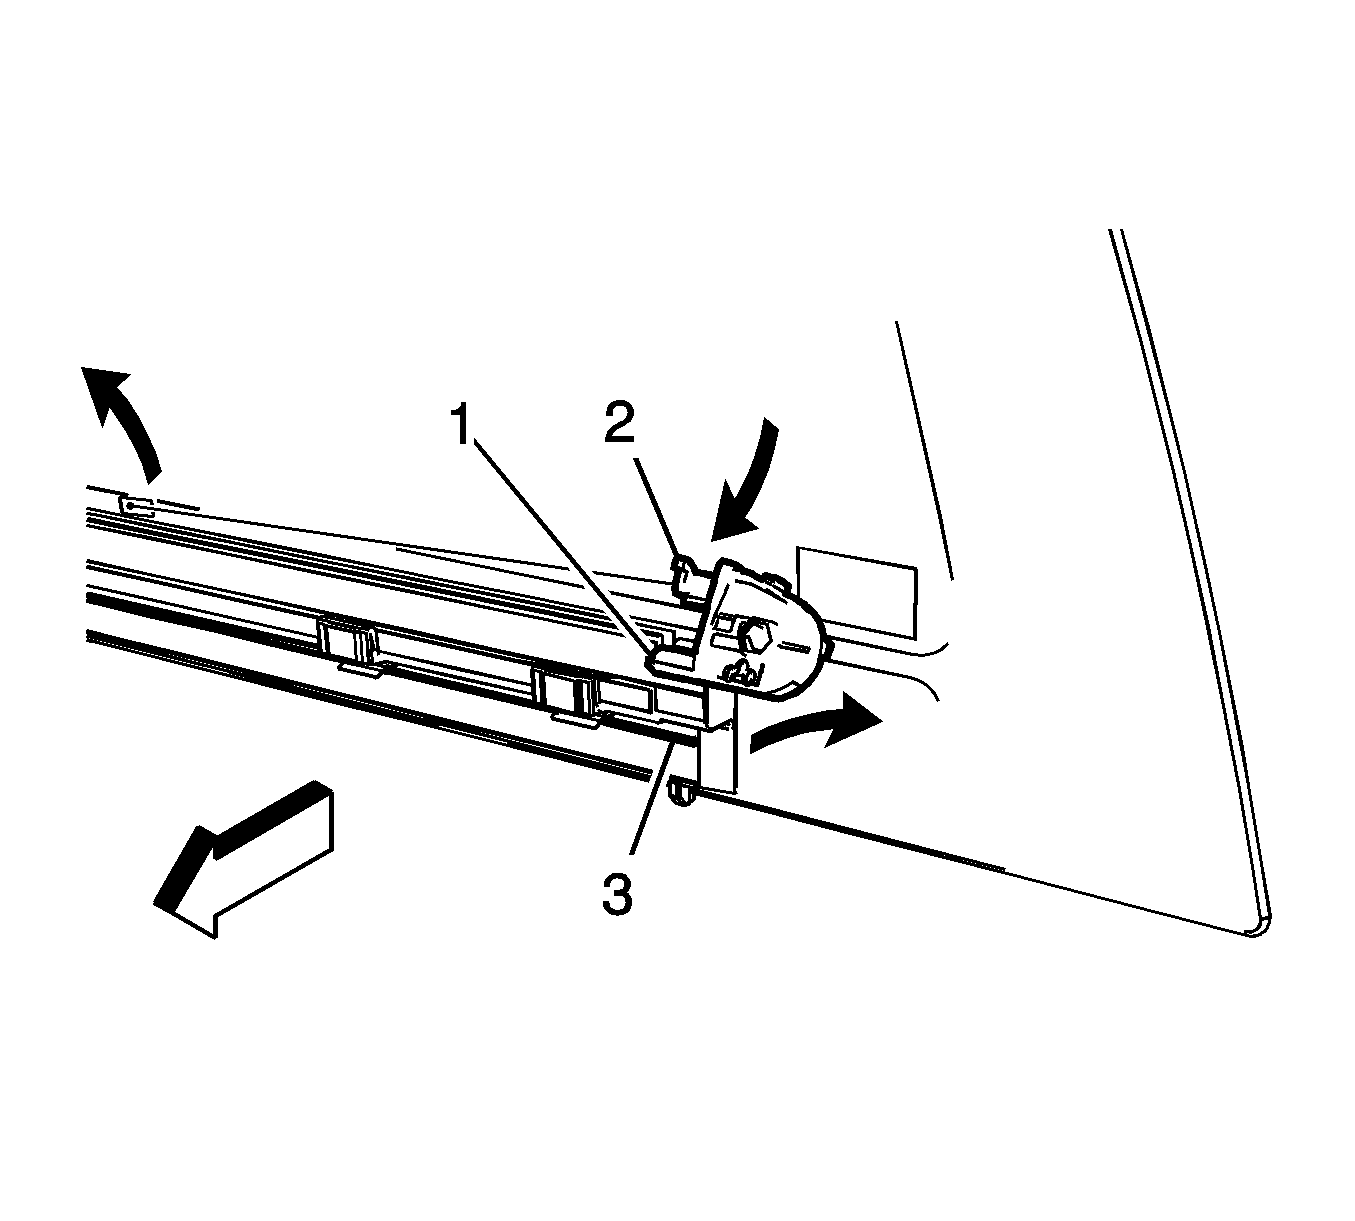
- Install the rear sliding window pulley (1).
- Install the regulator cables (2) to the retainers (1) across the bottom edge of the window frame.
- Install the rear sliding window pulley covers (2) to the pulley (3), clip the tabs (1) in place.
- Install the rear sliding window stops (1) in place and fully seated.
- Cycle the rear sliding window to the fully closed position.
- Install the lower garnish molding. Refer to Rear Window Lower Garnish Molding Replacement .
- Inspect the rear sliding window for proper operation.
- Clean the window.
Important: When installing the regulator (2) align the gear to the motor drivegear before installing the screw.
Tighten
Tighten nuts to 5 N·m (44 lb in).
Important: When removing the tension from the cables, depress and hold spring on the regulator to remove tension from the cable before locking the pulley into the frame. Once the pulley has been locked, the spring can then be release.
| 5.1. | Align the tabs (2) on the pulley (1) with the notch in the frame (3). |
| 5.2. | Turn the pulley downward, locking the pulley into the frame (3). |

