For 1990-2009 cars only
Special Tools
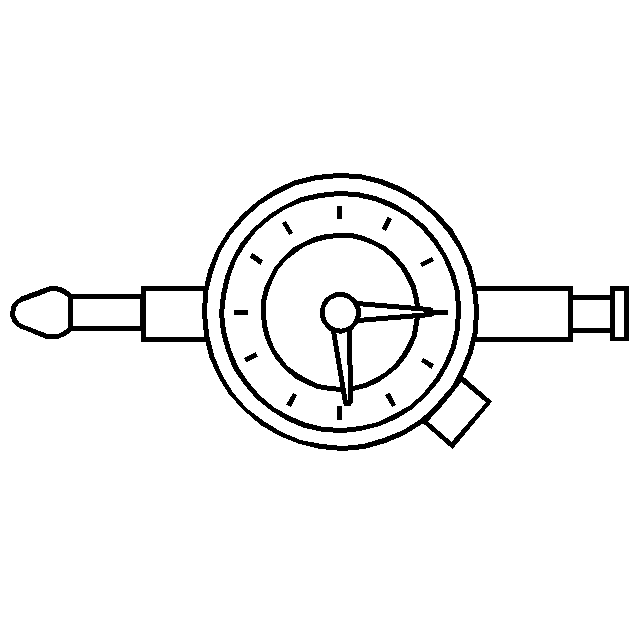
| • | J 26900-12 Dial Indicator |
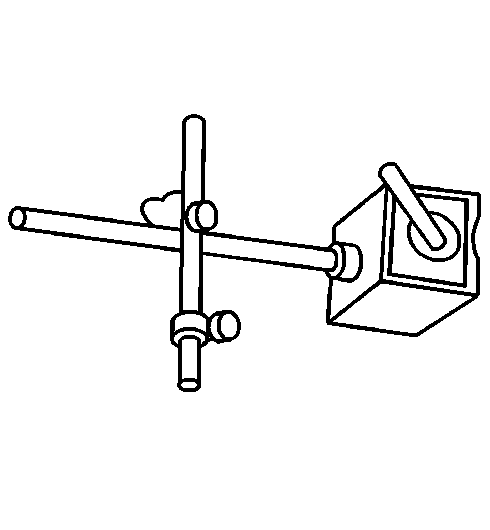
| • | J 26900-13 Magnetic Base |
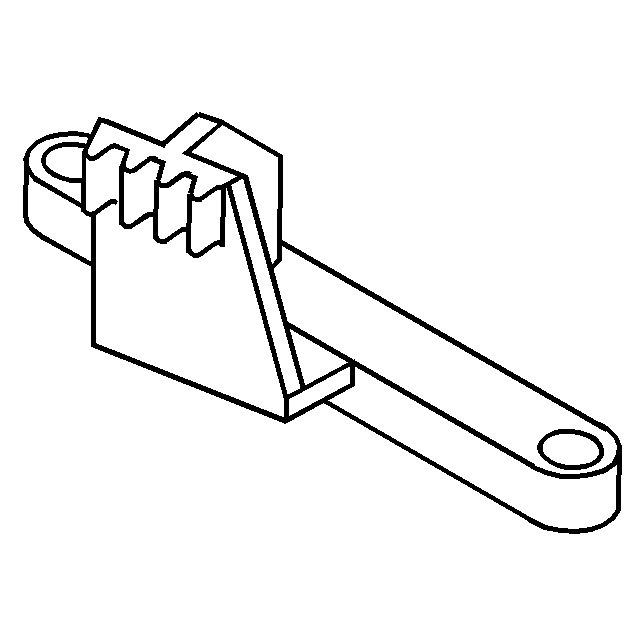
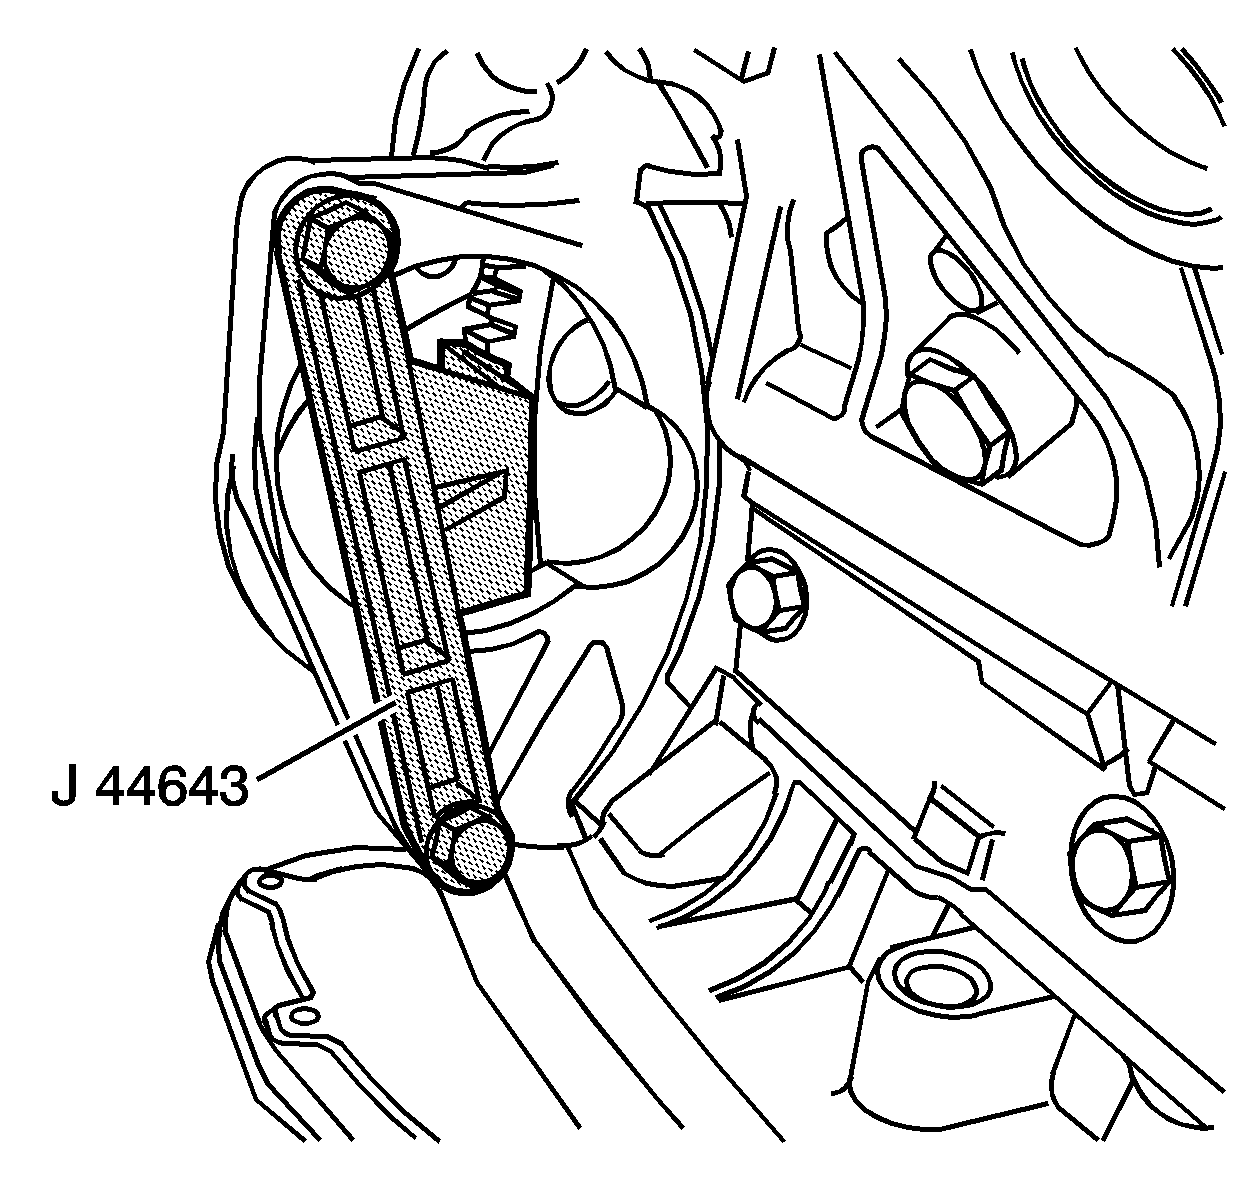
| • | J 44643 Flywheel Holding Tool |
Removal Procedure
- Remove the engine assembly. Refer to Engine Replacement.
- Remove the valve lifters. Refer to Valve Lifter Replacement.
- Install J 44643 flush to the flywheel opening.
- Remove the engine front cover. Refer to Engine Front Cover Replacement.
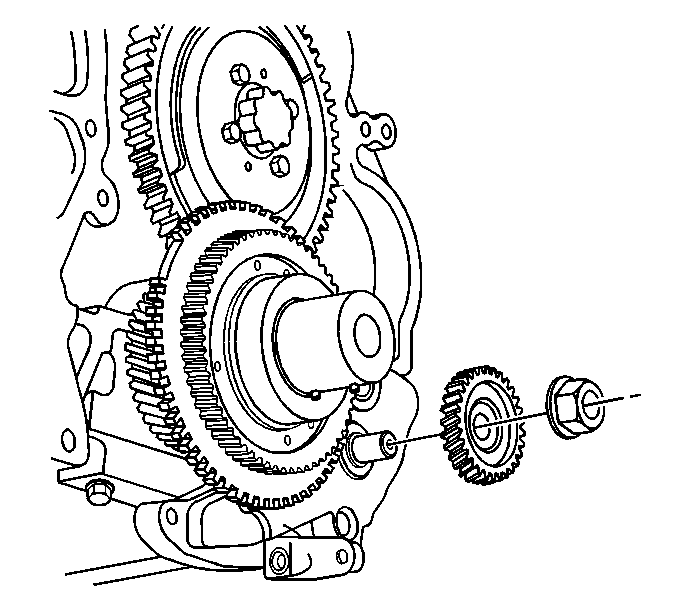
- Remove the oil pump driven gear nut.
- Remove the oil pump driven gear.
- Remove the oil pump drive gear and crankshaft reluctor.
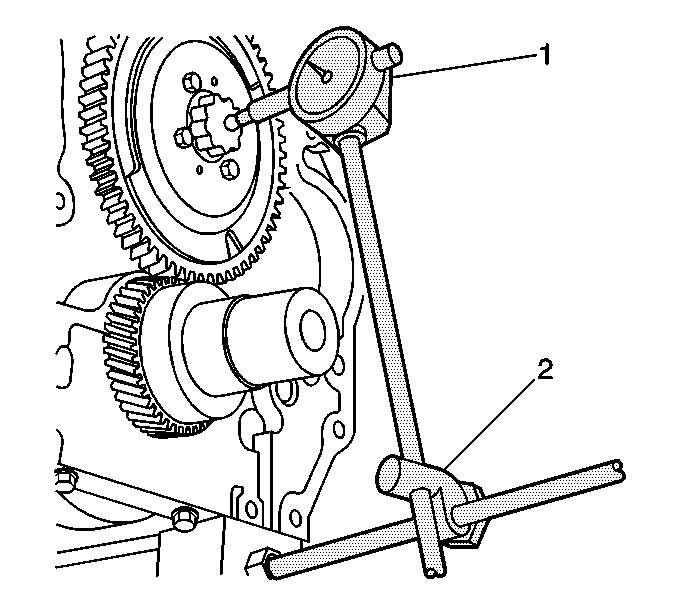
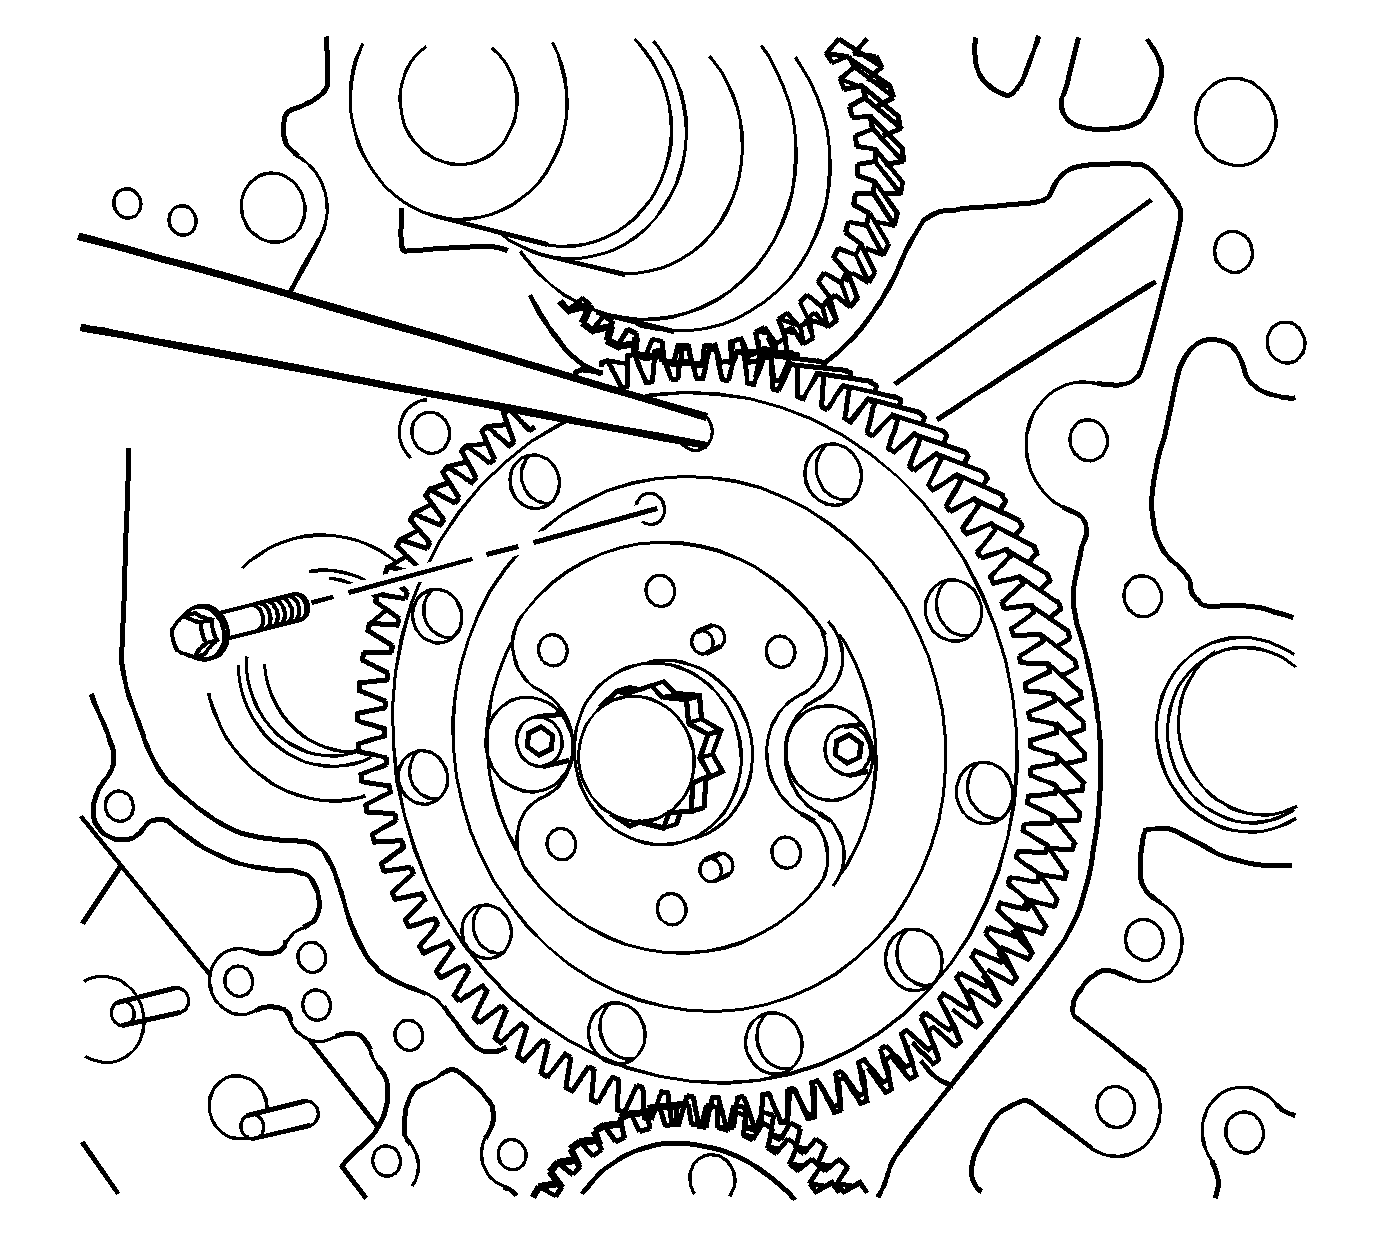
- Using J 26900-12 (1) and J 26900-13 (2), measure the camshaft end play.
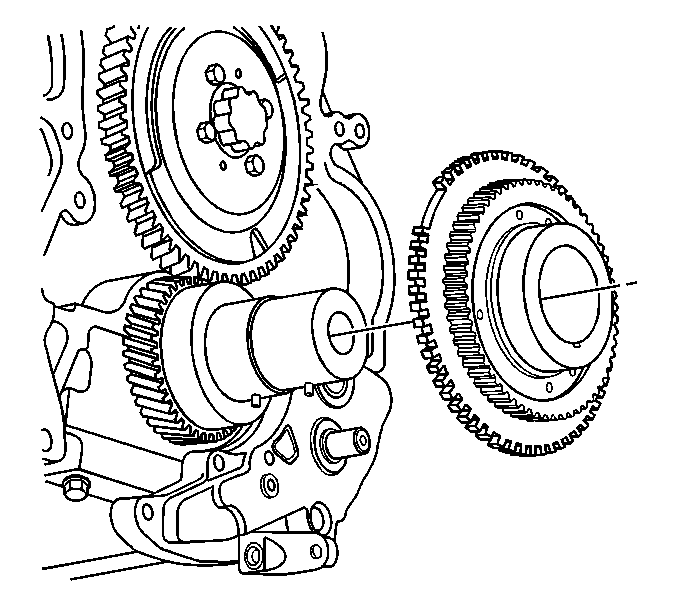
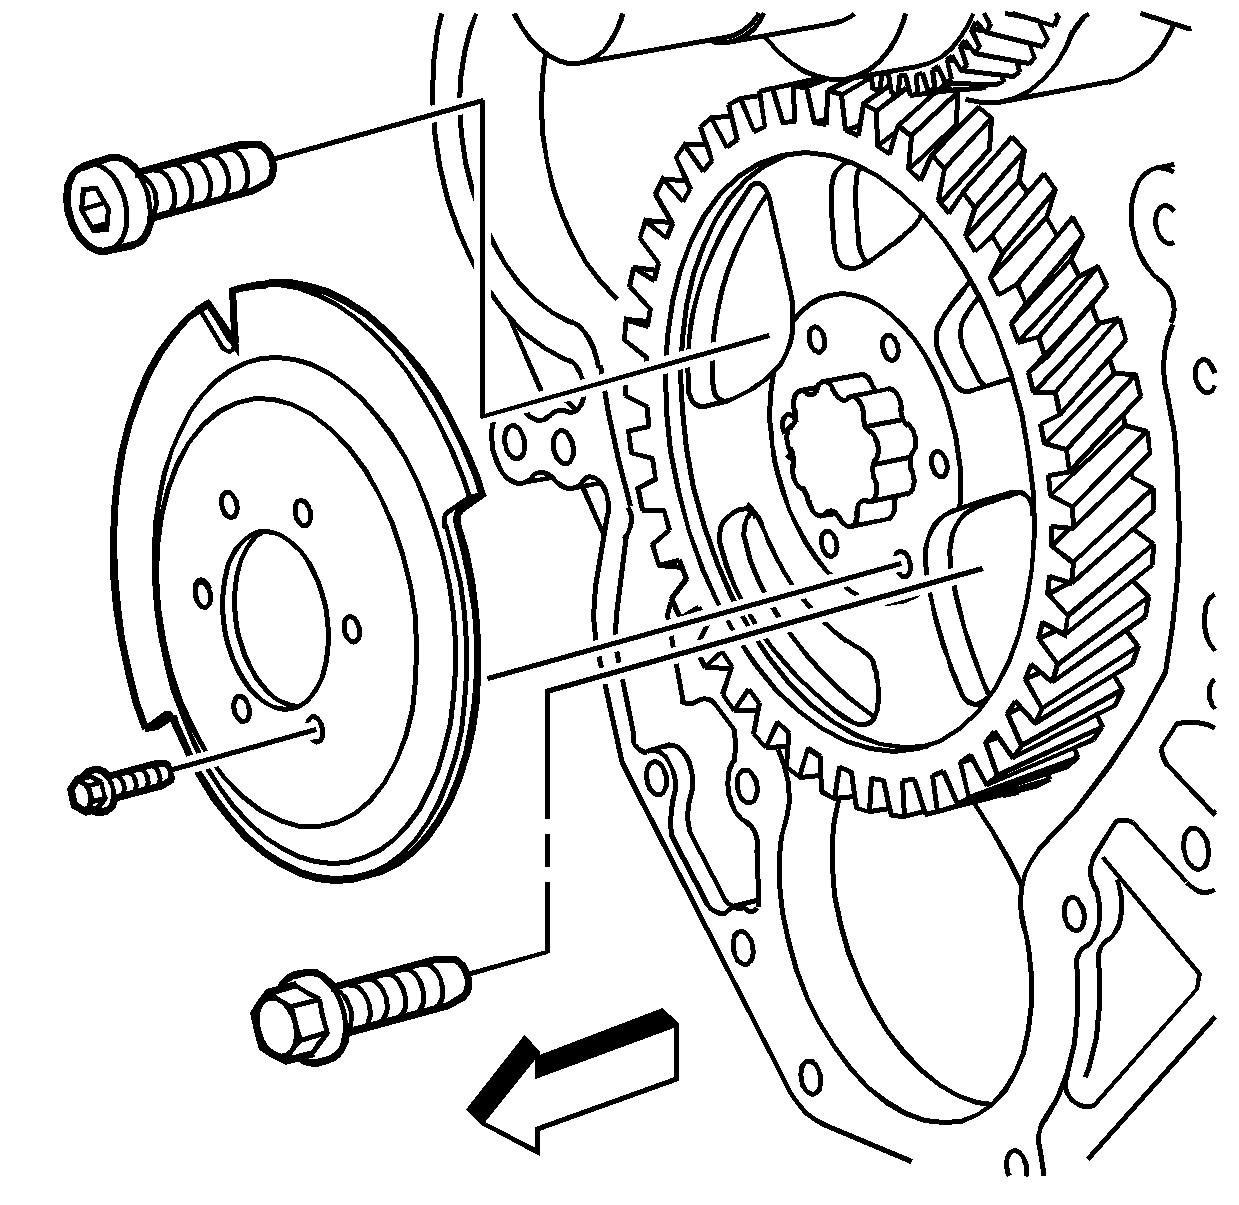
- Remove the camshaft reluctor screws.
- Remove the camshaft reluctor.
- Remove the camshaft exciter ring.
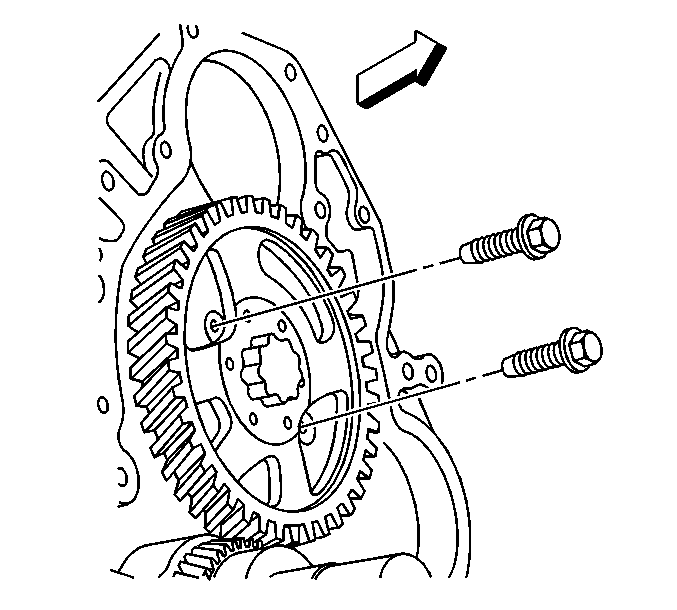
- Align the threaded hole with a suitable tool and install an exciter ring bolt to secure the spring tension.
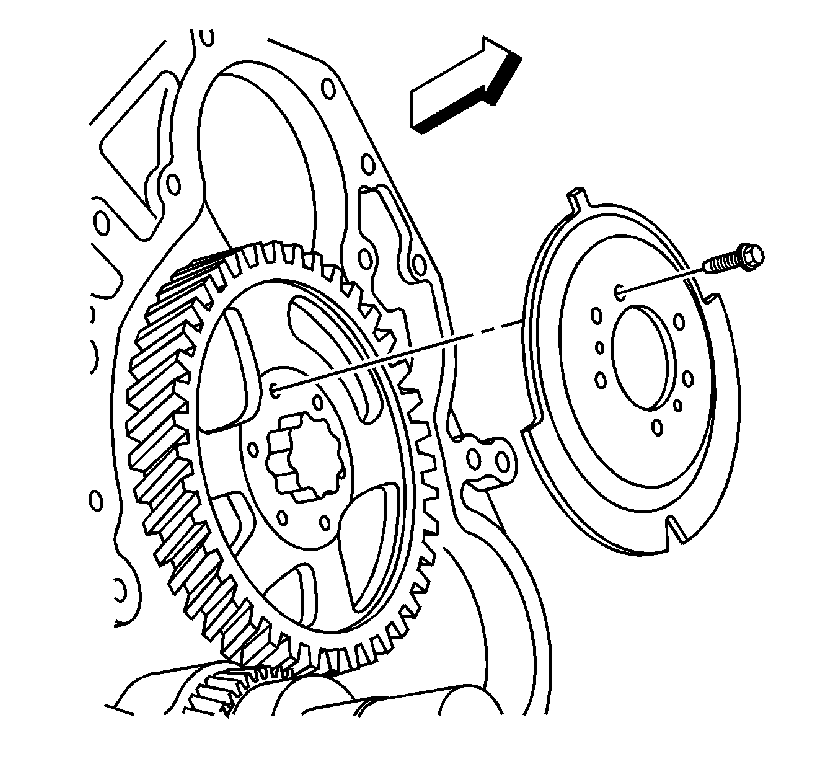
- Remove the camshaft thrust plate bolts through the holes in the camshaft gear.
- In order to loosen the camshaft gear bolt use J 44643 in order to hold the engine from turning.
- Loosen the camshaft gear bolt and leave the bolt finger tight.
- Remove the camshaft thrust plate bolts through the holes in the camshaft gear.
- Remove the camshaft with the camshaft gear attached.
- Remove the camshaft gear bolt and discard.
- Remove the camshaft gear.
- Remove the camshaft thrust plate.
- Clean and inspect the camshaft and bearings. Refer to Camshaft and Bearings Cleaning and Inspection.
Important: The crankshaft reluctor and the oil pump drive gear are timed together at the factory. Do not remove the crankshaft reluctor from the oil pump drive gear.
| • | Do not remove the crankshaft reluctor bolts. |
| • | Do not damage the reluctor teeth. |
| • | The production value is 0.050-0.114 mm (0.002-0.0045 in) and service limit is 0.20 mm (0.008 in). |
| • | Replace the camshaft gear or the camshaft thrust plate if measured value exceeds service limit. |
Important: The two piece cam gear must be bolted together to prevent the spring tension from unloading upon removal.


Installation Procedure
- Install the camshaft thrust plate to the camshaft.
- Install the camshaft driven gear.
- Install a NEW camshaft driven gear bolt.
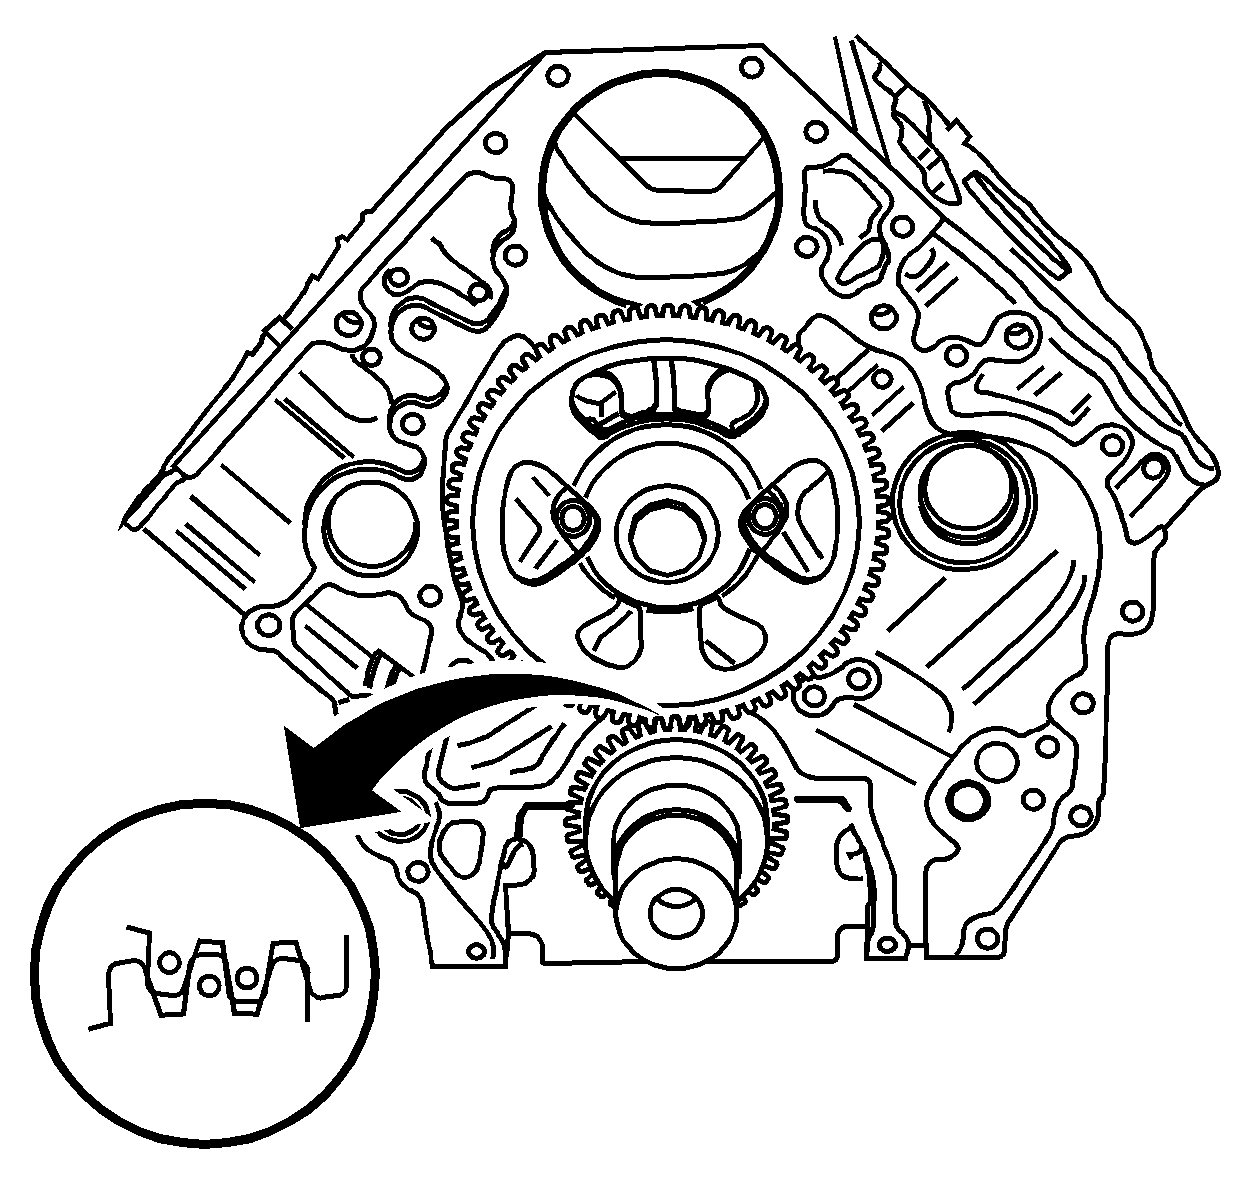
- Install the camshaft into the cylinder block, align the camshaft gear to the crankshaft gear as shown.
- Apply threadlock to the threads of the camshaft thrust plate bolts. Refer to Adhesives, Fluids, Lubricants, and Sealers for the correct part number.
- Install the camshaft thrust plate bolts.
- Remove the exciter ring bolt that was installed to hold the spring tension of the two piece cam gear.
- Install the camshaft reluctor to the camshaft gear.
- Install the camshaft reluctor bolts.
- Reinstall J 44643 in the starter opening, if removed.
- Install a NEW camshaft gear bolt.
- Using J 26900-12 (1) and J 26900-13 (2) measure the camshaft end play.
- Install the oil pump drive gear and reluctor to the crankshaft.
- Install the oil pump driven gear.
- Install the oil pump driven gear nut.
- Install the engine front cover. Refer to Engine Front Cover Replacement.
- Install the engine assembly. Refer to Engine Replacement.
- Install the valve lifters. Refer to Valve Lifter Replacement.
Leave the bolt finger tight.
Notice: Refer to Fastener Notice in the Preface section.
Tighten
Tighten the bolts to 22 N·m (16 lb ft).
Important: Use a suitable tool to relieve the spring tension wile removing the locking bolt.
Tighten
Tighten the bolts in a cross-bolt pattern to 9 N·m (80 lb in).
Tighten
Tighten the bolt to 234 N·m (173 lb ft).
| • | The production value is 0.050-0.114 mm (0.002-0.0045 in) and service limit is 0.20 mm (0.008 in). |
| • | Replace the camshaft gear or the camshaft thrust plate if measured value exceeds the service limit. |
Important: Do not damage the teeth on the crankshaft reluctor.
Tighten
Tighten the nut to 100 N·m (74 lb ft).
