For 1990-2009 cars only
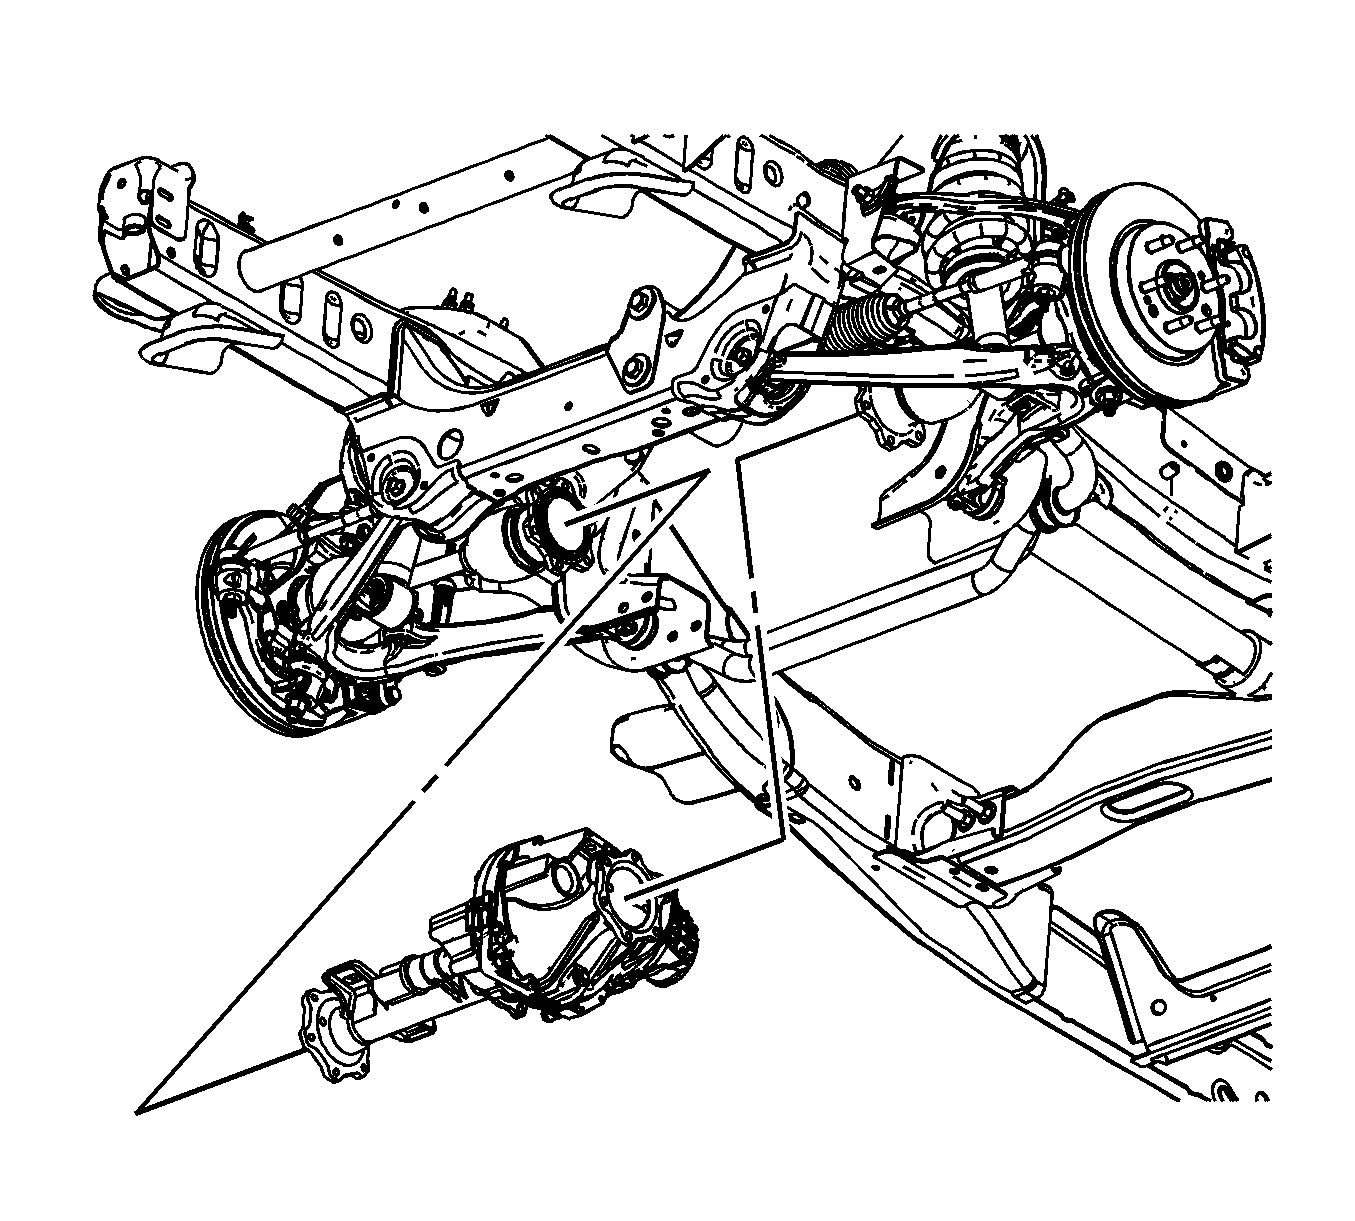
Differential Carrier Assembly Replacement 2500 4WD
Removal Procedure
- Turn the steering wheel all the way to the left.
- Raise the vehicle. Refer to Lifting and Jacking the Vehicle .
- Place jack or utility stands at the rear end of the vehicle.
- Remove the engine protection shield. Refer to Engine Shield Replacement .
- Remove the front differential carrier assembly shield, if equipped. Refer to Shield Replacement .
- Drain the differential carrier assembly. Refer to Front Axle Lubricant Replacement .
- Disconnect the front propeller shaft from the differential carrier assembly. Refer to Front Propeller Shaft Replacement .
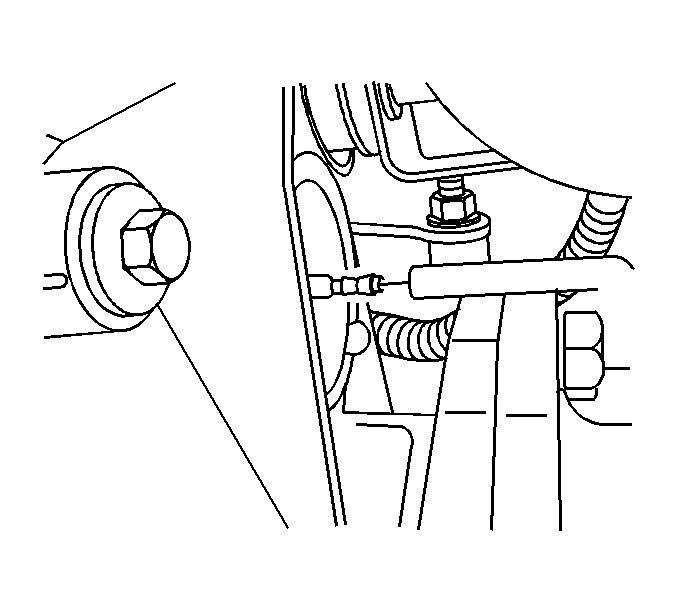
- Remove the relay rod. Refer to Relay Rod Replacement .
- Support the differential carrier assembly with a transmission jack or equivalent.
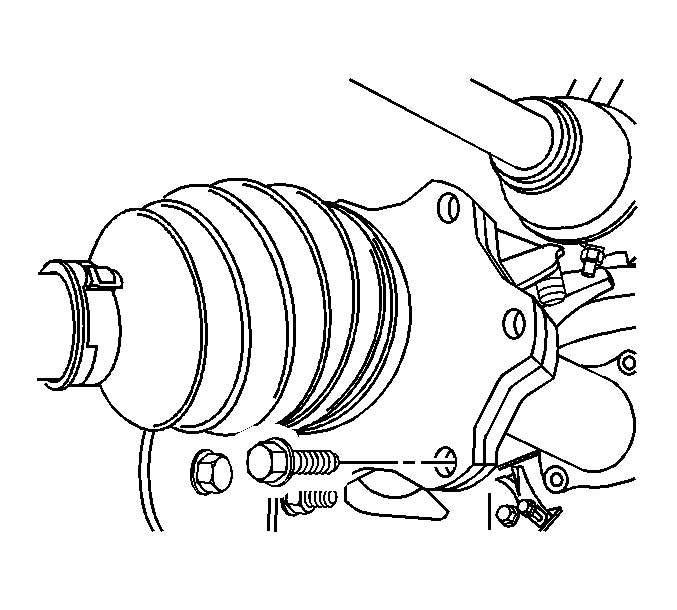
- Remove the wheel drive shaft inboard flange bolts from the inner axle shaft, both sides.
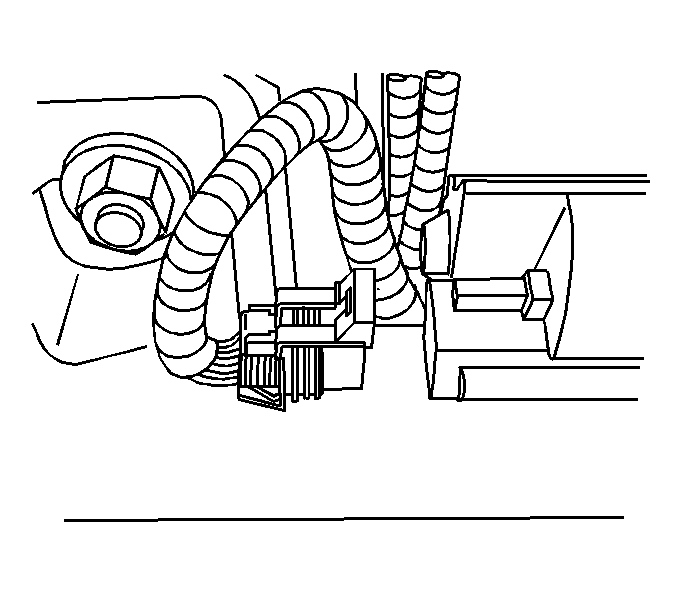
- Disconnect the electrical connector from the front axle actuator, S4WD axle only.
- Disconnect the wire harness from the inner axle shaft housing, S4WD axle only.
- Disconnect the wire harness from the differential carrier assembly, S4WD axle only.
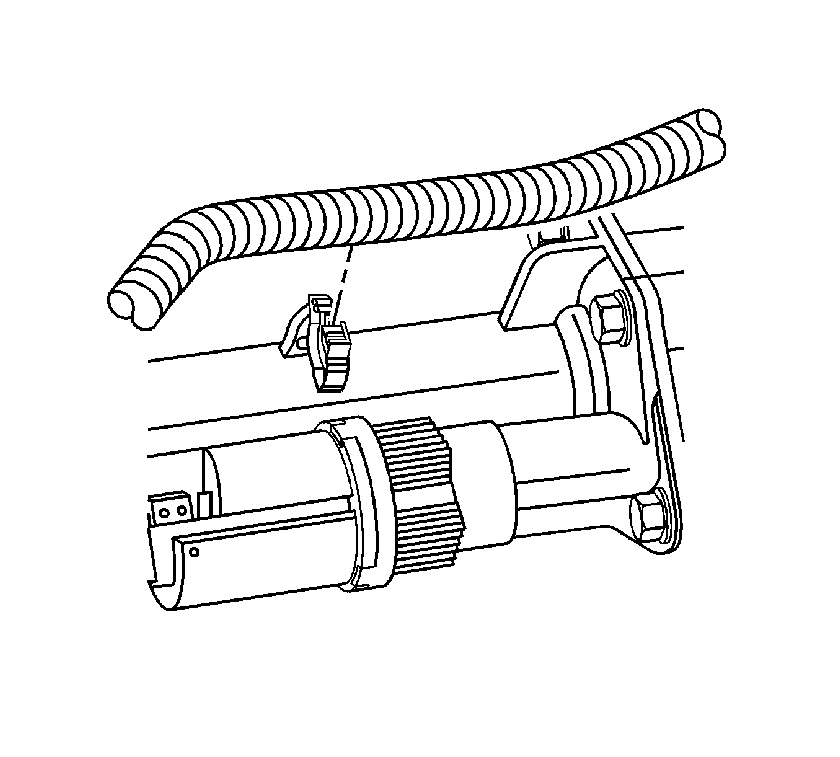
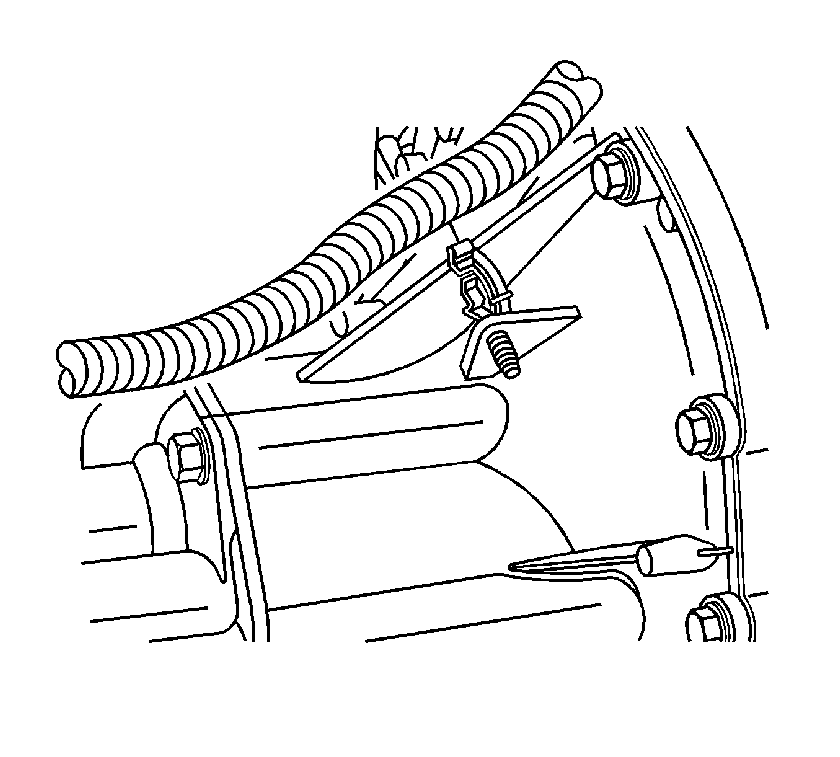
- Disconnect the vent hose from the differential carrier assembly.
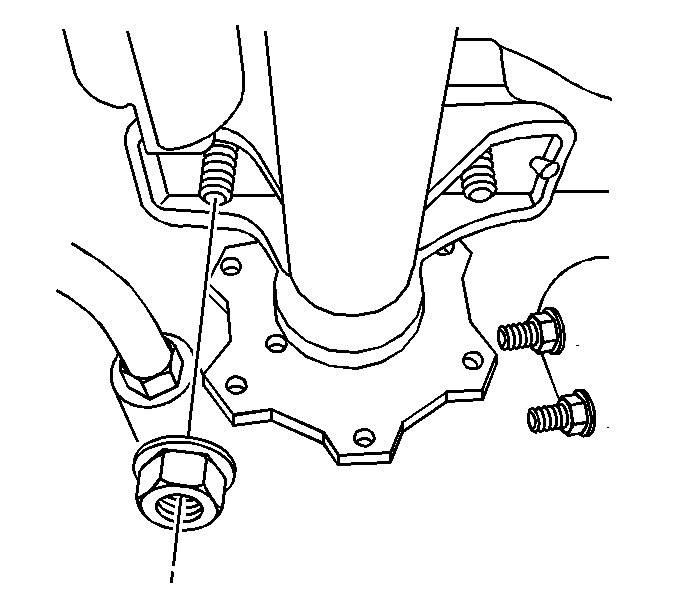
- Remove the inner axle housing nuts and washers from the bracket.
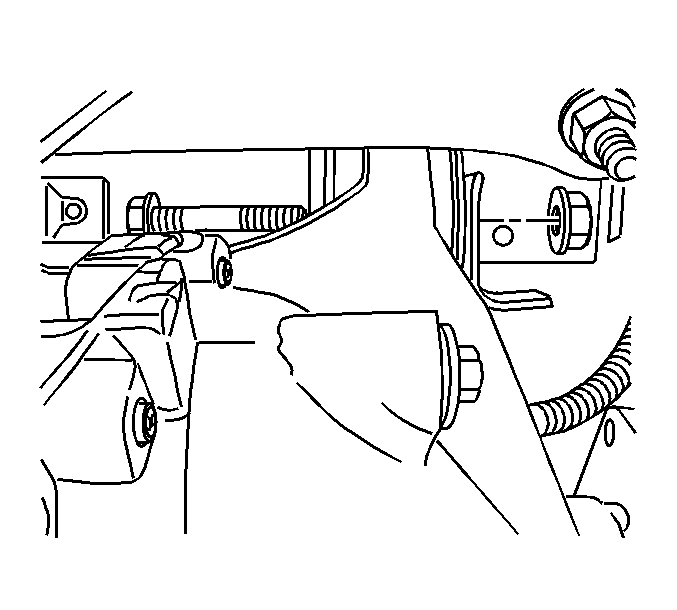
- Remove the differential carrier assembly upper mounting bolt and the nut.
- Pivot the differential carrier assembly forward and down on the lower mount bolt while it is being supported by the transmission jack.
- Secure the differential carrier assembly to the jack.
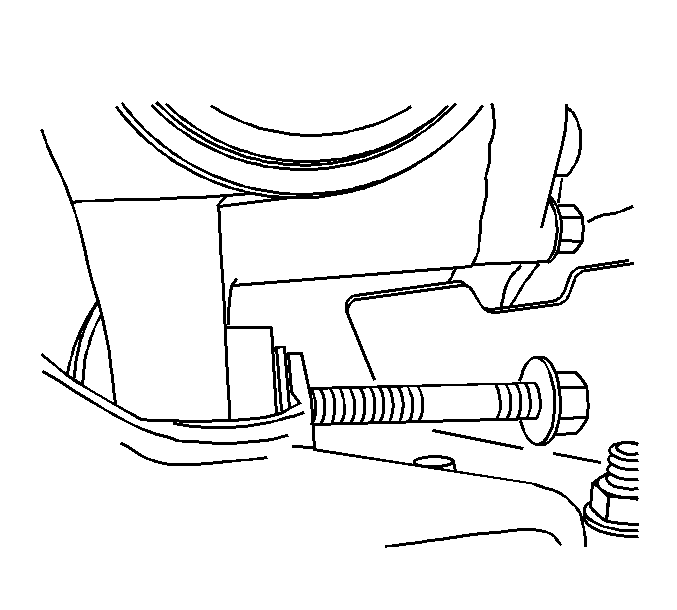
- Remove the differential carrier assembly lower mounting bolt and the nut.
- Remove the differential carrier assembly.
Installation Procedure
- Install the differential carrier assembly.
- Install the differential carrier assembly lower mounting bolt and the nut.
- Pivot the differential carrier assembly up and back on the lower mount bolt while it is being supported by the transmission jack.
- Install the differential carrier assembly upper mounting bolt and the nut.
- Install the inner axle housing washers and nuts to the bracket.
- Connect the vent hose to the differential carrier assembly.
- Remove the transmission jack.
- Connect the wire harness to the differential carrier assembly, S4WD axle only.
- Connect the wire harness to the inner axle shaft housing, S4WD axle only.
- Connect the electrical connector to the front axle actuator, S4WD axle only.
- Install the wheel drive shaft inboard flange to inner axle shaft bolts, both sides.
- Install the relay rod. Refer to Relay Rod Replacement .
- Install the front propeller shaft to the differential carrier assembly. Refer to Front Propeller Shaft Replacement .
- Fill the differential carrier assembly. Use the correct fluid. Refer to Front Axle Lubricant Replacement .
- Install the front differential carrier assembly shield, if equipped. Refer to Shield Replacement .
- Install the engine protection shield. Refer to Engine Shield Replacement .
- Remove the utility stands.
- Lower the vehicle.
Do not tighten the bolt at this time.
Notice: Refer to Fastener Notice in the Preface section.
Tighten
| • | Tighten the inner axle housing nuts to 100 N·m (75 lb ft). |
| • | Tighten the upper and the lower differential carrier assembly bolts to 100 N·m (75 lb ft). |
Tighten
Tighten the wheel drive shaft inboard flange to inner axle shaft bolts to 79 N·m (58 lb ft).
Differential Carrier Assembly Replacement 1500 FWD
Removal Procedure
- Raise and support the vehicle. Refer to Lifting and Jacking the Vehicle .
- Remove the lower control arm crossmember. Refer to Drivetrain and Front Suspension Frame Front Crossmember Replacement .
- Drain the differential carrier. Refer to Front Axle Lubricant Replacement .
- Remove the wiring harness from the differential carrier, if needed.
- Remove the electrical connector from the actuator motor.
- Remove the differential carrier vent hose.
- Remove the wheel drive shaft mounting bolts.
- Remove the front propeller shaft. Refer to Front Propeller Shaft Replacement .
- Support the differential carrier with a transmission jack.
- Remove the right differential carrier mounting nuts and washers.
- Remove the left differential carrier mounting bolts.
- With the aid of an assistant, pivot the differential carrier forward and down to remove the it from the vehicle.
- Remove the differential carrier assembly from the vehicle.
Important: If removing the differential carrier assembly to service other components, it is not necessary to drain the differential carrier.
Installation Procedure
- With the aid of an assistant, maneuver the differential carrier so that the wheel drive shafts can be installed.
- Install the differential carrier assembly.
- Install the right mounting nuts and washers.
- Install the left mounting bolts for the differential carrier.
- Remove the transmission jack stand.
- Install the wiring harness on the differential carrier, if needed.
- Install the electrical connector to the actuator motor, if needed.
- Install the differential carrier vent hose.
- Install the propeller shaft. Refer to Front Propeller Shaft Replacement .
- Install the wheel drive shaft mounting bolts.
- Install the lower control arm crossmember. Refer to Drivetrain and Front Suspension Frame Front Crossmember Replacement .
- Fill the differential carrier. Refer to Front Axle Lubricant Replacement .
- Remove the support and lower the vehicle.
Notice: Refer to Fastener Notice in the Preface section.
Tighten
Tighten the mounting nuts to 100 N·m (75 lb ft).
Tighten
Tighten the mounting nuts to 100 N·m (75 lb ft).
Tighten
Tighten the mounting bolts to 79 N·m (58 lb ft).
