Engine Coolant Thermostat Replacement 1.4L/1.6L
Removal Procedure
- Drain the coolant. Refer to Cooling System Draining and Filling .
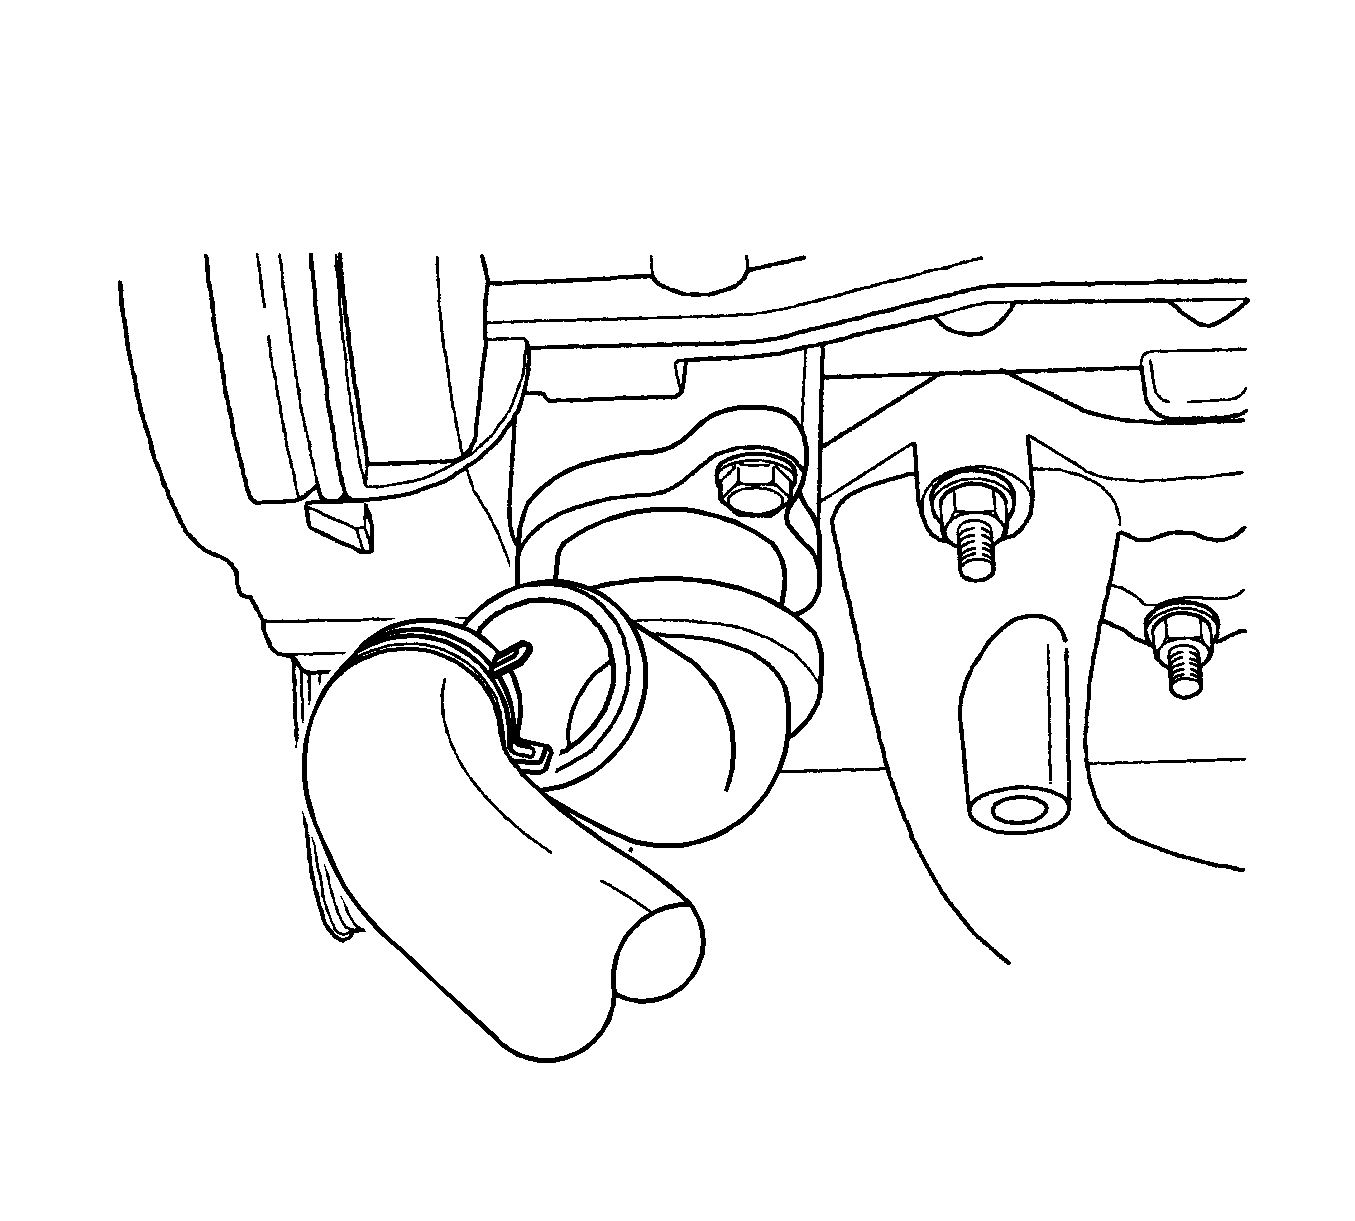
- Loosen the hose clamp on the upper radiator hose at the thermostat housing.
- Disconnect the upper radiator hose from the thermostat housing.
- Loosen the clamp on the bypass hose.
- Disconnect the bypass hose from the thermostat housing.
- Remove the mounting bolts that hold the thermostat housing to the cylinder head.
- Remove the thermostat housing from the head.
- Remove the O-ring seal from the head.
- Inspect the valve seat for foreign matter that could prevent the valve from seating properly.
- Inspect the thermostat for proper operation. Refer to Thermostat Diagnosis .
- Clean the thermostat housing and the cylinder head mating surfaces.
Caution: Refer to Radiator Cap Removal Caution in the Preface section.
Installation Procedure
- Coat the sealing surface of a new O-ring seal with Lubriplate®.
- Install a new O-ring seal into the recess in the cylinder head.
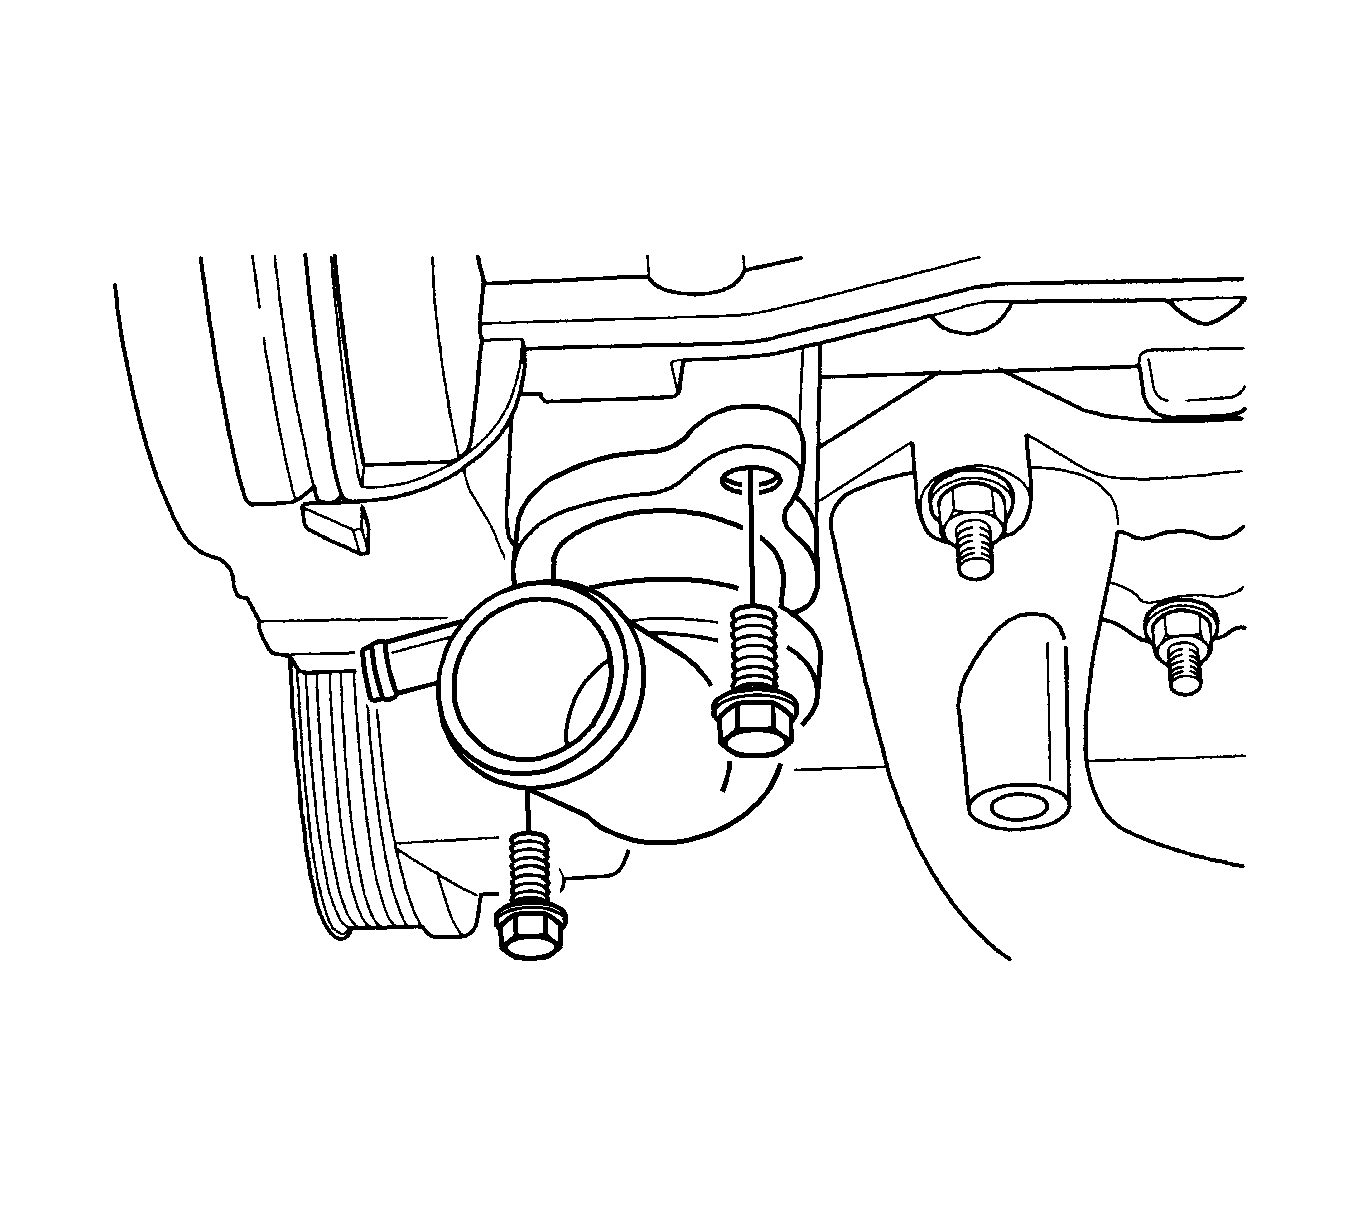
- Secure the thermostat housing to the cylinder head with the mounting bolts.
- Connect the upper radiator hose to the thermostat housing.
- Secure the upper radiator hose to the thermostat housing with a hose clamp.
- Connect the bypass hose to the thermostat housing.
- Secure the bypass hose with a hose clamp.
- Refill the engine cooling system. Refer to Cooling System Draining and Filling .
Notice: Refer to Fastener Notice in the Preface section.
Tighten
Tighten the thermostat housing mounting bolts to 20 N·m (15 lb ft).
Engine Coolant Thermostat Replacement 1.8L/2.0L
Removal Procedure
- Drain the coolant. Refer to Cooling System Draining and Filling .
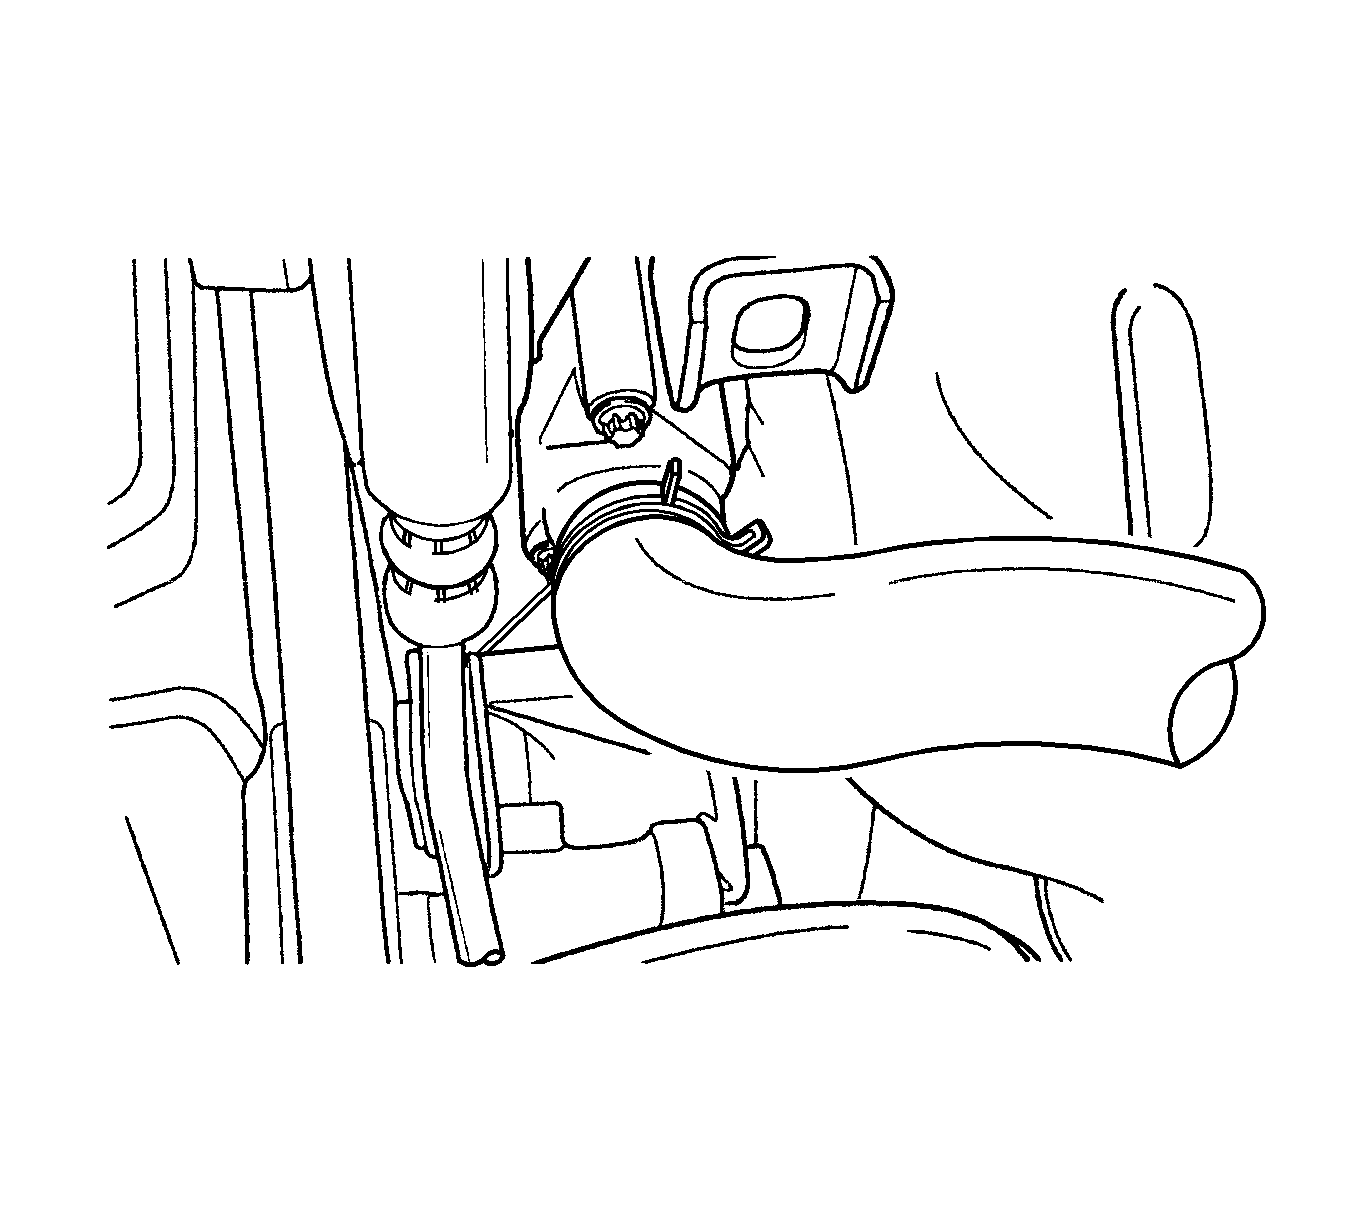
- Loosen the hose clamp on the upper radiator hose at the thermostat housing.
- Disconnect the upper radiator hose from the thermostat housing.
- Remove the mounting bolts that hold the thermostat housing to the cylinder head.
- Remove the thermostat housing from the cylinder head.
- Remove the seal ring from the thermostat housing.
- Remove the thermostat from the thermostat housing by pressing the thermostat mounting flange downward and then rotating the flange clockwise.
- Inspect the valve seat for foreign matter that could prevent the valve from sealing properly.
- Inspect the thermostat for proper operation. Refer to Thermostat Diagnosis .
- Clean the thermostat housing and the cylinder head mating surfaces.
Caution: Refer to Radiator Cap Removal Caution in the Preface section.
Installation Procedure
- Install the thermostat into the thermostat housing by pressing the thermostat mounting flange downward and then rotating the flange counterclockwise. Rotate the thermostat mounting flange until it is seated in the thermostat housing recesses.
- Coat the sealing surface of a new seal ring with Lubriplate®.
- Install a new seal ring into the recess in the thermostat housing.
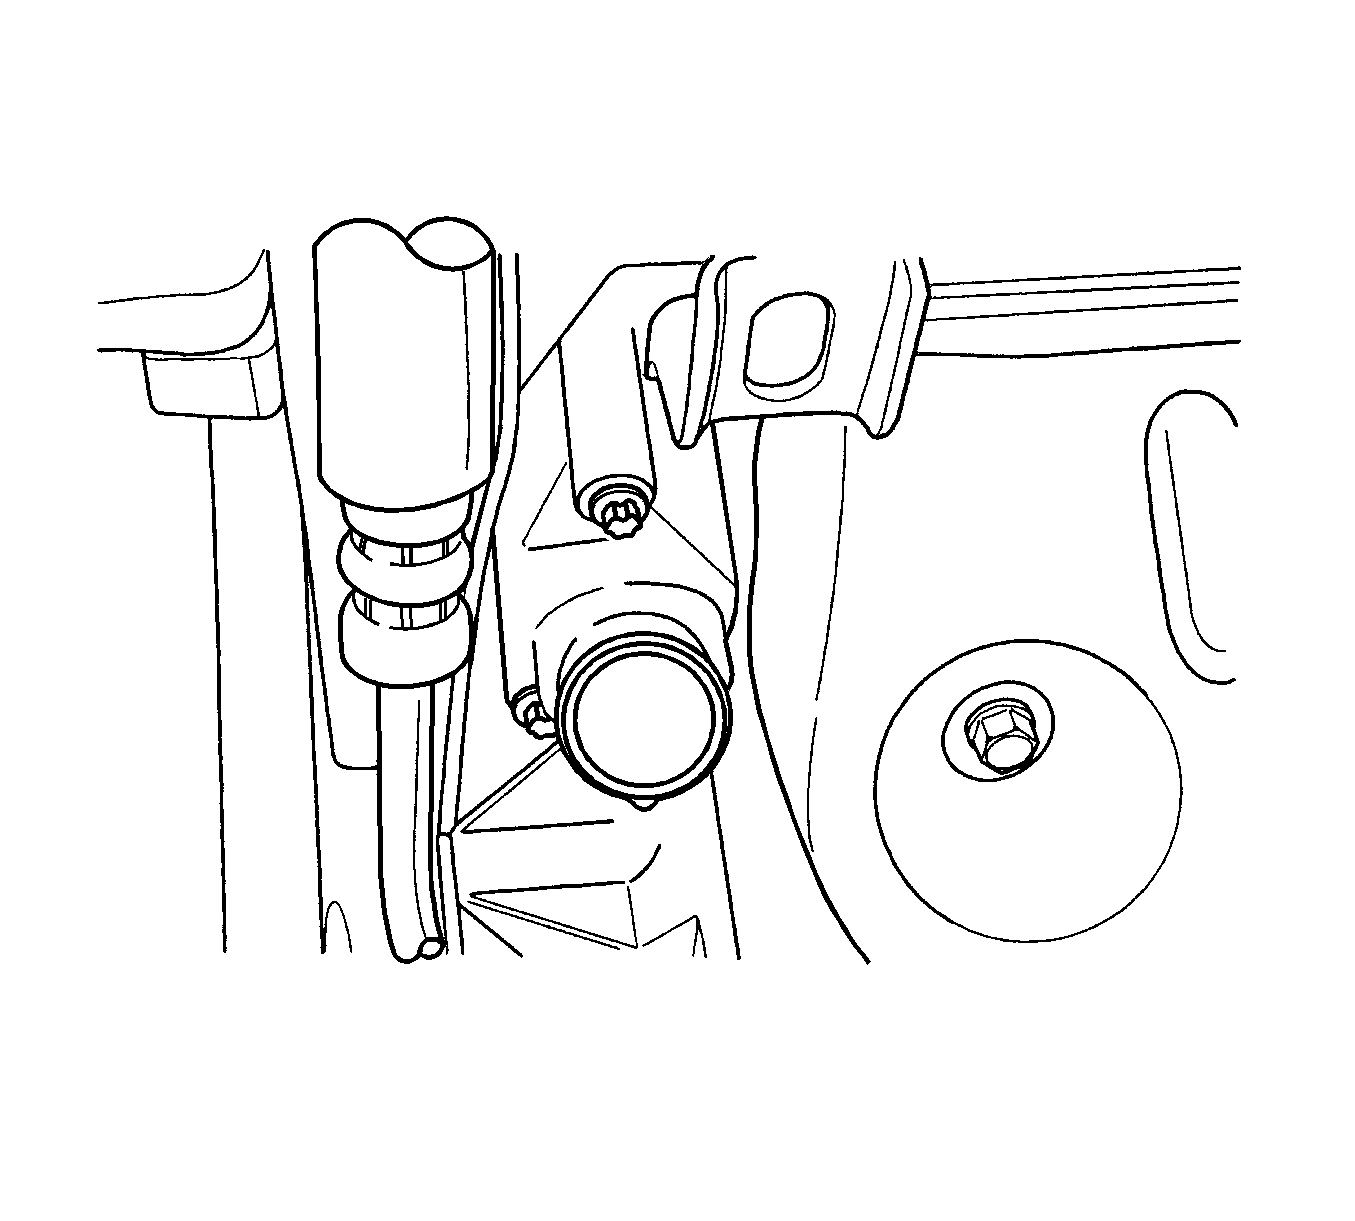
- Install the thermostat housing to the cylinder head.
- Secure the thermostat housing to the cylinder head with the mounting bolts.
- Connect the upper radiator hose to the thermostat housing.
- Secure the upper radiator hose to the thermostat housing with a hose clamp.
- Refill the engine cooling system. Refer to Cooling System Draining and Filling .
Notice: Refer to Fastener Notice in the Preface section.
Tighten
Tighten the thermostat housing mounting bolts to 15 N·m (11 lb ft).
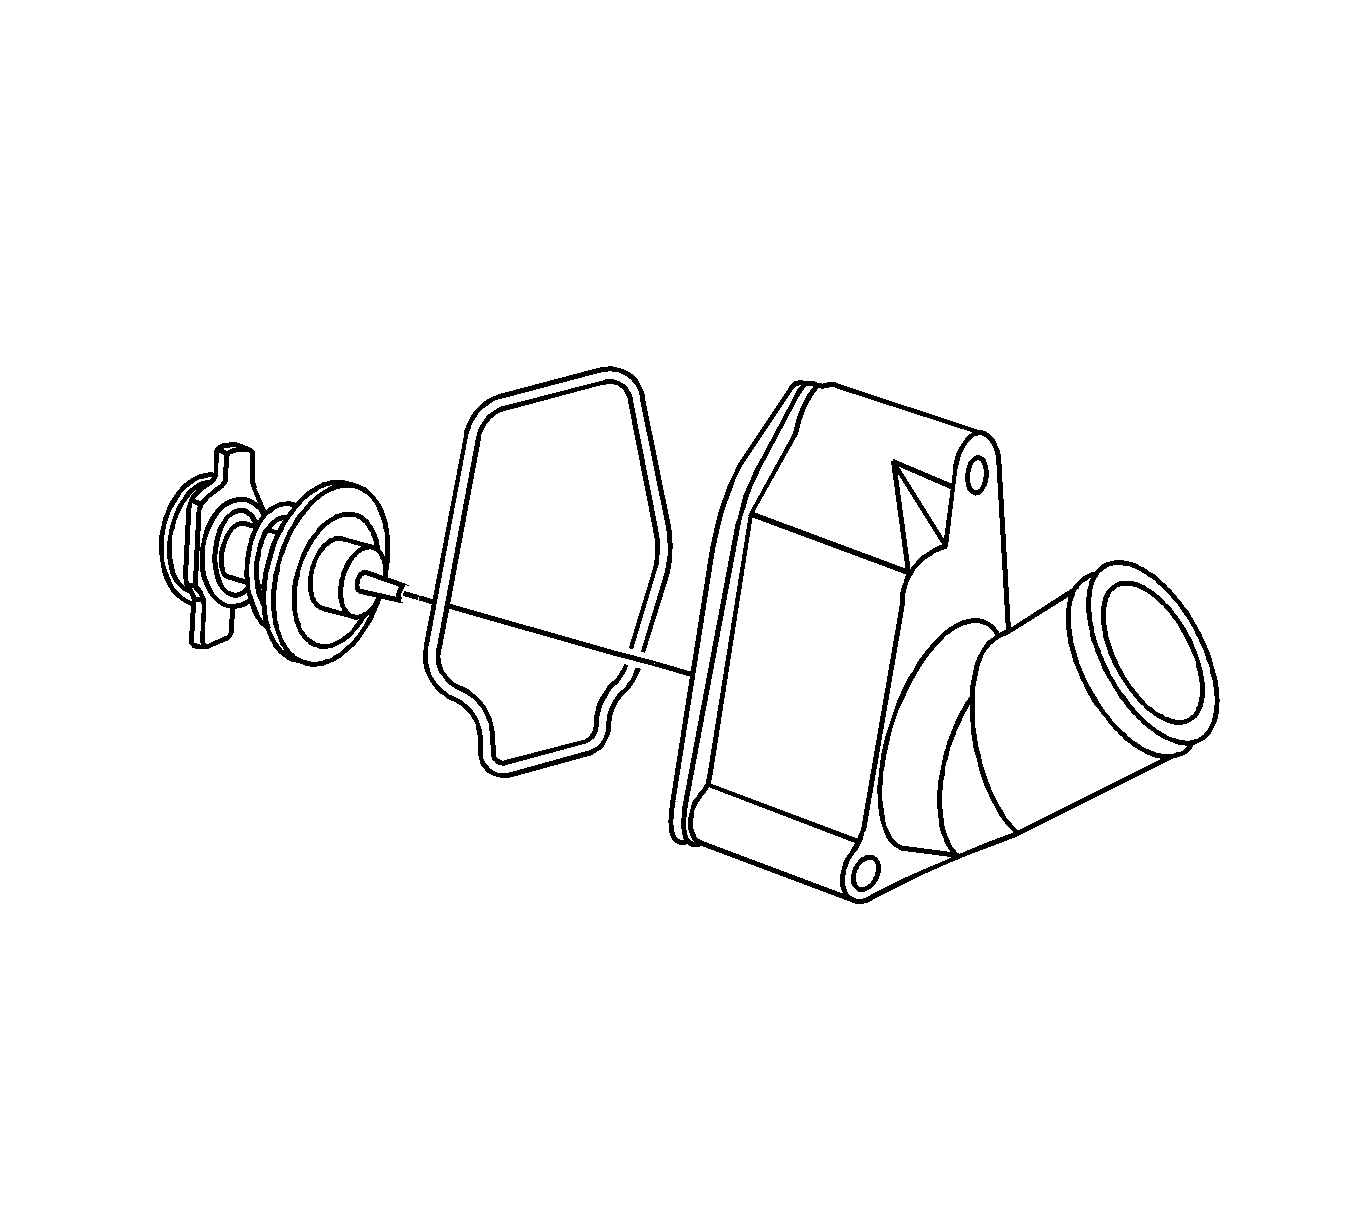
Engine Coolant Thermostat Replacement 2.0L Diesel
Removal Procedure
- Drain the coolant. Refer to Cooling System Draining and Filling .
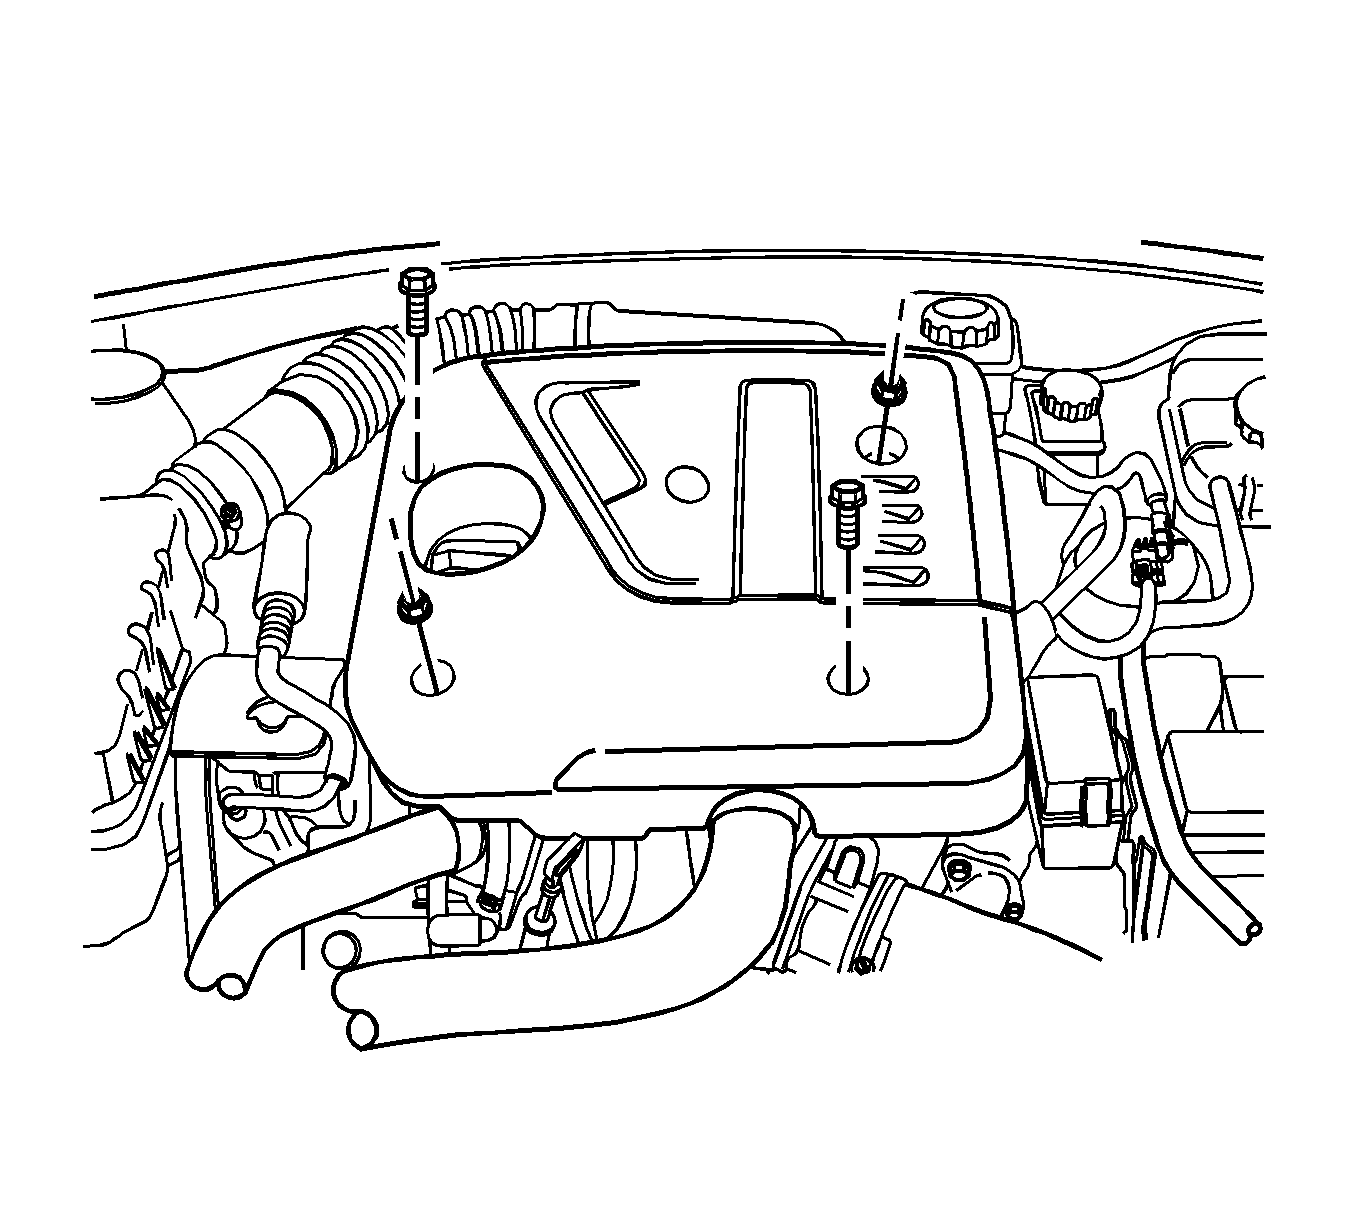
- Remove the engine cover. Refer to Engine Cover Replacement .
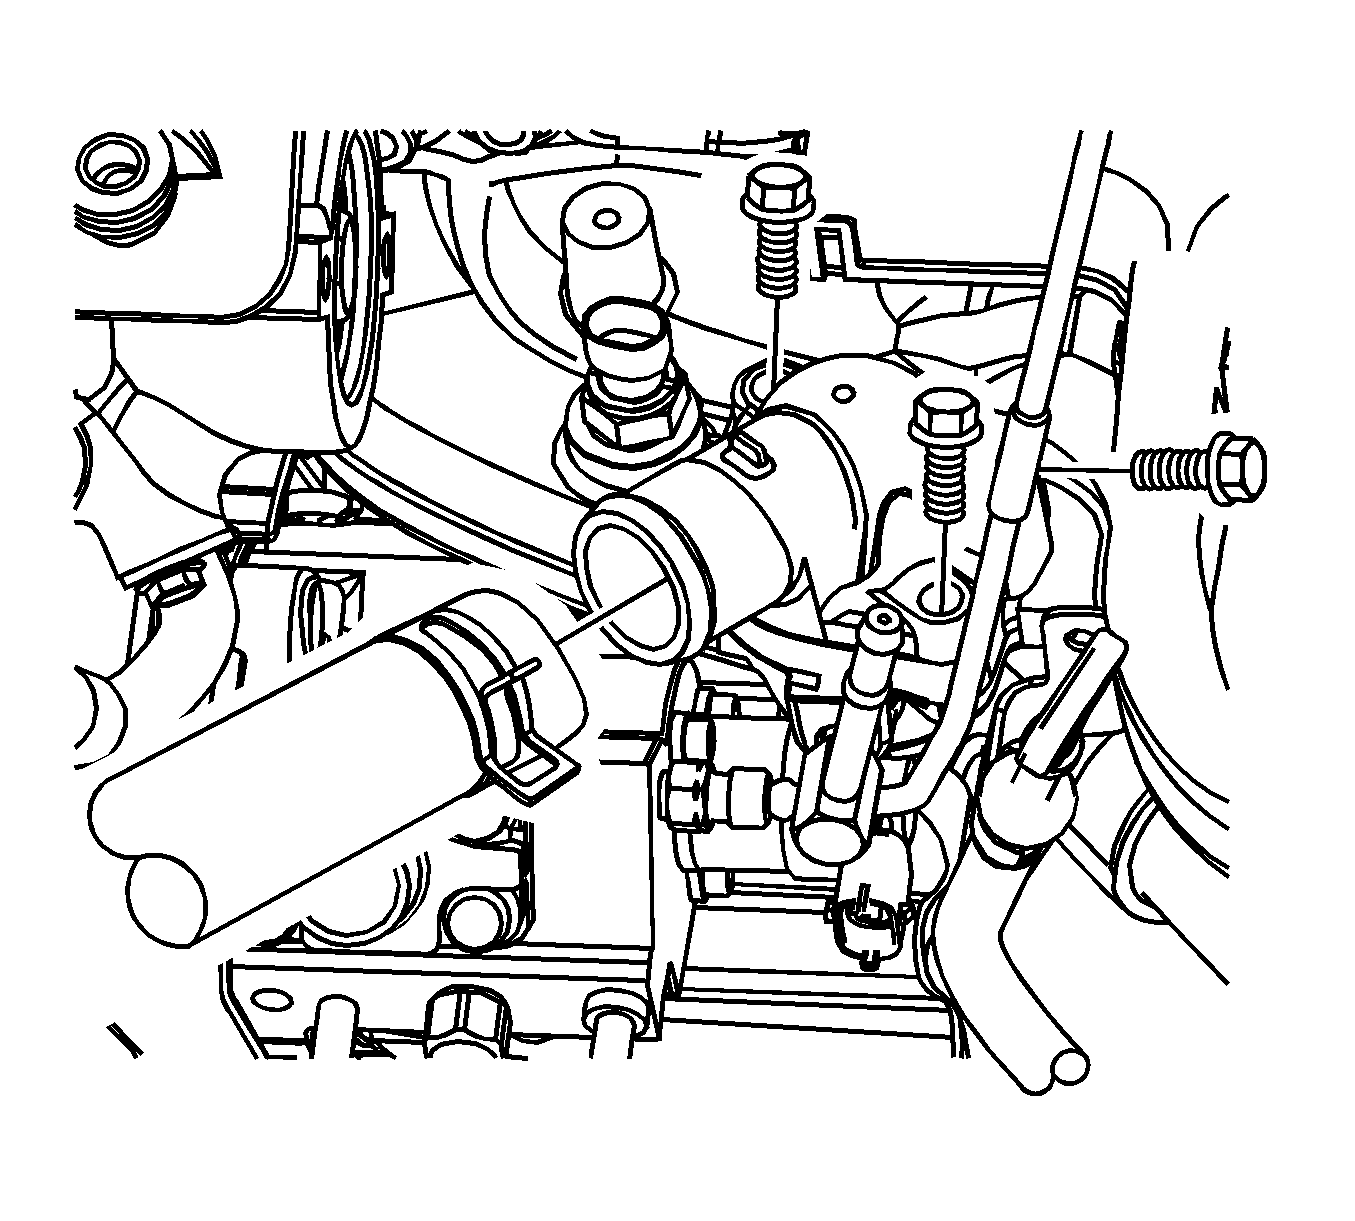
- Disconnect the radiator upper hose from the thermostat housing.
- Remove the fuel injection pump-to-rail feeding pipe retaining bolt.
- Remove the thermostat housing.
- Remove the thermostat with the gasket.
Caution: To avoid being burned, do not remove the radiator cap or surge tank cap while the engine is hot. The cooling system will release scalding fluid and steam under pressure if radiator cap or surge tank cap is removed while the engine and radiator are still hot.
Installation Procedure
- Install the thermostat with a new gasket.
- Install the thermostat housing.
- Install the fuel pipe-to-common rail retaining bolt.
- Connect the upper radiator hose.
- Install the engine cover. Refer to Engine Cover Replacement .
- Fill the cooling system. Refer to Cooling System Draining and Filling .
Notice: Refer to Fastener Notice in the Preface section.
Tighten
| • | Tighten the thermostat housing bolts to 23 N·m (17 lb ft). |
| • | Tighten the fuel pipe-to-common rail retaining bolt to 10 N·m (88.5 lb in). |
Caution: To avoid being burned, do not remove the radiator cap or surge tank cap while the engine is hot. The cooling system will release scalding fluid and steam under pressure if radiator cap or surge tank cap is removed while the engine and radiator are still hot.
