Tools Required
| • | J 8037 Ring Compressor or Equivalent |
| • | J 24086-B (KM 427) Piston Pin Remover/Installer Set |
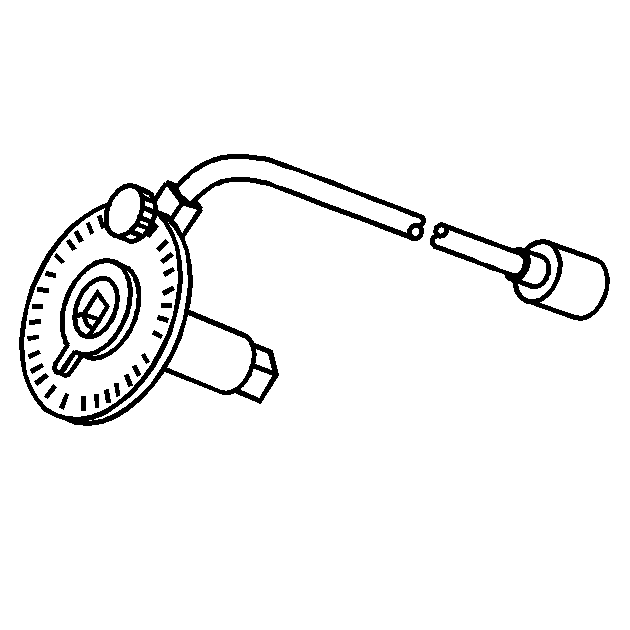
| • | J 45059 Angle Meter |
| • | KM-470-B Angular Torque Gage |
Removal Procedure
- Remove the cylinder head with the intake manifold and exhaust manifold attached. Refer to Cylinder Head Replacement .
- Remove the oil pan. Refer to Oil Pan Replacement .
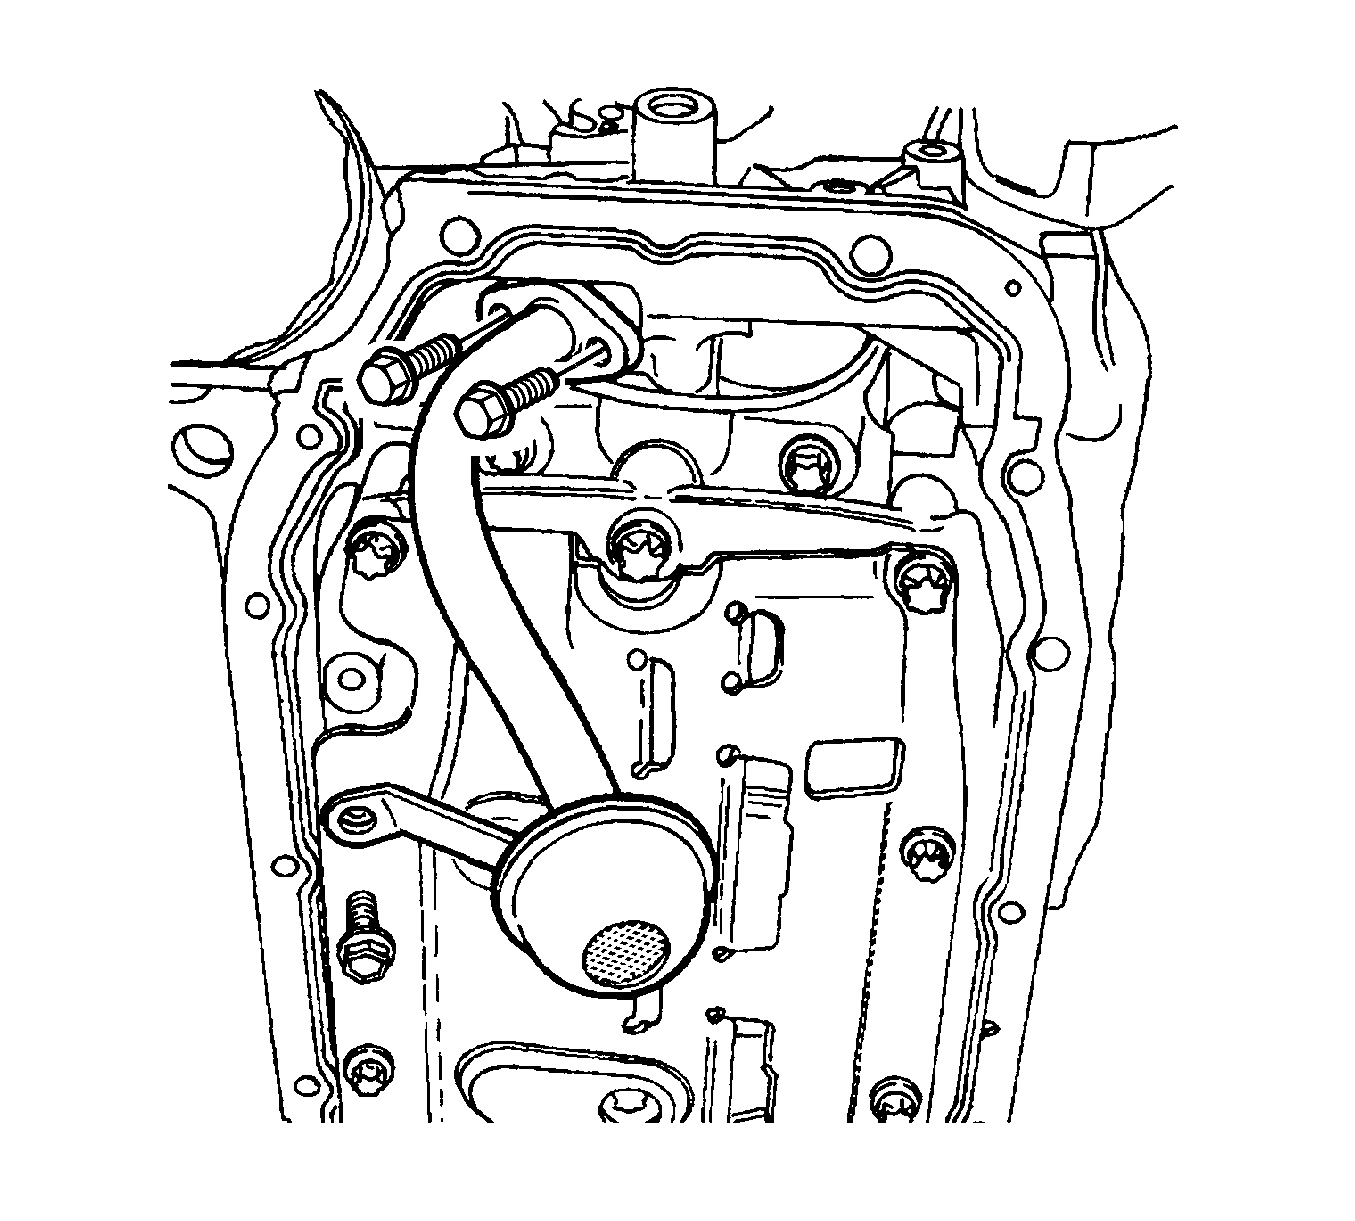
- Remove the oil suction pipe bolts and the support bracket bolts.
- Remove the oil suction pipe.
- Remove the crankshaft bearing bridge and the oil pan scraper bolts.
- Remove the crankshaft bearing bridge and the oil pan scraper.
- Move the piston to the bottom of the piston stroke.
- Mark the connecting rod cap for position.
- Remove the connecting rod cap bolts.
- Remove the connecting rod cap and the lower connecting rod bearing.
- Remove the upper piston connecting rod bearing.
- Ridge ream the cylinder wall.
- Remove the piston.
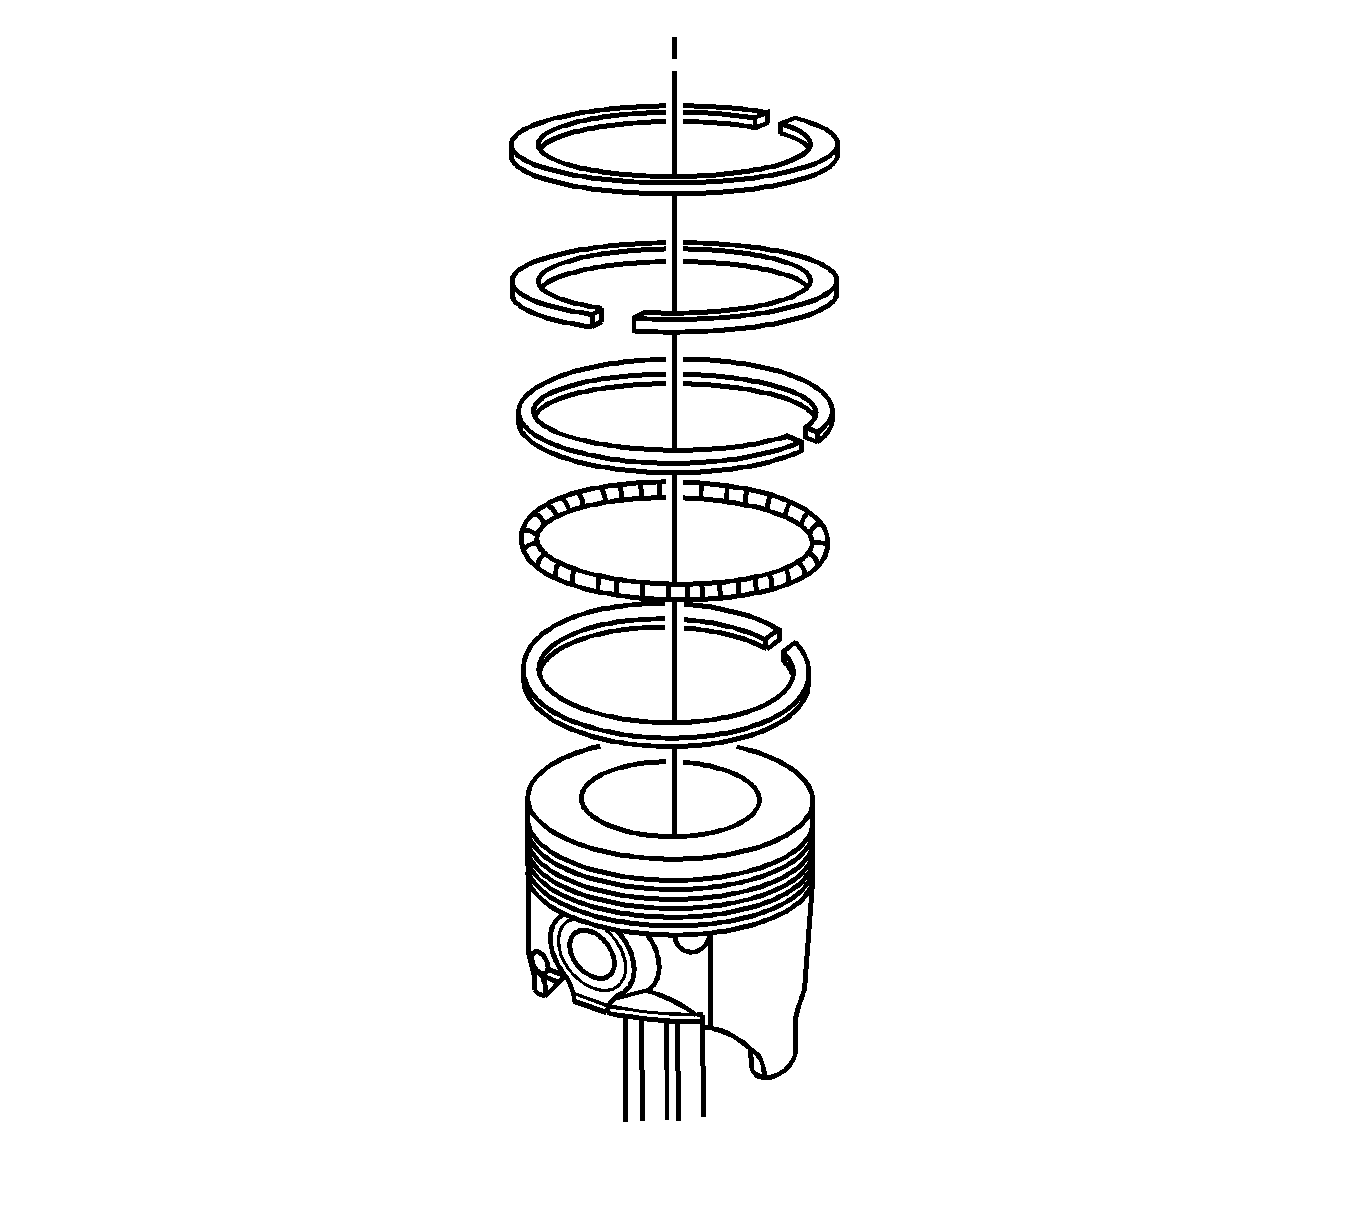
- Use a piston ring expander tool to expand the piston rings.
- Remove the piston rings.
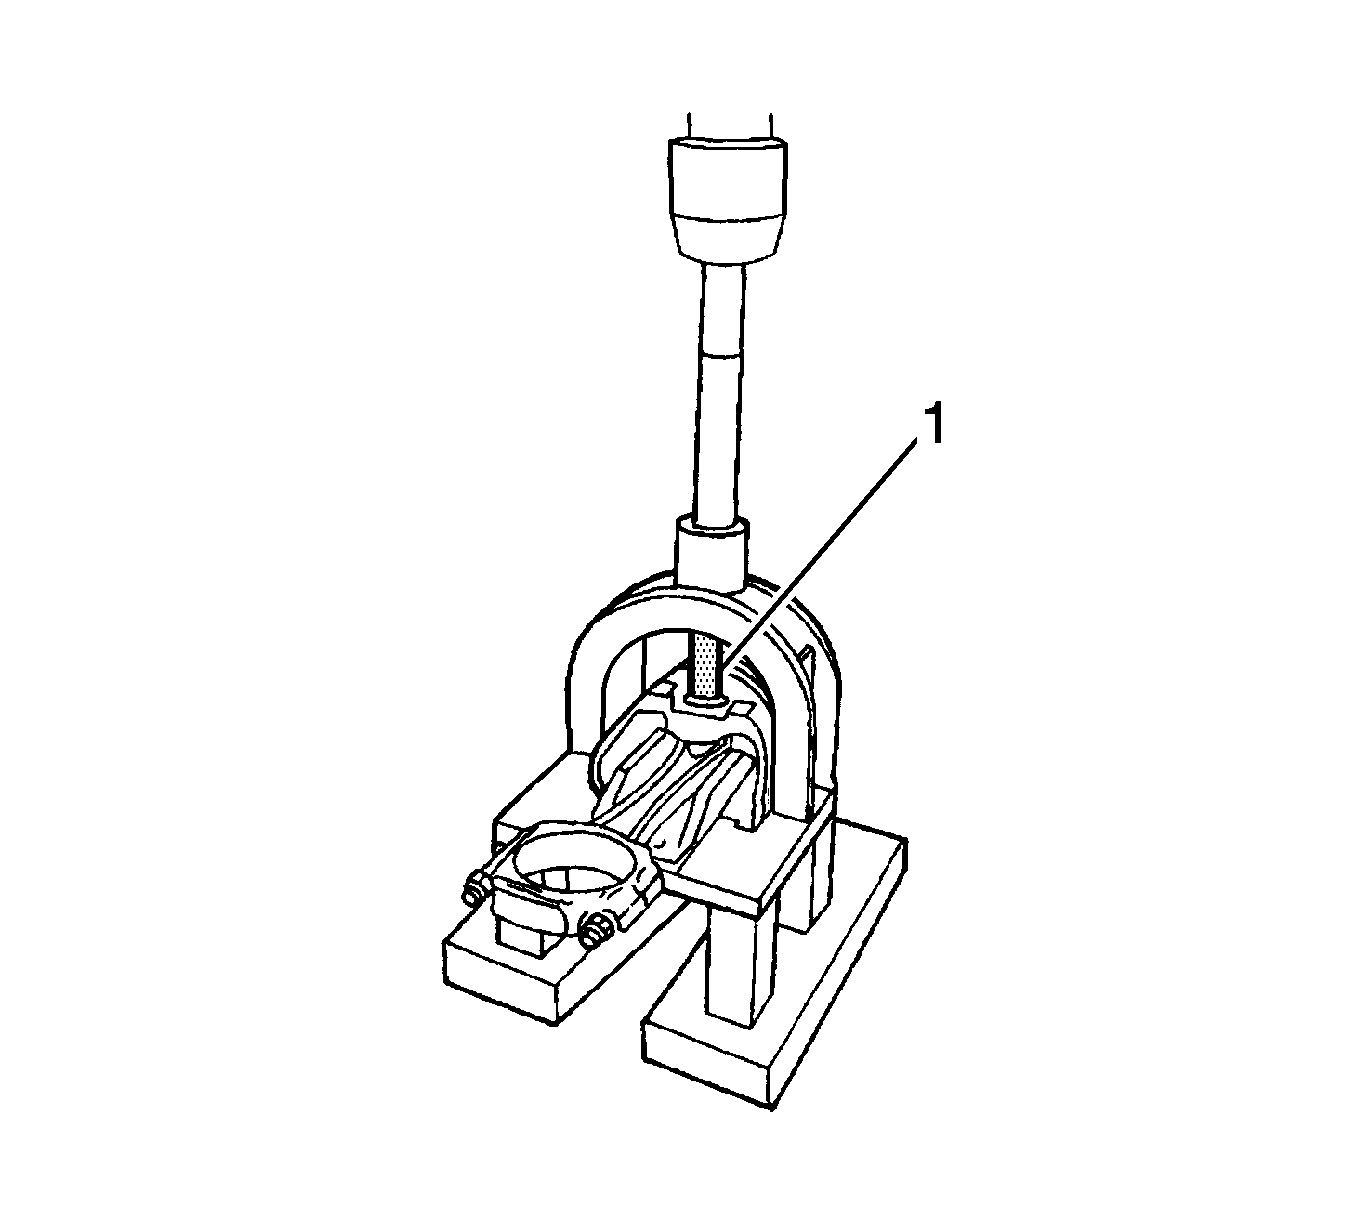
- Remove the piston pin from the piston and connecting rod assembly using the J 24086-B (1).
- Separate the piston from the connecting rod.
Caution: Handle the piston carefully. Worn piston rings are sharp and may cause bodily injury.
Installation Procedure
- Align the notch on the piston and connecting rod so that the proper sides will be facing the front of the engine.
- Install the piston pin guide through the piston and the connecting rod.
- Coat the piston pin with clean oil.
- Install the piston pin into the opposite side of the piston.
- Install the piston pin into the piston and connecting rod assembly using the J 24086-B (1).
- Select a set of new piston rings.
- Measure the piston ring gap using a feeler gage. Refer to Engine Mechanical Specifications .
- Increase the piston ring gap by carefully filing off excess material if the piston ring gap is below specifications.
- Measure the piston ring side clearance using a feeler gage. Refer to Engine Mechanical Specifications .
- If the piston ring is too thick, try another piston ring.
- If no piston ring can be found that fits to specifications, the piston ring may be ground to size with emery paper placed on a sheet of glass.
- Install a piston oil ring, the expander, then the second piston oil ring to the bottom ring groove of the piston.
- Install the second compression ring to the middle ring groove of the piston.
- Install the top compression ring to the top ring groove of the piston.
- Use a piston ring expander to install the piston rings. Do not expand the piston rings beyond the expansion necessary for installation.
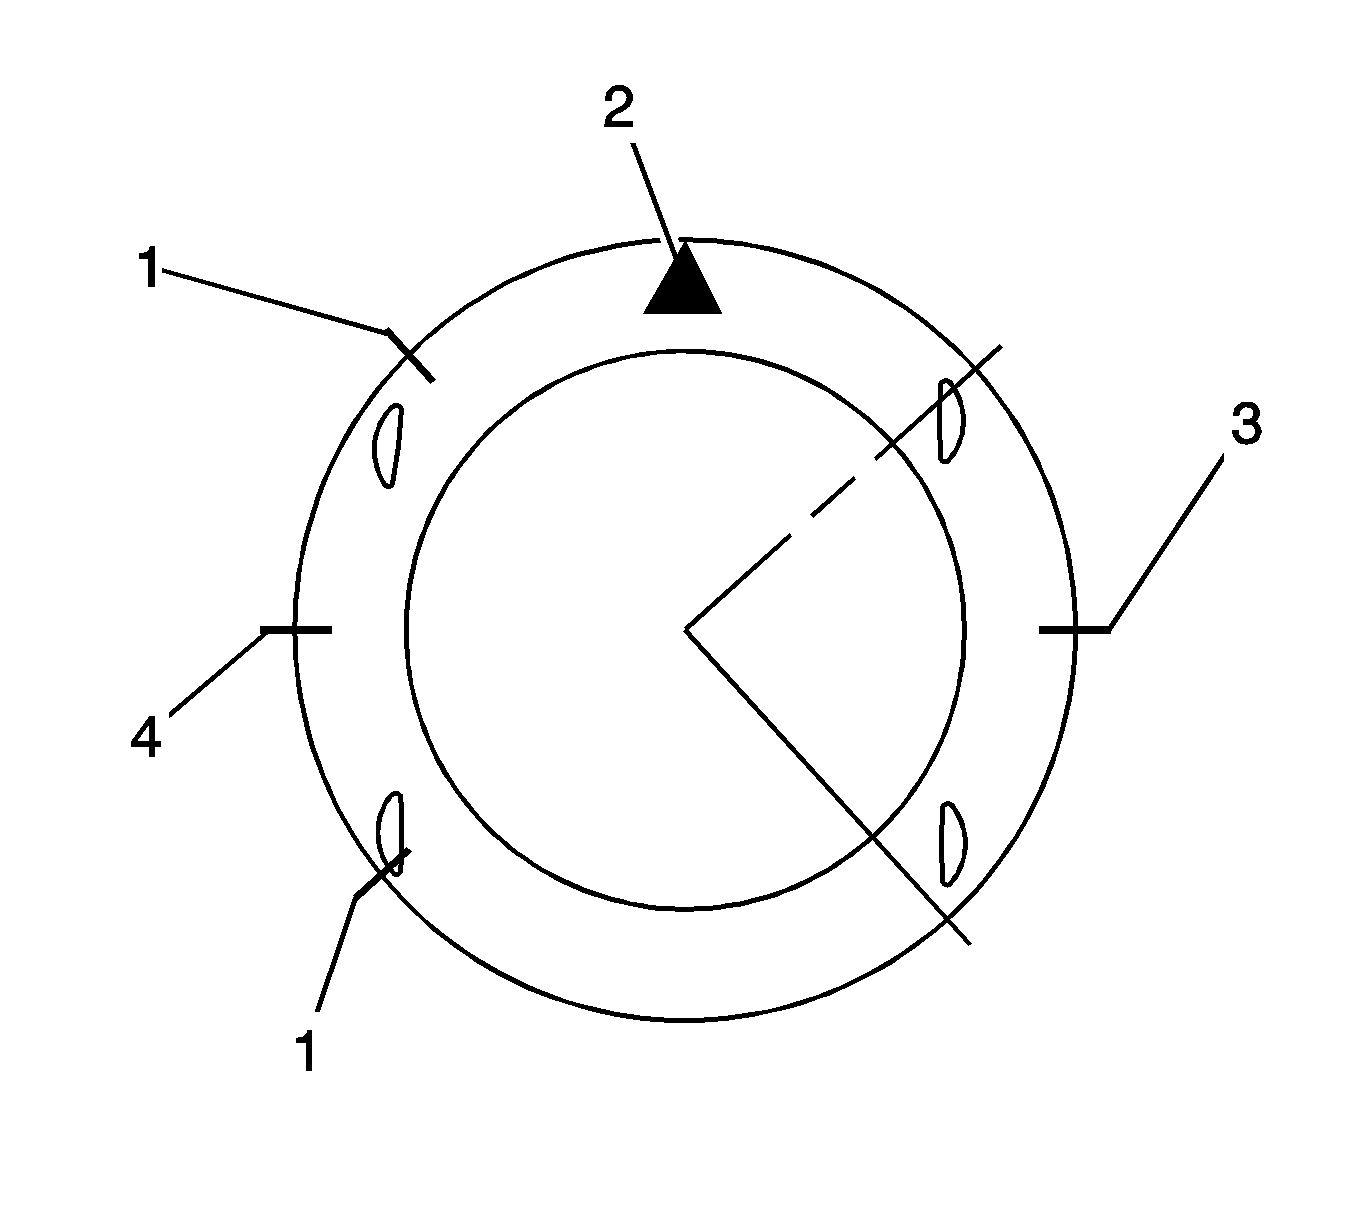
- Stagger the piston oil rings, the oil ring rail gaps (1), the second compression ring (4), and the top compression ring (3) in relation to the notch on the top of the piston (2).
- Lubricate the cylinder wall and the piston rings with clean engine oil.
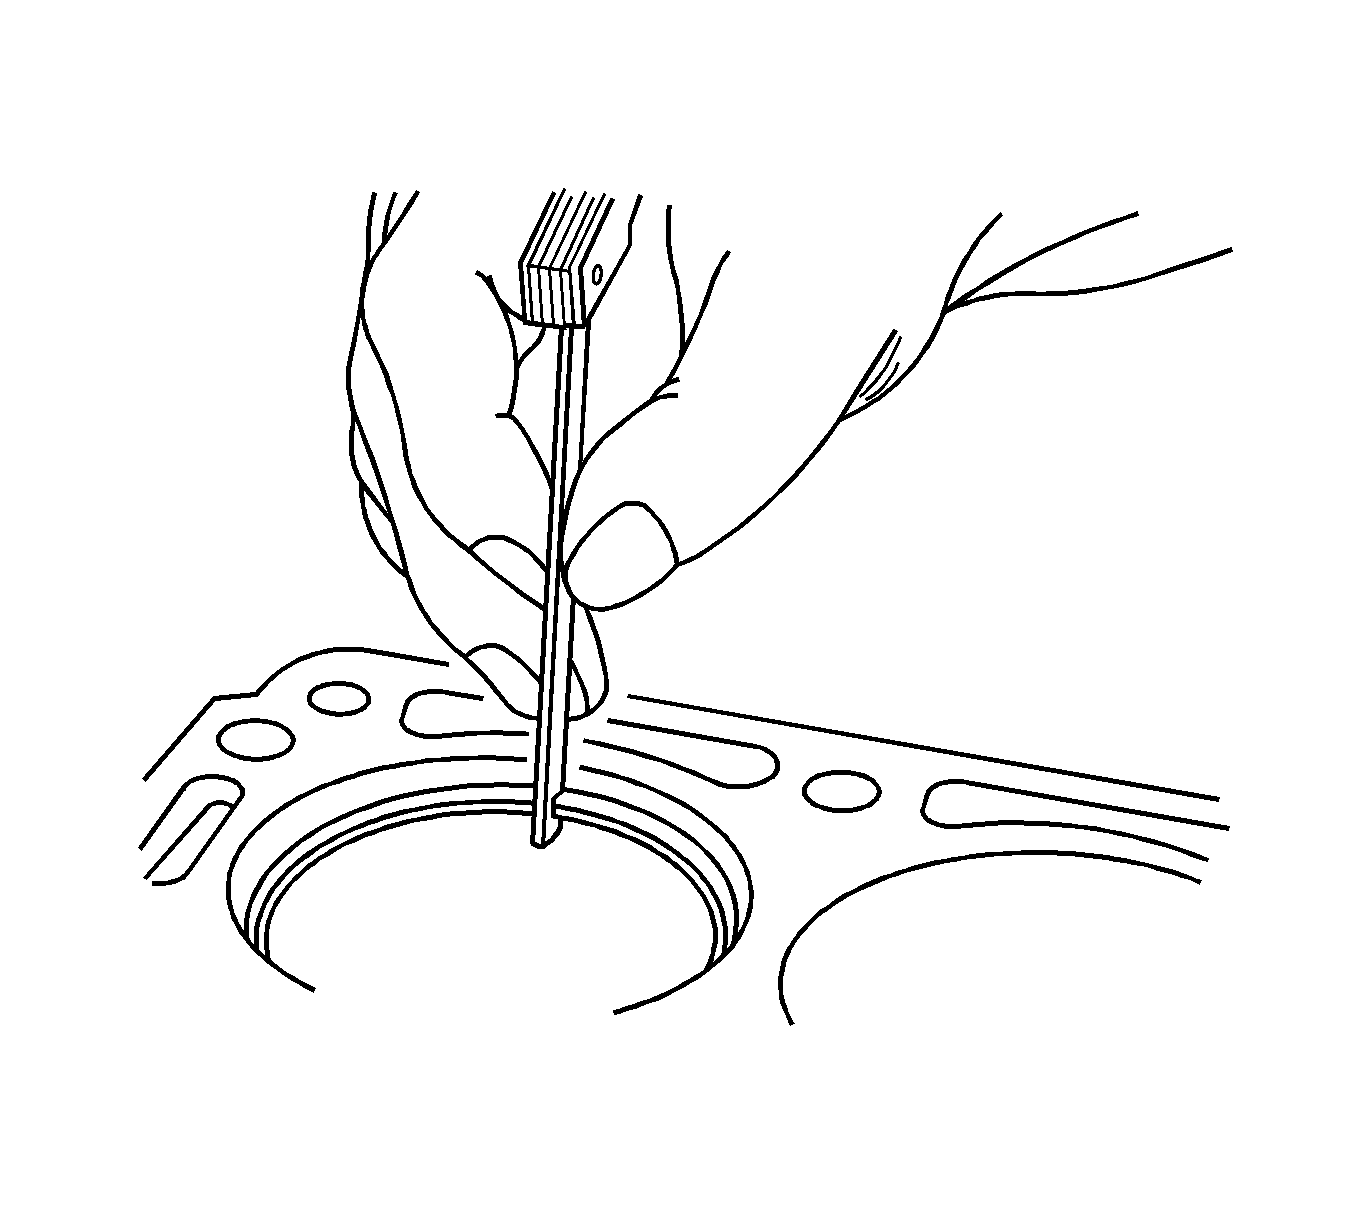
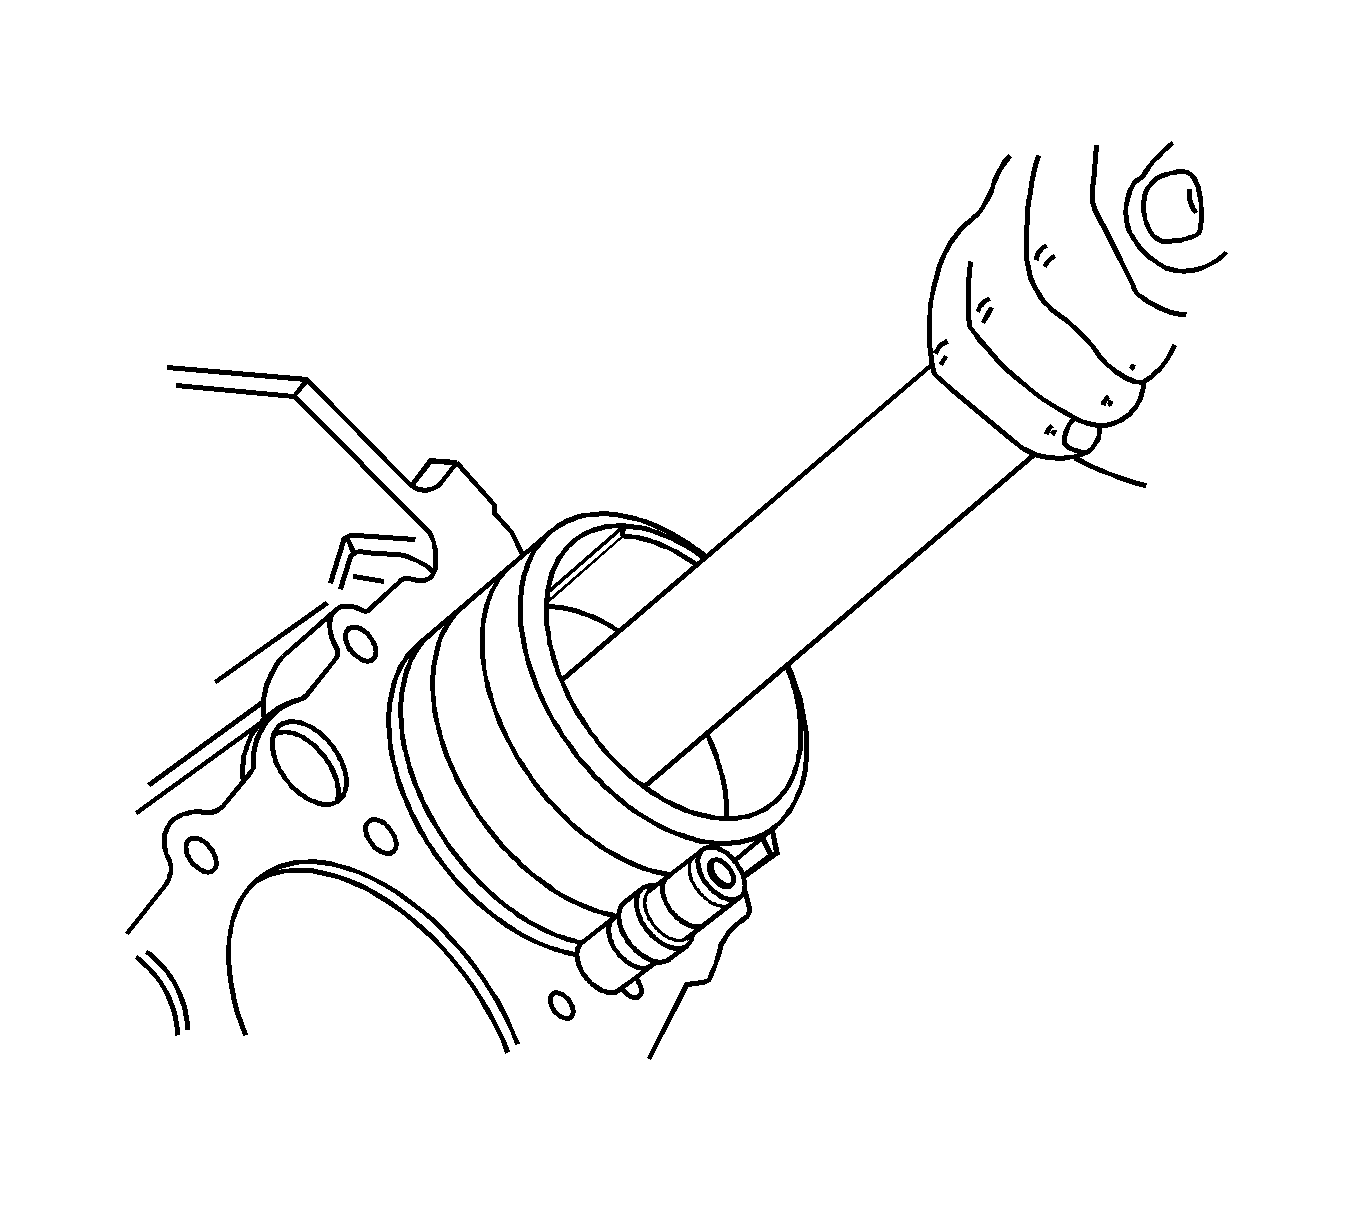
- Install the piston using J 8037 and a wood handle. Guide the lower connecting rod end to prevent damaging the crankshaft journal.
- Install the connecting rod cap and bearings. Refer to Crankshaft and Bearing Cleaning and Inspection .
- Install the connecting rod cap bolts.
- Install the crankshaft bearing bridge/oil pan scraper bolts.
- Install the oil suction pipe.
- Install the oil suction pipe bolts.
- Install the oil pan. Refer to Oil Pan Replacement .
- Install the cylinder head with the intake manifold and exhaust manifold attached. Refer to Cylinder Head Replacement .
Important: For ease of installation of the piston pin, the connecting rod should be heated to 280°C (536°F). Heat the upper connecting rod only. Use commercial thermocolor material to determine the correct temperature. When the thermocolor material changes from black to green, the temperature is correct for installation.

Notice: Refer to Fastener Notice in the Preface section.
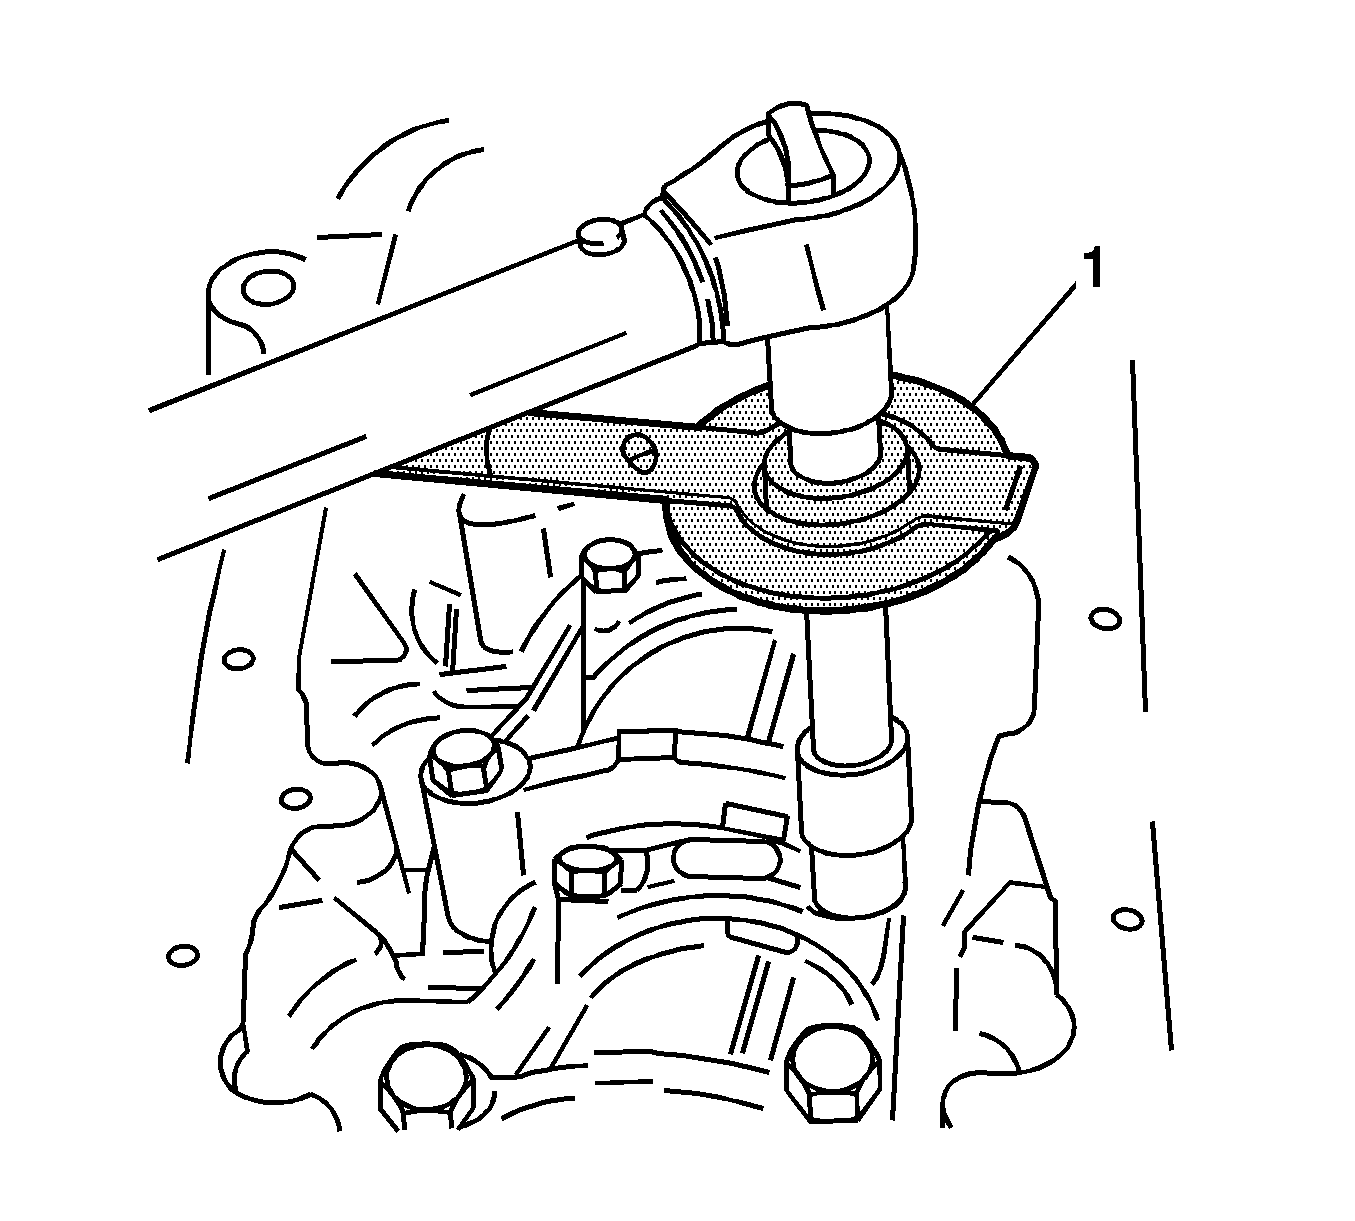
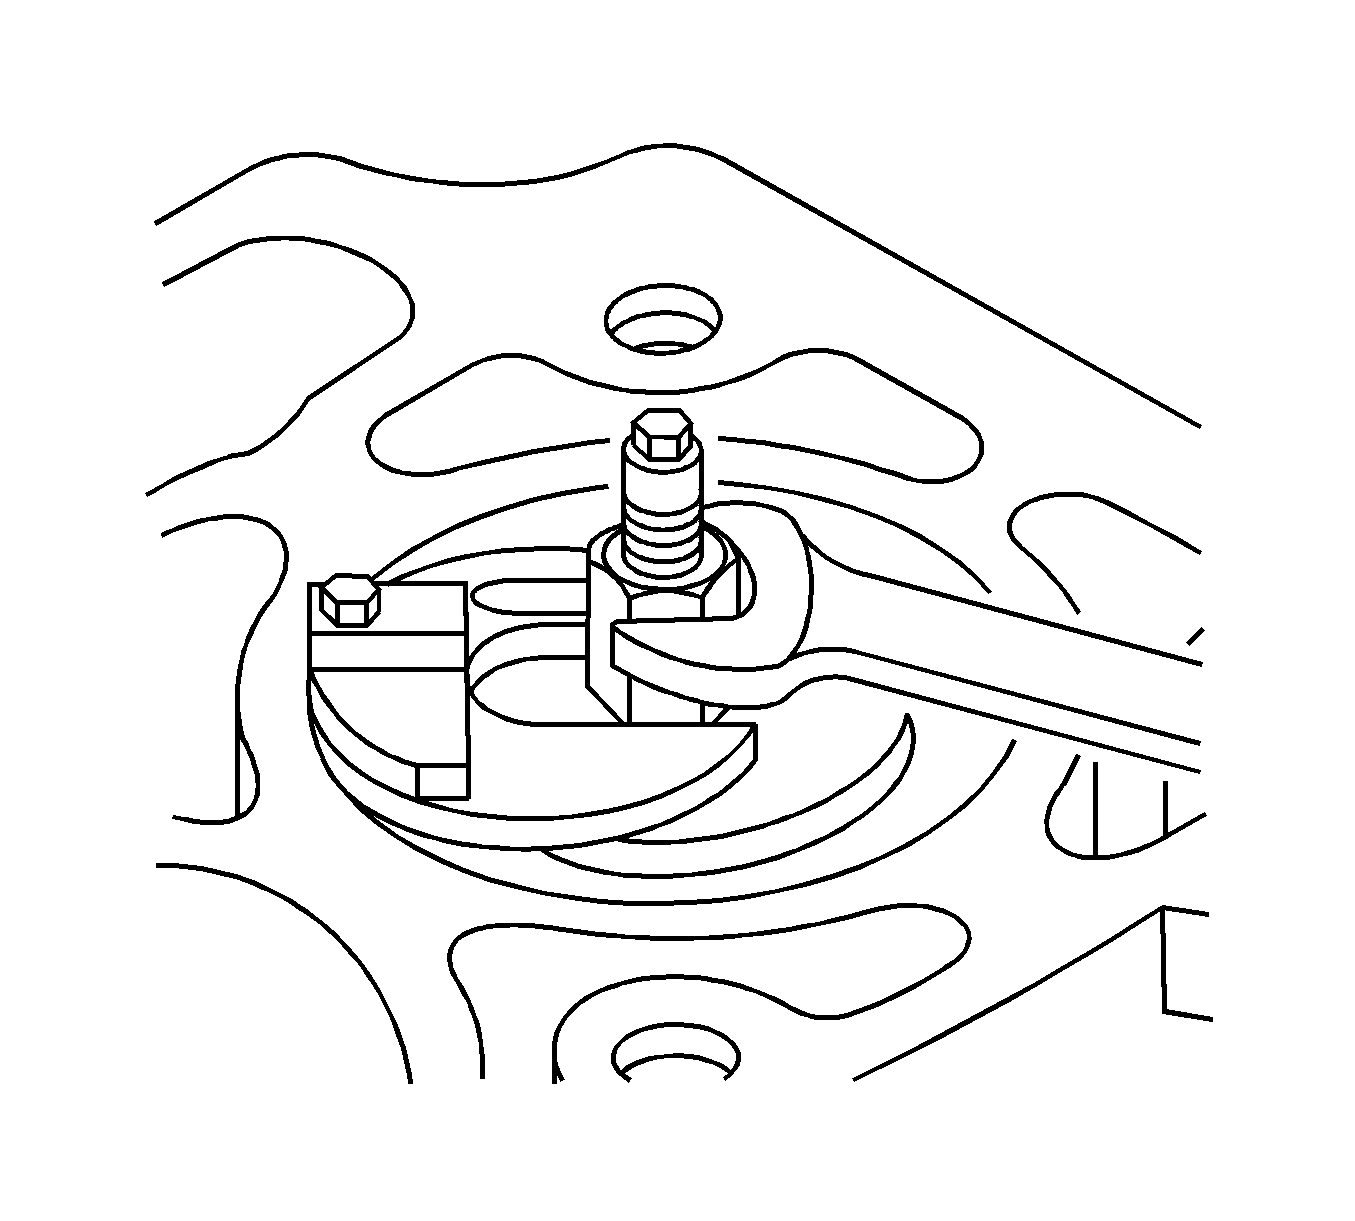
Tighten
Tighten the connecting rod bearing cap bolts to 35 N·m (26 lb ft). Using the
J 45059
or the
KM-470-B
(1), tighten the bolts one turn of 45 degrees plus one turn of 15 degrees.
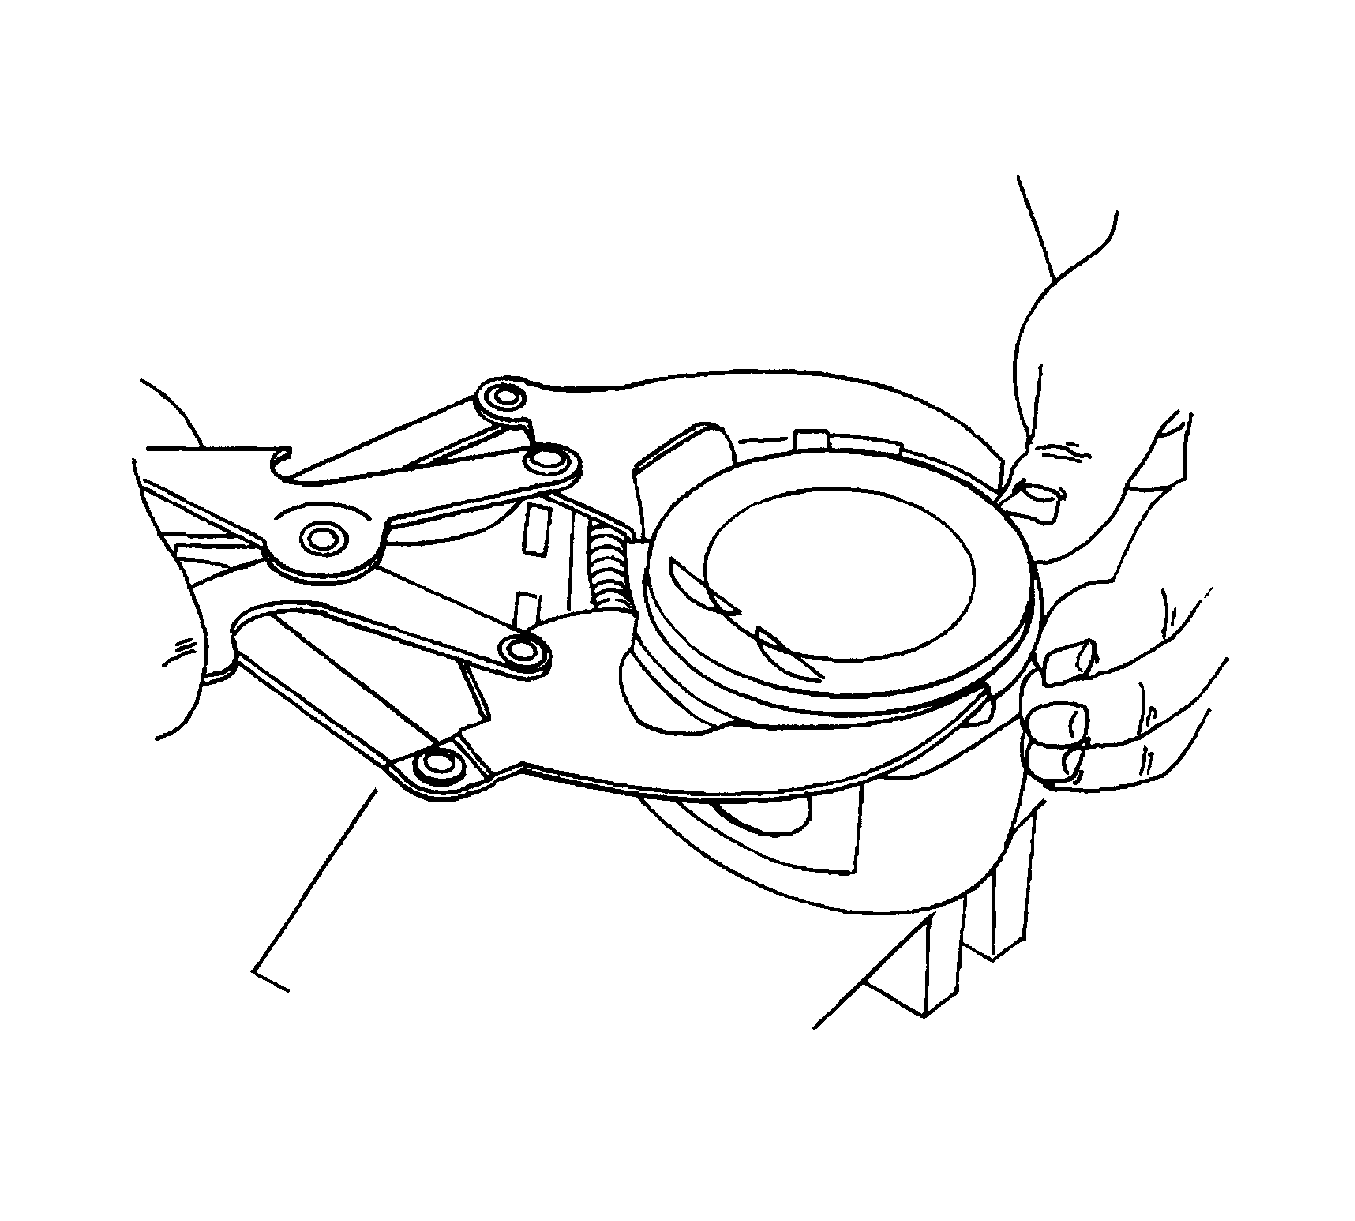
Tighten
Tighten the crankshaft bearing bridge/oil pan scraper bolts to 20 N·m (15 lb ft) plus 45 degrees using the
J 45059
or the
KM-470-B
(1).
Tighten
| • | Tighten the oil suction pipe bolts to 8 N·m (71 lb in). |
| • | Tighten the oil suction pipe bracket bolt to 6 N·m (53 lb in). |
