Tool Required
J 34853 Crankshaft Oil Seal Guide
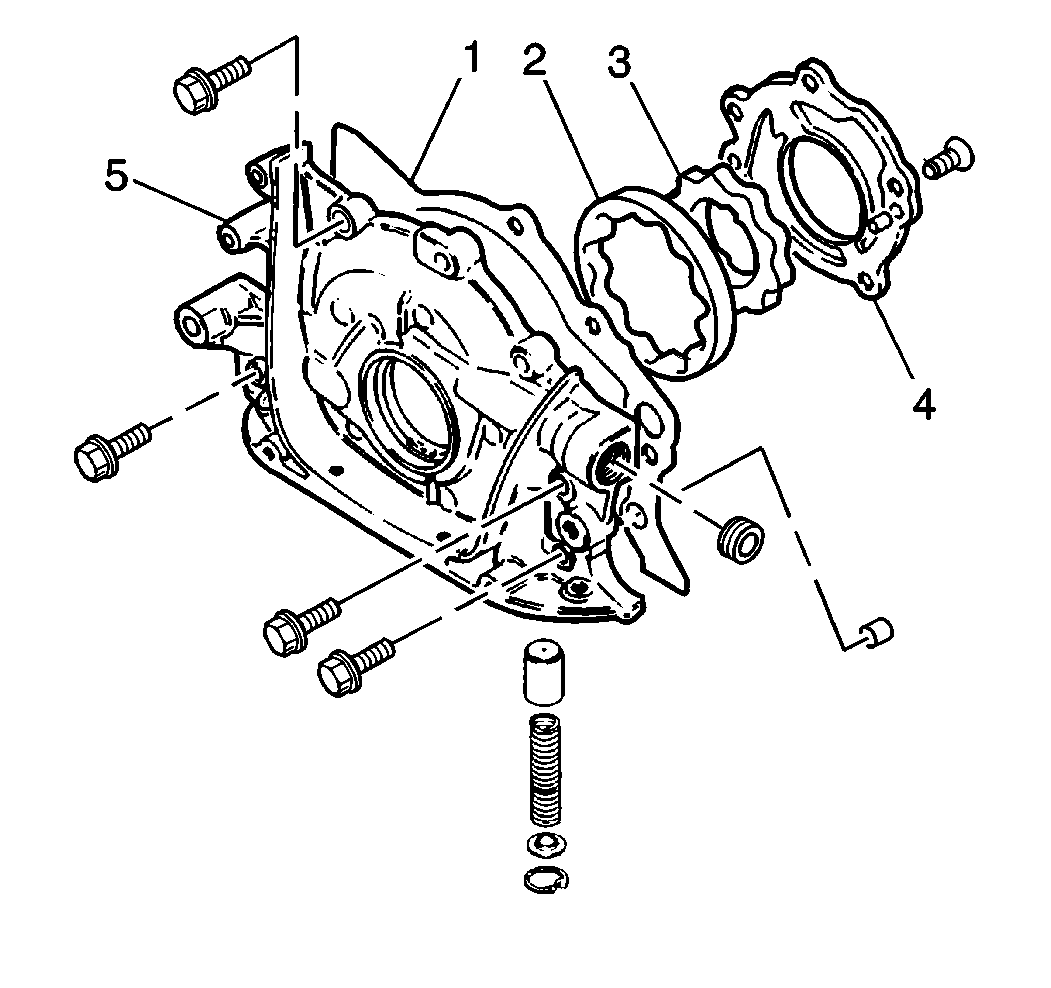
- Install the rotor plate pins into the oil pump body (5).
- Apply engine oil to a J 34853 .
- Fit the J 34853 .
- Install the oil pump to the cylinder block.
- Remove the J 34853 .
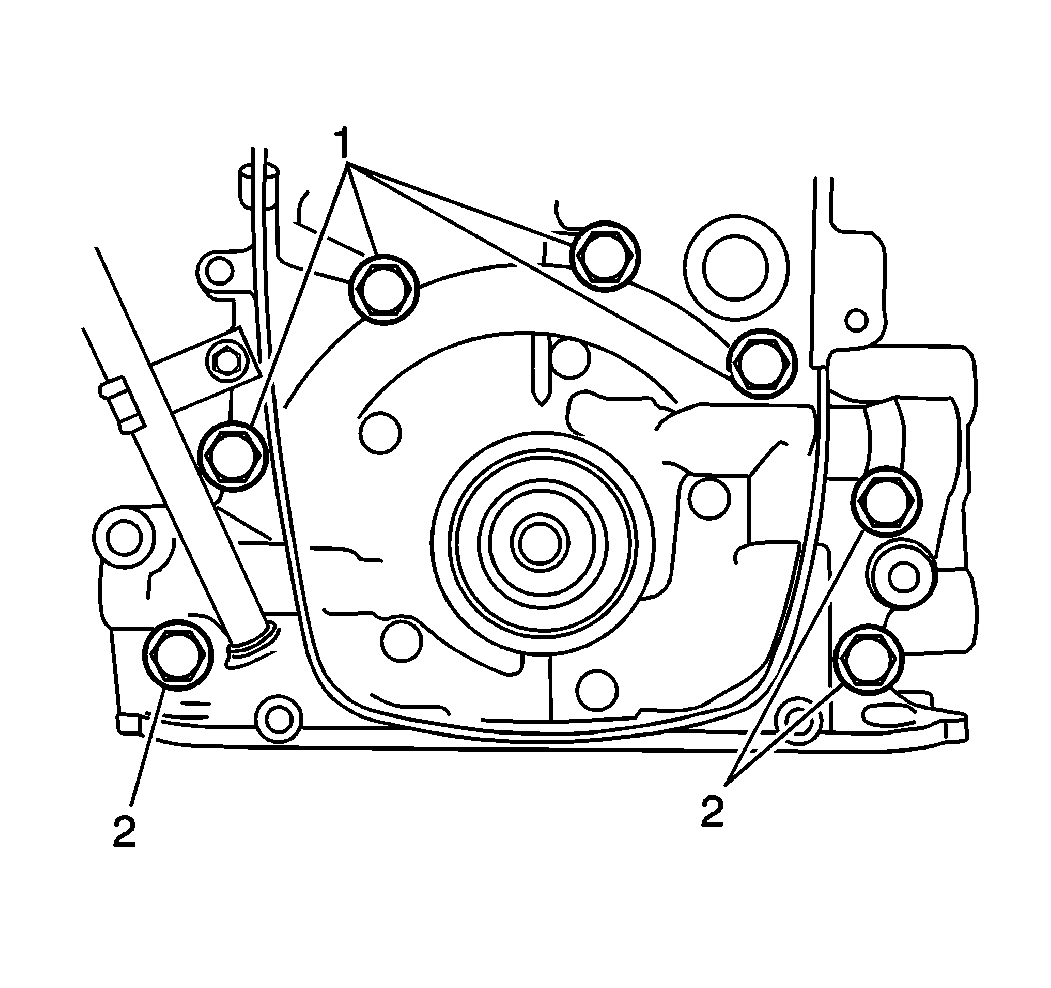
- Apply Locite® pipe sealant GM P/N 12346004 or the equivalent to the threads of the short mounting bolt (1) for the indicated oil pump.
- Install the oil pump mounting bolts (2) to the oil pump assembly.
- Use a knife in order to cut off the edge of the oil pump gasket if the edge of the gasket bulges out.
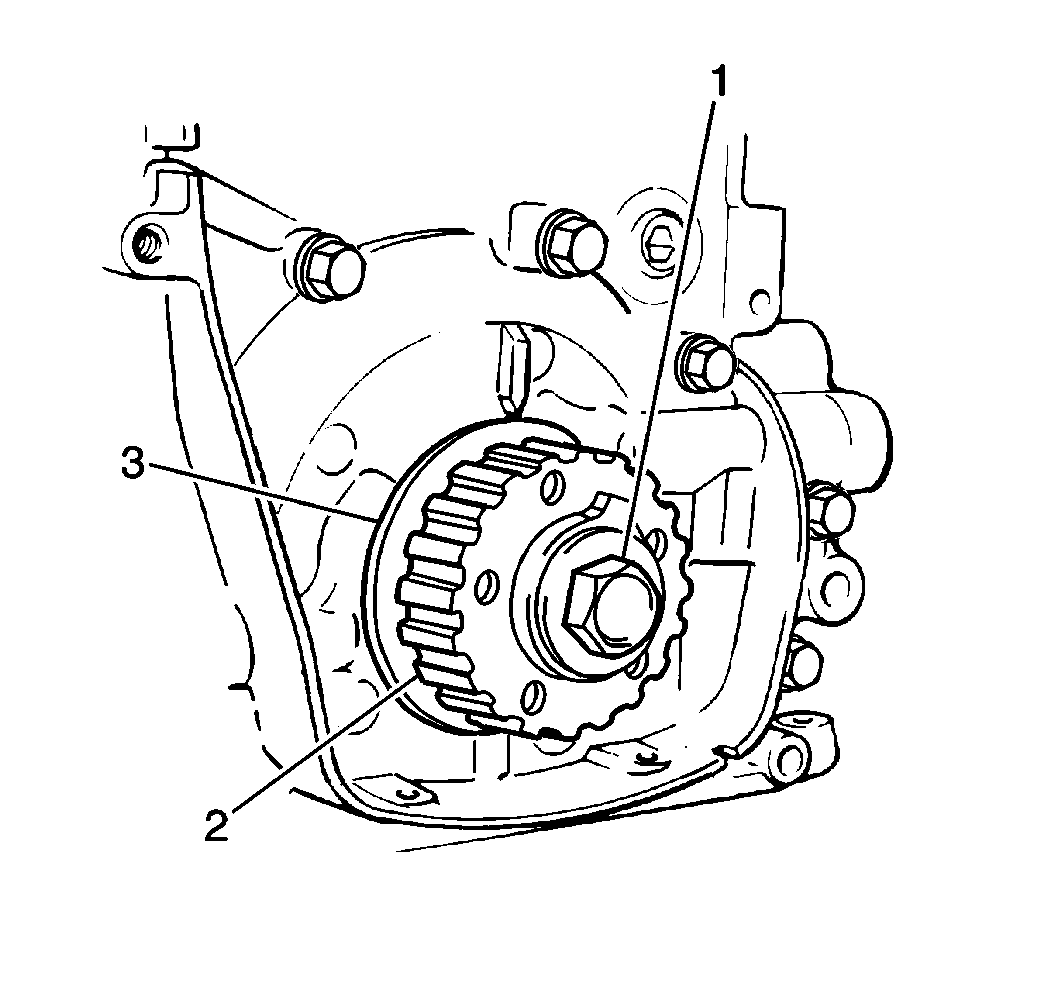
- Install the crankshaft timing gear (2).
- Lock the crankshaft with a slotted screwdriver.
- Secure the crankshaft timing gear (2) with the crankshaft timing gear bolt (1).
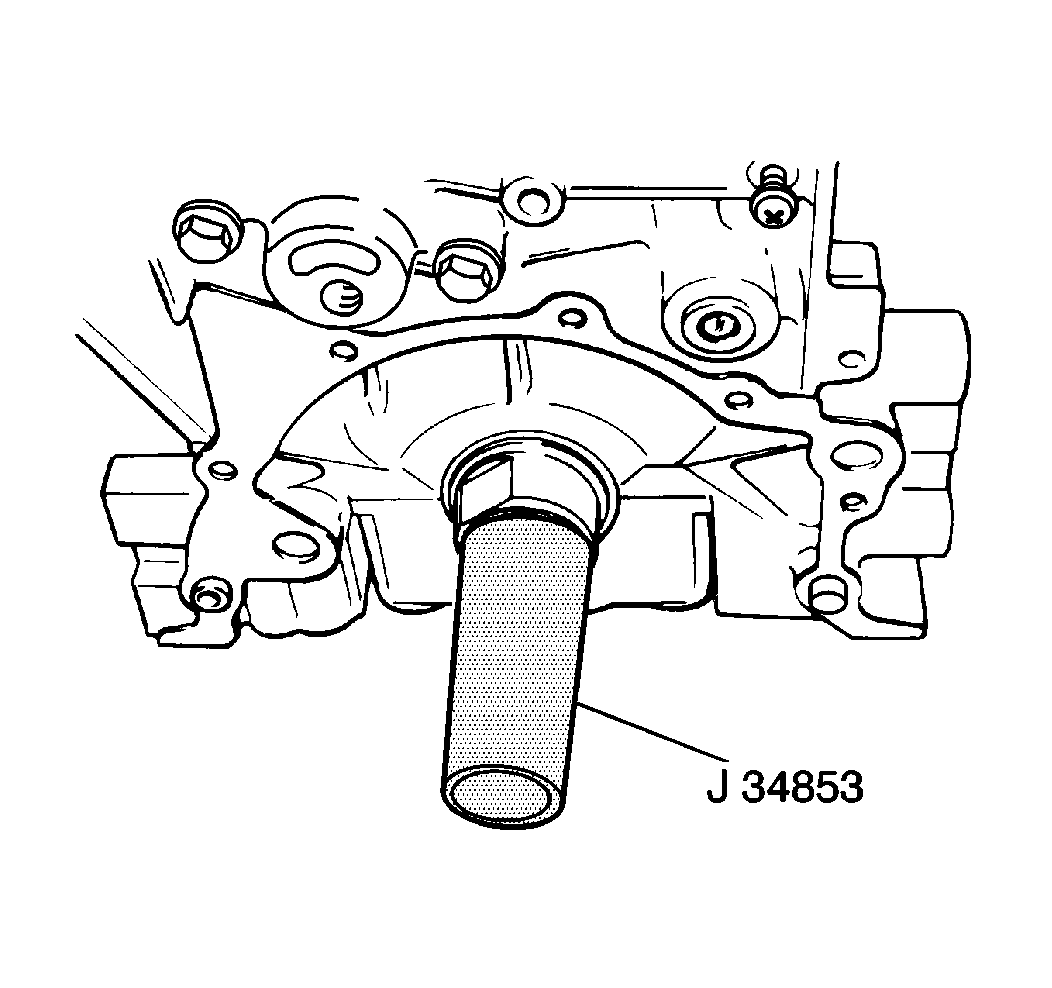
Important: Ensure that the oil seal lip is not turned out during oil pump installation.
Use the J 34853 .
Notice: Use the correct fastener in the correct location. Replacement fasteners must be the correct part number for that application. Fasteners requiring replacement or fasteners requiring the use of thread locking compound or sealant are identified in the service procedure. Do not use paints, lubricants, or corrosion inhibitors on fasteners or fastener joint surfaces unless specified. These coatings affect fastener torque and joint clamping force and may damage the fastener. Use the correct tightening sequence and specifications when installing fasteners in order to avoid damage to parts and systems.
Tighten
Tighten the oil pump mounting bolts to 11 N·m (97 lb in).

Verify that the edge is smooth and flush with the end faces of the pump case and with the cylinder block.
Tighten
Tighten the crankshaft timing gear bolt to 130 N·m (94 lb ft).
