1
| Front Side Door Center Molding Assembly
Procedure
- Use a
J 25070
or equivalent to remove the bodyside molding.
- Clean all adhesive from the door side, using a 50/50 mixture by volume of isopropyl alcohol and clean drinkable water, wipe surface dry with a clean lint-free towel prior to installing new bodyside door moldings.
- When removing protective liners from adhesive tape, be careful not to touch tape with hands and do not allow tape to come in contact with dirt or any foreign matter prior to adhesion.
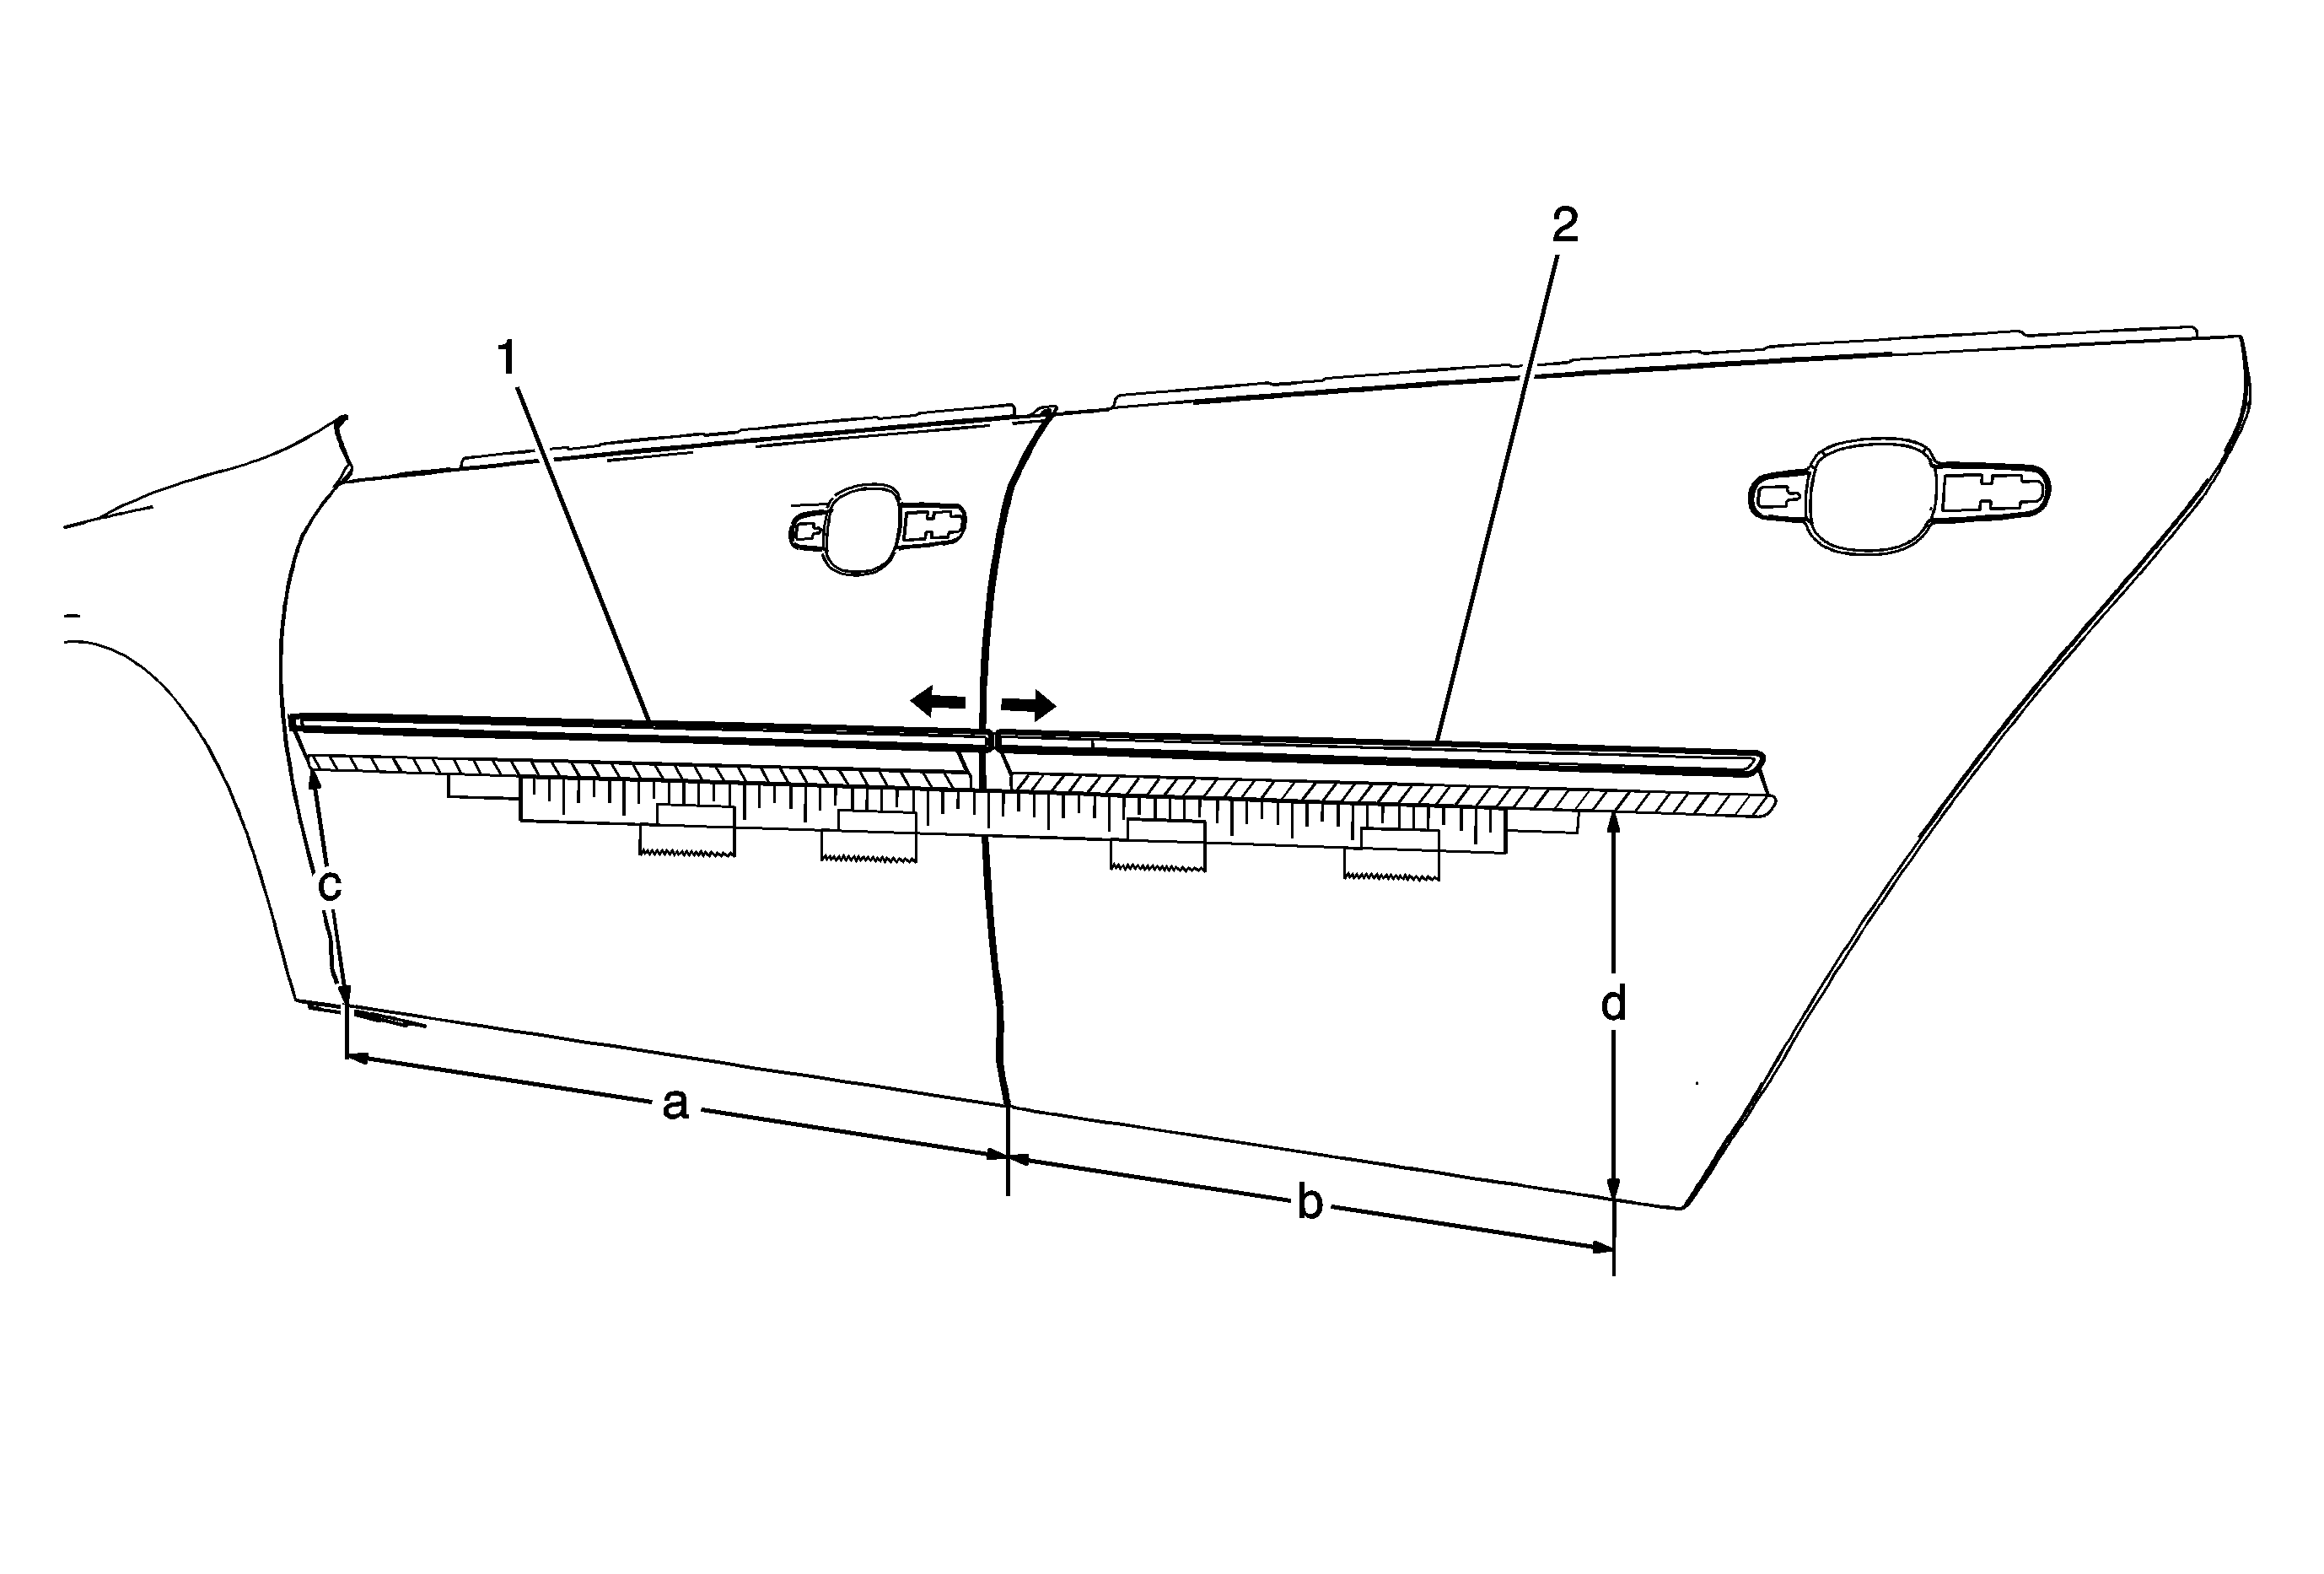
- From the rear edge of the front door, measure 1000 mm (a) forward and from the front edge of the rear door, measure 700 mm (b) rearward.
- From the bottom edge of the front door measure vertically 308 mm (c), from the bottom edge of the rear door measure vertically 330 mm (d).
- At the two upper measured points on the front and rear door, apply automotive type masking tape horizontally across both doors.
- Using a yard stick as a straight edge, tape the yard stick to the door at four locations using the top edge of the masking tape as a guide for the yard stick.
- The yard stick is now the edge used for aligning the bottom edge of the molding across both door panels.
- Using a pair of diagonal cutters, cut the alignment pins from the bodyside molding below the surface of the adhesive tape.
- For the front side door molding, peel approximately 20 mm of the protective tape liner from the rearward edge of the adhesive tape.
- Place the molding 2 mm forward from the rear edge of the front door.
- Peel the tape liner and apply the bodyside molding along the topside of the yard stick.
- Using a roller type tool, apply even medium pressure along the molding from rear to front to ensure complete adhesion to the door is made.
|
2
| Rear Side Door Center Molding Assembly
Procedure
- Use a
J 25070
or equivalent to remove the bodyside molding.
- Clean all adhesive from the door side, using a 50/50 mixture by volume of isopropyl alcohol and clean drinkable water, wipe surface dry with a clean lint-free towel prior to installing new bodyside door moldings.
- When removing protective liners from adhesive tape, be careful not to touch tape with hands and do not allow tape to come in contact with dirt or any foreign matter prior to adhesion.
- Using a pair of diagonal cutters, cut the alignment pins from the bodyside molding below the surface of the adhesive tape.
- For the rear side door molding, peel approximately 20 mm of the protective tape liner from the front edge of the adhesive tape.
- Place the molding 4 mm rearward from the front edge of the rear door.
- Peel the tape liner and apply the bodyside molding along the topside of the yard stick.
- Using a roller type tool, apply even medium pressure along the molding from front to rear to ensure complete adhesion to the door is made.
- Remove the yard stick and masking tape from both doors.
- Clean any adhesive marks using a clean lint-free towel along with a 50/50 mixture by volume of isopropyl alcohol and clean drinkable water.
|
