For 1990-2009 cars only
Removal Procedure
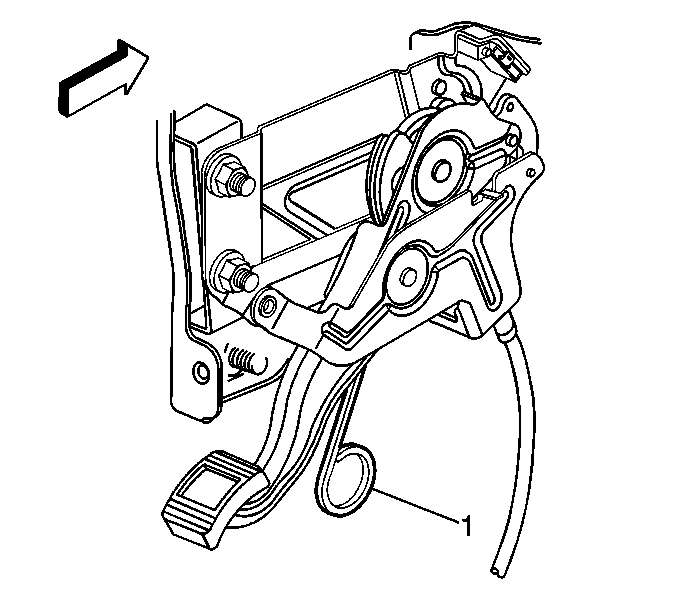
The automatic adjustment park brake pedal assembly and the front park brake cable are serviced as a unit. The front park brake cable has no threads and is not adjustable.
- Remove left side instrument panel insulator panel. Refer to Instrument Panel Insulator Replacement - Left Side.
- Remove the left front carpet retainer. Refer to Front Side Door Opening Floor Carpet Retainer Replacement.
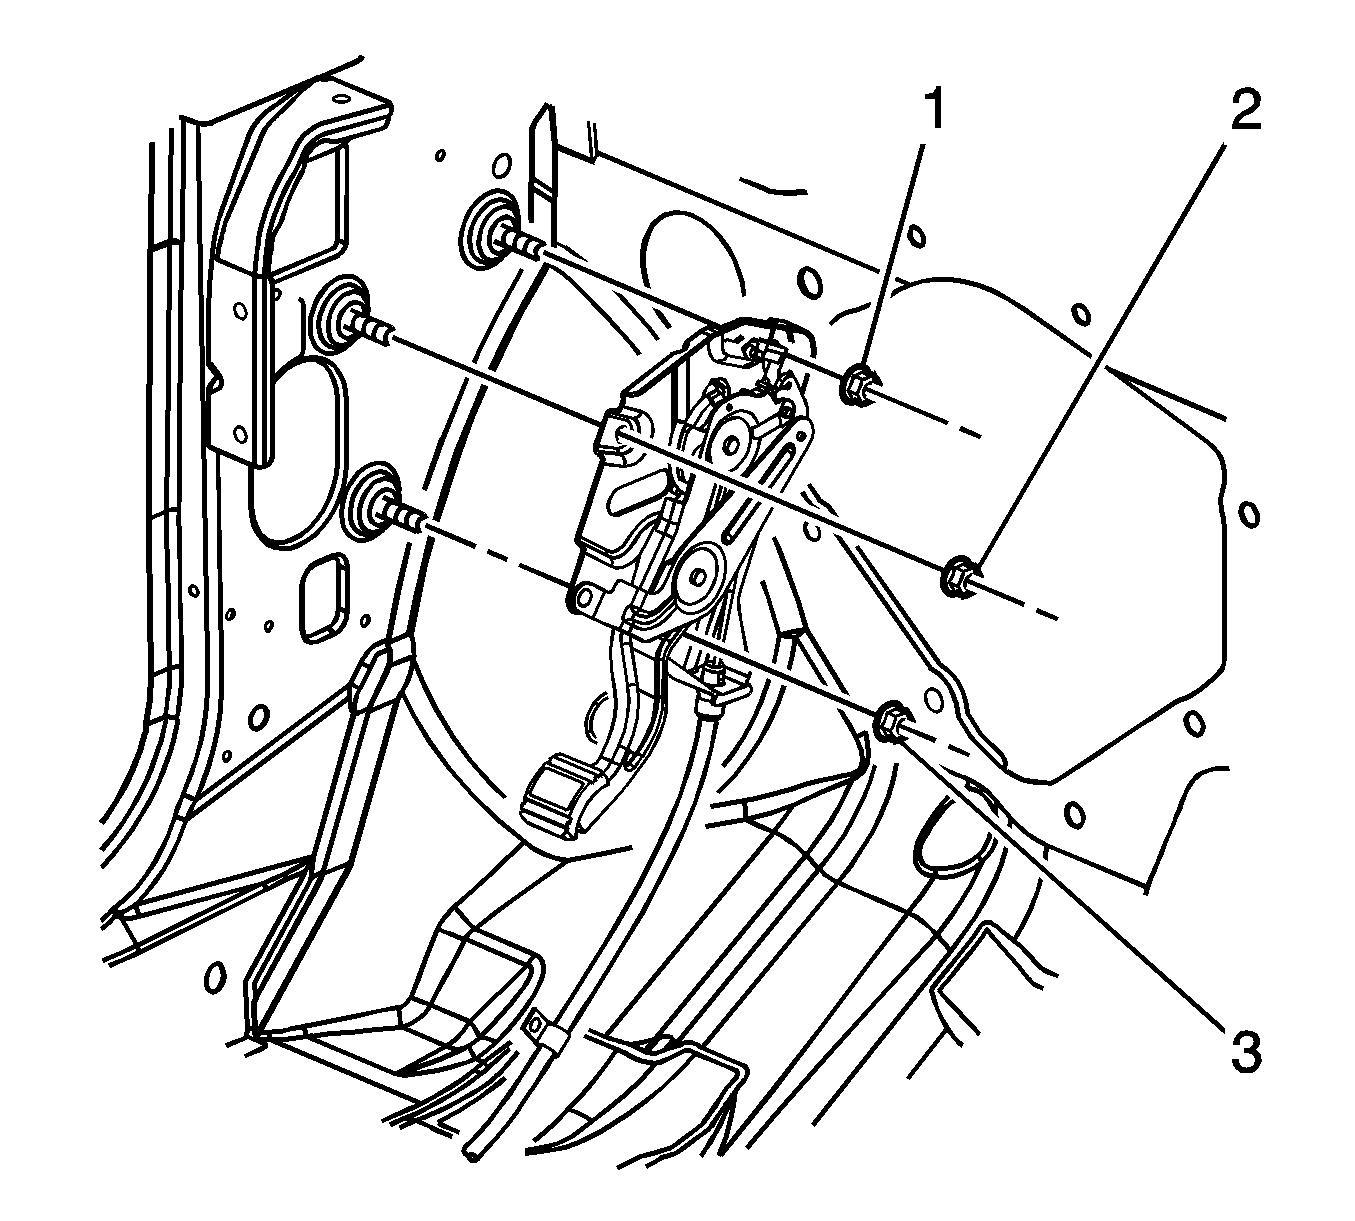
- Remove the 3 park brake pedal assembly nuts (1, 2, 3).
- Pull the carpet back to expose the front park brake cable.
- Disconnect the electrical connector from the park brake warning lamp switch.
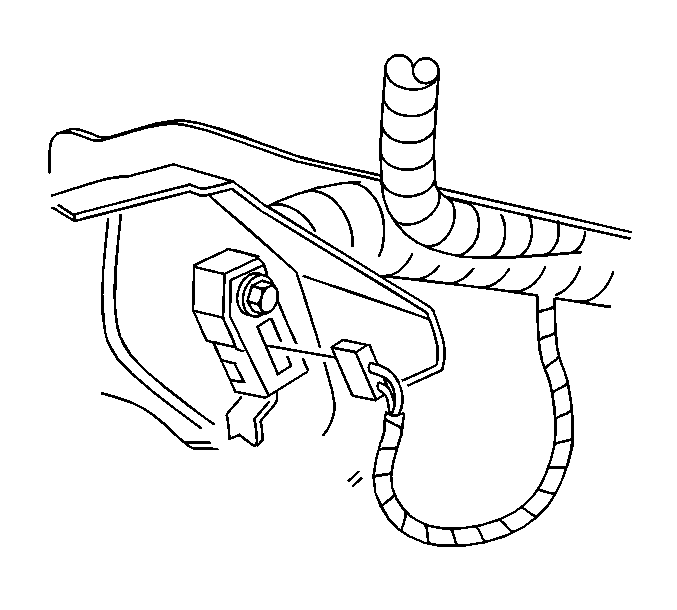
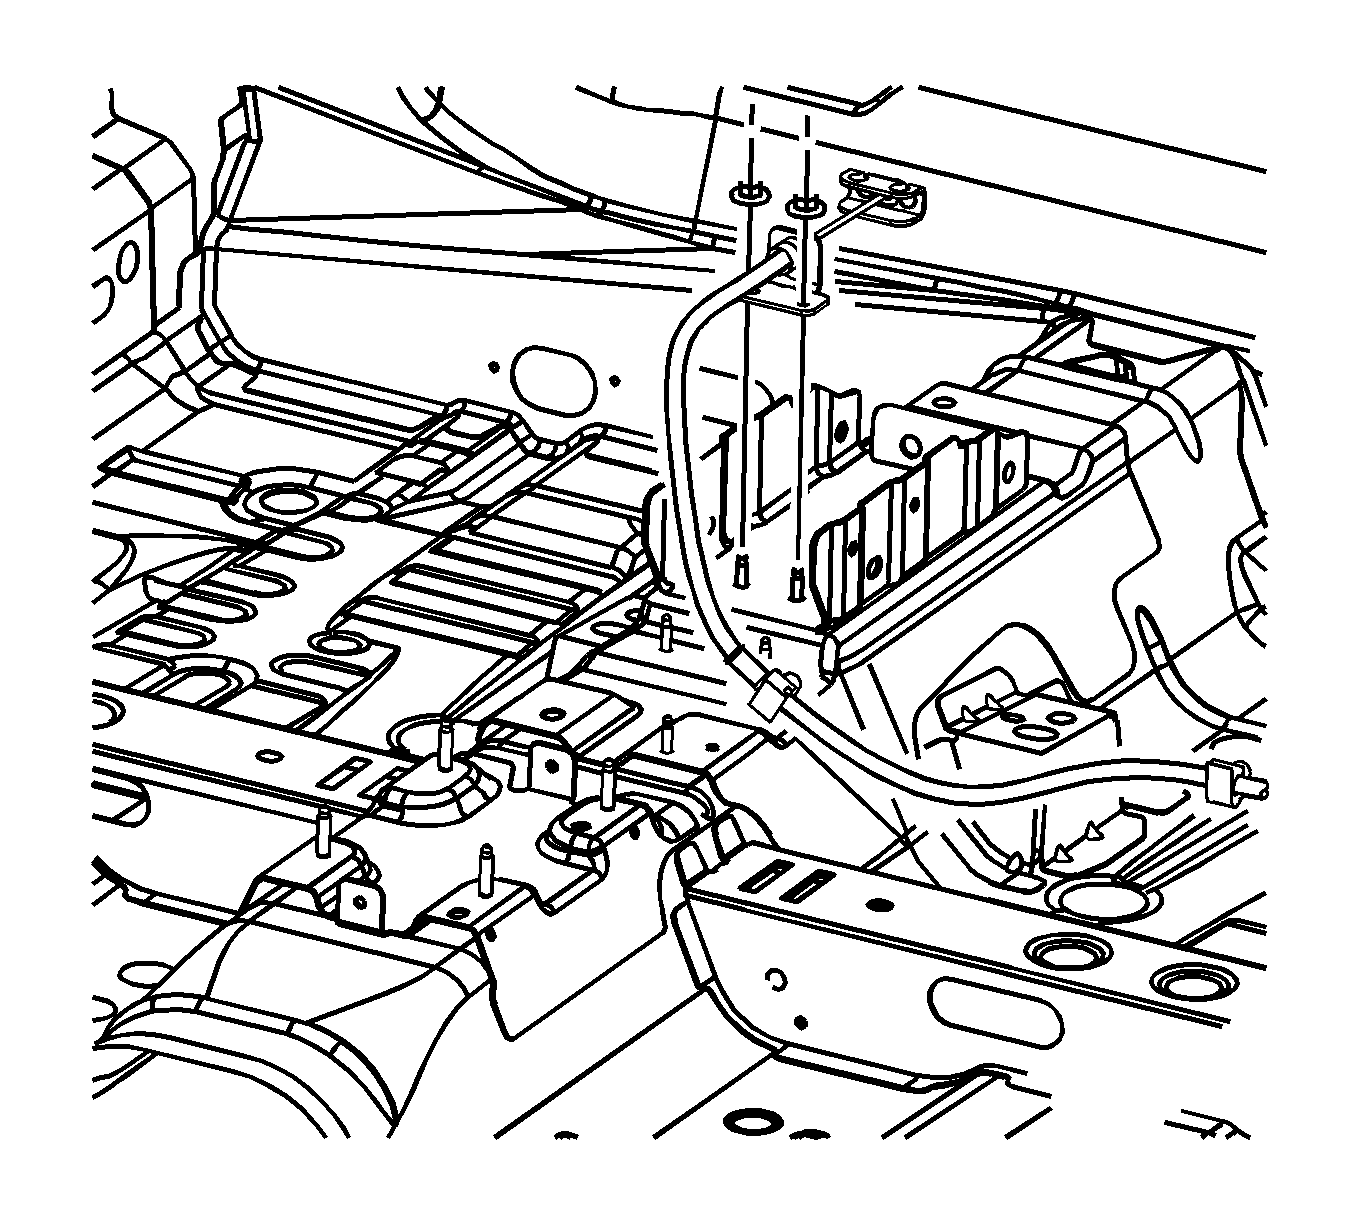
- Remove the front cable retaining screw.
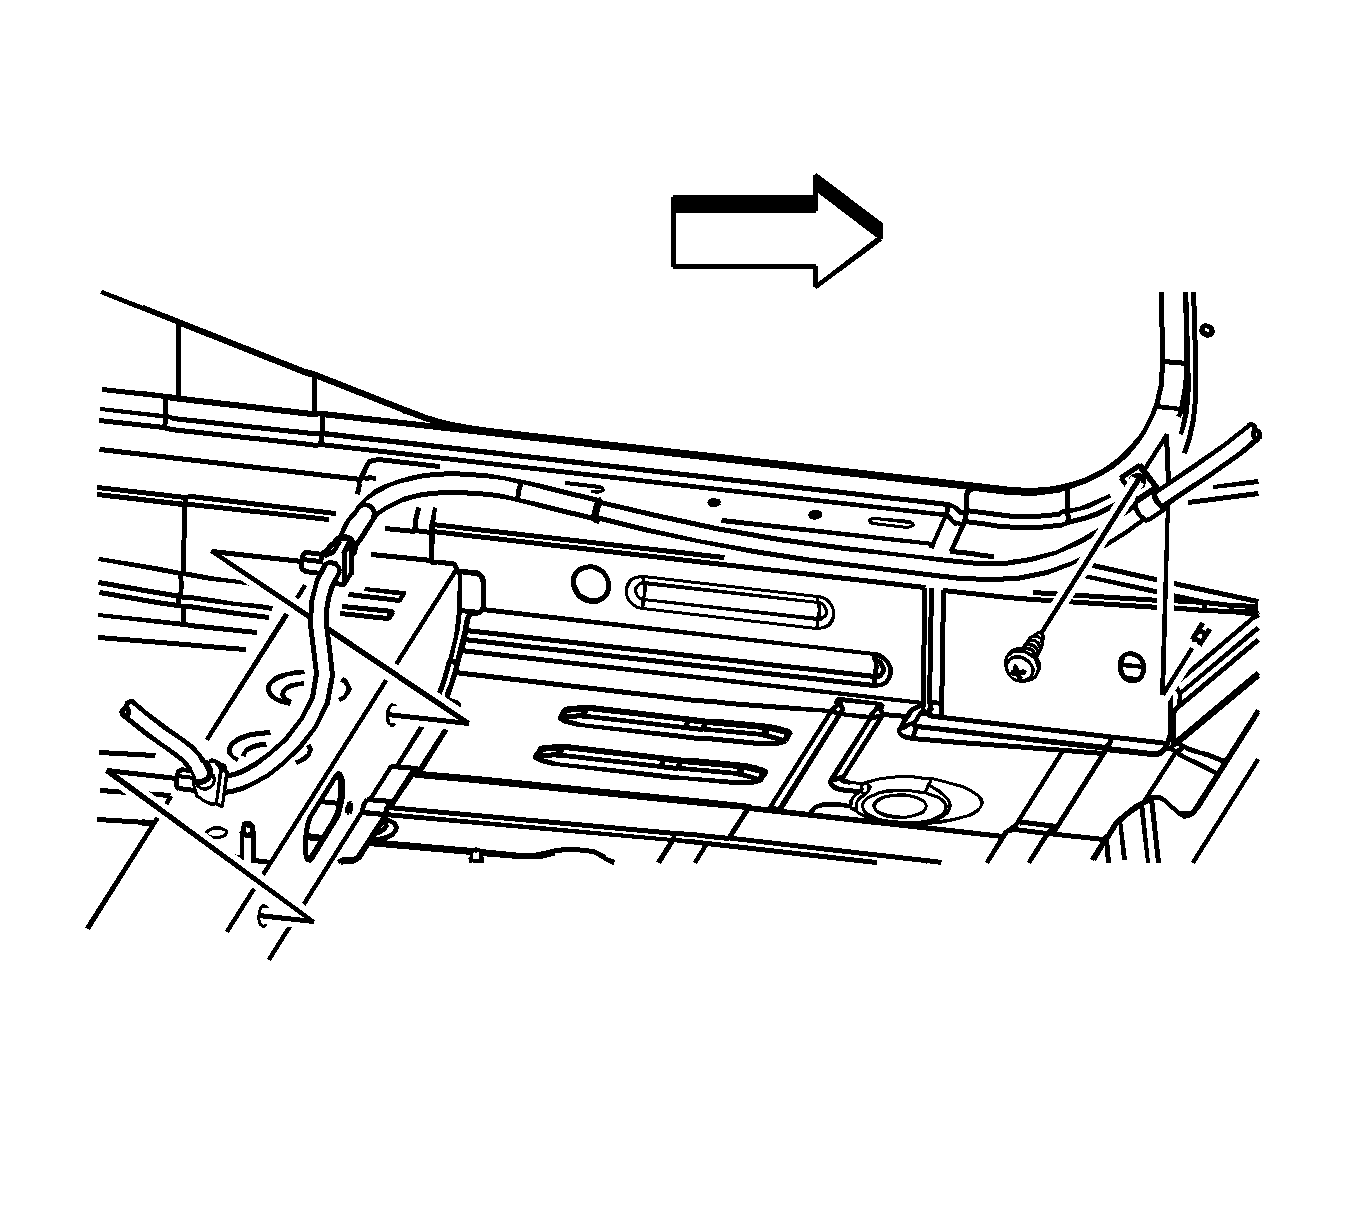
- Remove the 2 front park brake cable plastic retainers from the body.
- Remove the front floor console. Refer to Front Floor Console Replacement.
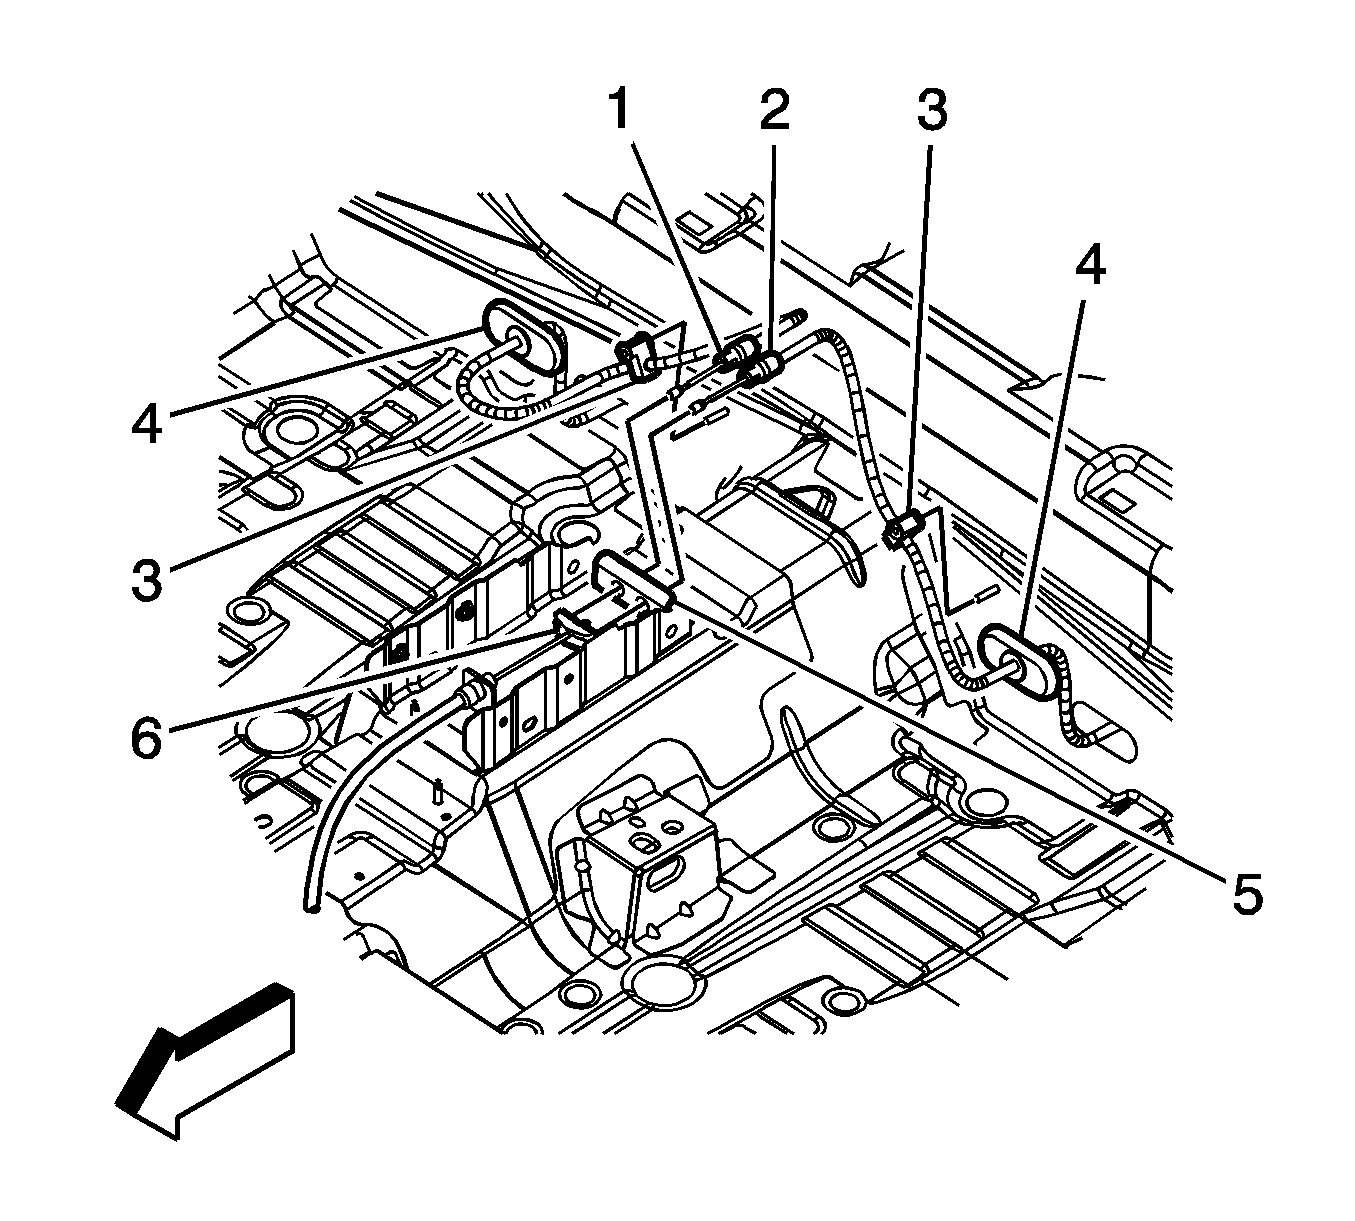
- Remove the right rear park brake cable (1) from the crush bracket (5).
- Remove the left rear park brake cable (2) from the crush bracket (5).
- Remove the 2 nuts from the front brake cable mounting bracket.
- Remove the park brake pedal assembly from the vehicle.
Installation Procedure
- Install the park brake pedal assembly to the vehicle.
- Install the 2 nuts to the front park brake cable mounting bracket and tighten to 10 N·m (89 lb in).
- Install the left rear park brake cable (2) to the crush bracket (5).
- Install the right rear park brake cable (1) to the crush bracket (5).
- Install the front floor console. Refer to Front Floor Console Replacement.
- Install the 2 front cable plastic retainers to the body.
- Install the front cable retainer screw and tighten to 2 N·m (18 lb in).
- Connect the electrical connector to the park brake warning lamp switch.
- Position the carpet back into place.
- Install the 3 park brake pedal assembly nuts (1, 2, 3) and tighten to 25 N·m (18 lb ft). Tighten in sequence as shown.
- Pull down to remove the cable tension set pin (1).
- Apply the park brake pedal 4 full cycles to complete the tension set.
- Install the left front carpet retainer. Refer to Front Side Door Opening Floor Carpet Retainer Replacement.
- Install left side instrument panel insulator panel. Refer to Instrument Panel Insulator Replacement - Left Side.
Caution: Refer to Fastener Caution in the Preface section.