Cleaning Procedure
- Clean the following components in solvent:
| • | Connecting rod bearings |
| • | Crankshaft oil passages |
| • | Crankshaft threaded holes |
Warning: Refer to Safety Glasses Warning in the Preface section.
- Dry the following components with compressed air:
| • | Connecting rod bearings |
| • | Crankshaft oil passages |
| • | Crankshaft threaded holes |
Visual Inspection
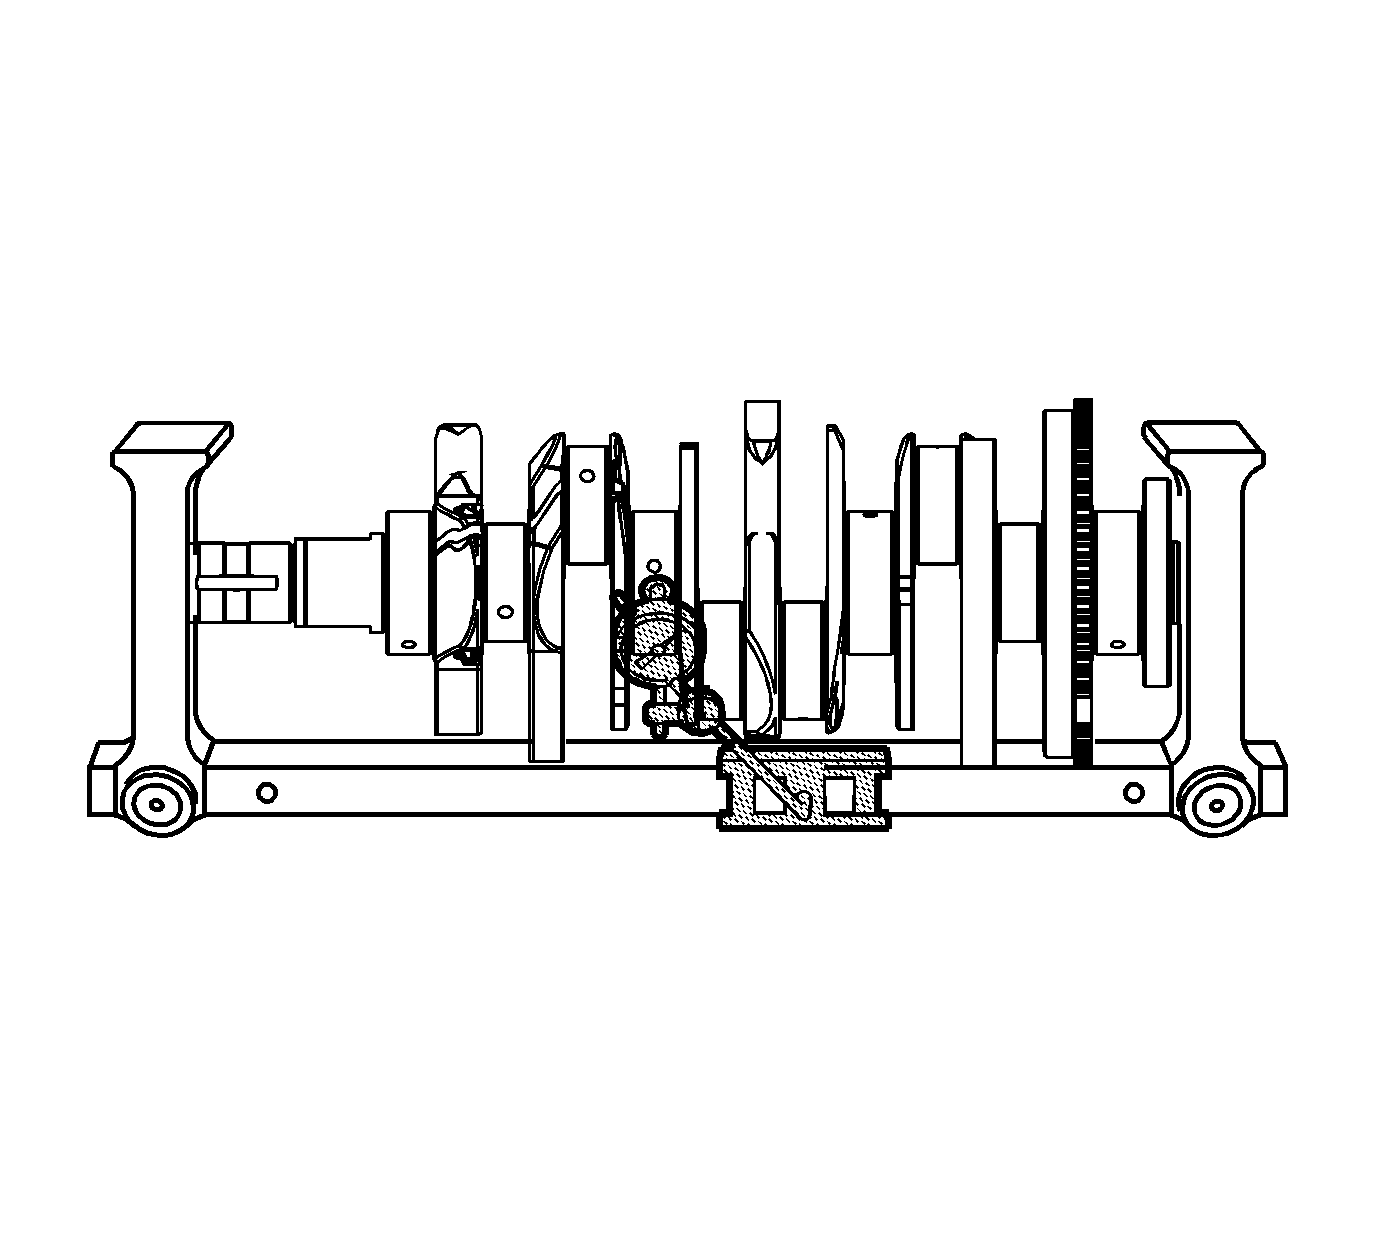
- Perform the following visual inspections:
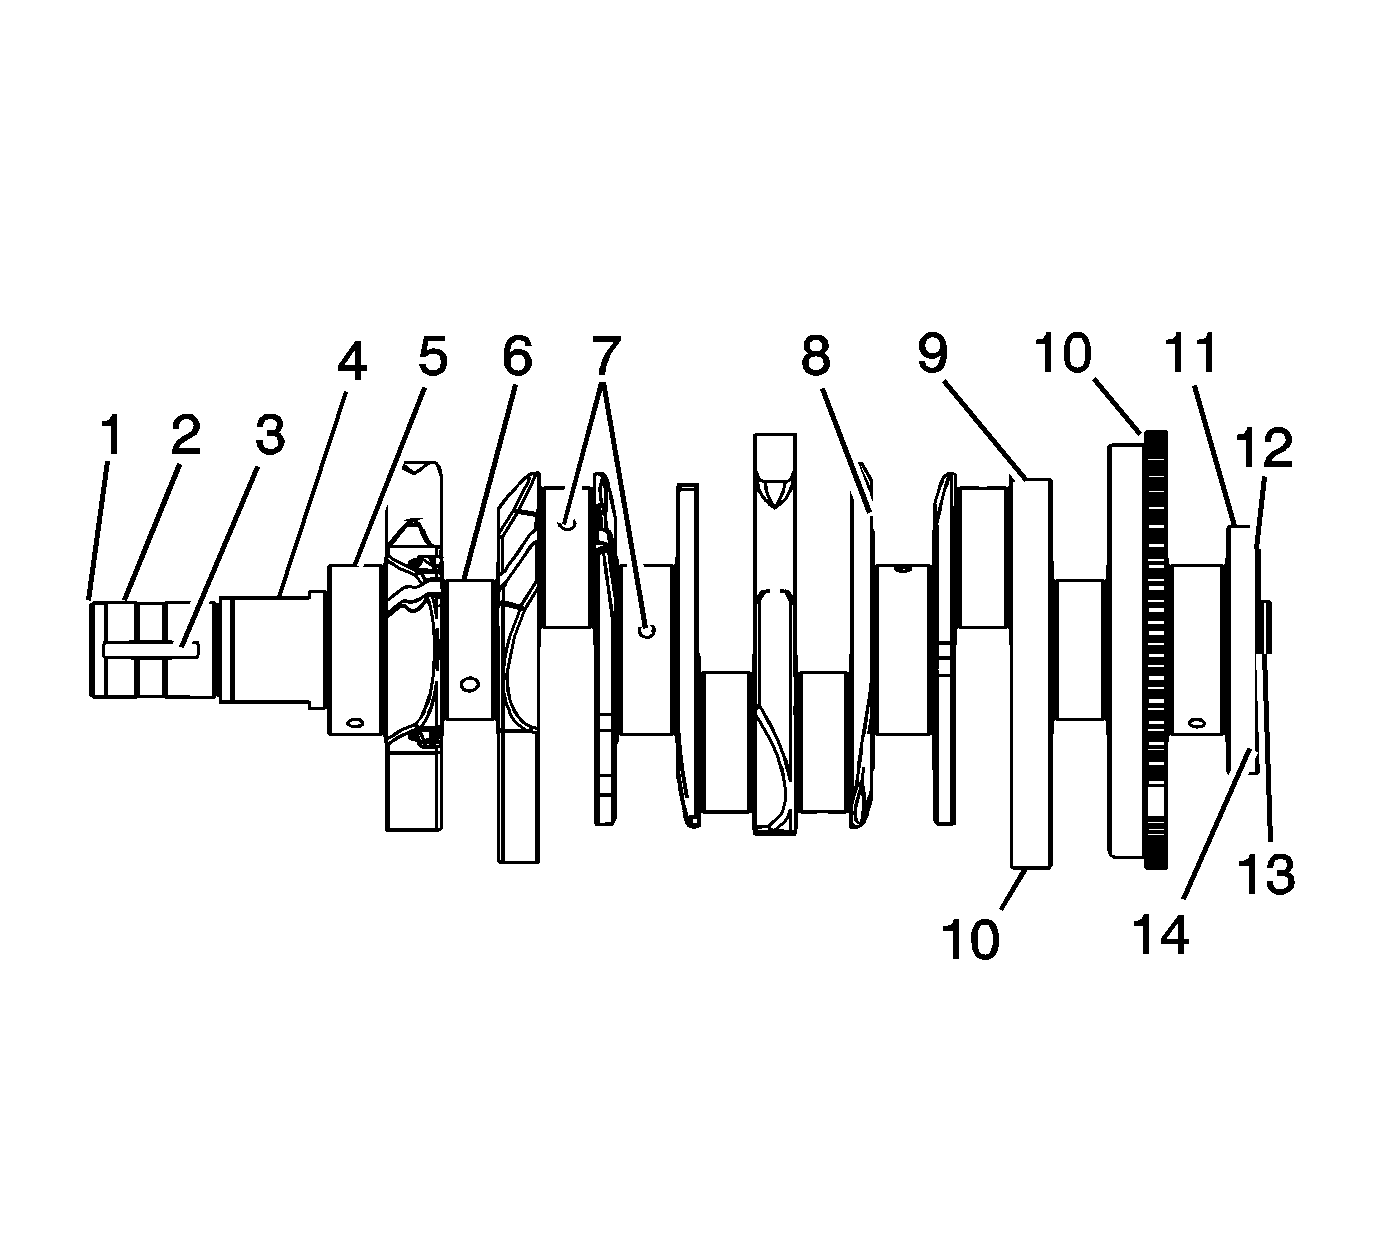
| • | Inspect the crankshaft balancer bolt hole (1) for thread damage. |
| • | Inspect the crankshaft balancer mounting area (2) for damage. |
| • | Inspect the crankshaft keyway (3) for damage. |
| • | Inspect the oil pump drive flats (4) for damage. |
| • | Inspect the crankshaft main journals (5) for damage. |
| • | Inspect the crankshaft connecting rod journals (6) for damage. |
| • | Inspect the crankshaft oil passages (7) for obstructions. |
| • | Inspect the crankshaft main bearing thrust wall surfaces (8) for damage. |
| • | Inspect the crankshaft counterweights (9) for damage. |
| • | Inspect the crankshaft reluctor ring teeth (10) for damage. |
| • | Inspect the crankshaft rear main oil seal surface (11) for damage. |
| • | Inspect the crankshaft engine flywheel mounting surface (12) for damage. |
| • | Inspect the crankshaft pilot hole (13) for damage. |
| • | Inspect the crankshaft engine flywheel bolt holes (14) for thread damage. |
- Repair or replace the crankshaft as necessary.
Crankshaft Bearing Inspection
Note:
| • | All connecting rod and main journal bearings that have been used in a running engine must be replaced. Never re-use the crankshaft or connecting rod bearings. |
| • | The following bearing wear conditions should be used to diagnose engine operating conditions or root cause of a condition. |
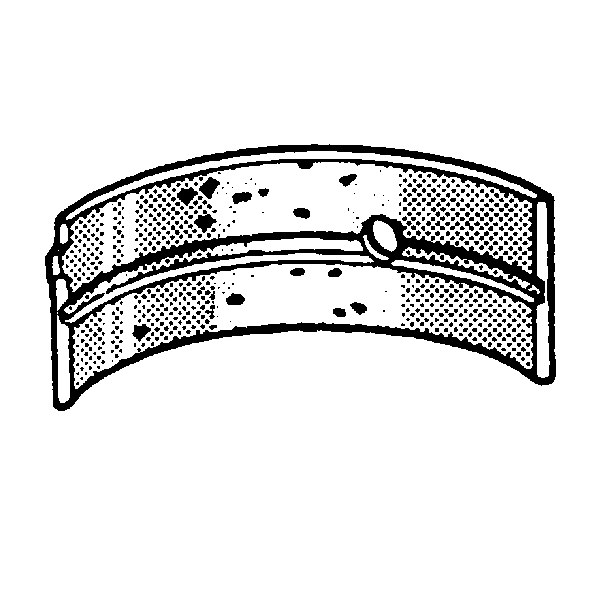
- Inspect for fatigue indicated by craters or pockets. Flattened sections on the bearing halves also indicate fatigue.
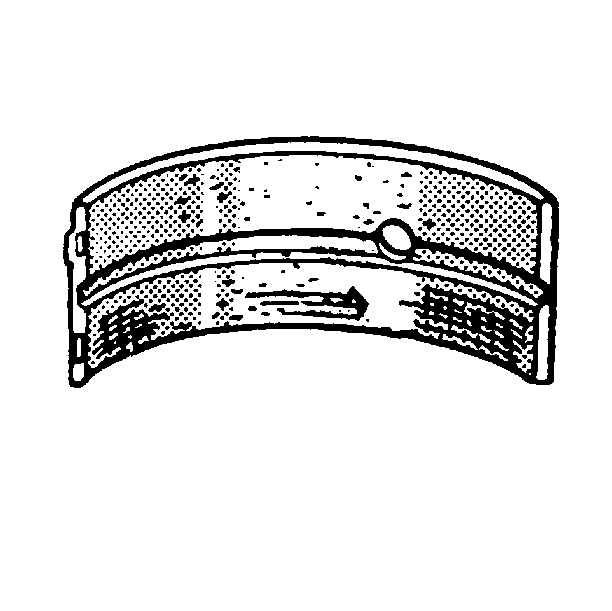
- Inspect for excessive scoring or discoloration on both front and back of the bearing halves.
- Inspect the main bearings for dirt embedded into the bearing material.
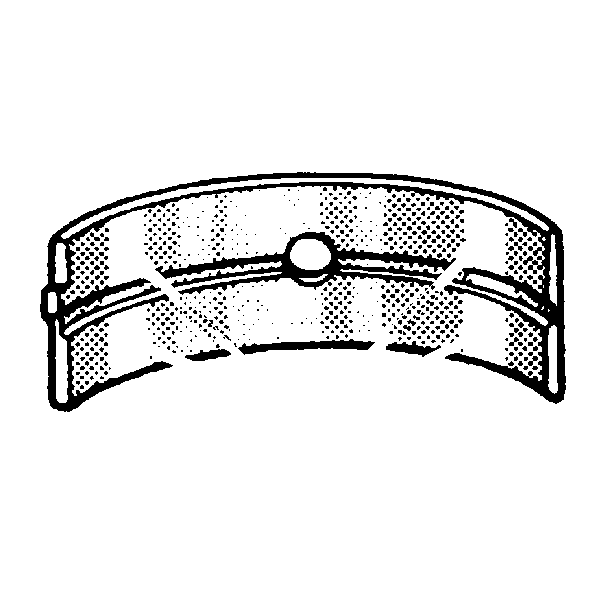
- Inspect for improper seating indicated by bright, polished sections.
Crankshaft Measurement
Special Tools
J 7872 Magnetic Base Dial Indicator
For equivalent regional tools, refer to
Special Tools.

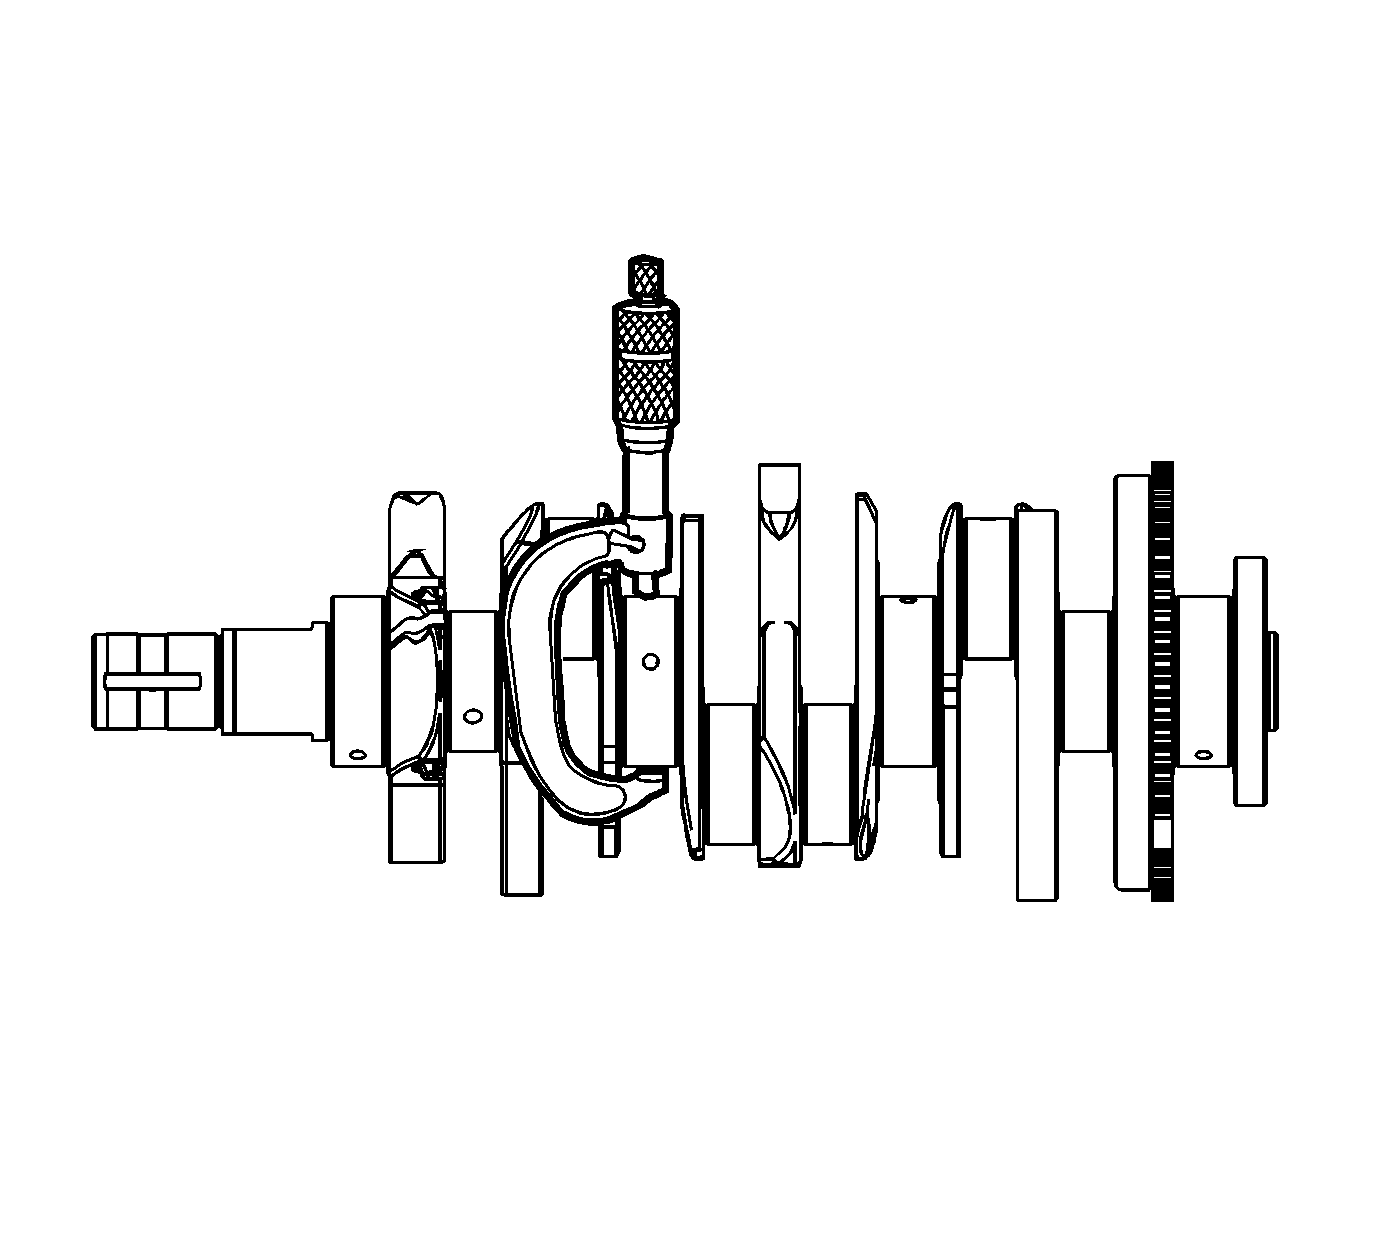
- Using a suitable fixture, support the crankshaft.
- Install the
J 7872 indicator
.
- Measure the crankshaft runout using the
J 7872
. Refer to
Engine Mechanical Specifications.
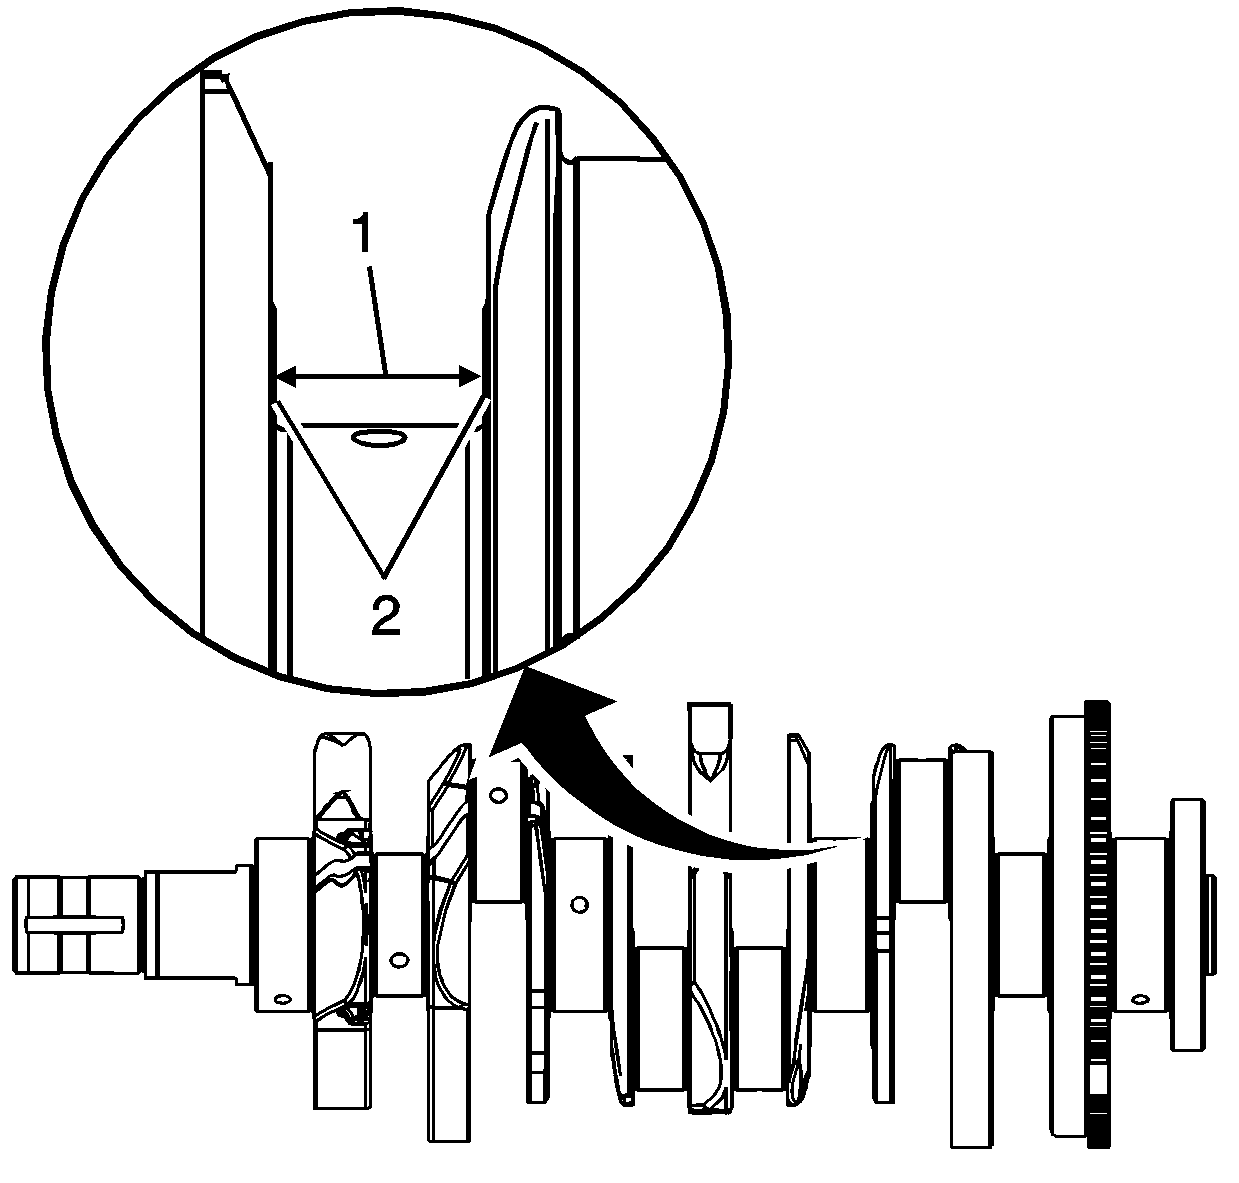
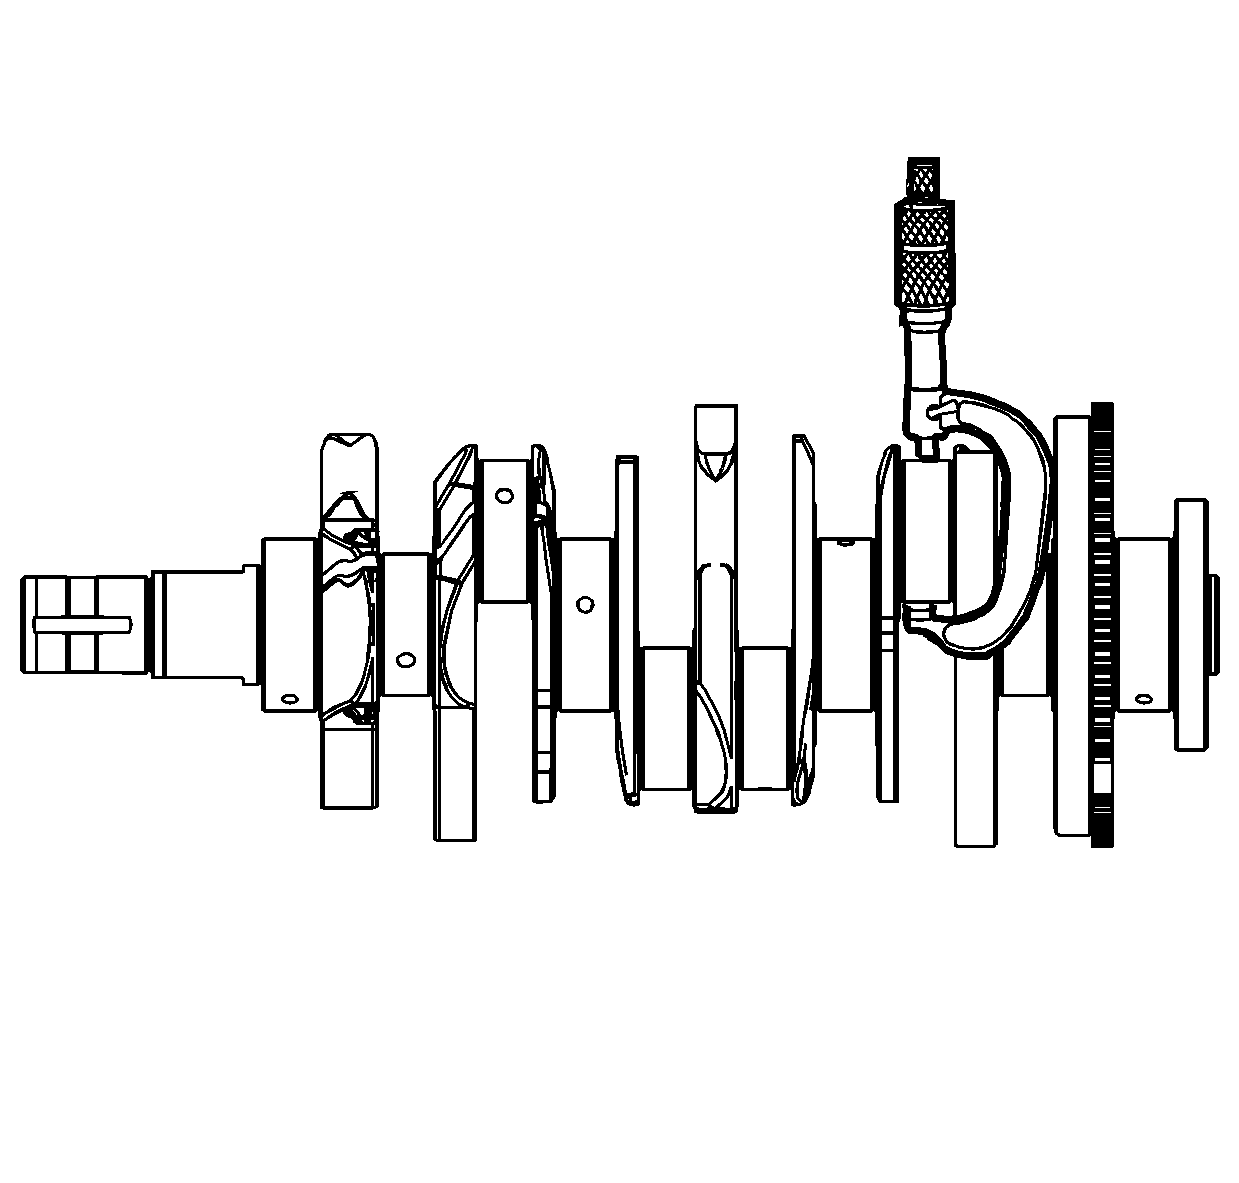
- Measure the crankshaft thrust wall width (1) for wear using an inside micrometer. Refer to
Engine Mechanical Specifications.
- Measure the crankshaft thrust wall surface (2) for runout using the
J 7872 indicator
. Refer to
Engine Mechanical Specifications.
- If the crankshaft journals are damaged or worn beyond specifications, the crankshaft may be ground 0.25 mm (0.010 in). There is only 1 size of oversized main bearings available for service.
- Inspect the crankshaft main journals for undersize, using an outside micrometer.
- Inspect the crankpins for undersize using an outside micrometer.
- Compare your measurements with those listed in the
Engine Mechanical Specifications. If the crankpin journals are worn beyond the specifications, the crankshaft may be ground 0.25 mm (0.010 in).
There is only 1 size of oversized connecting rod bearings available for service.
- Measure the main bearing and crankpin journals for out-of-round using the following procedure:
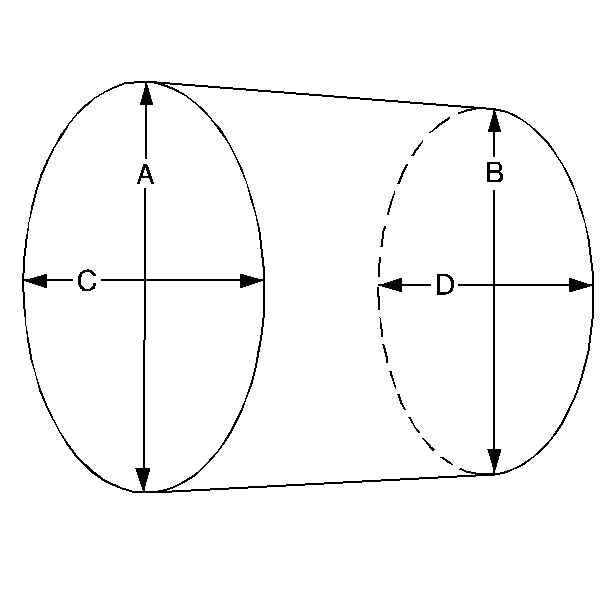
| 10.1. | Using an outside micrometer, measure the journal at the extreme front and rear locations on the journal. Call these points A and B. |
| 10.2. | Measure the journal in 2 new locations exactly 90 degrees from the first points. Call these points C and D. |
| 10.3. | Subtract A from C and B from D. The differences will indicate journal out-of-round. |
| 10.4. | The out-of-round should not exceed 0.004 mm (0.00016 in) maximum. |
| 10.5. | If the journals are worn beyond the specifications, the crankshaft may be ground 0.25 mm (0.010 in). There is only 1 size of oversized crankshaft and connecting rod bearings available for service. |
- Measure the main bearing and crankpin journals for taper using the following procedure:
| 11.1. | Using an outside micrometer, measure the journal at the extreme front (A) and rear (B) of the journal parallel to the crankshaft centerline. |
| 11.2. | Subtract the smallest from the largest measurement. The result will be the journal taper. |
| 11.3. | If the main bearing journal taper exceeds 0.004 mm (0.00016 in), replace the crankshaft. |
| 11.4. | If the journals are worn beyond the specifications, the crankshaft may be ground 0.25 mm (0.010 in). There is only 1 size of oversized crankshaft and connecting rod bearings available for service. |
