Disconnect Procedure
Warning: To help avoid personal injury, always ensure the ignition switch is in the OFF position and the ignition key has been removed prior to working on any 36V components. After the key has been removed,
disconnect the negative 12V battery cable and then open the generator battery disconnect control module cover. After waiting for at least 5 minutes, measure the voltage potential using a DMM between the following:
- 36V positive and negative battery cables
- 36V positive battery cable and vehicle ground
- 36V negative battery cable and vehicle ground
All measured voltage levels must be below 3 volts.
- Remove the ignition key from the ignition switch. Secure the ignition key in order to ensure that the key CANNOT be re-installed without your knowledge.
- Disconnect the 12 volt negative battery cable. Refer to
Battery Negative Cable Disconnection and Connection.
- Fold down both rear seat backs.
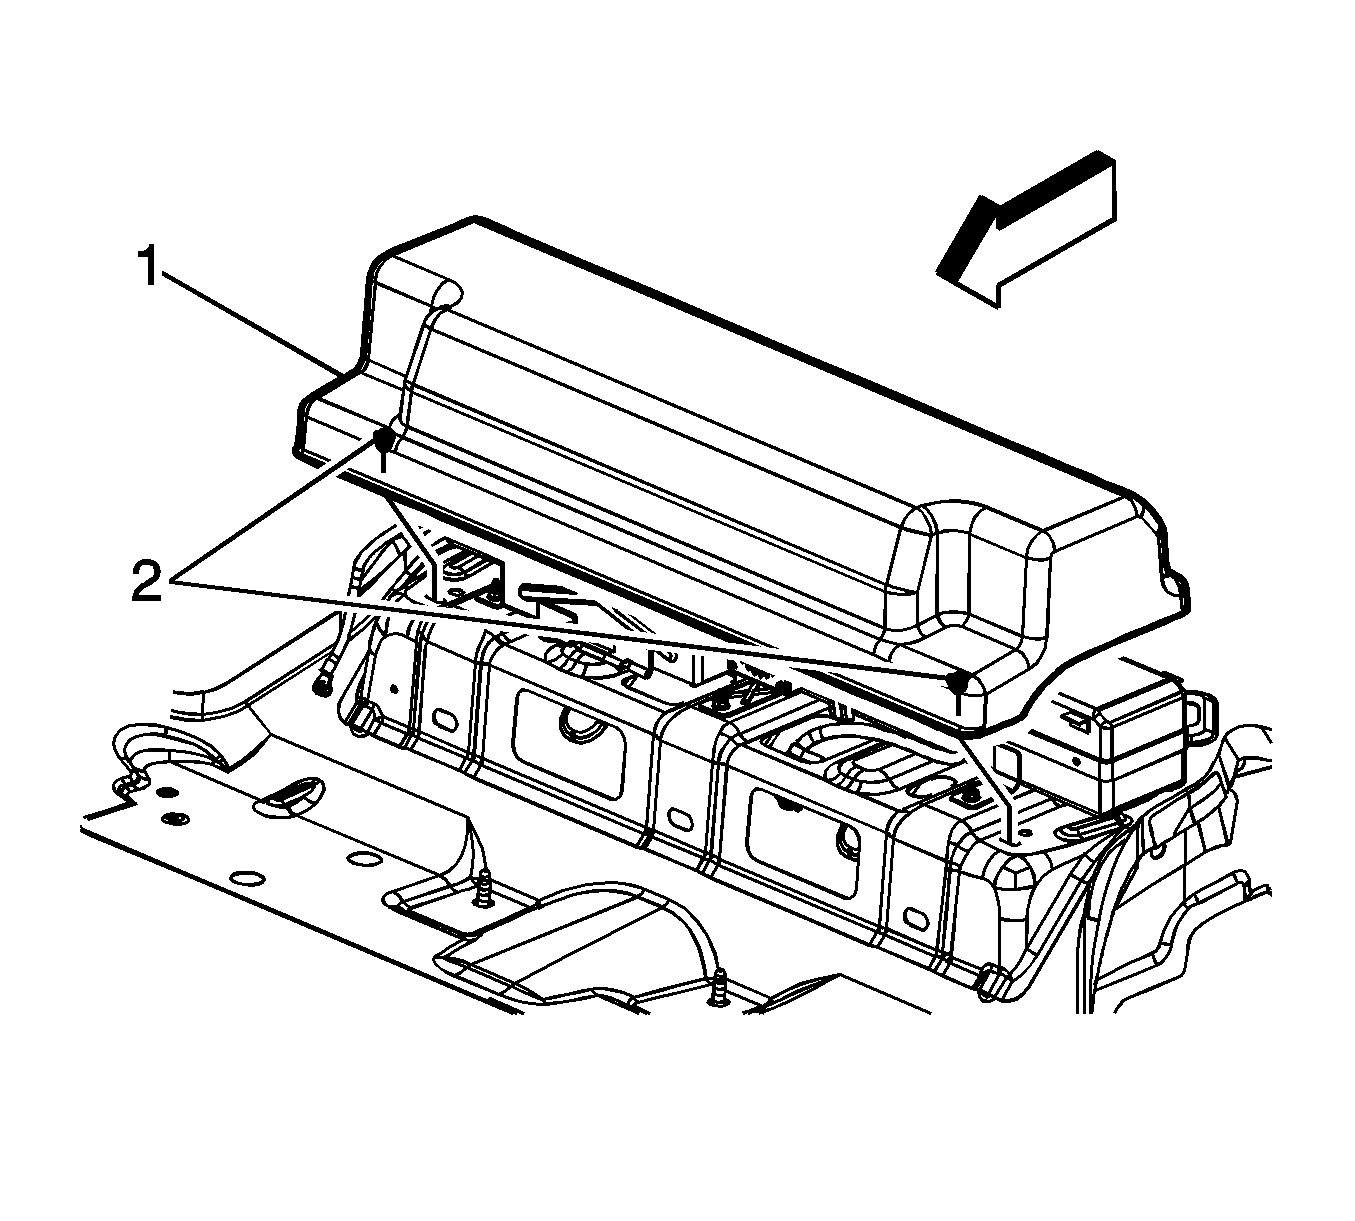
- Carefully lift up on the load floor rear compartment cover (1) at the retaining clip (2) locations.
- Tilt the load floor rear compartment cover (2) towards the rear of the vehicle slightly, disengaging the tabs (1) and remove the load floor rear compartment cover.
Warning: To help avoid personal injury, be careful when working in the vicinity of the generator battery disconnect control module. Internal components will still be live, 36V potential, even when the
cover has been opened or removed.
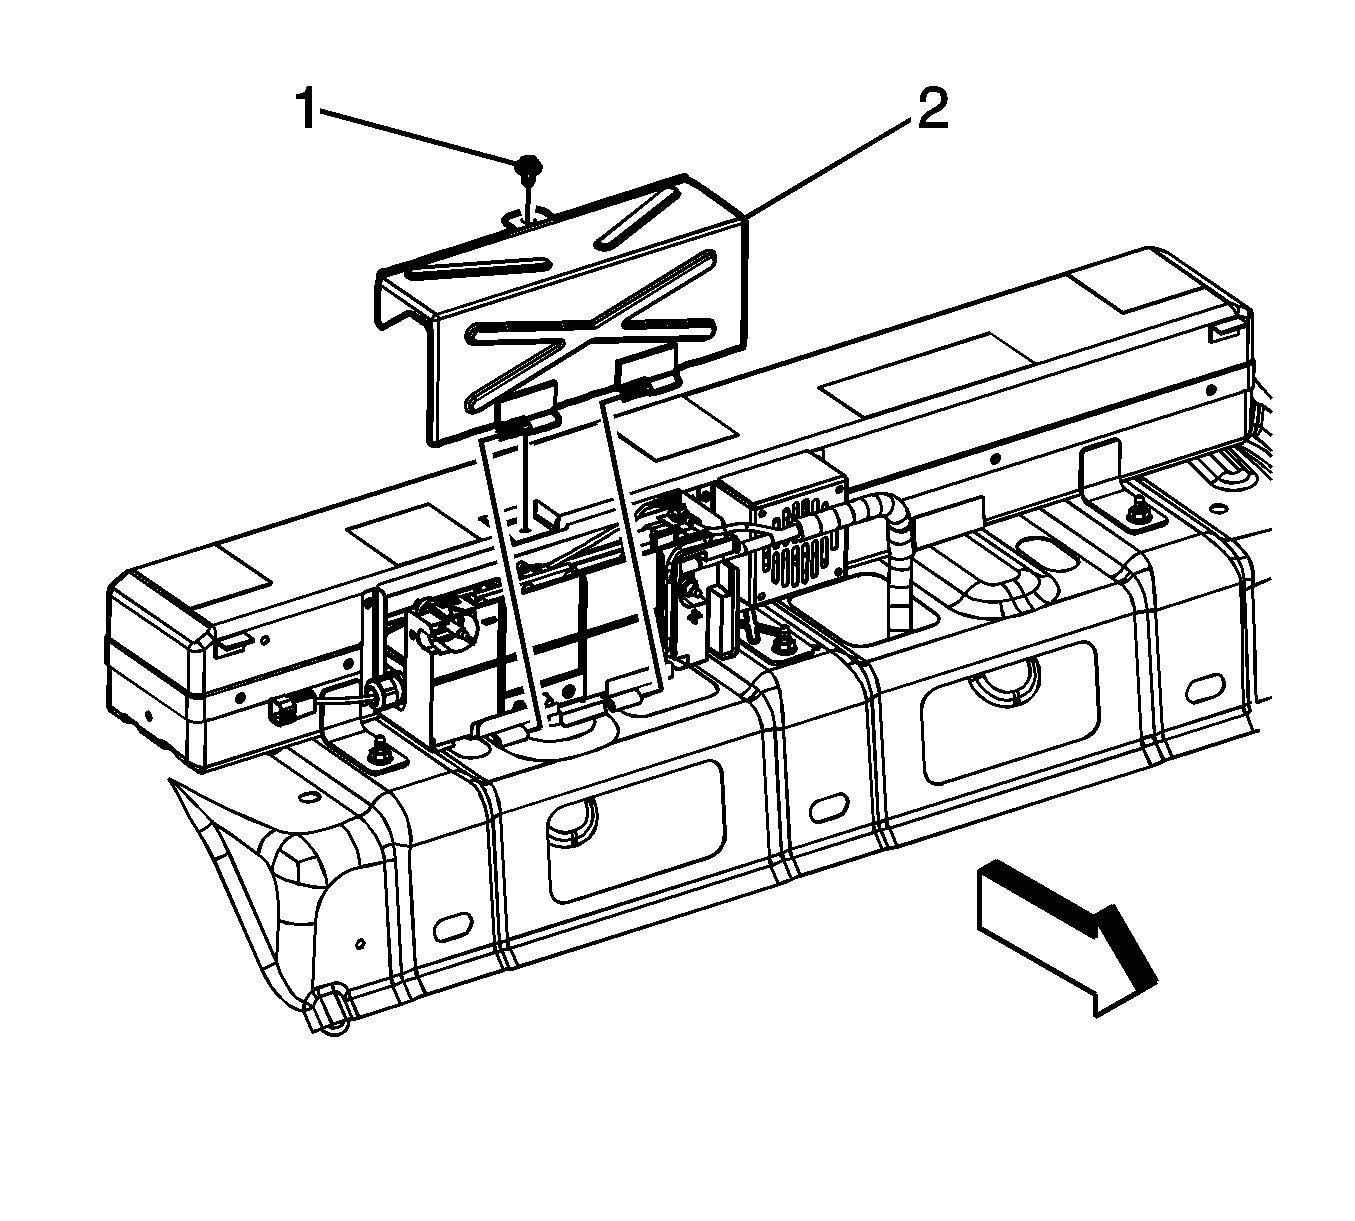
- Remove the generator battery disconnect control module cover bolt (1).
- Open and slide the generator battery disconnect control module cover (2) to the right, removing the cover.
- WAIT at least 5 minutes in order to allow the generator control module capacitors to discharge.

Note: Never assume the battery pack is disabled when the generator battery disconnect control module cover is opened.
- The generator battery will have to be checked for voltage potential using a voltmeter first, verify that the voltmeter works:
| 9.1. | Set the voltmeter to DC voltage. |
| 9.2. | Measure the vehicle's 12-volt battery voltage (at 12-volt positive jumper location and negative battery cable). |
| 9.3. | The meter should read greater than +12 volts DC. |
- Now, check the generator battery for voltage potential in order to ensure that the generator battery has been disabled.
| 10.1. | Measure from the positive (3) stud to the negative stud (2). The voltage should be less than 3 volts. |
| 10.2. | Measure from the positive (3) stud to vehicle chassis ground (1). The voltage should be less than 3 volts. |
| 10.3. | Measure from the negative (2) stud to vehicle chassis ground (1). The voltage should be less than 3 volts. |
| 10.4. | After verifying that there is no voltage present, the vehicle is now safe to work on. |
Connect Procedure
- Install and close the generator battery disconnect control module cover (2).
Caution: Refer to Fastener Caution in the Preface section.
- Install the generator battery cover bolt (1).
Tighten
Tighten the bolt to 10 N·m (89 lb in).
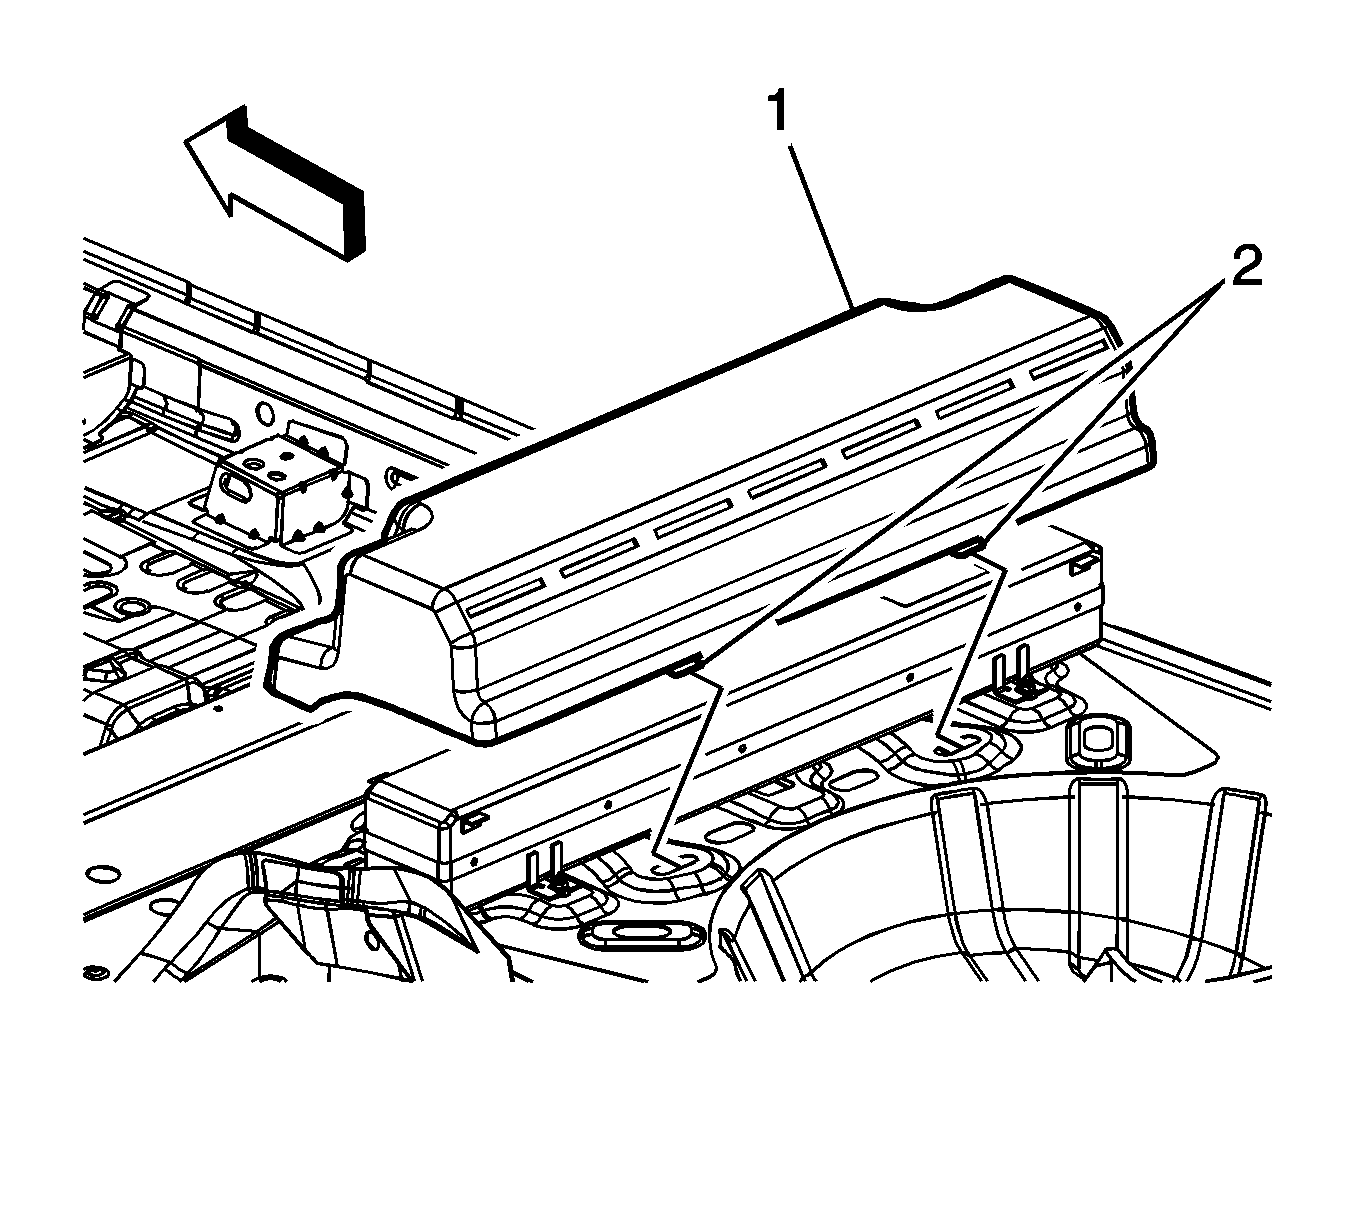
- Tilt the load floor rear compartment cover (2) towards the rear of the vehicle slightly in order to insert the tabs (2) into the battery tray rear support.
- Set the load floor rear compartment cover (1) down ensuring that the retaining clips (2) align to the proper locations, carefully push down securing the cover.
- Return both rear seats backs to their proper positions.
- Connect the 12 volt negative battery cable. Refer to
Battery Negative Cable Disconnection and Connection.
