For 1990-2009 cars only
Removal Procedure
- Raise and support the vehicle. Refer to Lifting and Jacking the Vehicle.
- Remove the tire and wheel. Refer to Tire and Wheel Removal and Installation.
- Remove the lower ball joint to knuckle nut and bolt.
- Separate the lower control arm from the knuckle.
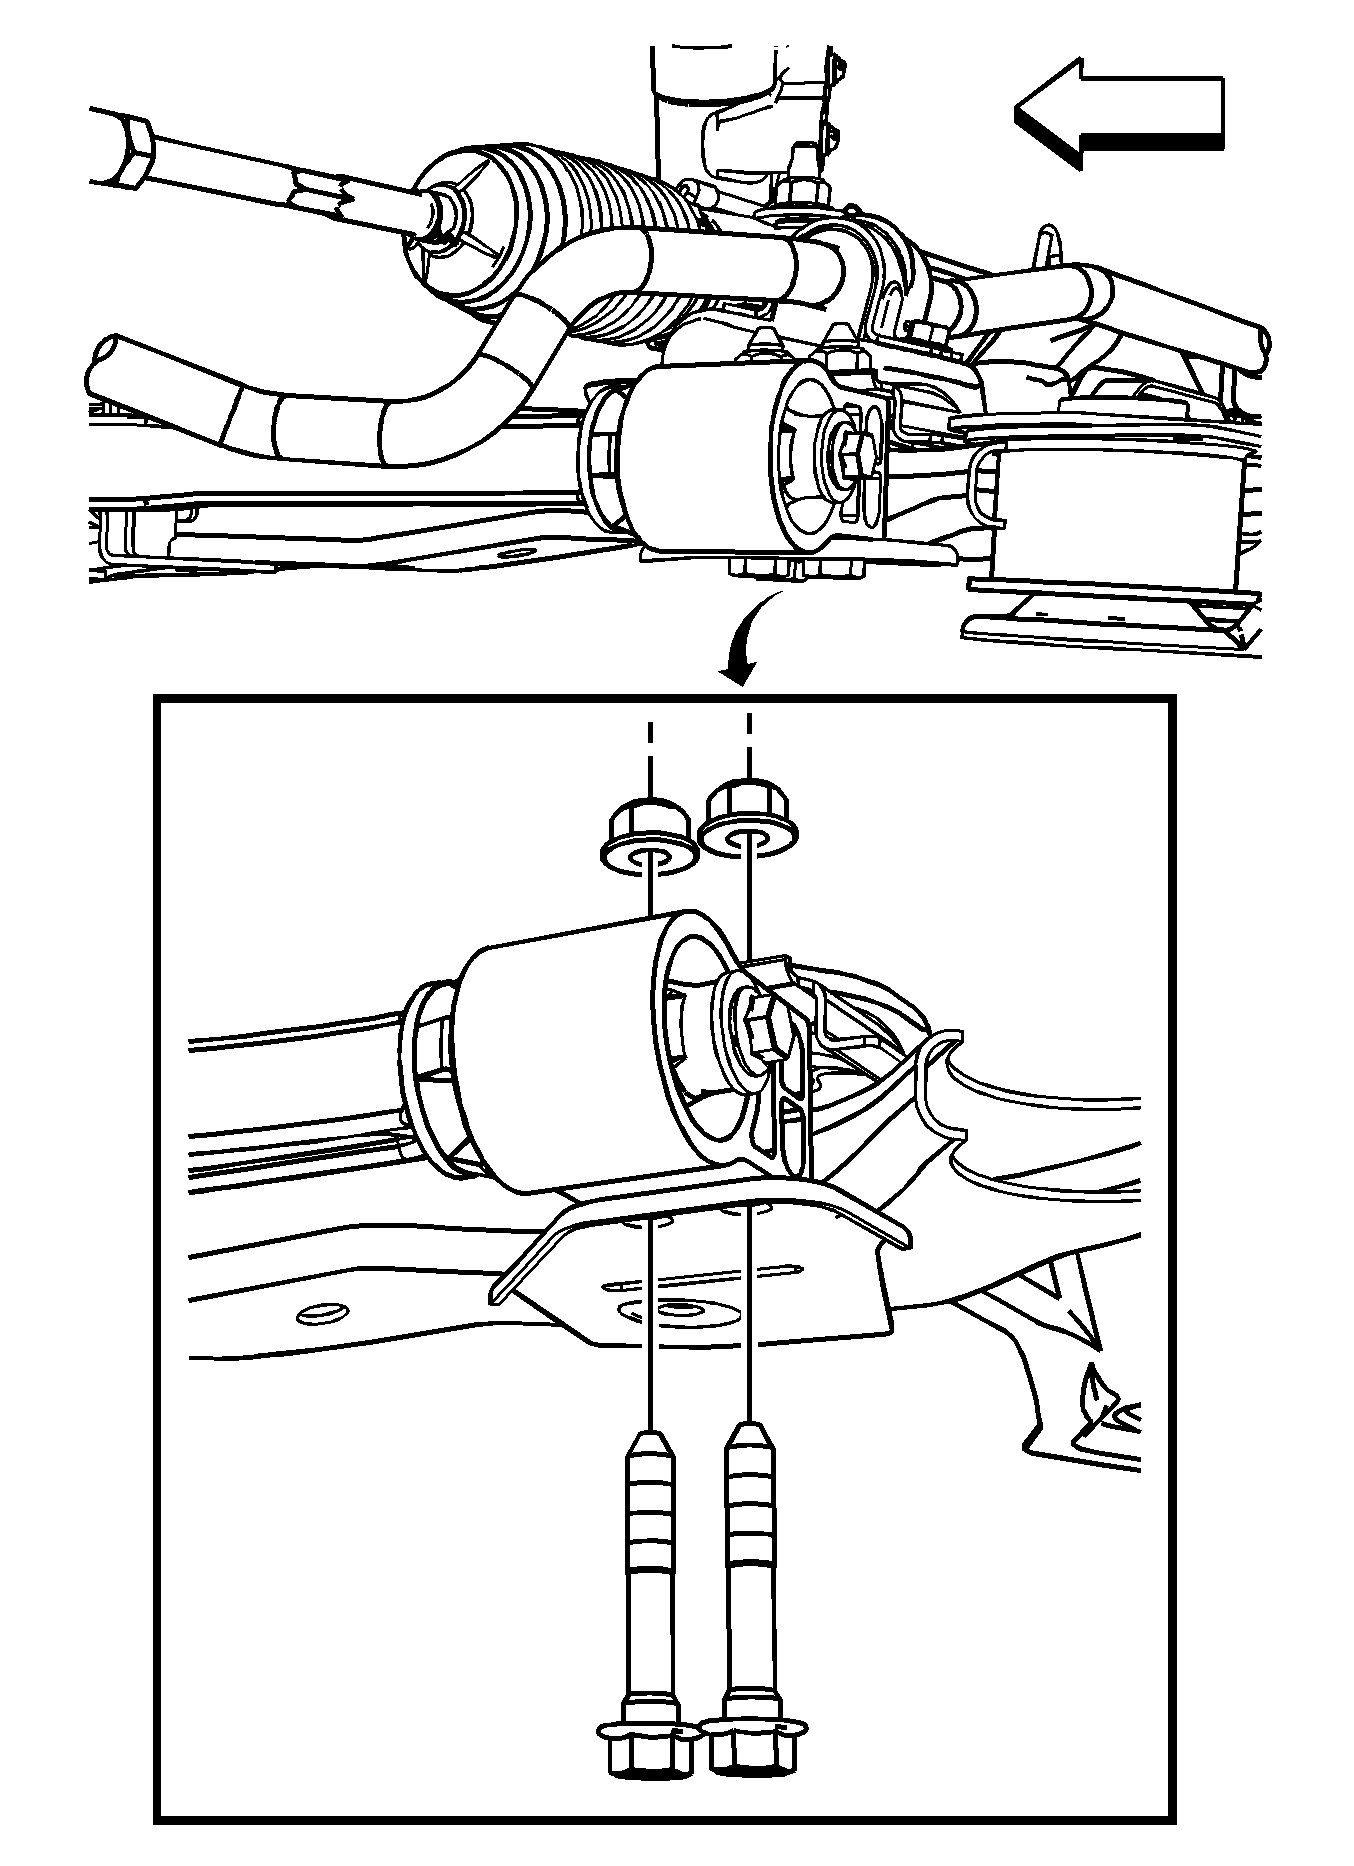
- If removing the left lower control arm and the vehicle is equipped with the 4T45-E transmission, remove the left side transmission mount. Refer to Transmission Mount Replacement - Left Side.
- If removing the right lower control arm and the vehicle is equipped with the 3.5L engine, remove the right engine mount. Refer to Engine Mount Replacement.
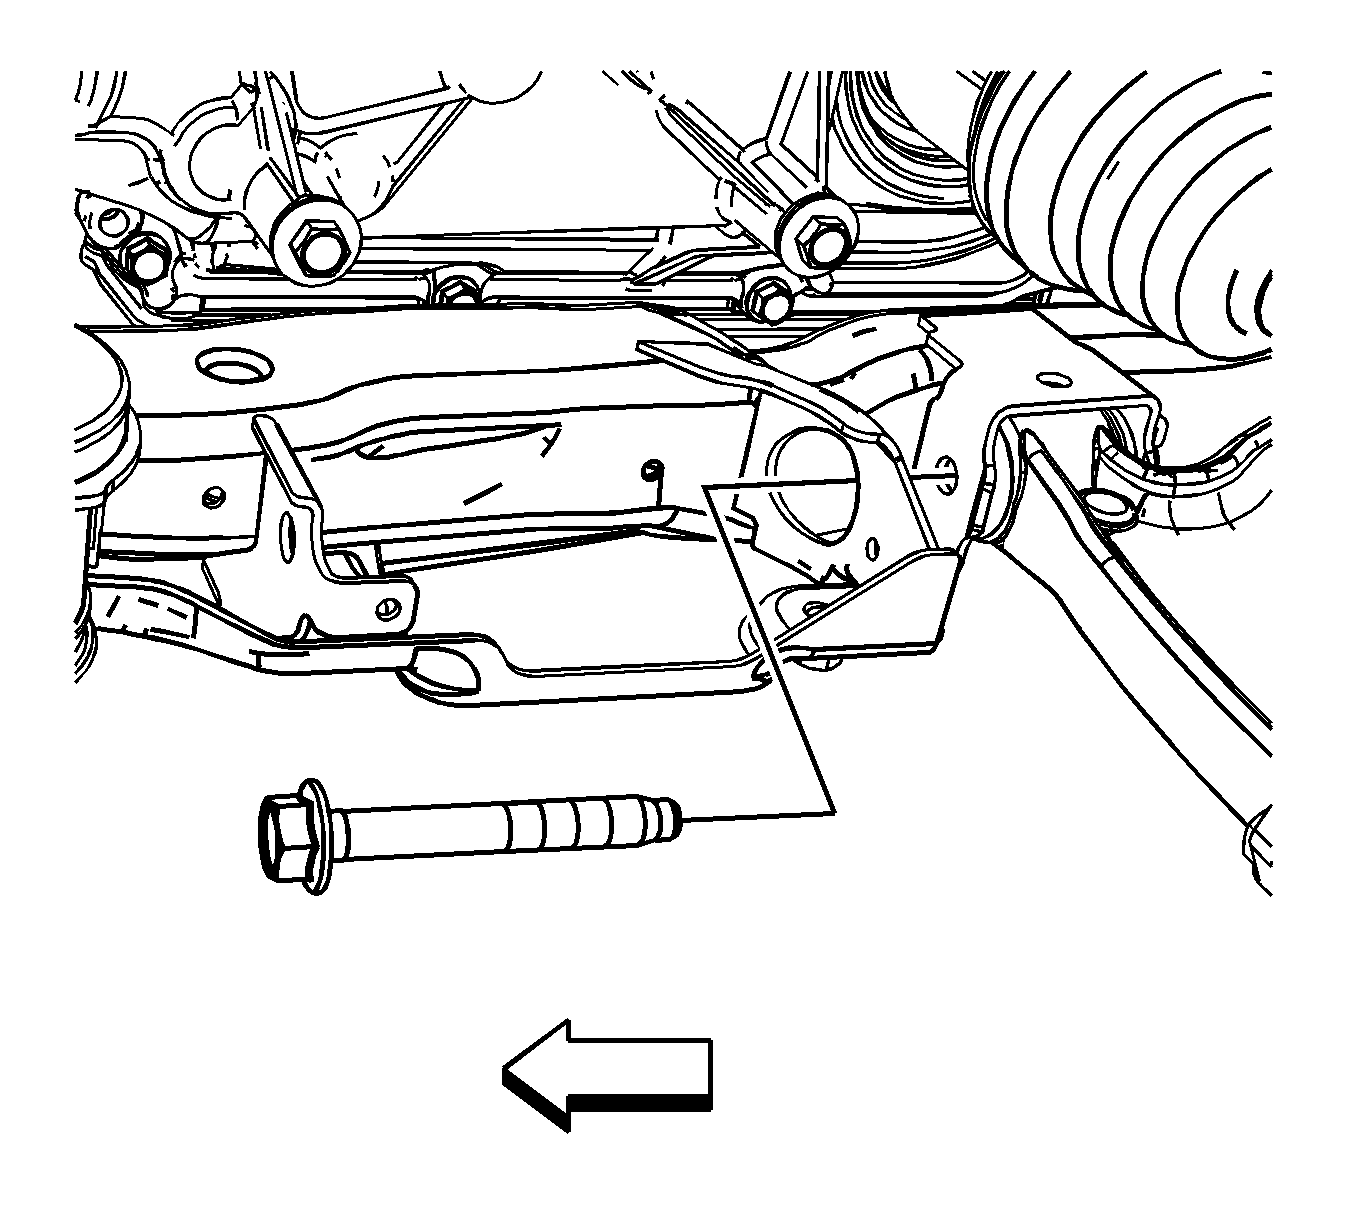
- Remove the front lower control arm bolt.
- Remove the rear lower control arm bushing nuts and bolts. Refer to Front Lower Control Arm Bushing Replacement.
- Remove the lower control arm from the front frame.
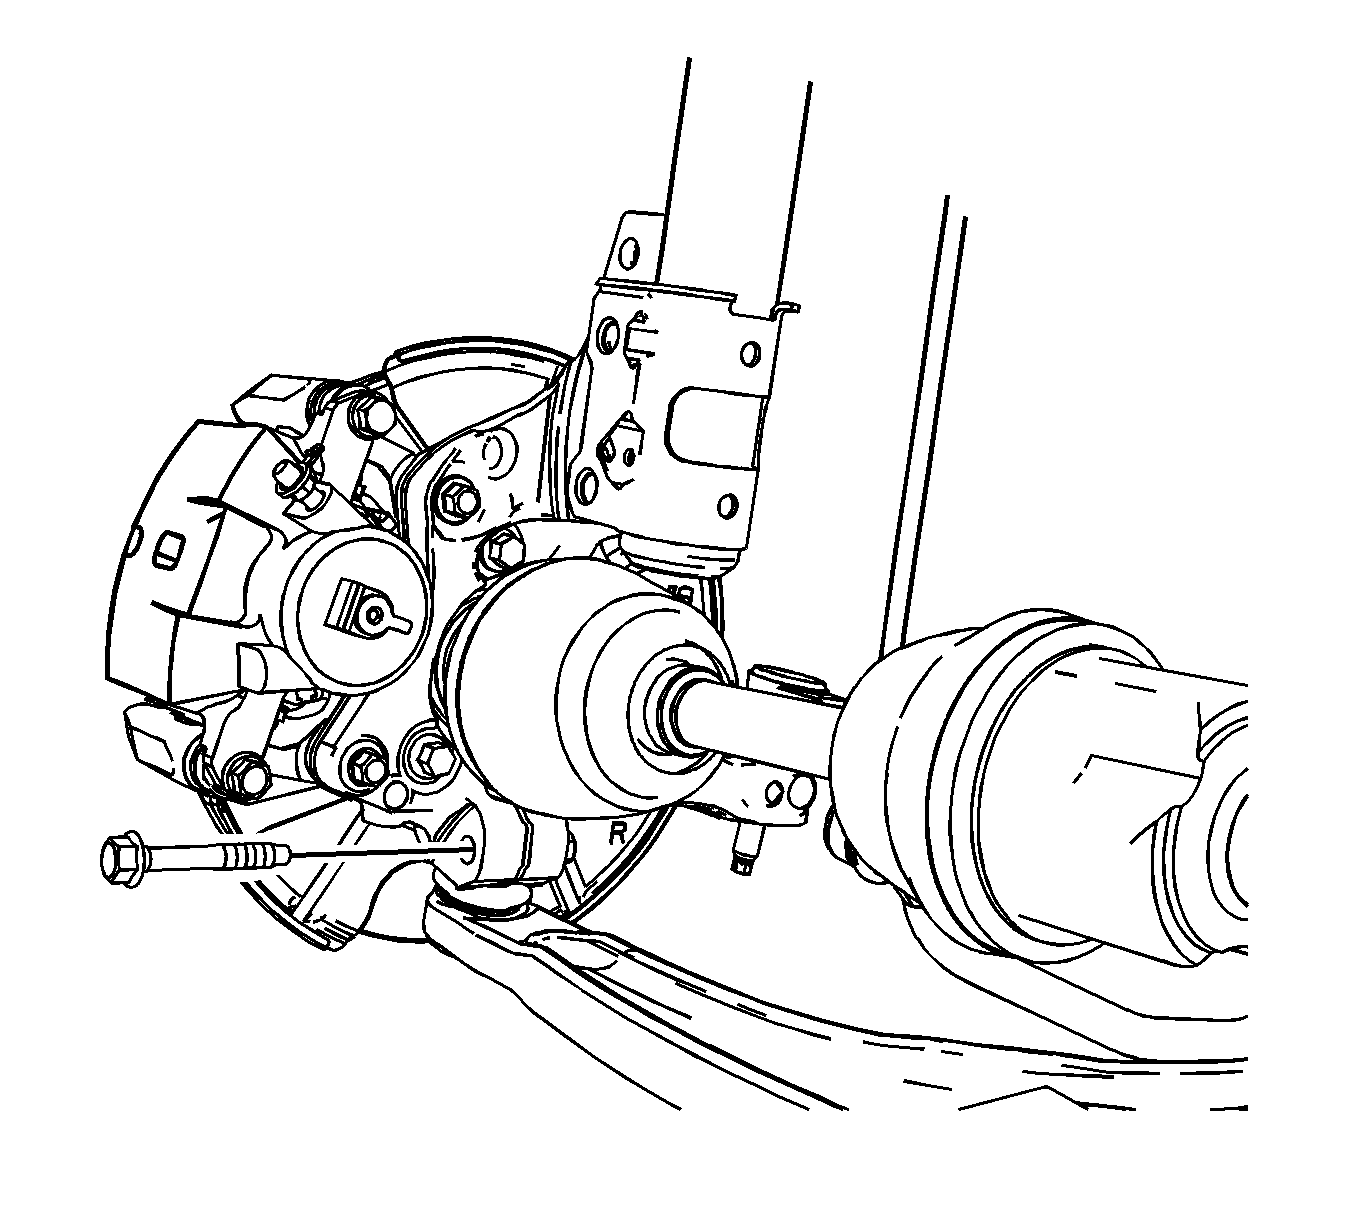
Important: DO NOT re-use the lower ball joint bolt. Discard and use NEW only.
Installation Procedure
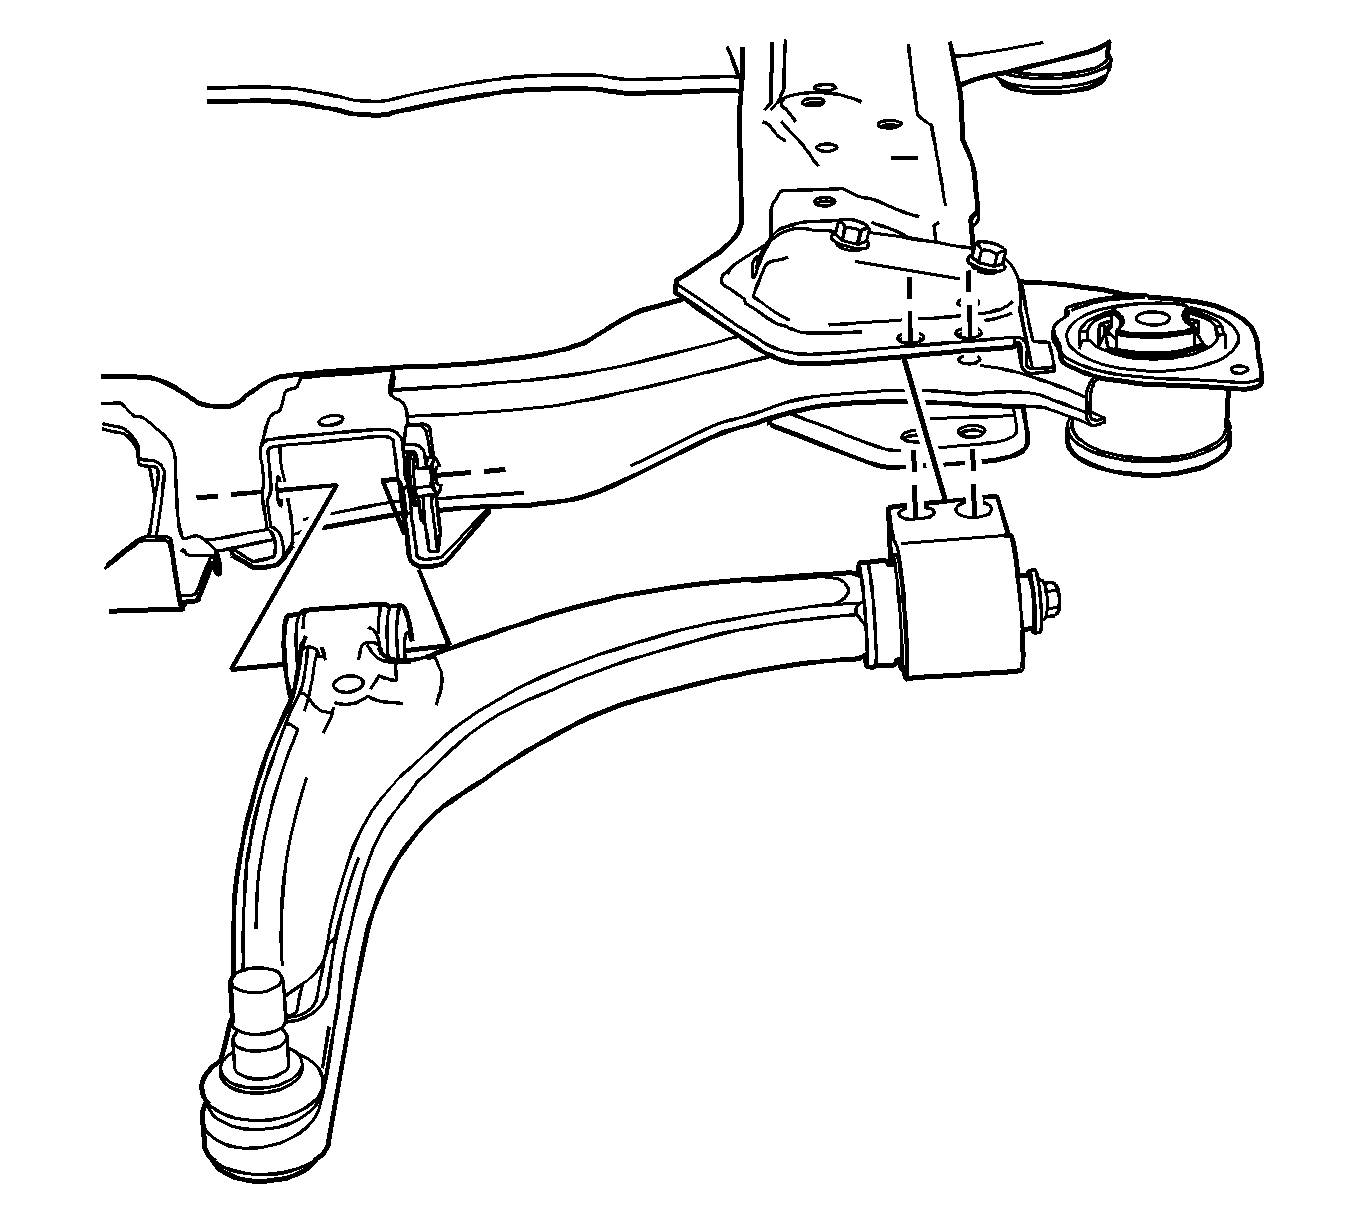
- Position the lower control arm in the cradle.
- Install and hand tighten the rear lower control arm bushing nuts and bolts.
- Install and hand tighten the front lower control arm bolt.
- Install the ball joint to knuckle bolt and nut.
- Load the front suspension with the proper jack stand before tightening the bolts to specifications.
- Tighten the front lower control arm bolt and tighten to 50 N·m (37 lb ft) plus 90 degrees.
- Tighten the rear bushing to frame bolts and tighten to 50 N·m (37 lb ft)plus 90 degrees.
- Remove the jack stand.
- For vehicles equipped with the 4T45-E transmission, install the left side transmission mount. Refer to Transmission Mount Replacement - Left Side.
- For vehicles equipped with the 3.5L engine, install the right side engine mount. Refer to Engine Mount Replacement.
- Install the tire and wheel. Refer to Tire and Wheel Removal and Installation.
- Verify wheel alignment. Refer to Wheel Alignment Specifications.
- Remove the support and lower the vehicle.
Caution: Refer to Fastener Caution in the Preface section.
| • | Tighten the ball joint bolt and nut to 50 N·m (37 lb ft). |
| • | Reverse the nut 3/4 of a turn. |
| • | Tighten to 50 N·m (37 lb ft) plus 30 degrees. |
