Electronic Brake Control Module Replacement Without RPO LAT
Removal Procedure
Notice: Always connect or disconnect the wiring harness connector from the EBCM/EBTCM with the ignition switch in the OFF position. Failure to observe this precaution could result in damage to the EBCM/EBTCM.
- Turn the ignition switch to the OFF position.
- Clean the electronic brake control module (EBCM) to brake pressure modulator valve (BPMV) area of any accumulated dirt and foreign material.
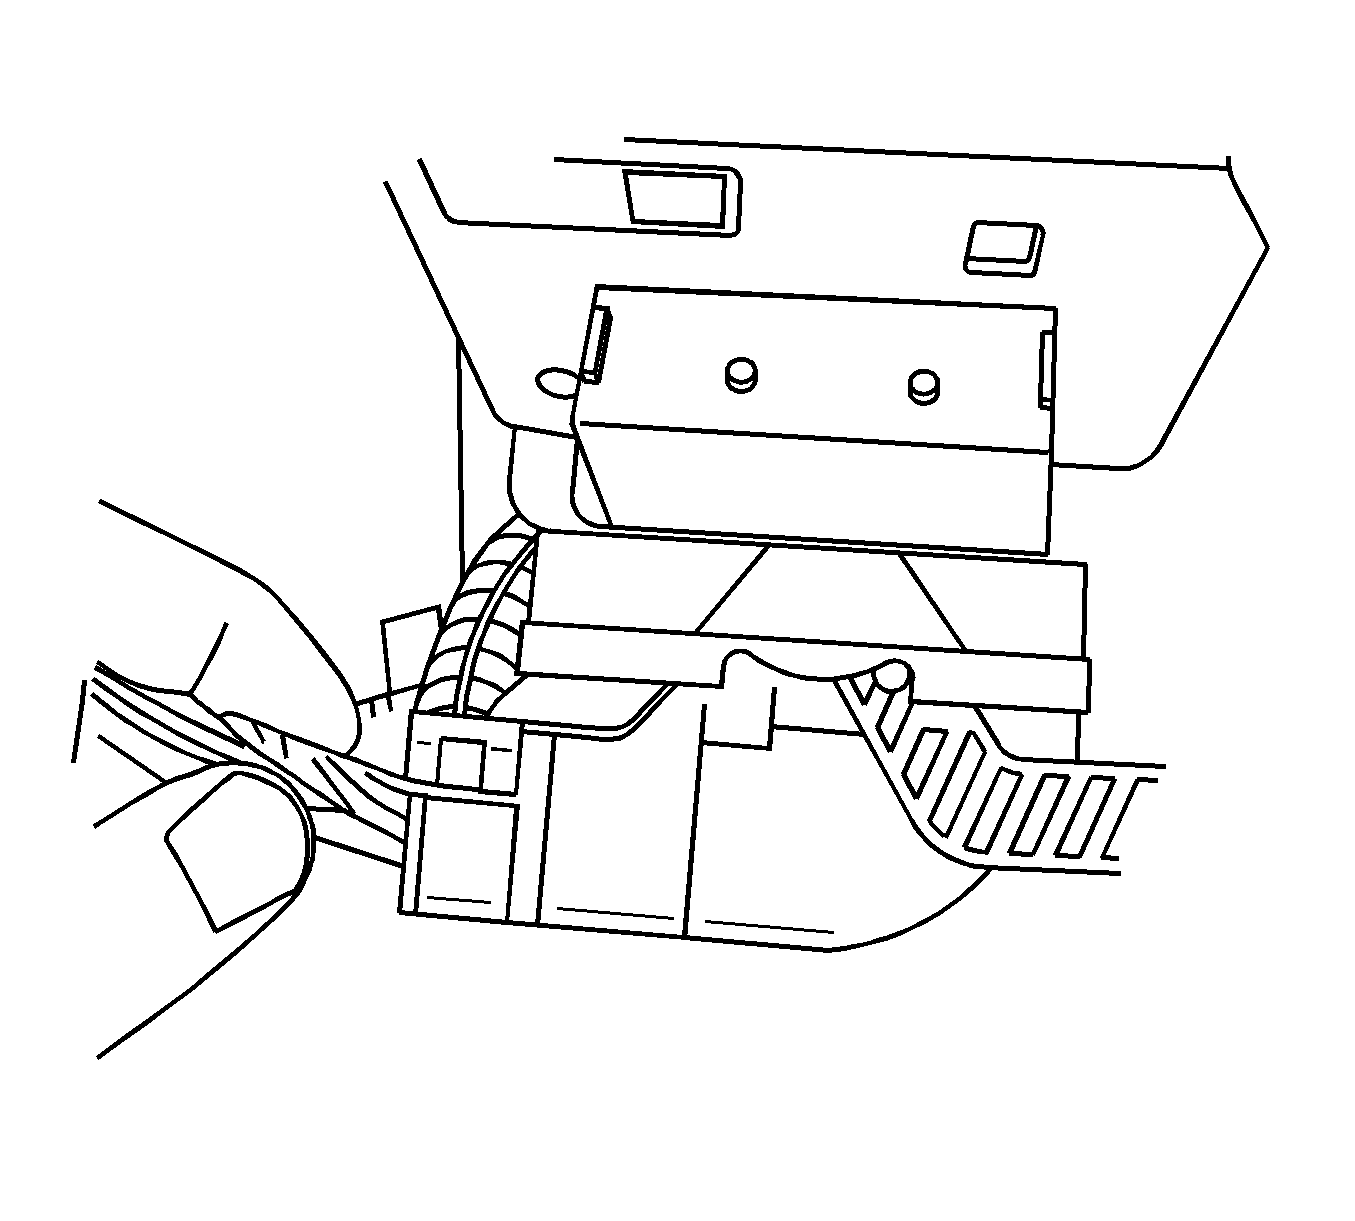
- Disconnect the electrical connector from the EBCM.
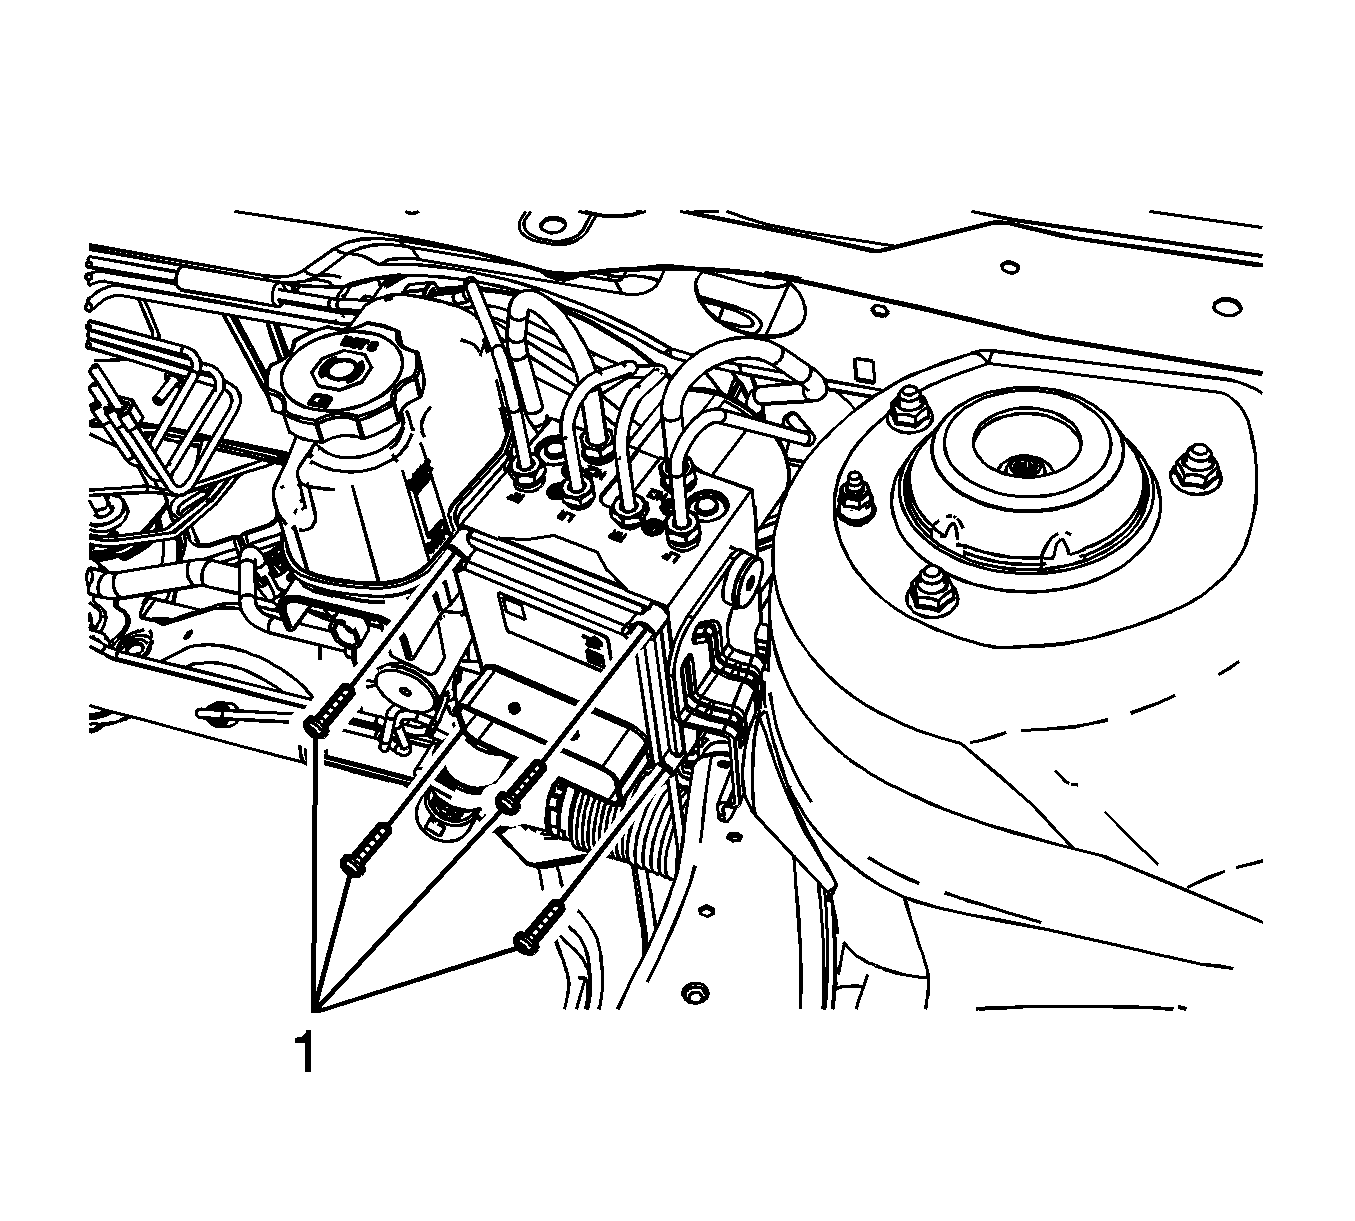
- Remove the 4 EBCM bolts (1).
- Separate the EBCM (1) from the BPMV by carefully pulling the components apart.


Installation Procedure
- Clean the sealing surface of the BPMV with denatured alcohol and a clean shop cloth.
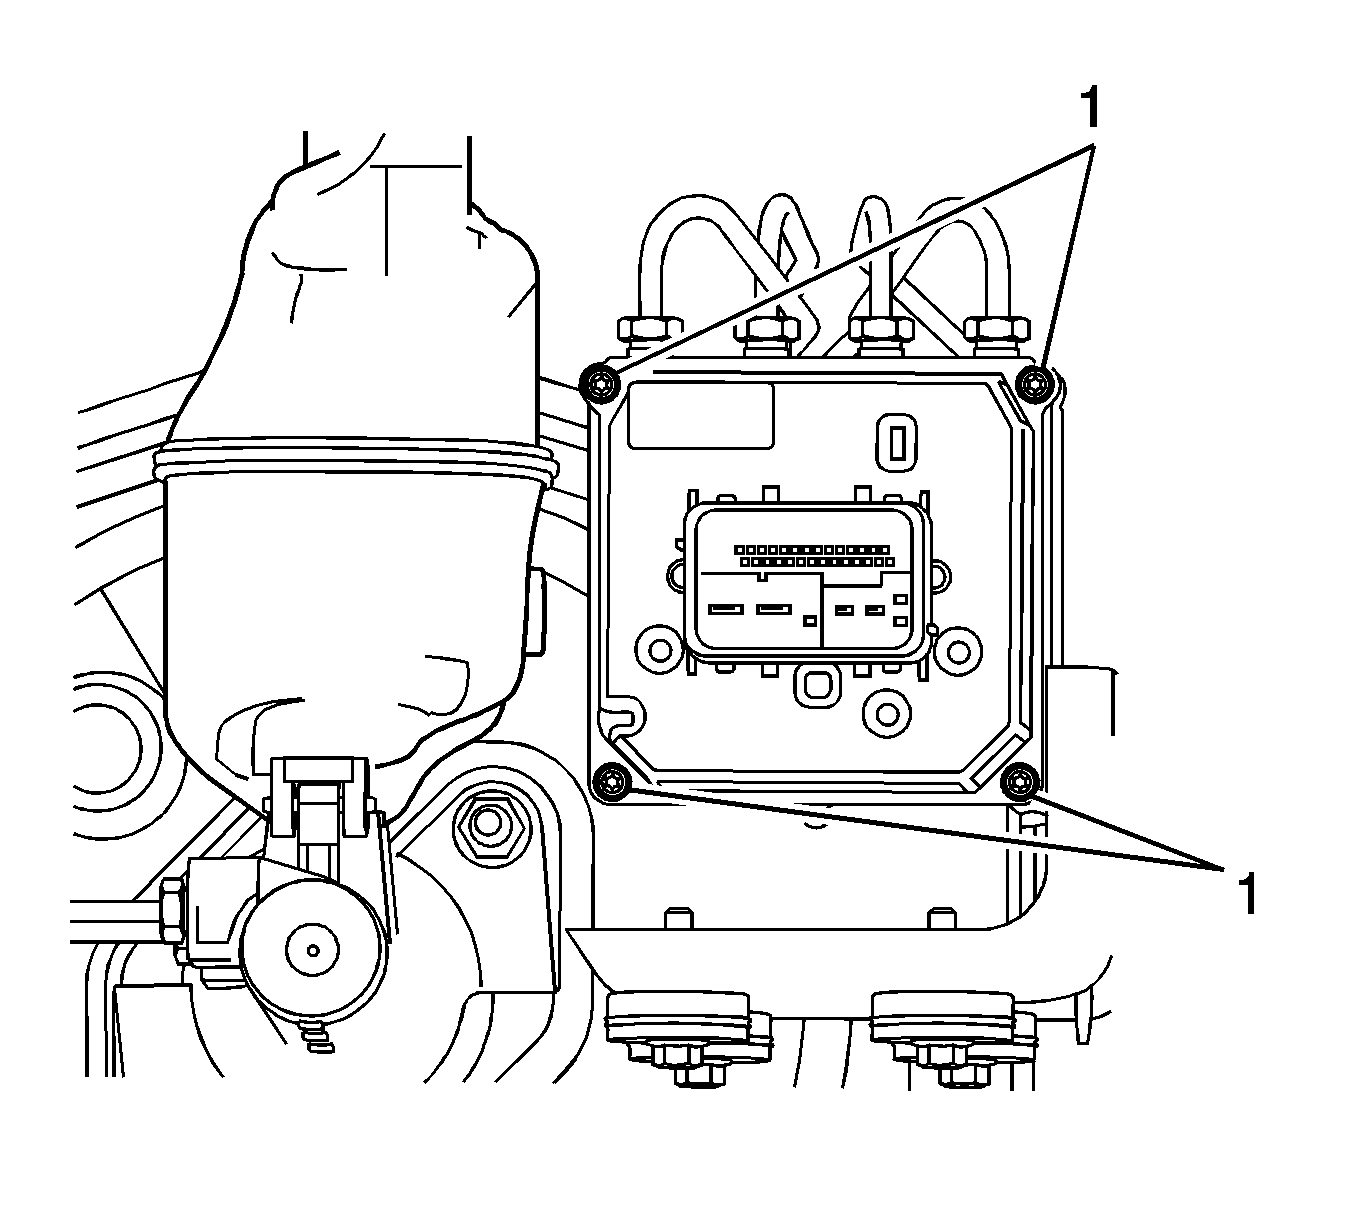
- Carefully install the EBCM (1) to the BPMV.
- Install the 4 EBCM bolts (1). Tighten the bolts in a cross pattern.
- Connect the electrical connector to the EBCM.
- If installing a new EBCM, it is necessary to program the EBCM. Refer to Control Module References .

Notice: Refer to Fastener Notice in the Preface section.

Tighten
Tighten the bolts to 3 N·m (27 lb in).
Important: Ensure the electrical connector is correctly inserted into the EBCM prior to placing the locking lever into position. Failure to make a proper connection may cause communication problems with the module.
Electronic Brake Control Module Replacement With RPO LAT
Removal Procedure
Notice: Always connect or disconnect the wiring harness connector from the EBCM/EBTCM with the ignition switch in the OFF position. Failure to observe this precaution could result in damage to the EBCM/EBTCM.
- Turn the ignition switch to the OFF position.
- Clean the electronic brake control module (EBCM) to brake pressure modulator valve (BPMV) area of any accumulated dirt and foreign material.
- Disconnect the electrical connector from the EBCM.
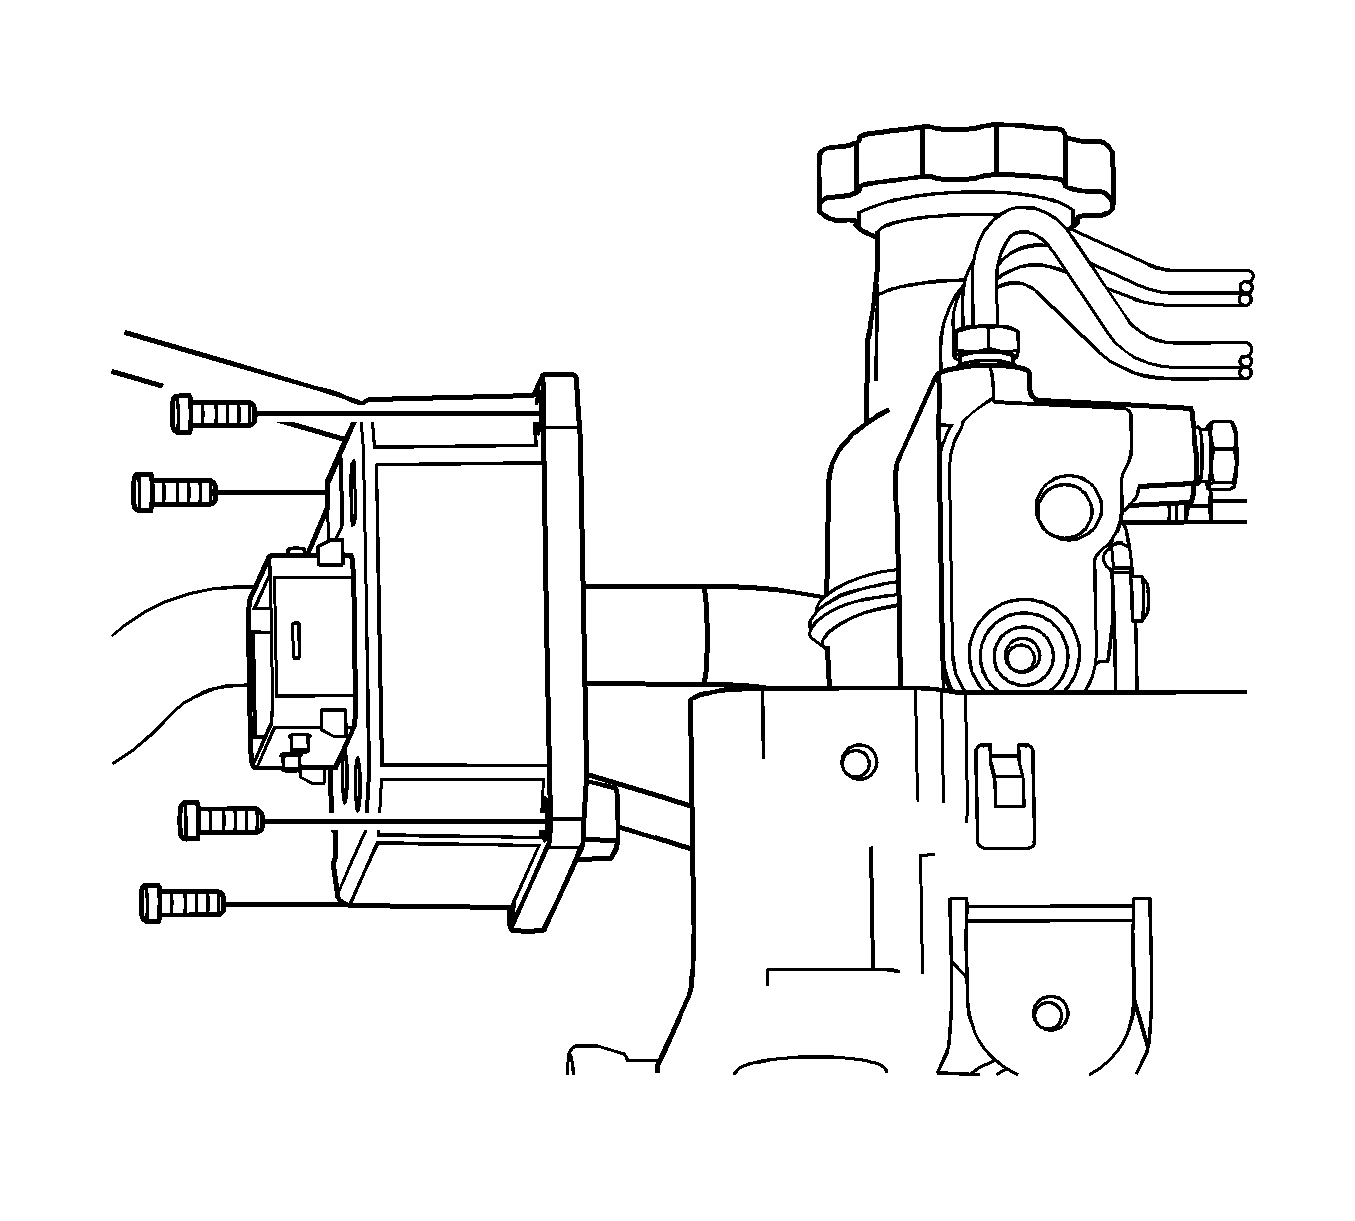
- Remove the 4 EBCM bolts.
- Separate the EBCM from the BPMV by carefully pulling the components apart.


Ensure the motor pin connector is removed with the EBCM. A new motor pin is provided with the replacement EBCM.
Installation Procedure
- Clean the sealing surface of the BPMV with denatured alcohol and a clean shop cloth.
- Carefully align the EBCM to BPMV electrical terminals and install the EBCM to the BPMV.
- Install the 4 EBCM bolts. Tighten the bolts in a cross pattern.
- Connect the electrical connector to the EBCM.
- Connect the electrical connector to the EBCM.
- If installing a new EBCM, it is necessary to program the EBCM. Refer to Control Module References.

Notice: Refer to Fastener Notice in the Preface section.

Tighten
Tighten the bolts to 6 N·m (53 lb in).
Important: Ensure the electrical connector is correctly inserted into the EBCM prior to placing the locking lever into position. Failure to make a proper connection may cause communication problems with the module.

Important: Ensure the electrical connector is correctly inserted into the EBCM prior to placing the locking lever into position. Failure to make a proper connection may cause communication problems with the module.
