For 1990-2009 cars only
Removal Procedure
- Remove the right closeout panel. Refer to Instrument Panel Insulator Replacement - Right Side.
- Remove the blower motor wire harness connector.
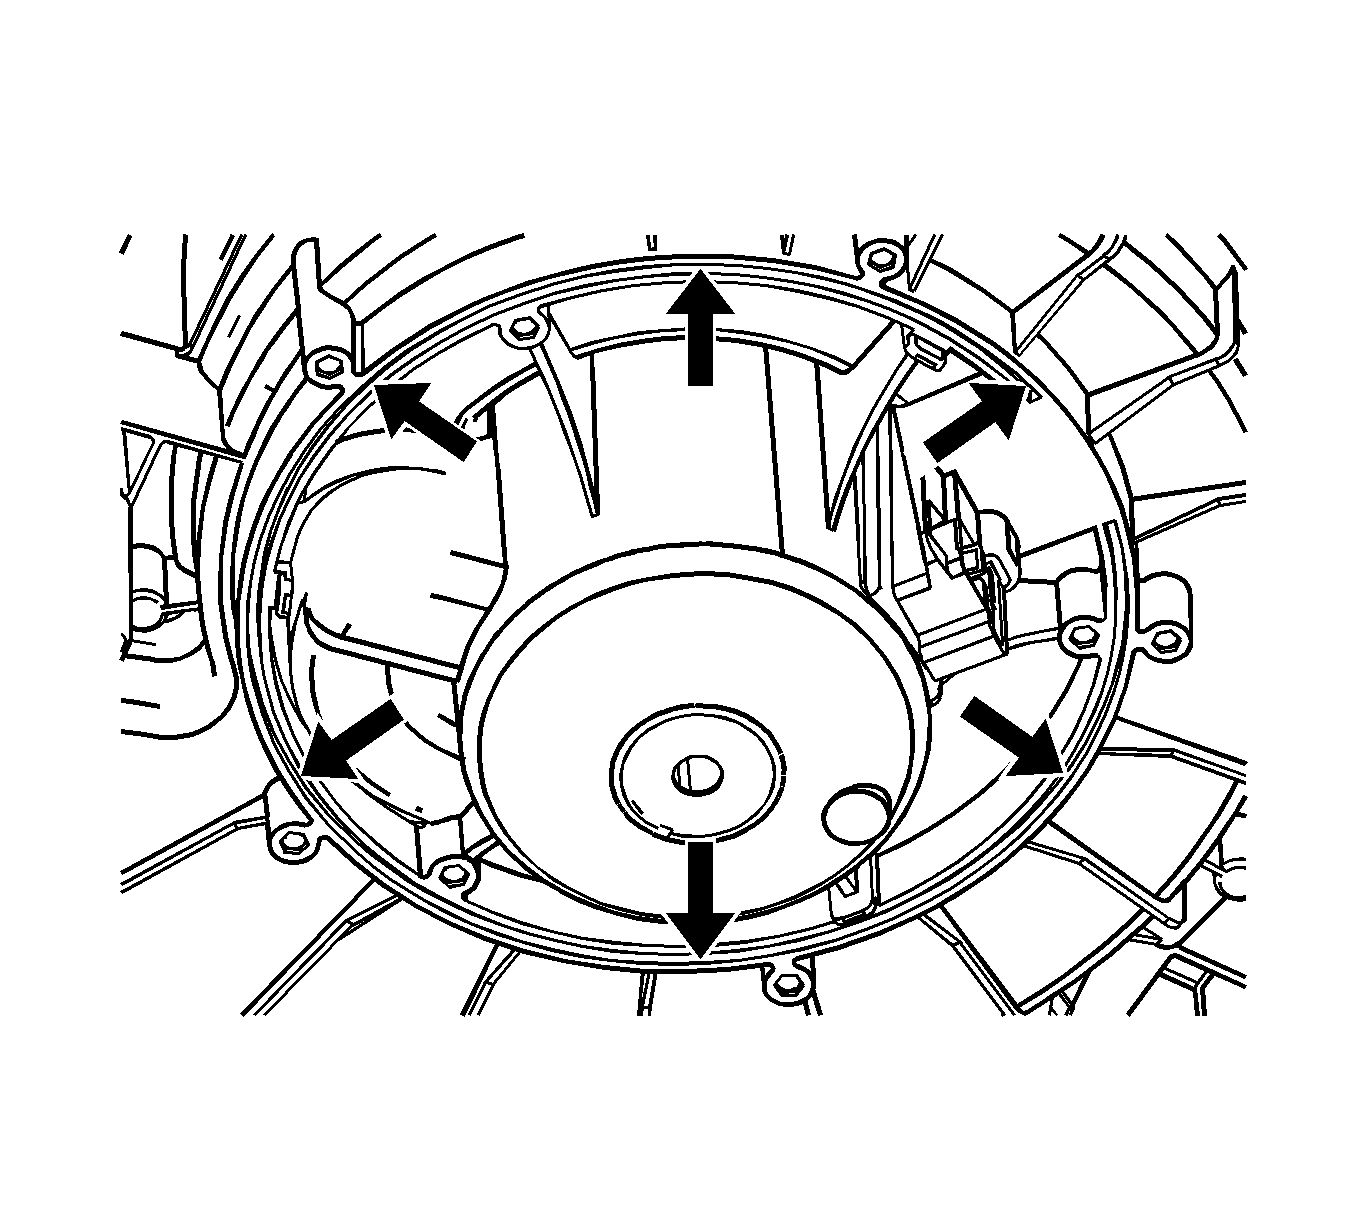
- Cut out the blower motor using a utility knife in the narrow groove of the lower case.
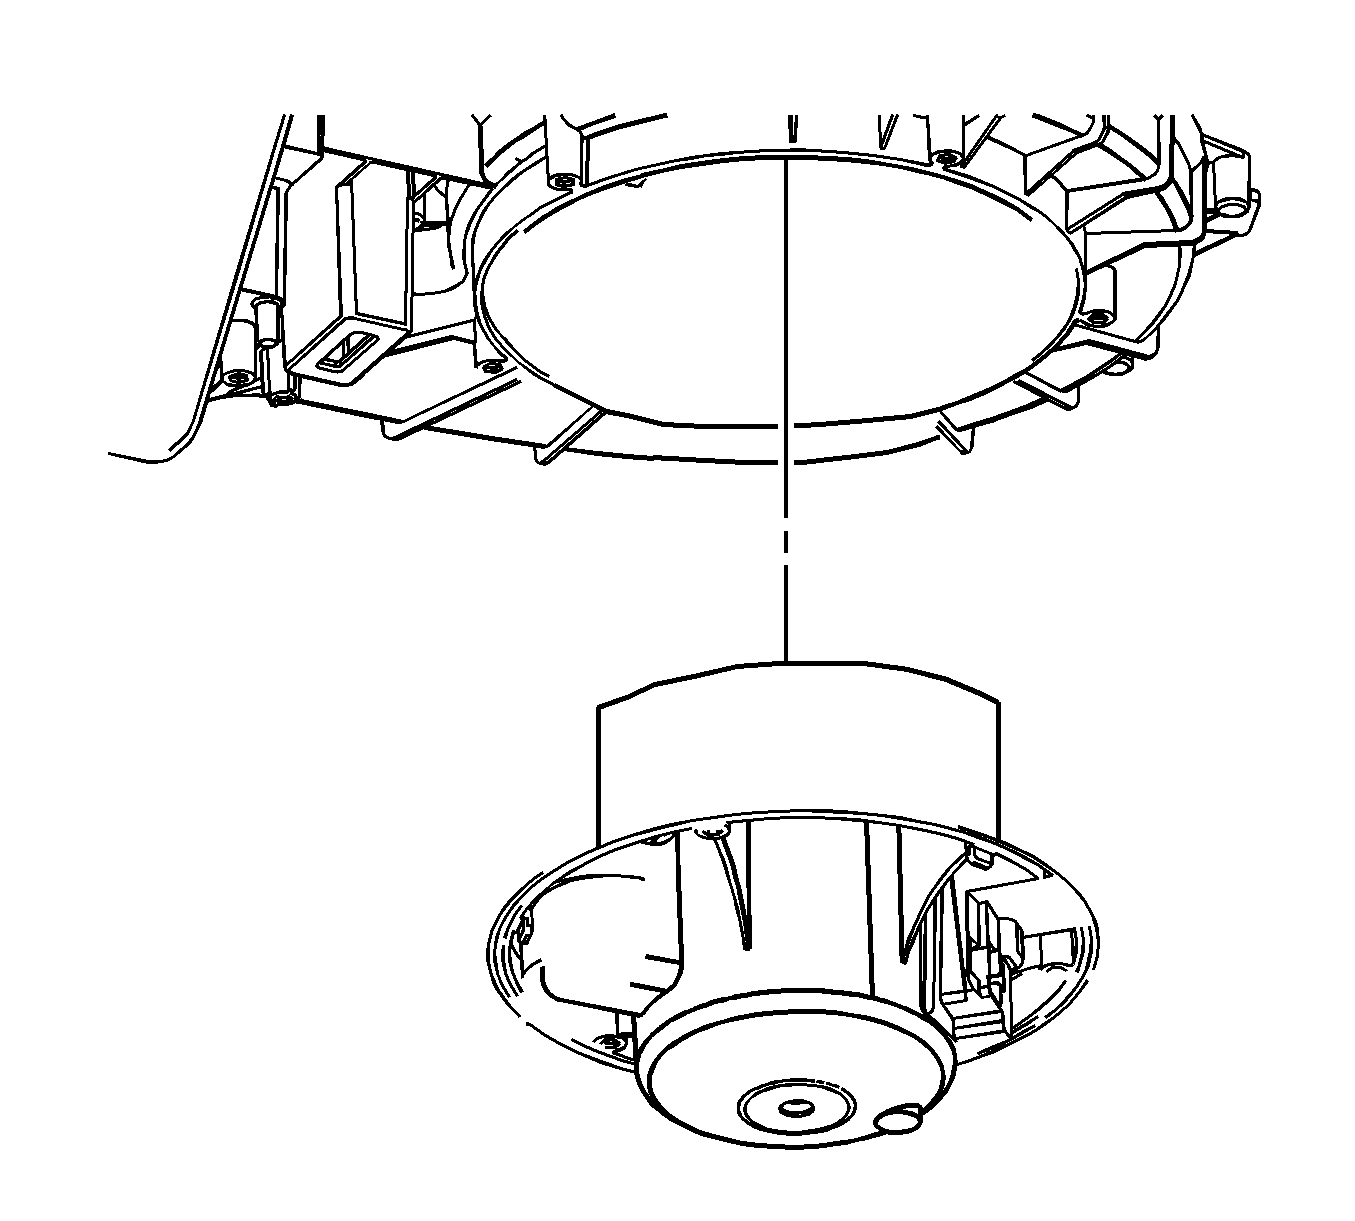
- Remove the blower motor.
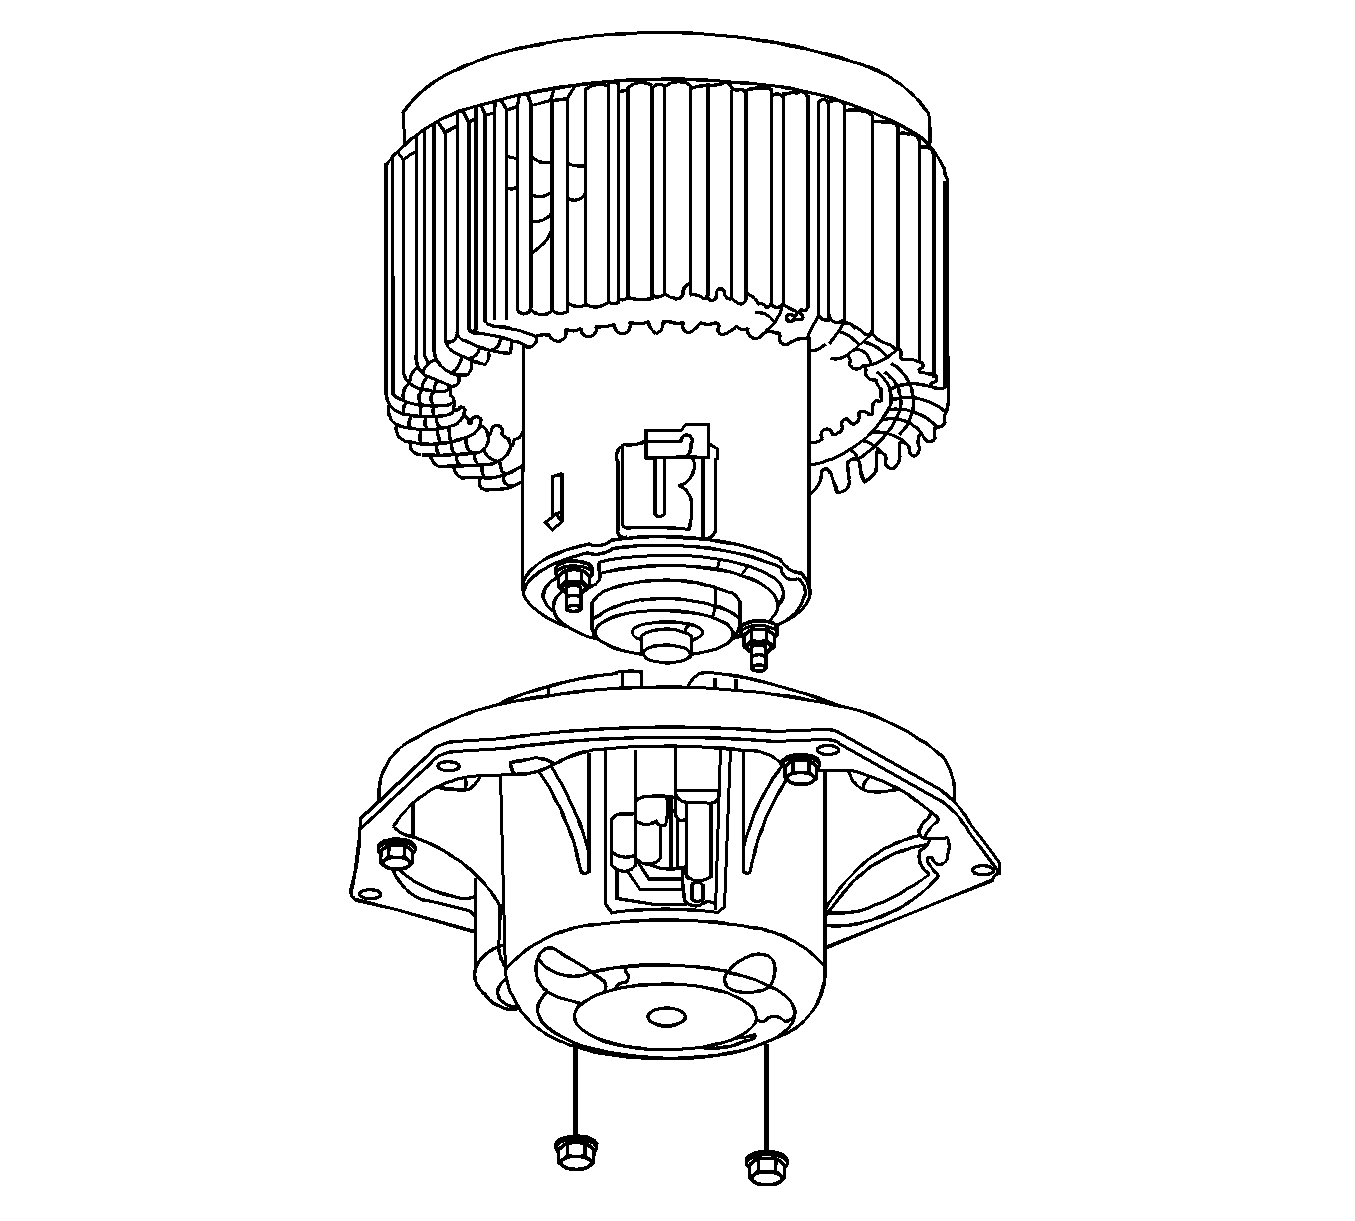
- Remove the blower motor nuts.
- Remove the blower motor from the blower motor cup.

Important: Cut through the case as straight as possible because the motor cup must be reused. In order to prevent damage to the component, do not cut any deeper than necessary to remove the motor cup.


Installation Procedure
- Install the new blower motor to the blower motor cup.
- Install the blower motor nuts.
- Install the motor blower seal to the blower motor service ring.
- Install the blower motor.
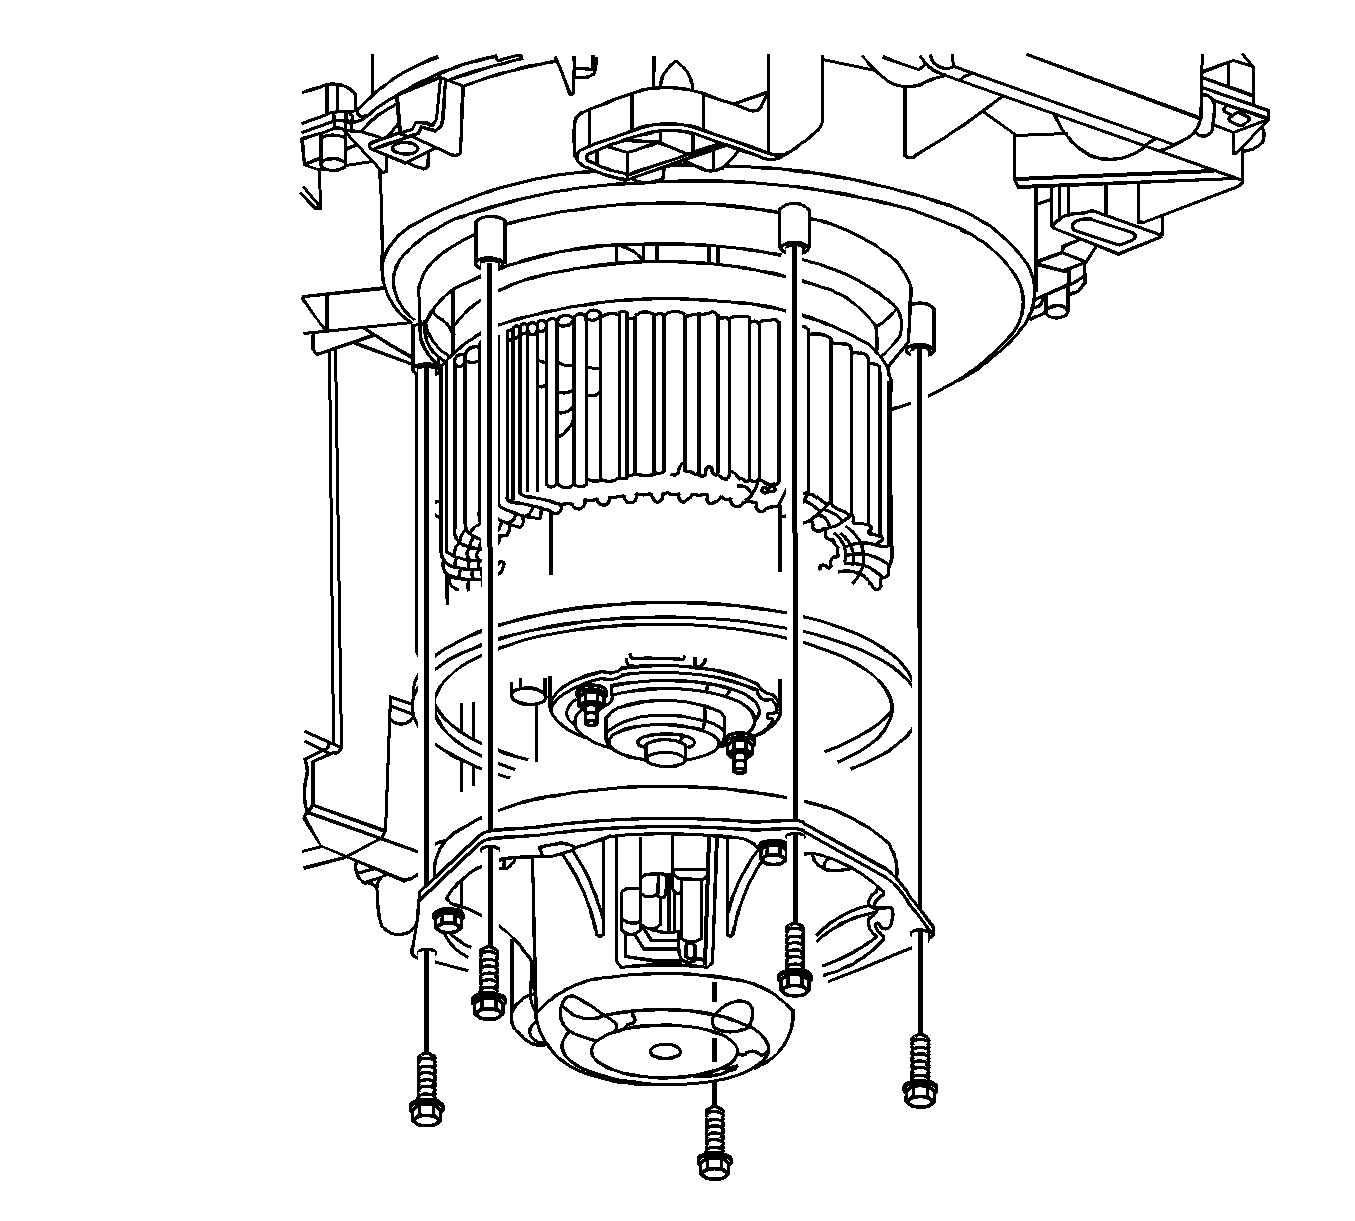
- Install the blower motor attachment ring.
- Install the blower motor screws.
- Install the blower motor wire harness connector.
- Install the right closeout panel. Refer to Instrument Panel Insulator Replacement - Right Side.

Notice: Refer to Fastener Notice in the Preface section.
Tighten
Tighten the nuts to 2.4 N·m (21 lb in).

Tighten
Tighten the screws to 1.5 N·m (13 lb in).
