Removal Procedure
- Position the vehicle on a hoist and raise the vehicle.
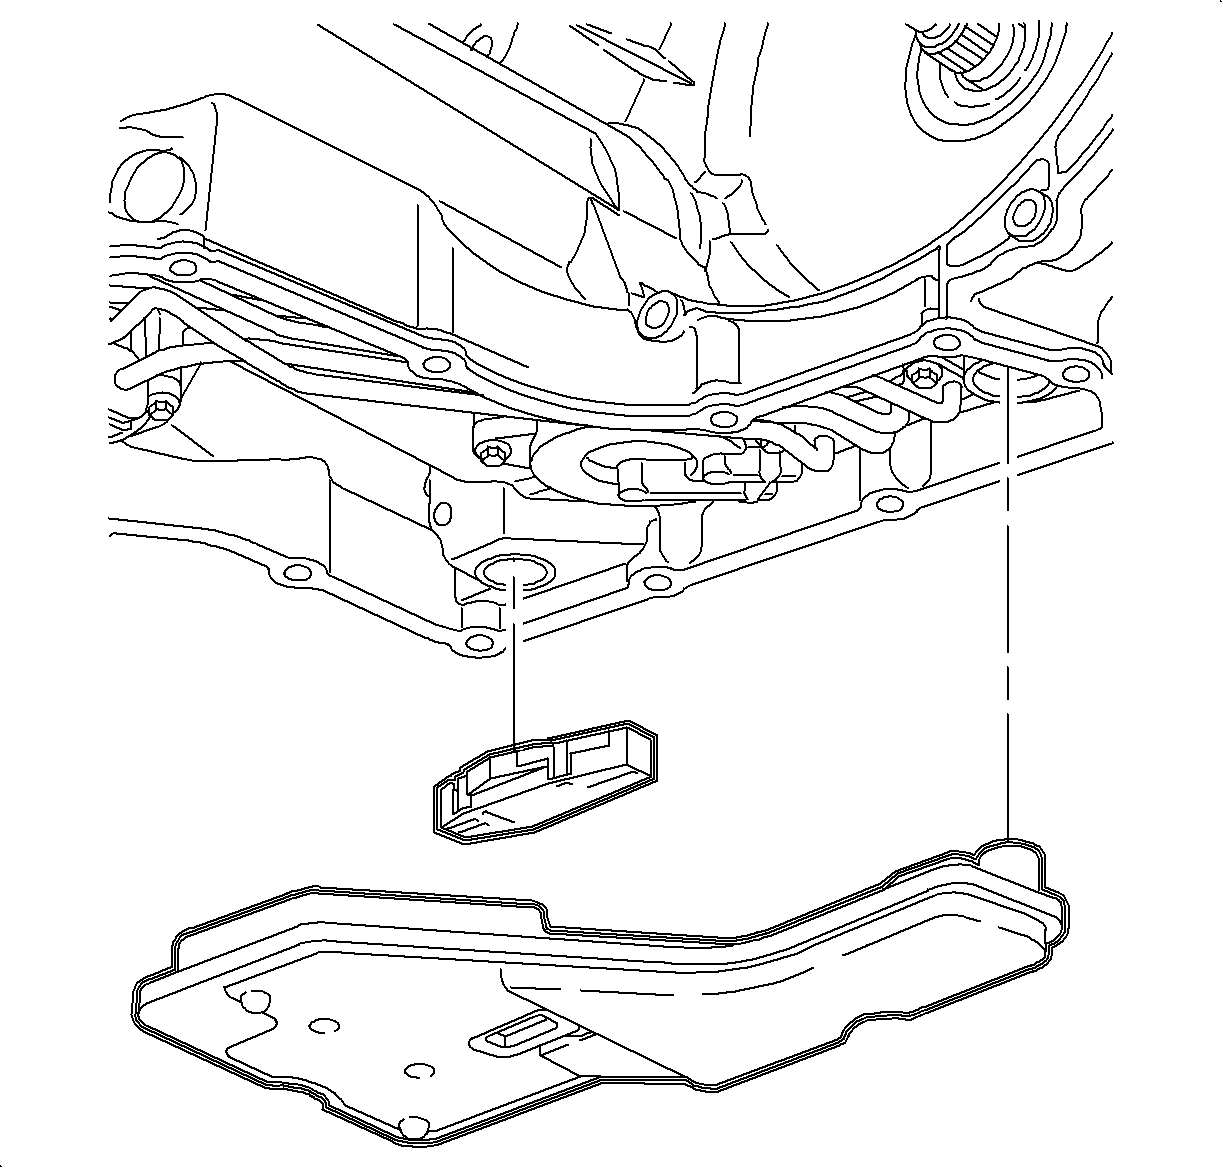
- Remove the transaxle oil pan. Refer to Oil Pan Replacement .
- Remove the oil level control valve. Pull the valve straight down. Do not pry on the valve.
- Remove the oil filter and oil filter O-ring seal. The seal may stay in the case when the filter is removed.
- Using a chisel, indent the top of filter neck seal to relax the press fit.
- Remove the filter neck seal from the transaxle case.
- Remove the oil feed pipe assembly bolts and remove the assembly.
- Remove the low and reverse band oil pipe assembly seals.
Caution: Ensure that the vehicle is properly supported and squarely positioned. To help avoid personal injury when a vehicle is on a hoist, provide additional support for the vehicle on the opposite end from which the components are being removed.
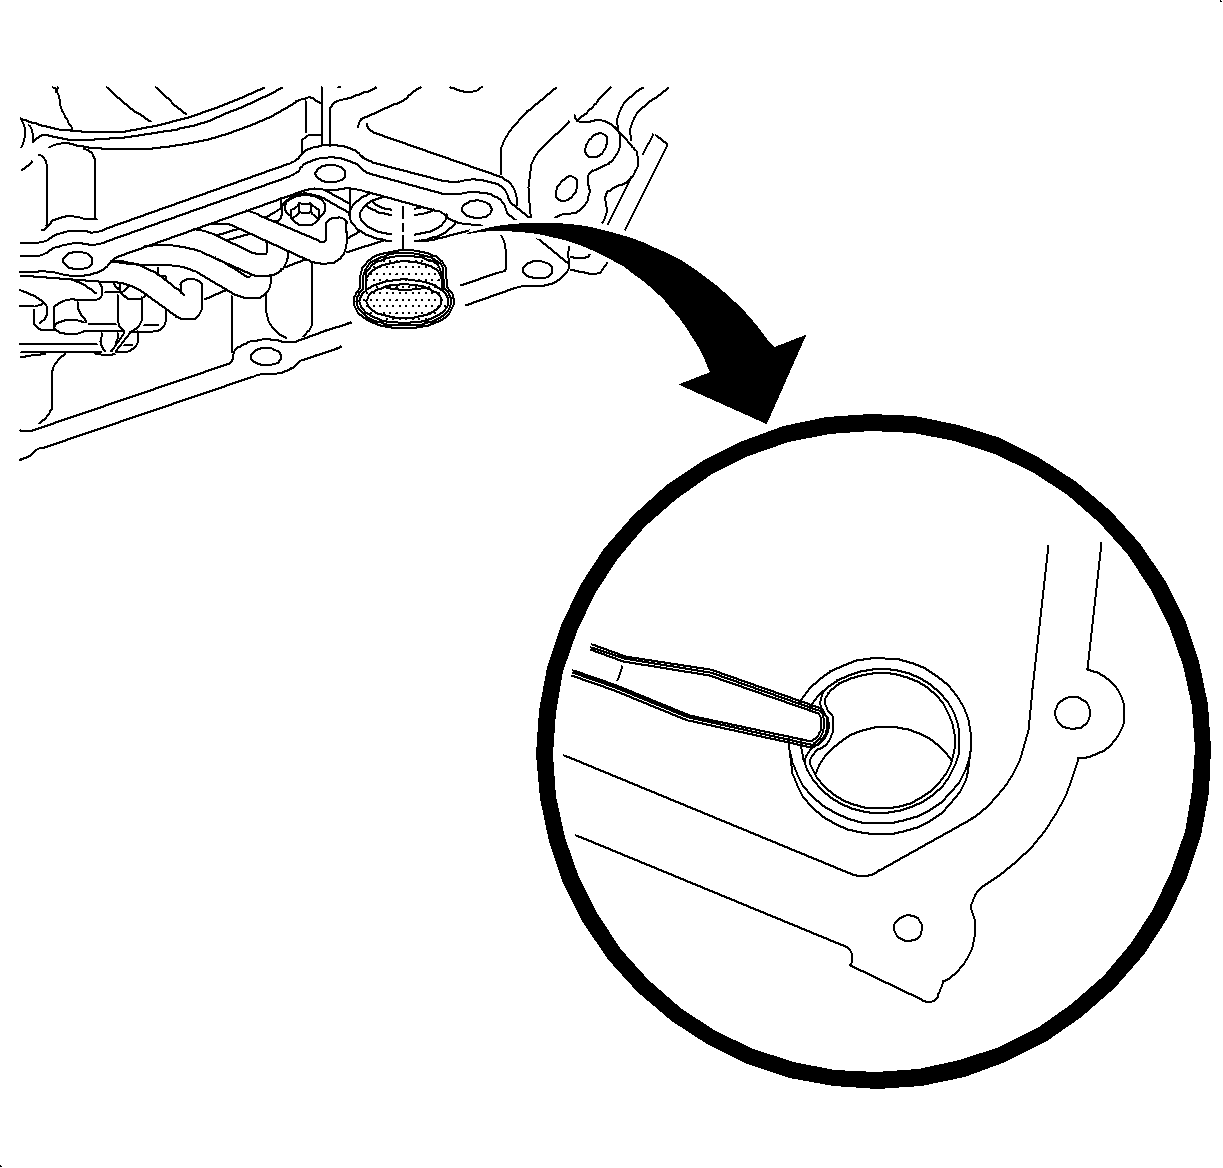
Important: Do not score or damage the transaxle case when removing the filter neck seal.

Installation Procedure
- Inspect the oil feed pipes for plugged passages, bent pipes, or cracks.
- Inspect the oil feed pipe seal rings in order to verify the proper location of the seal rings.
- Replace the seal rings only if they are cut, swelled, or damaged.
- Install the oil feed pipe assembly.
- Hand start the oil feed pipe assembly bolts.
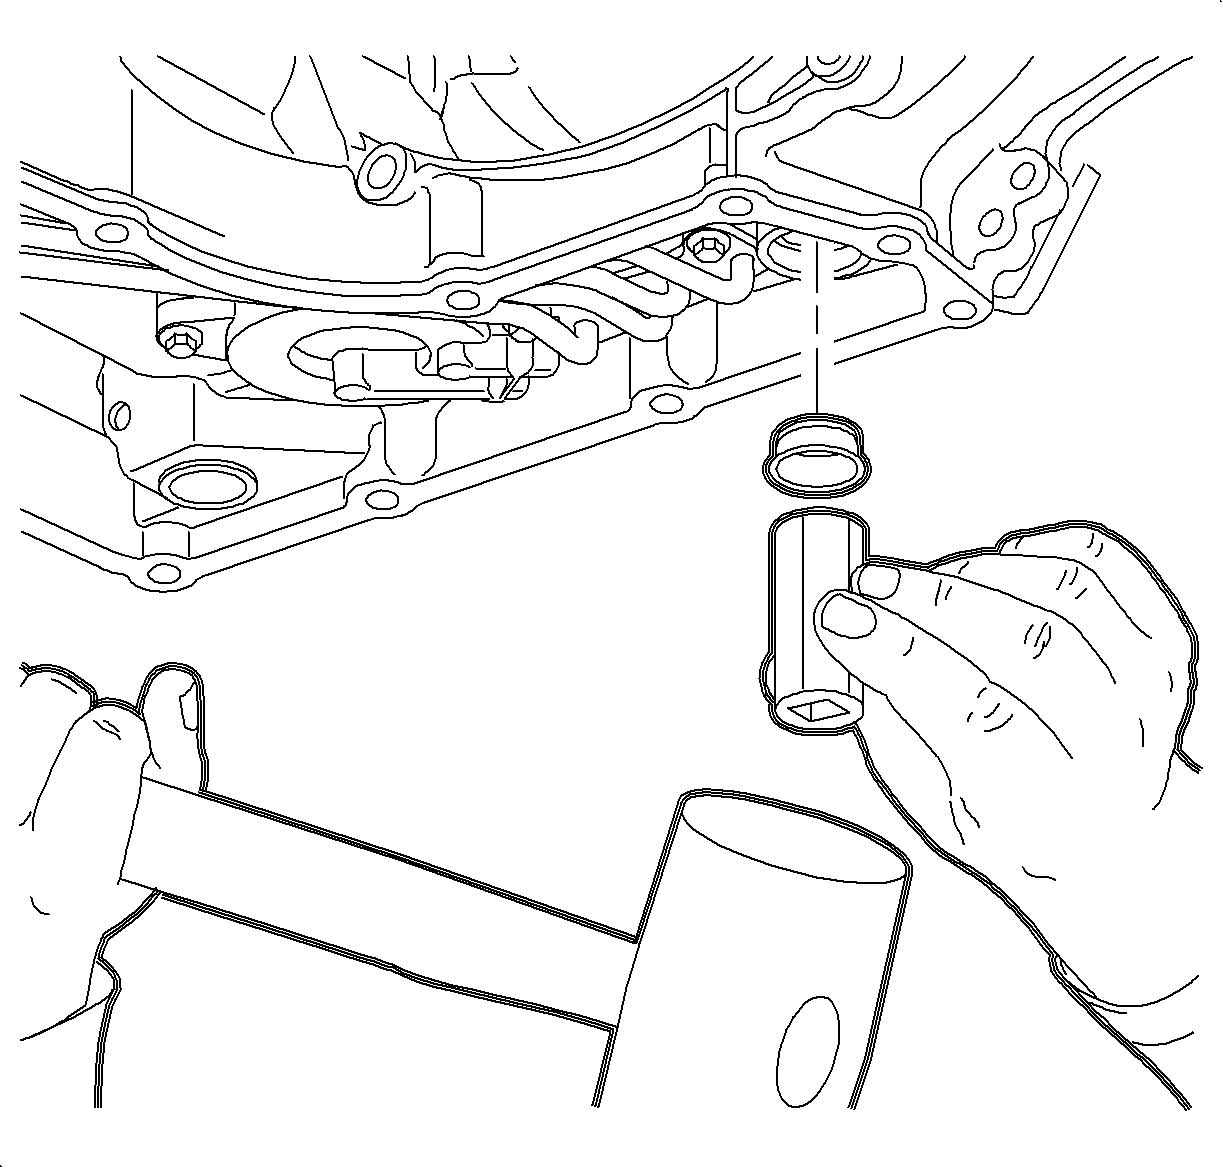
- Install the new filter neck seal into the transaxle case. A large socket can be used as an installation tool. Two mallets can be used as well.
- Coat the filter O-ring seal with a small amount of petroleum jelly, and install the filter into the transaxle case.
- Install the oil level control valve.
- Install the transaxle oil pan and gasket. Refer to Oil Pan Replacement .
- Lower the vehicle.
- Add DEXRON® VI transaxle fluid or equivalent.
- Start the engine, warm up the transaxle, and check for leaks.
- Check the fluid level. Refer to Transmission Fluid Check .
- Reset the TAP values. Refer to Transmission Adaptive Functions .

Important: The oil feed pipe seals are glued into place during the initial assembly. If a seal ring is to be replaced, be sure to thoroughly clean any residual glue from the feed pipes.
Notice: Refer to Fastener Notice in the Preface section.
Tighten
Tighten the oil feed pipe assembly bolts to 12 N·m (9 lb ft).
Notice: Push straight down on the center of the oil level control valve in order to prevent damage to the case bore.
Specification
| • | The bottom pan removal capacity is approximately 6.5 L (6.9 qt). |
| • | The complete overhaul capacity is approximately 9 L (9.5 qt). |
| • | The dry capacity is approximately 12.2 L (12.9 qt). |
Important: It is recommended that transmission adaptive pressure (TAP) information be reset.
Resetting the TAP values using a scan tool will erase all learned values in all cells. As a result, The ECM, PCM or TCM will need to relearn TAP values. Transmission performance may be affected as new TAP values are learned.