Removal Procedure
- Position the vehicle on a hoist and raise the vehicle.
- Place a drain pan under the transaxle oil pan.
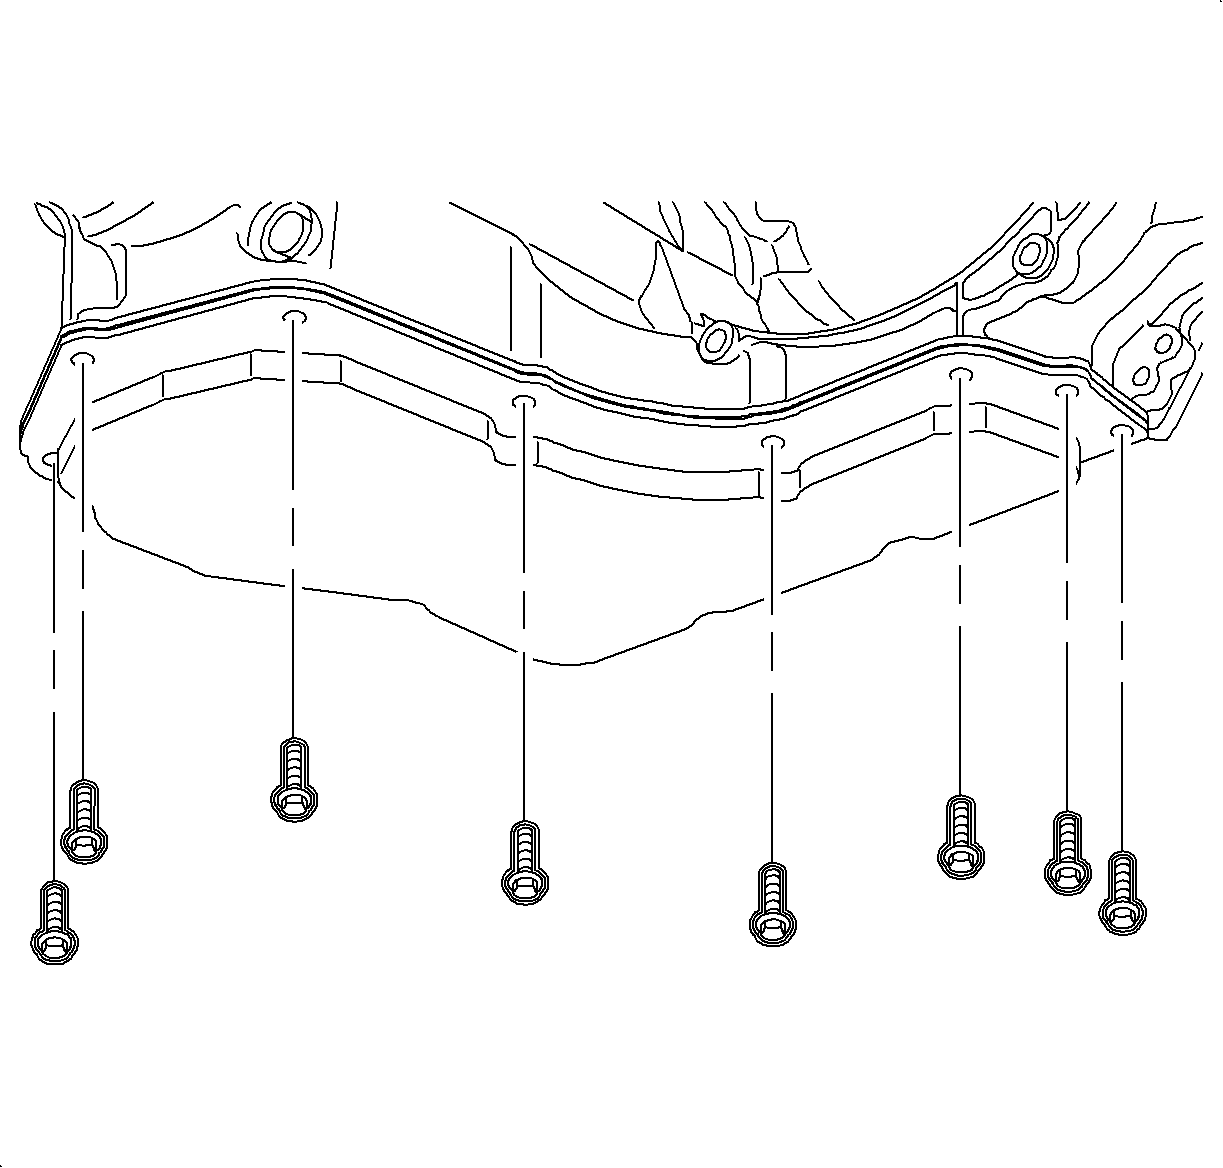
- Remove the oil pan bolts from the front and sides only.
- Loosen the rear oil pan bolts approximately 4 times.
- Lightly tap the oil pan with a rubber mallet or carefully pry in order to allow the oil to drain.
- Remove the AIR. Refer to Transmission Fluid Check .
- Inspect the fluid color.
- Remove the remaining oil pan bolts and the oil pan.
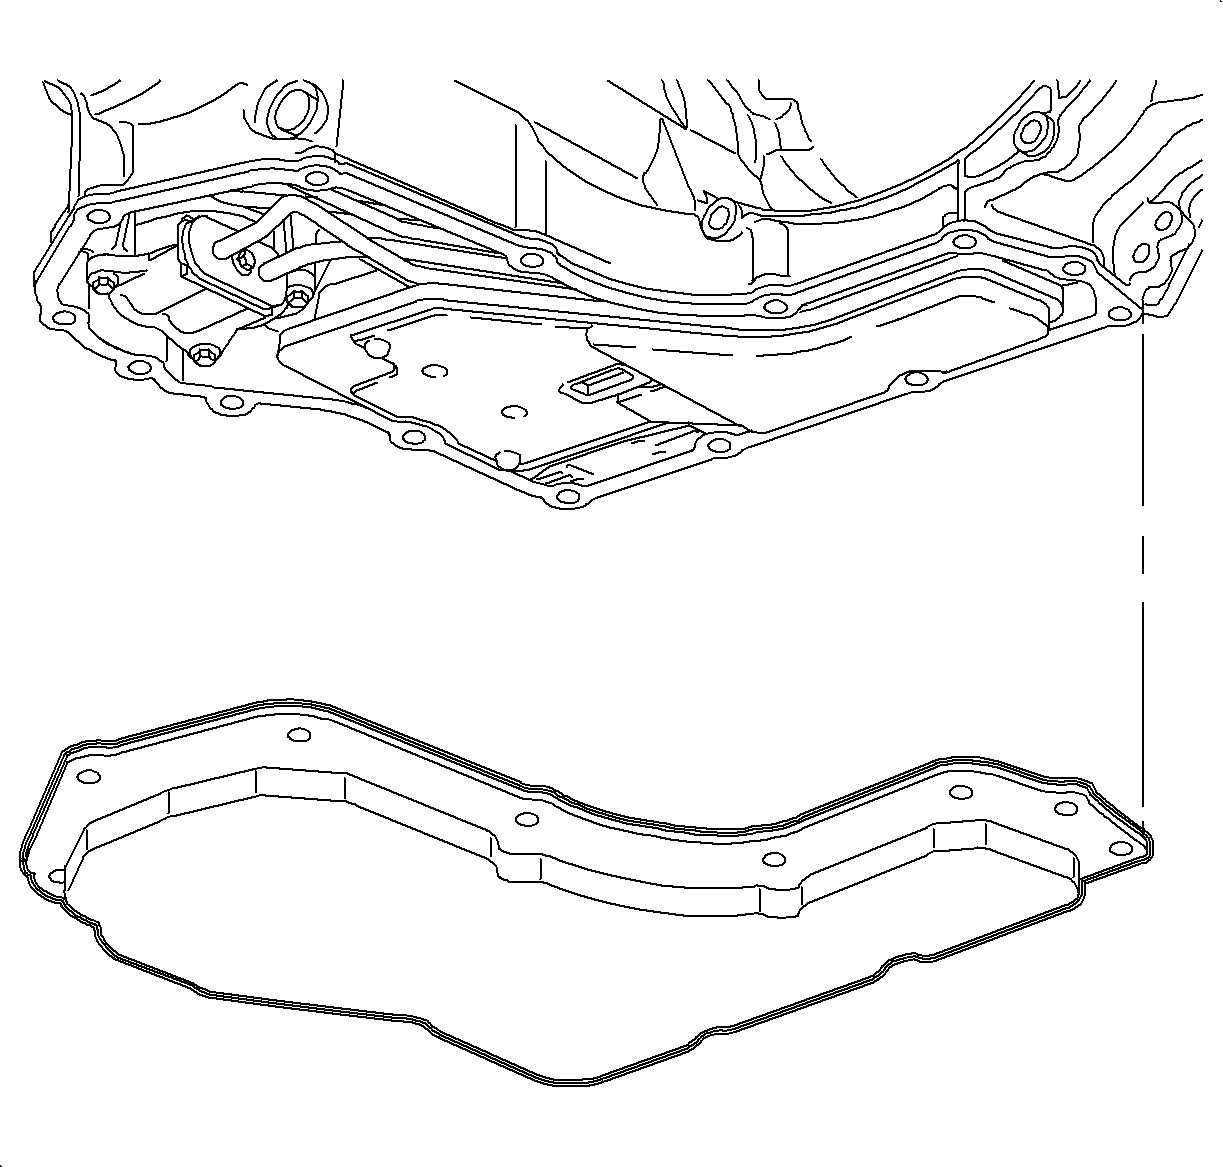
- Remove the oil pan gasket.
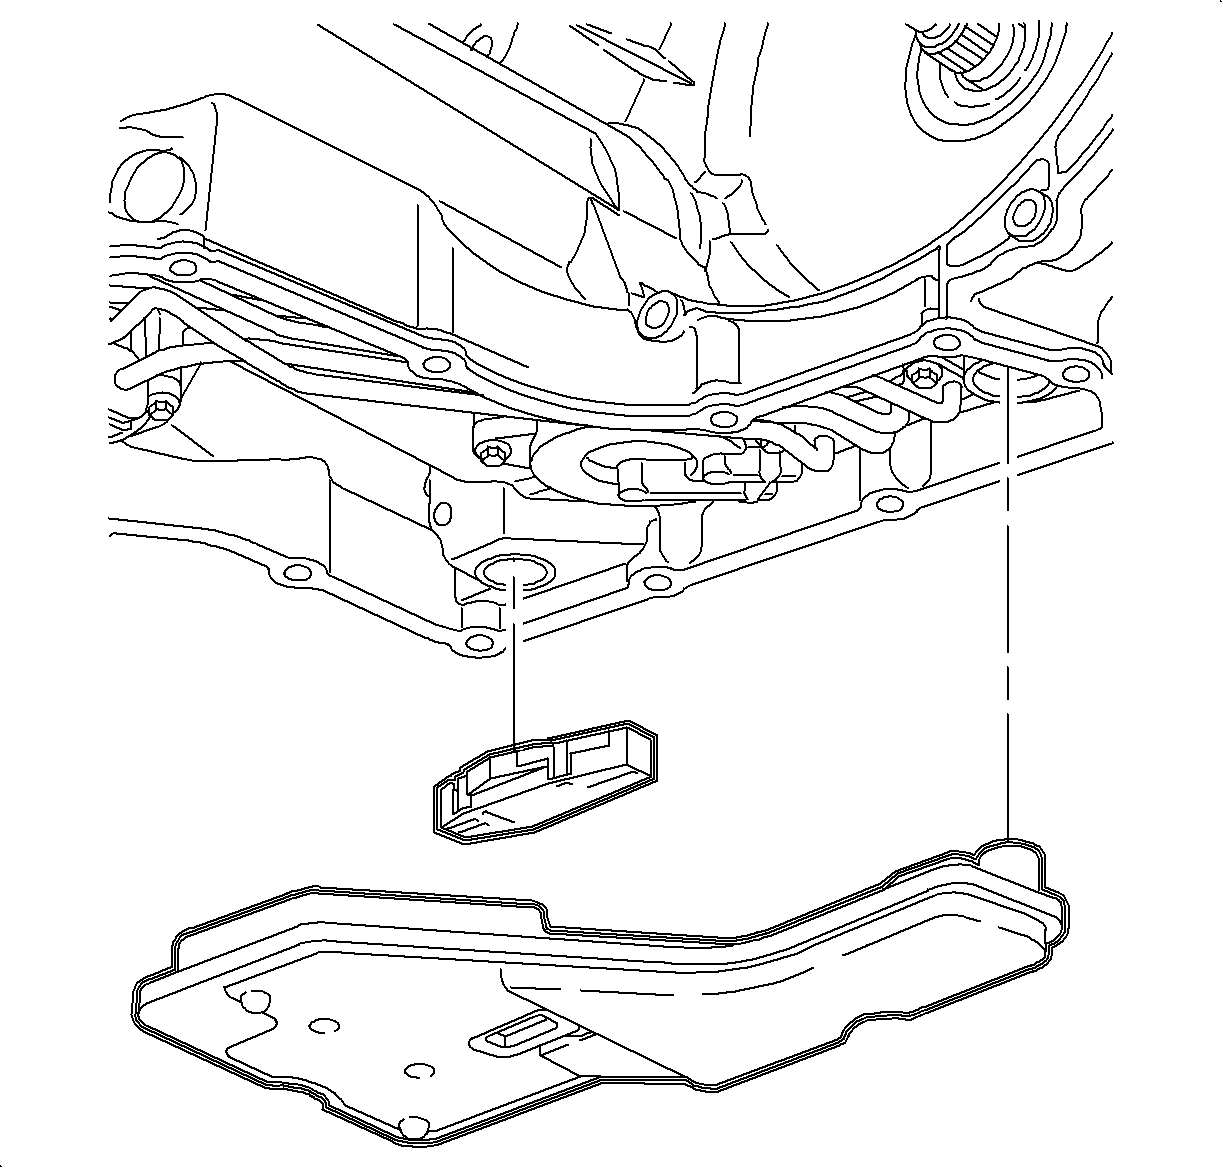
- Remove the oil level control valve.
- Remove the oil filter and oil filter O-ring seal. The seal may stay in case when filter is removed.
- Using a chisel, indent the top of the filter neck seal to relax the press fit.
- Remove the filter neck seal from the transaxle case and discard.
- Remove all traces of the old gasket material.
- Clean the transaxle case and oil pan gasket surfaces with solvent, and allow to air dry.
Caution: Ensure that the vehicle is properly supported and squarely positioned. To help avoid personal injury when a vehicle is on a hoist, provide additional support for the vehicle on the opposite end from which the components are being removed.
Notice: Pry the oil pan carefully in order to prevent damage to the transaxle case or the oil pan sealing surfaces.
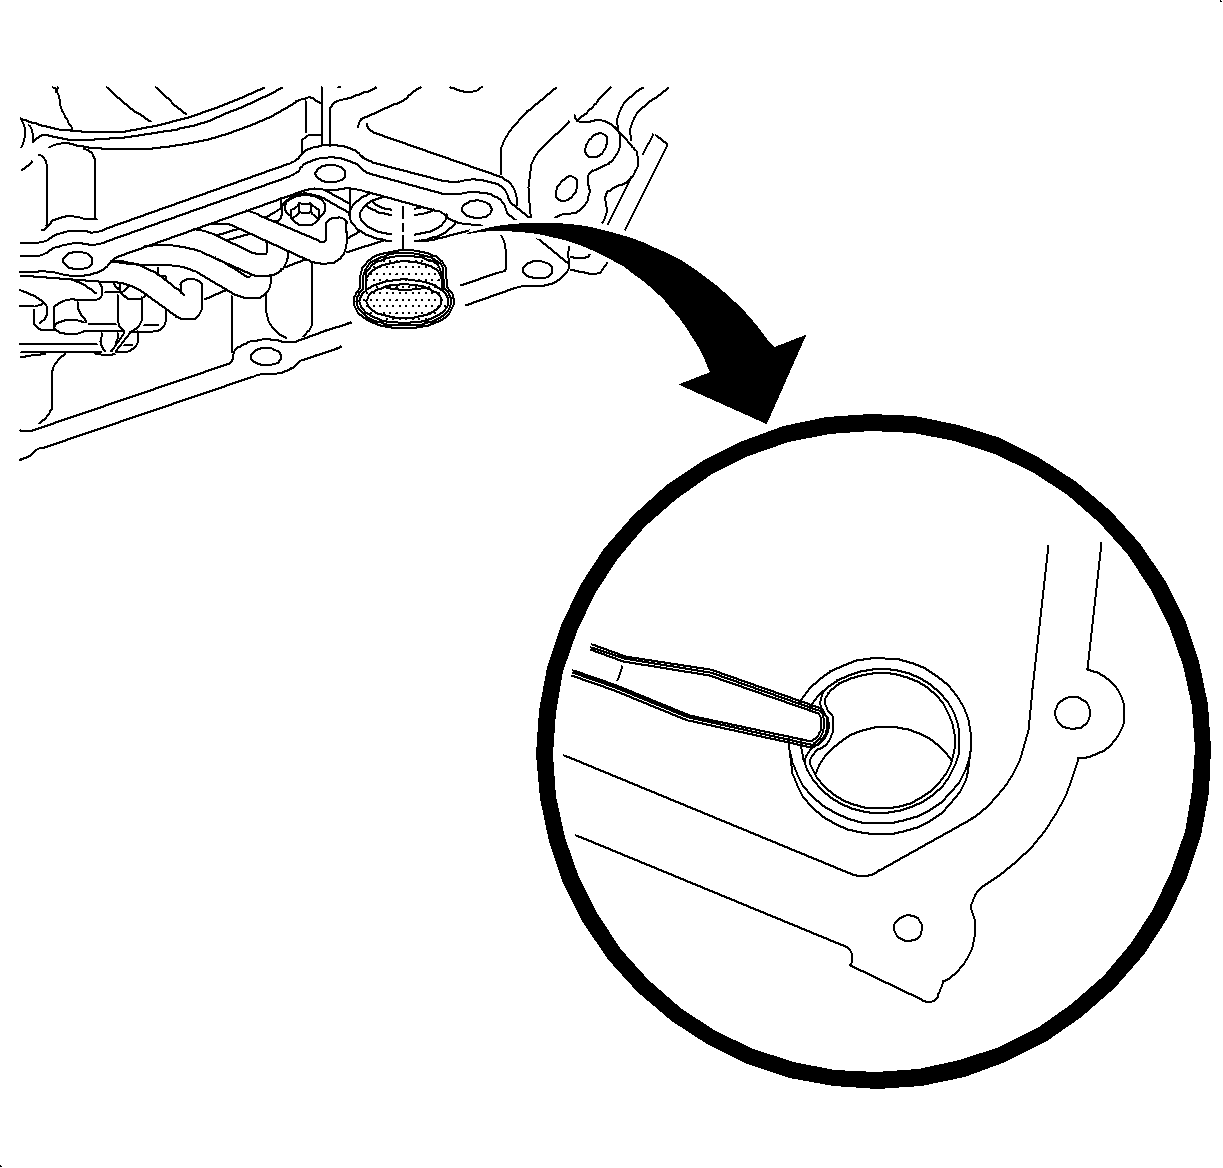
Important: Do not score or damage the transaxle case when removing the filter neck seal.
Installation Procedure
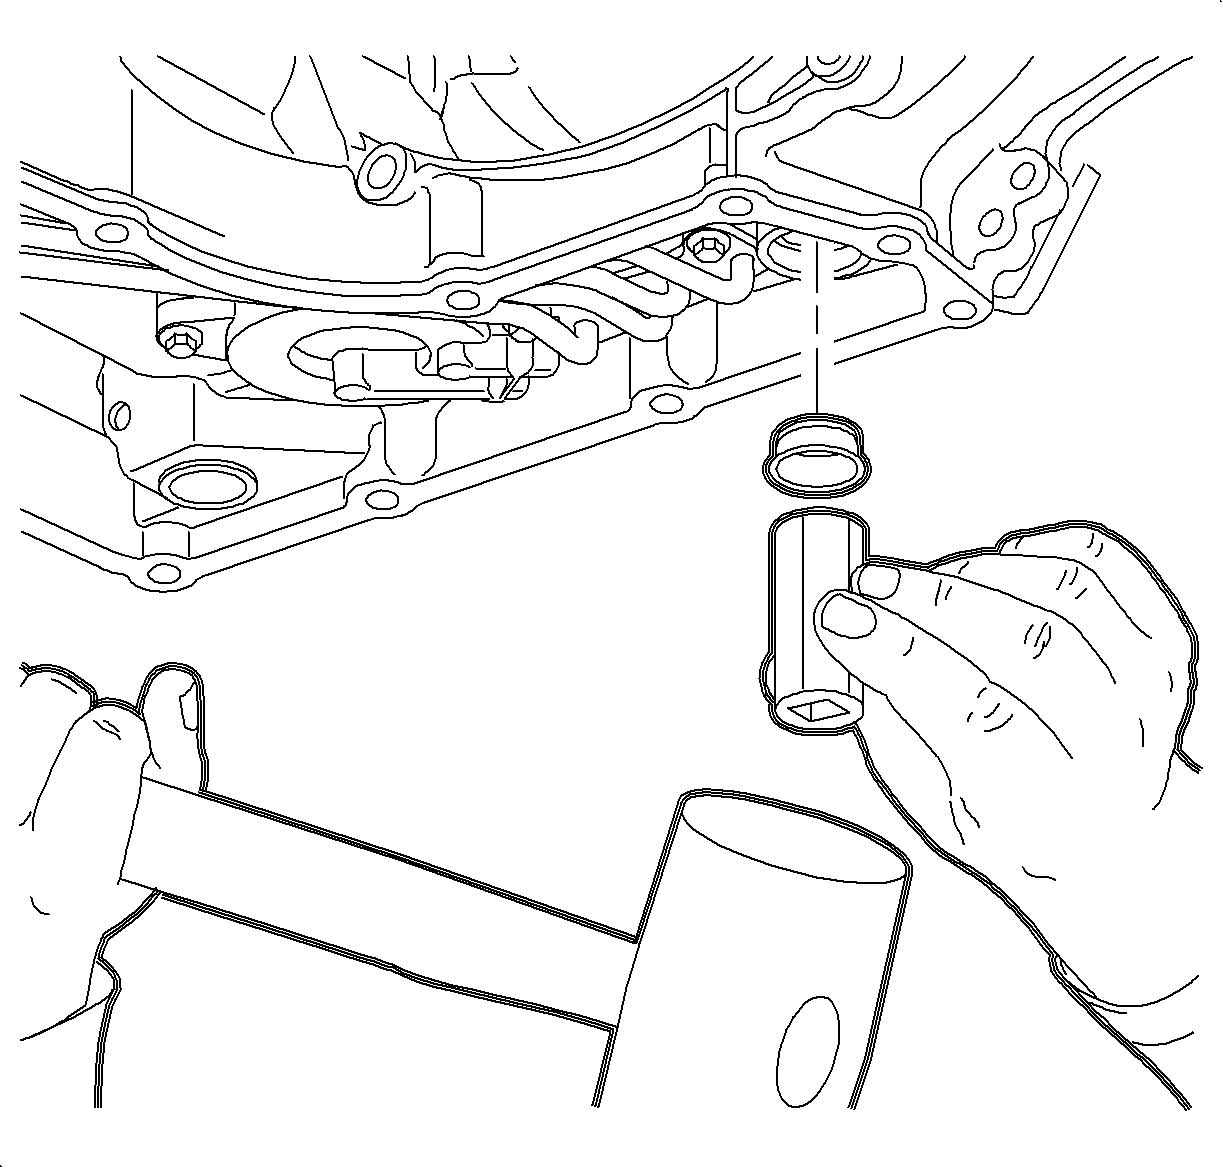
- Install a new filter neck seal. A large socket can be used as an installation tool as shown. Two mallets can be used as well.
- Coat the new filter O-ring seal with a small amount of petroleum jelly, and install the filter into the case.
- Install the oil level control valve.
- Install the oil pan gasket, the oil pan, and hand start the oil pan bolts.
- Lower the vehicle.
- Refill transaxle using DEXRON® VI to the specified refill capacity.
- Start the engine. Warm up the transaxle and check for leaks.
- Check for proper fluid level. Refer to Transmission Fluid Check .
Notice: Use petroleum jelly when lubricating the components. Greases other than petroleum jelly will change the transaxle fluid characteristics and will cause undesirable shift conditions or filter clogging.
Notice: Push straight down on the center of the oil level control valve in order to prevent damage to the case bore.
Notice: Refer to Fastener Notice in the Preface section.
Tighten
Tighten the oil pan bolts to 12 N·m (9 lb ft).
Specification
| • | The bottom pan removal capacity is approximately 6.5 L (6.9 qt). |
| • | The complete overhaul capacity is approximately 9 L (9.5 qt). |
| • | The dry capacity is approximately 12.2 L (12.9 qt). |
