For 1990-2009 cars only
Frame Replacement W/L61
Removal Procedure
- Support the radiator and condenser by looping a rope around each of the 2 tabs of the condenser and tie the rope around the upper tie bar.
- Raise and support the vehicle. Refer to Lifting and Jacking the Vehicle .
- Remove the front wheels. Refer to Tire and Wheel Removal and Installation .
- Remove the engine splash shield. Refer to Radiator Air Lower Baffle and Deflector Replacement .
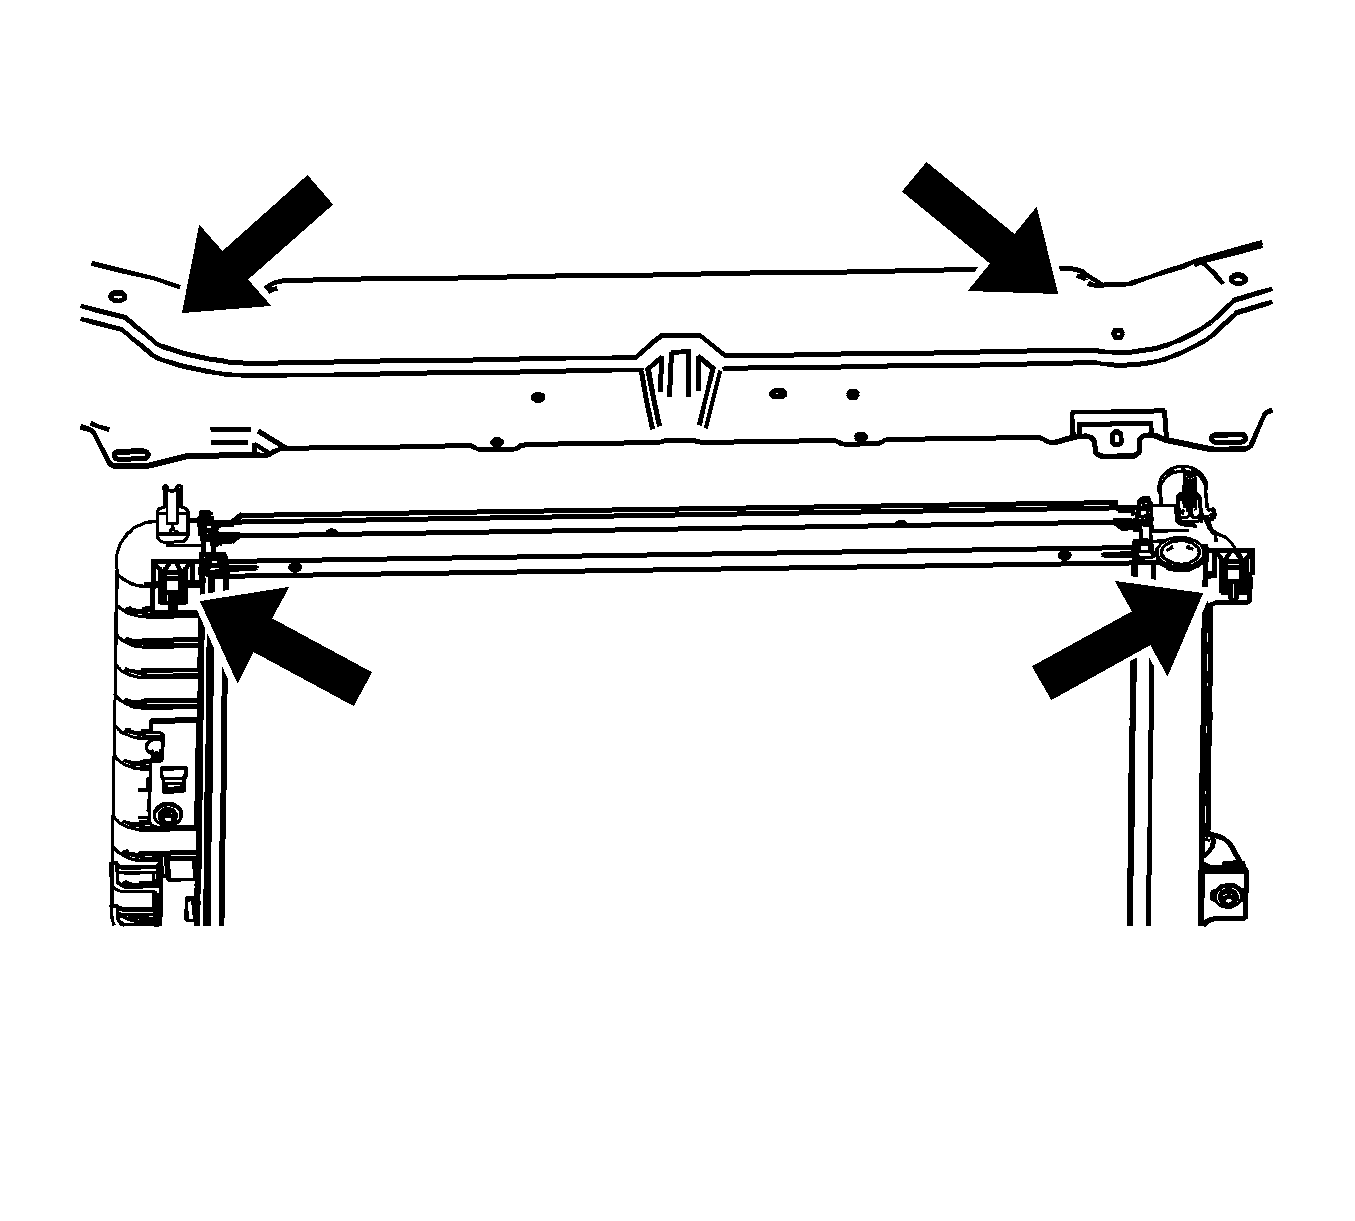
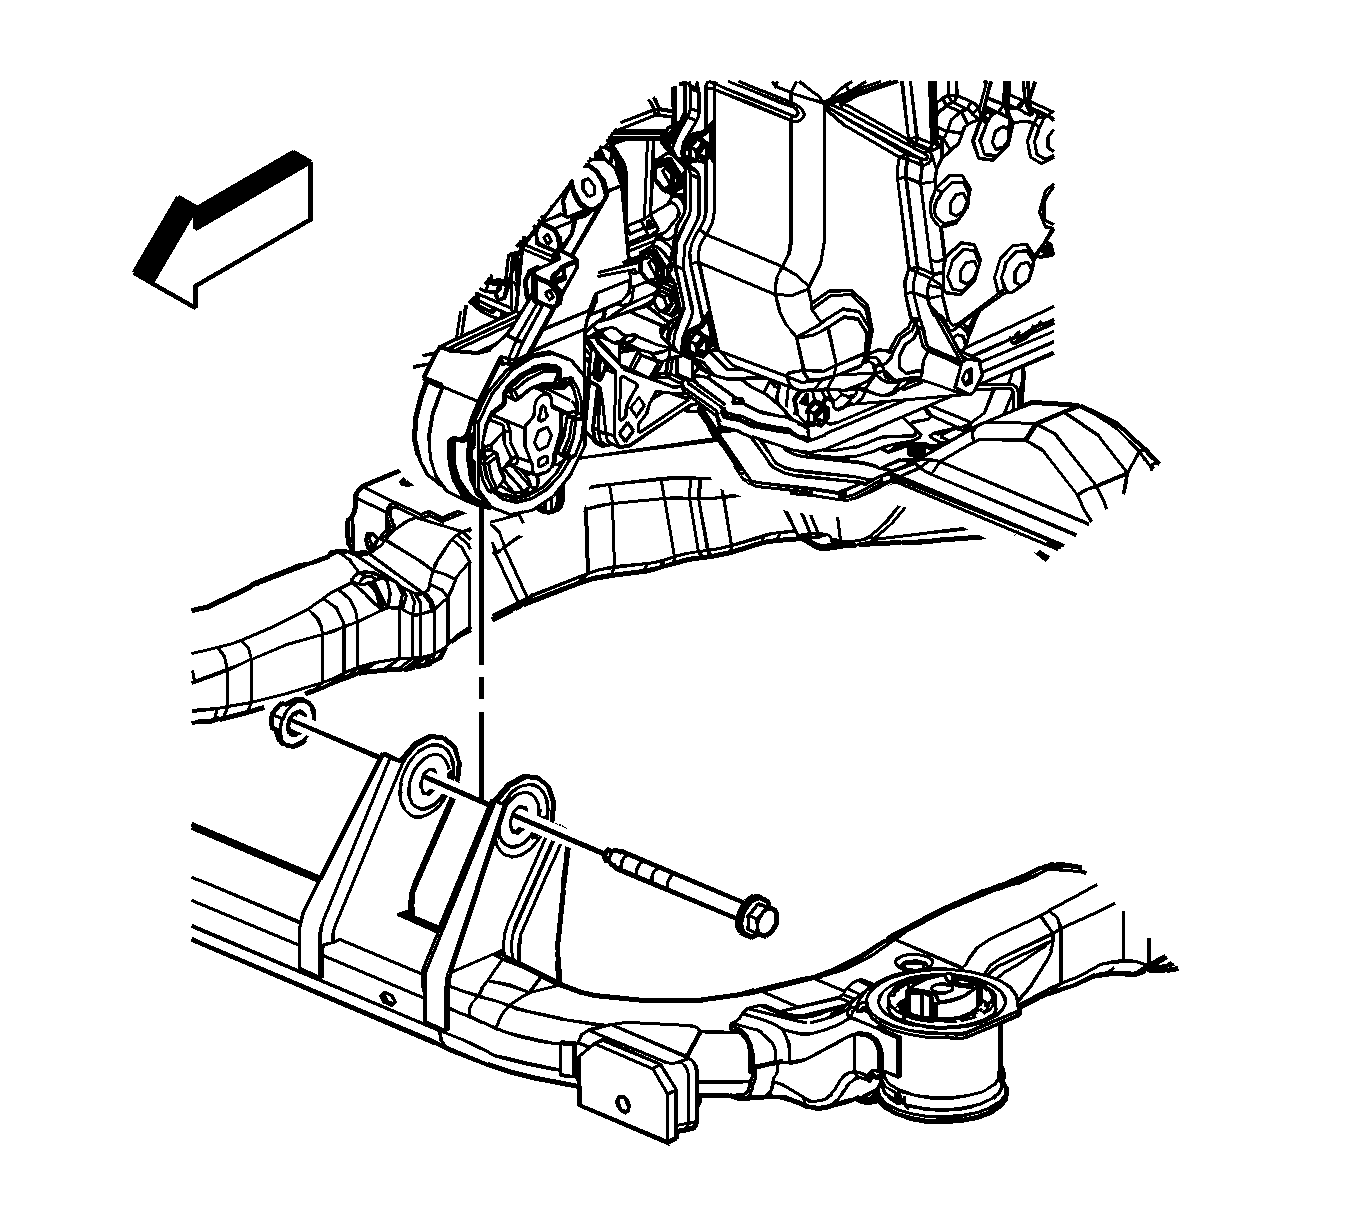
- Disconnect the lower radiator support bracket to frame bolts and disengage the alignment feature.
- Disconnect the stabilizer link from the stabilizer shaft. Refer to Stabilizer Shaft Link Replacement .
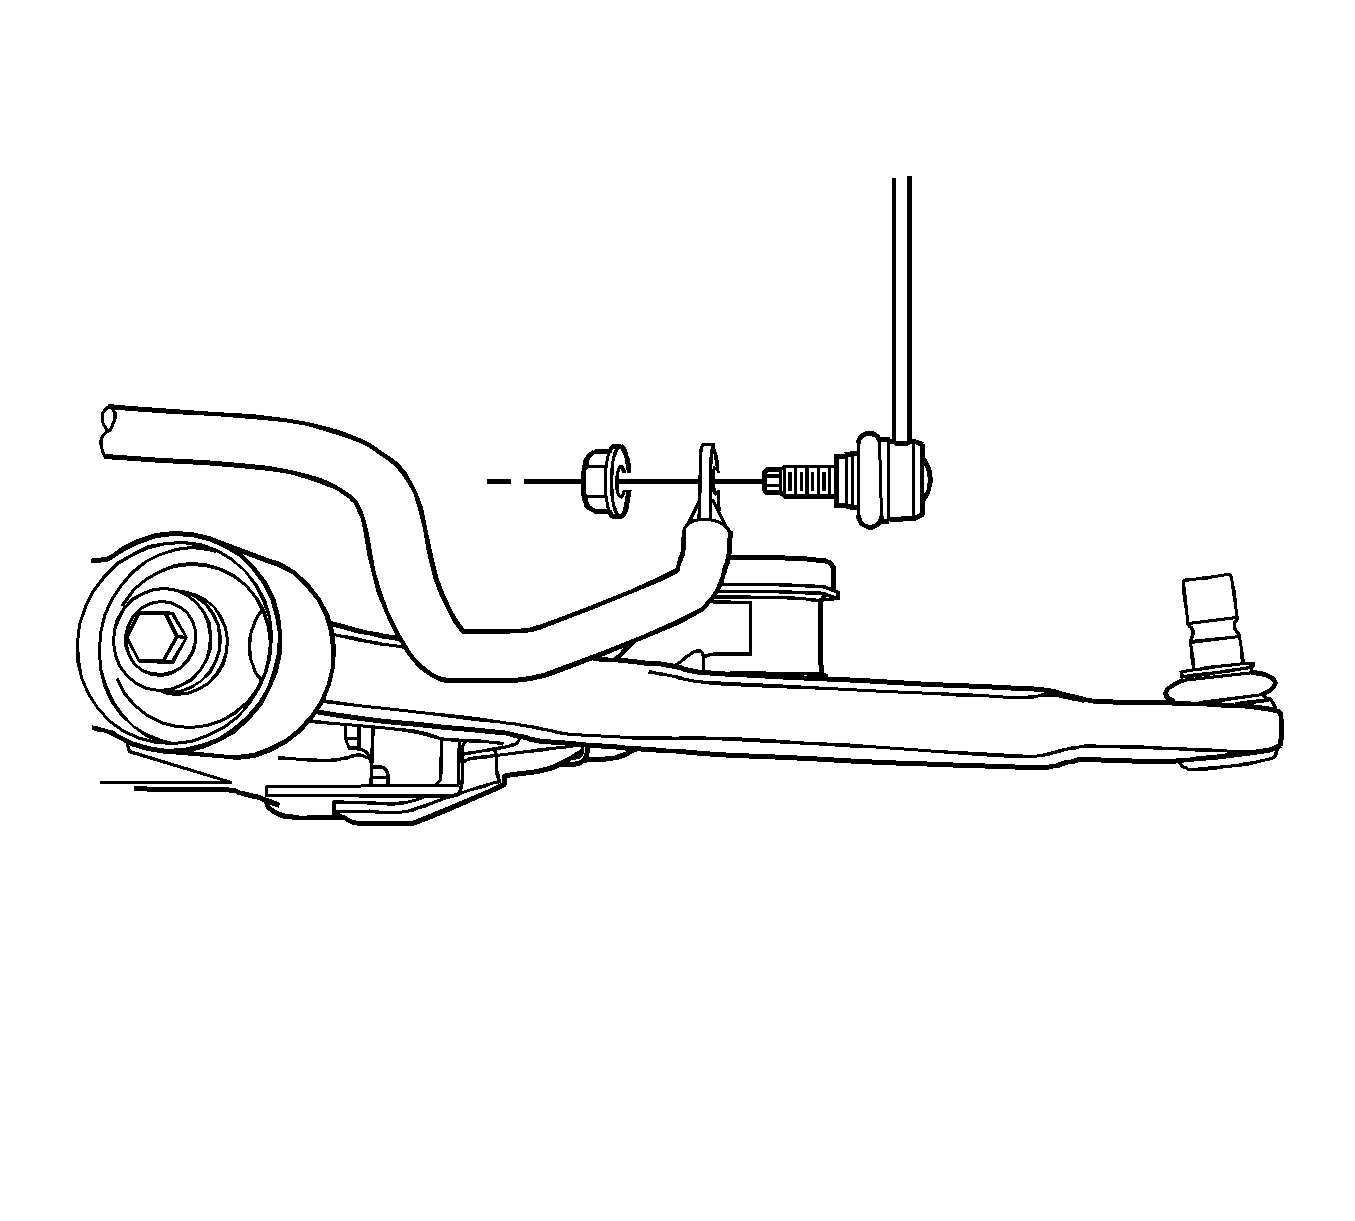
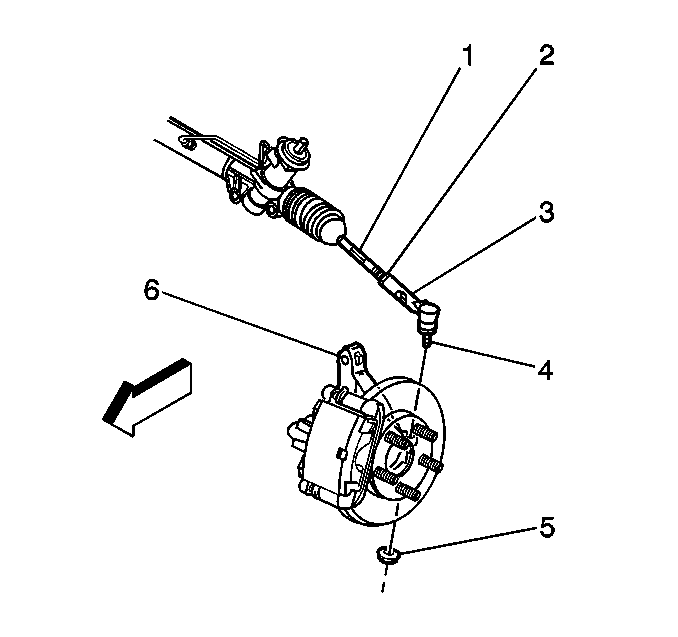
- Disconnect the outer tie rods (3) from the steering knuckles (6). Refer to Steering Linkage Outer Tie Rod Replacement .
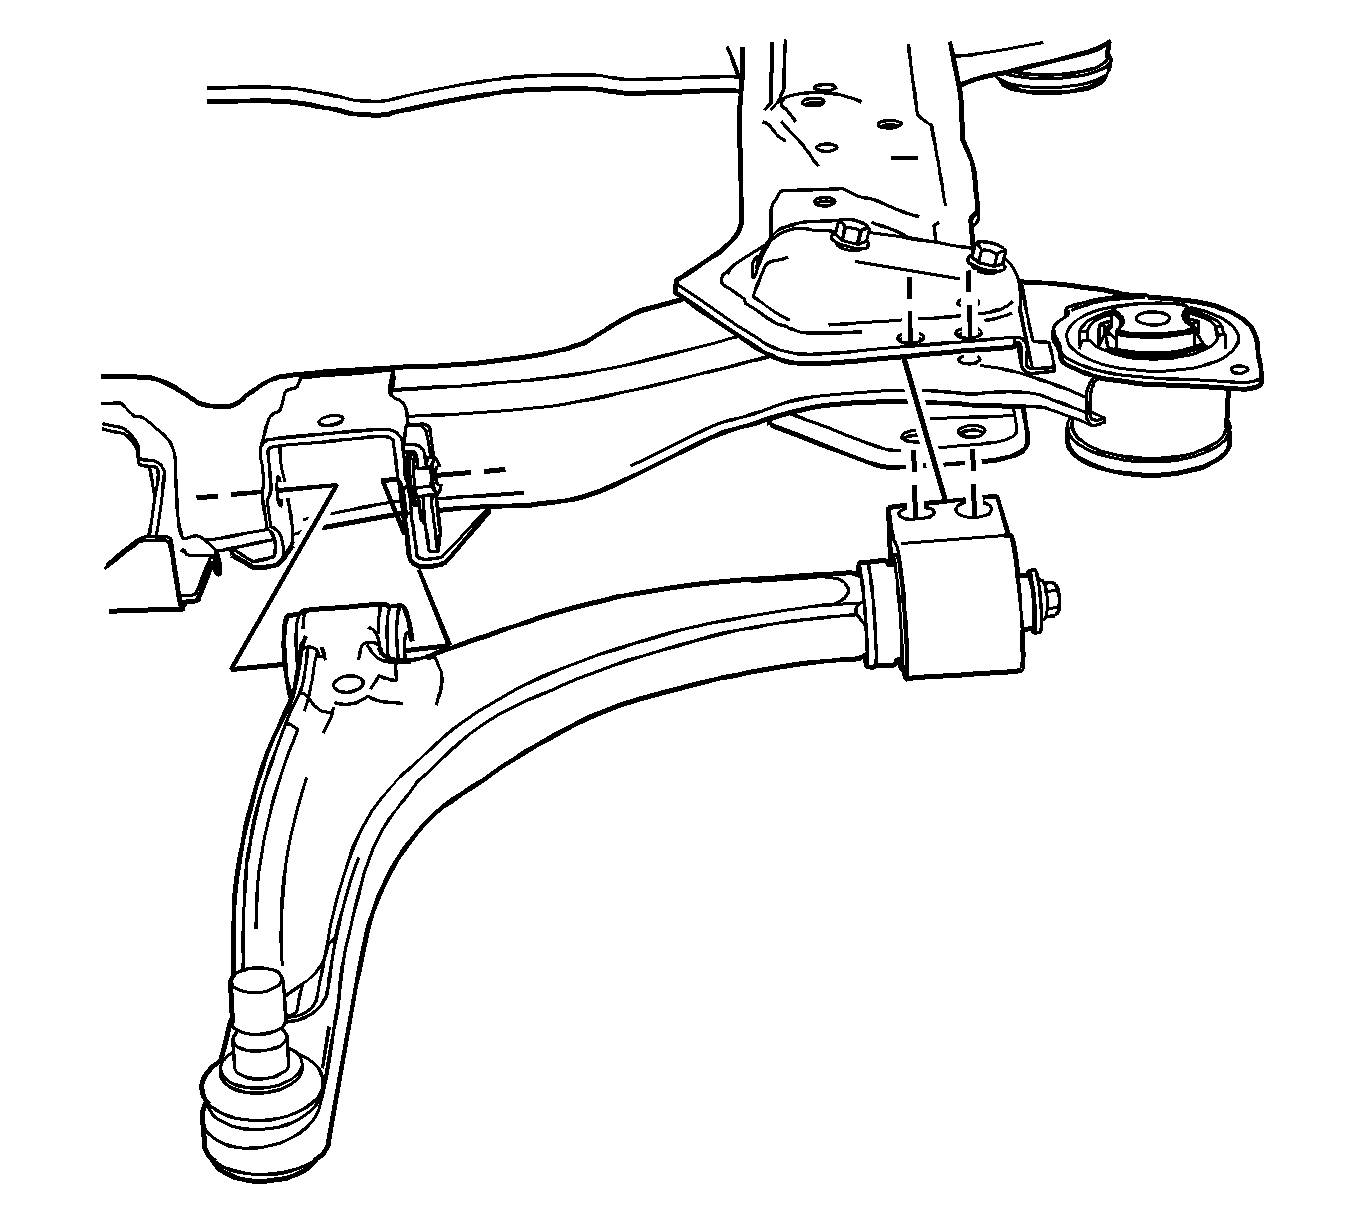
- Remove the lower control arms. Refer to Lower Control Arm Replacement .
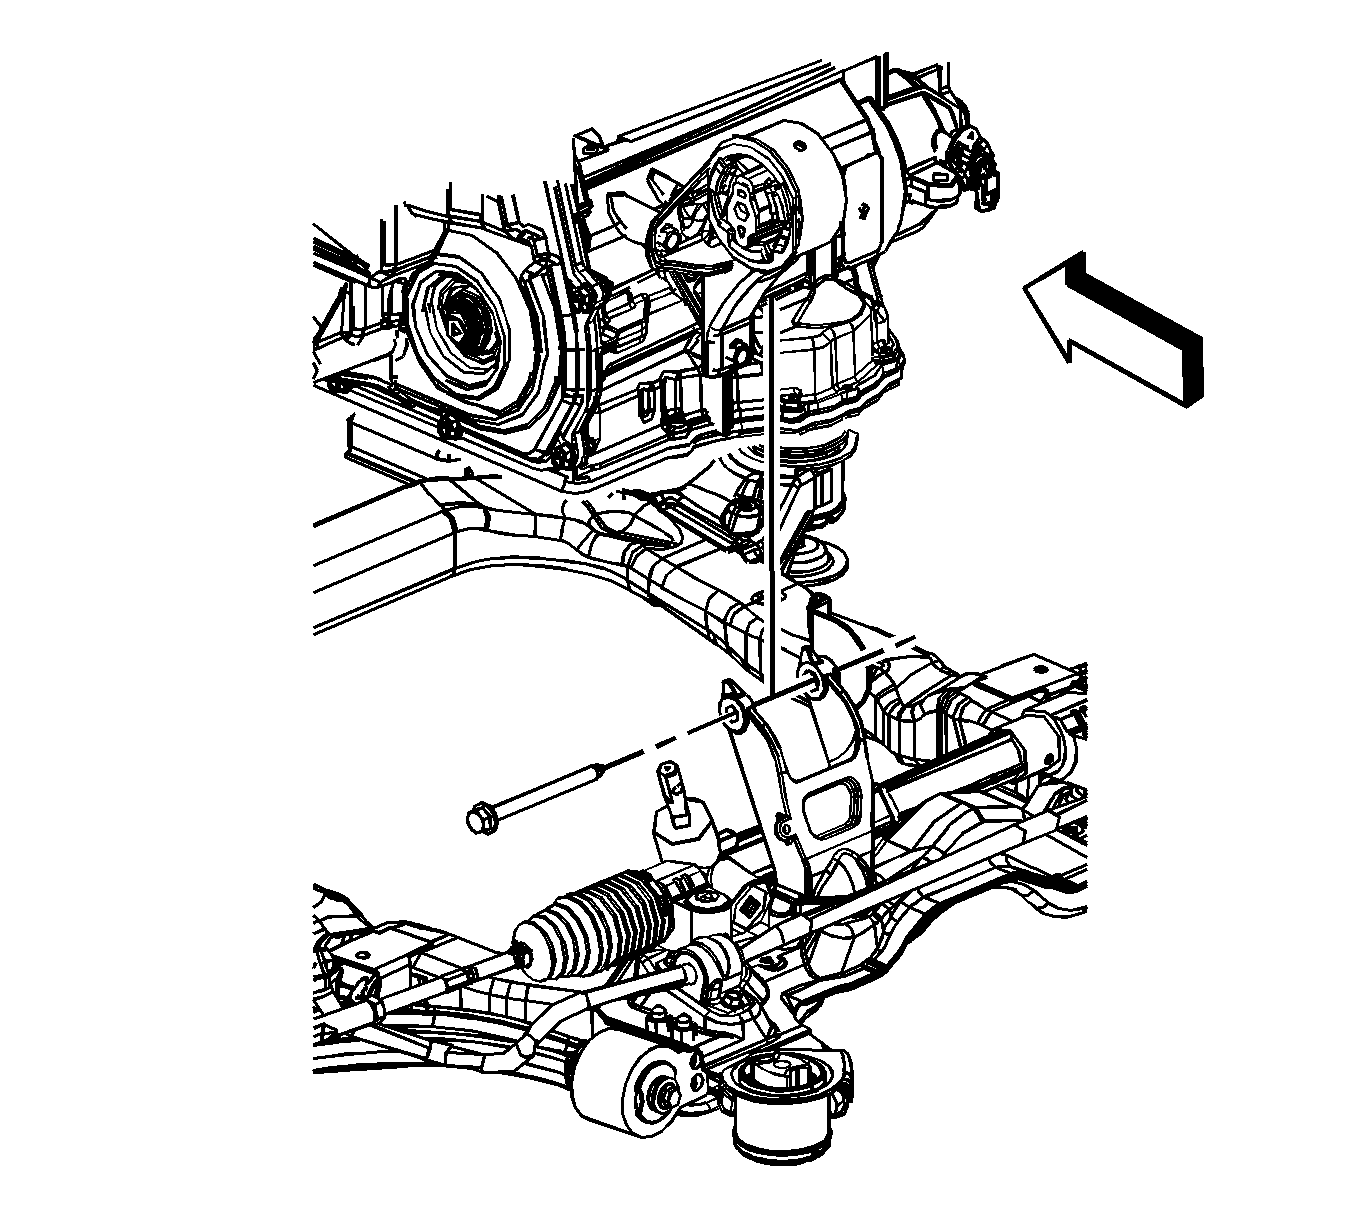
- Remove the intermediate steering shaft to steering gear pinch bolt.
- Disconnect the intermediate steering shaft from the steering gear. Note the alignment of the steering shaft to steering gear for installation.
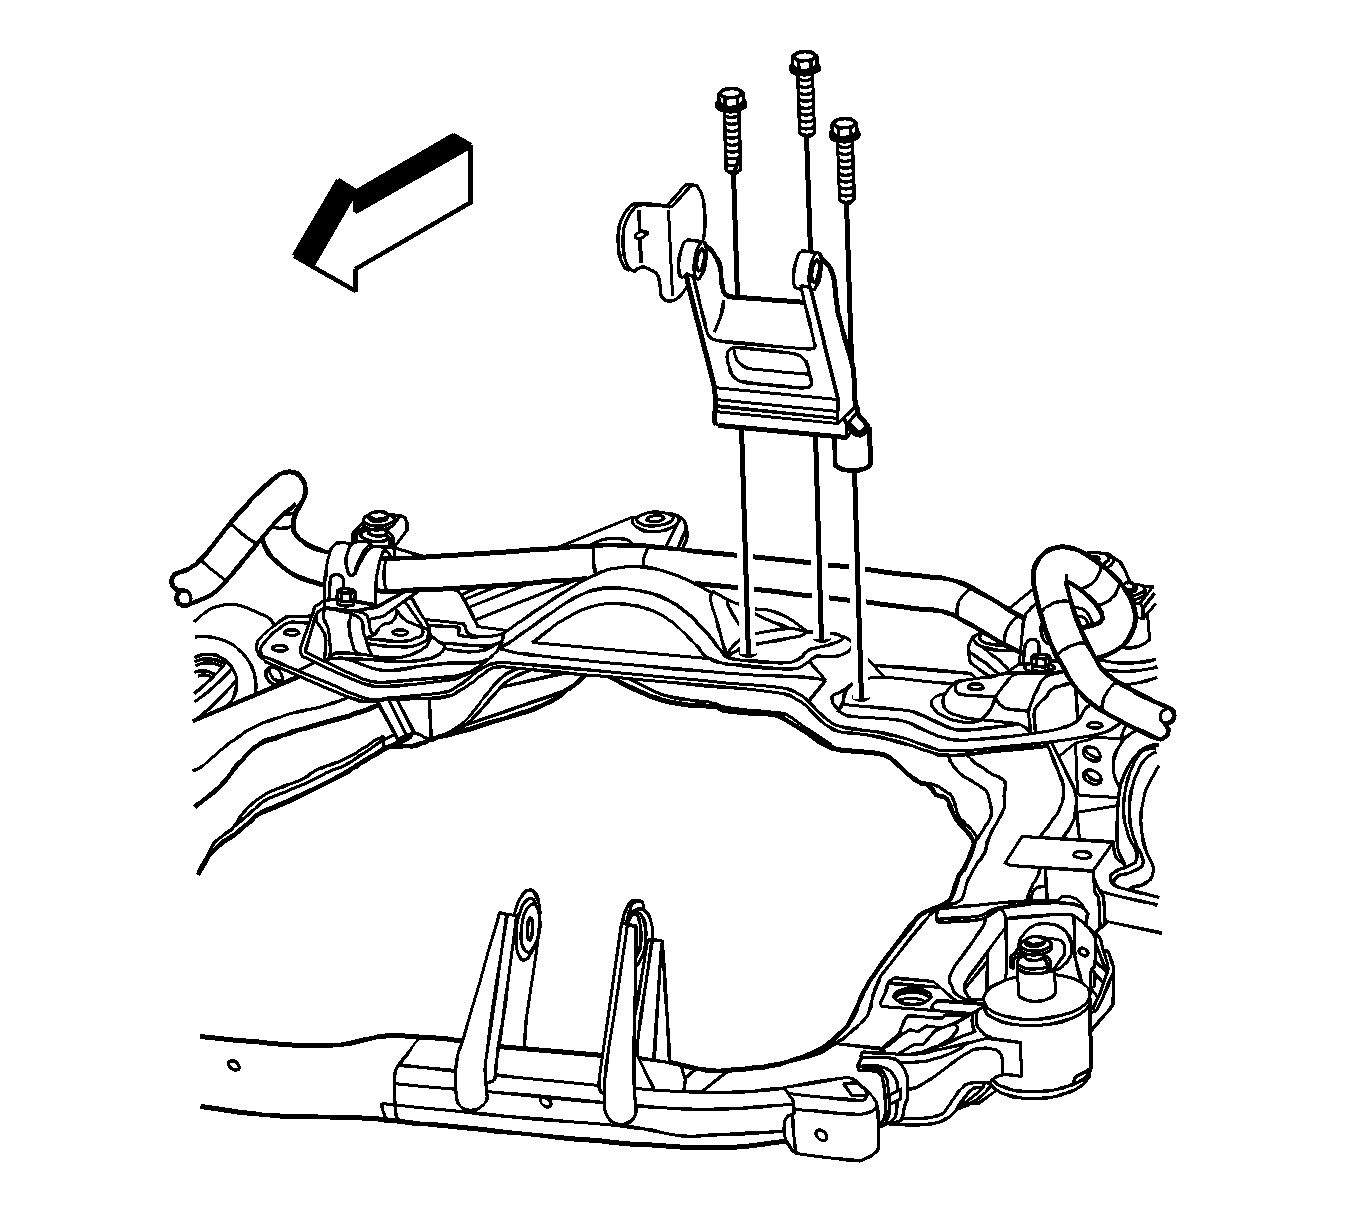
- Remove the front transmission mount through bolt.
- Remove the rear transmission mount through bolt.
- Support the frame assembly with a support fixture.
- Remove the rear frame to support brace bolts.
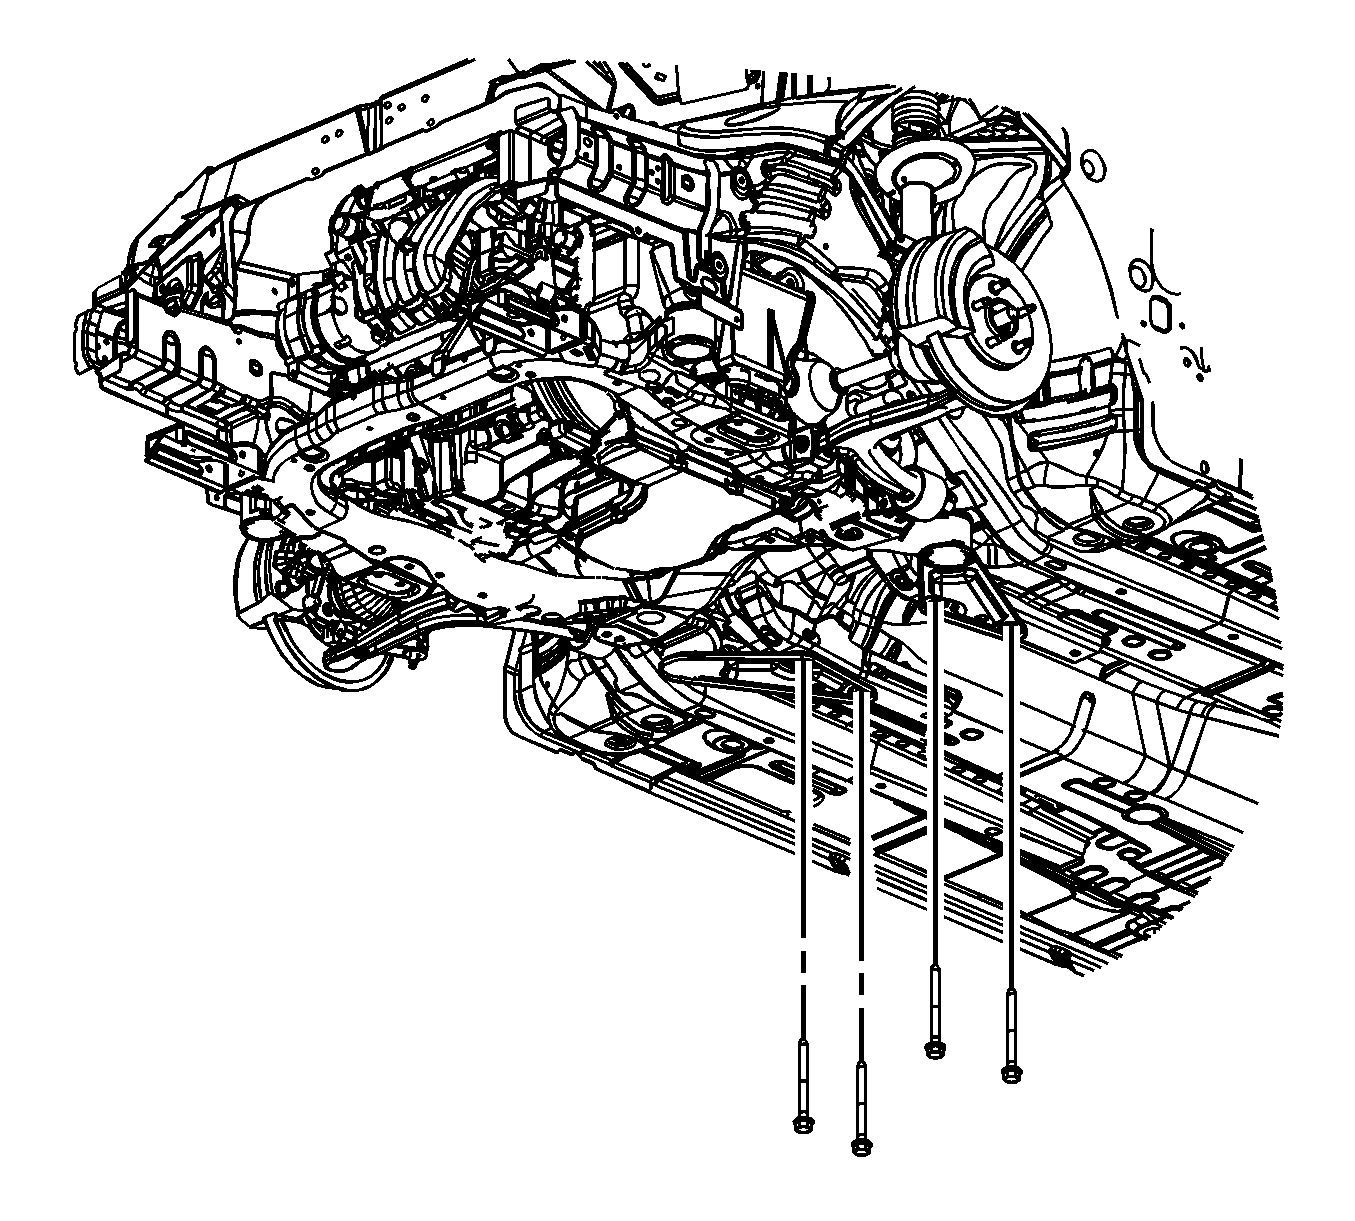
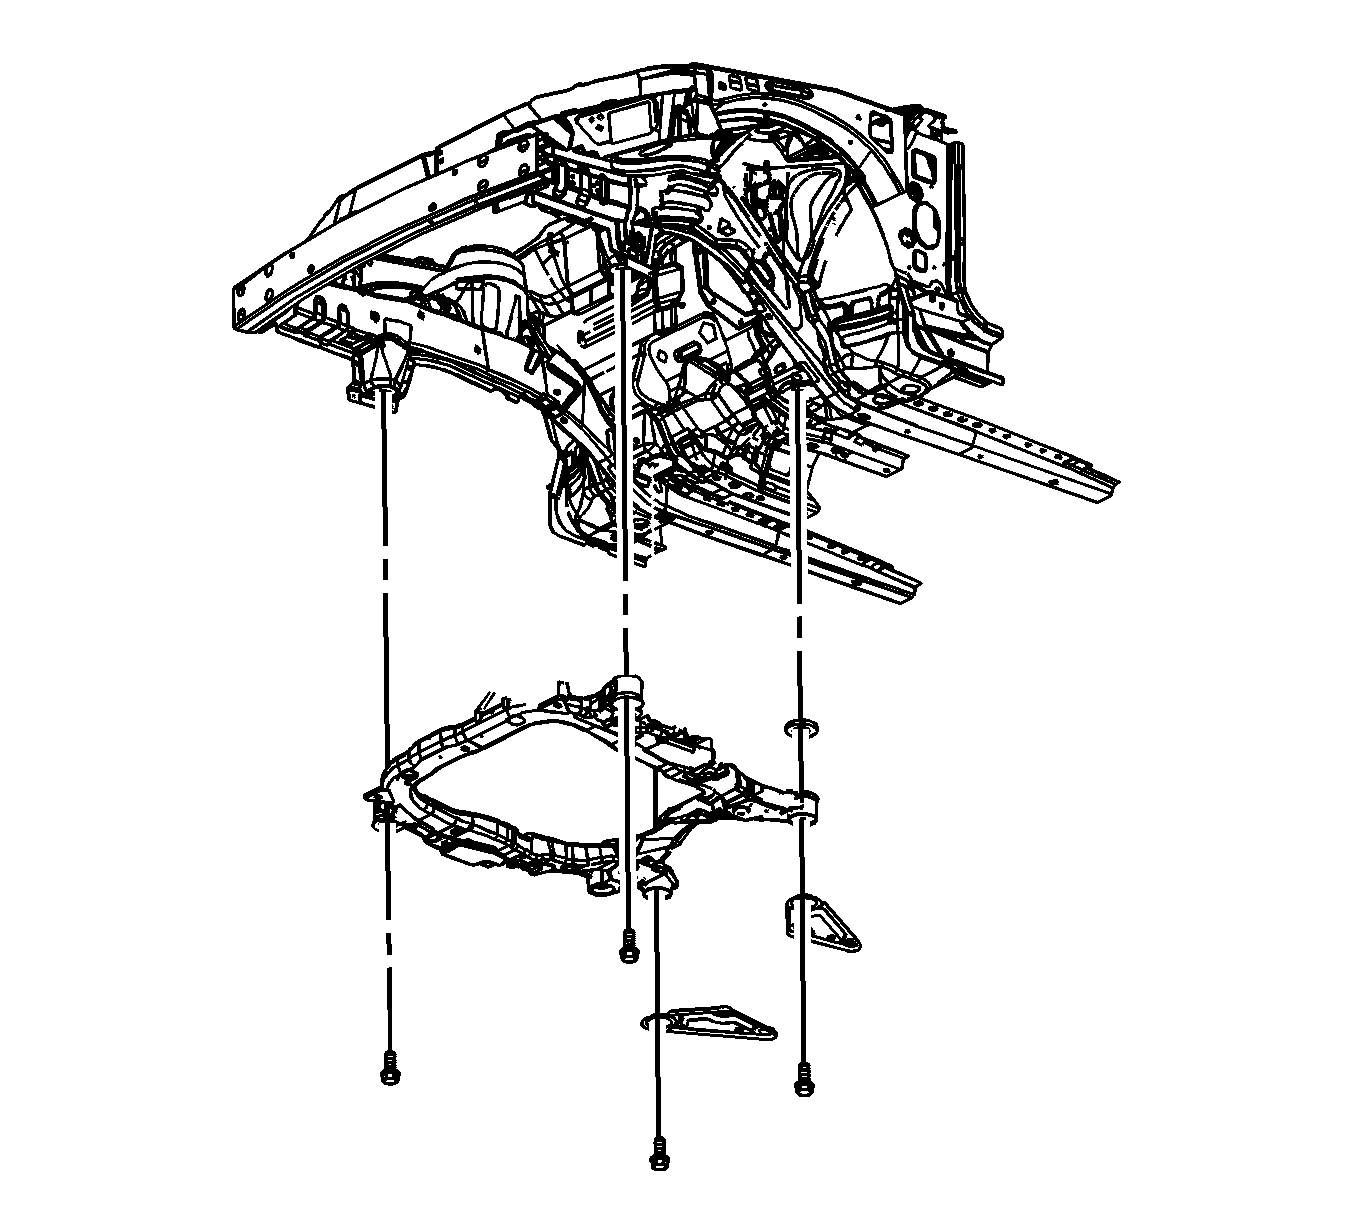
- Remove the frame to body bolts.
- Lower the cradle from the vehicle.
- When replacing the frame, remove the following components:

| • | Steering gear--Refer to Steering Gear Replacement . |
| • | Stabilizer shaft--Refer to Stabilizer Shaft Replacement . |
| • | Rear transmission mount bracket |
Installation Procedure
- When replacing the frame, install the following components.
- Raise the cradle to the vehicle.
- Install the frame to body bolts. Hand tighten only.
- Install the rear frame support brace to frame and body bolts. Hand tighten only.
- Using a drift or suitable alignment tool, align the frame to body through the supplied alignment holes in the rear of the frame.
- Remove the support fixture.
- Install the lower control arm. Refer Lower Control Arm Replacement .
- Connect the outer tie rods (3) to the steering knuckle (6). Refer to Steering Linkage Outer Tie Rod Replacement .
- Connect the stabilizer link to the stabilizer shaft.
- Install the rear transmission mount through bolt. Hand tighten only.
- Install the front transmission mount through bolt. Hand tighten only.
- Balance and tighten the powertrain mounts. Refer to Powertrain Mount Balance - Lower Mount .
- Connect the intermediate steering shaft to the steering gear. Locate the shaft as previously noted.
- Install the Intermediate steering shaft pinch bolt.
- Connect the lower radiator support bracket to frame bolts using the alignment feature.
- Install the engine splash shields. Refer to Radiator Air Lower Baffle and Deflector Replacement .
- Install the front wheels. Refer to Tire and Wheel Removal and Installation .
- Lower the vehicle.
- Remove the radiator and condenser support.
| • | Steering gear--Refer to Steering Gear Replacement . |
| • | Stabilizer shaft--Refer to Stabilizer Shaft Replacement . |
| • | Rear transmission mount bracket |
Notice: Refer to Fastener Notice in the Preface section.
Tighten
| • | Tighten the frame to body bolts to 100 N·m (74 lb ft) plus 90 degrees. |
| • | Tighten the frame support to body bolts to 100 N·m (74 lb ft). |
Tighten
Tighten the stabilizer link nut to 65 N·m (48 lb ft).
Tighten
Tighten the bolt to 49 N·m (36 lb ft).
Tighten
Tighten the radiator support bracket bolts to 60 N·m (44 lb ft).
Frame Replacement W/LX9
Removal Procedure
- Install the engine support fixture. Refer to Engine Support Fixture in Engine Mechanical - 3.5L (LX9).
- Support the radiator and condenser by looping a rope around each of the 2 tabs of the condenser and tie the rope around the upper tie bar.
- Remove the exhaust pipe heat shield and crossover pipe bolts at the front of the engine. Refer to Exhaust Crossover Pipe Replacement in Engine Exhaust.
- Raise and support the vehicle. Refer to Lifting and Jacking the Vehicle in General Information.
- Remove the front wheels. Refer to Tire and Wheel Removal and Installation in Tires and Wheels.
- Remove the engine splash shield. Refer to Radiator Air Lower Baffle and Deflector Replacement in Engine Cooling.
- Disconnect the lower radiator support bracket to frame bolts and disengage the alignment feature.
- Disconnect the stabilizer link from the stabilizer shaft. Refer to Stabilizer Shaft Link Replacement in Front Suspension.
- Disconnect the outer tie rods (3) from the steering knuckles (6). Refer to Rack and Pinion Outer Tie Rod End Replacement in Power Steering System.
- Remove the lower control arms from the frame. Refer to Lower Control Arm Replacement in Front Suspension.
- Remove the exhaust crossover pipe lower bolts. Refer to Exhaust Crossover Pipe Replacement in Engine Exhaust.
- Remove the intermediate steering shaft to steering gear pinch bolt.
- Disconnect the intermediate steering shaft from the steering gear. Note the alignment of the steering shaft to steering gear for installation.
- Remove the front transmission mount through bolt.
- Remove the rear transmission mount through bolt.
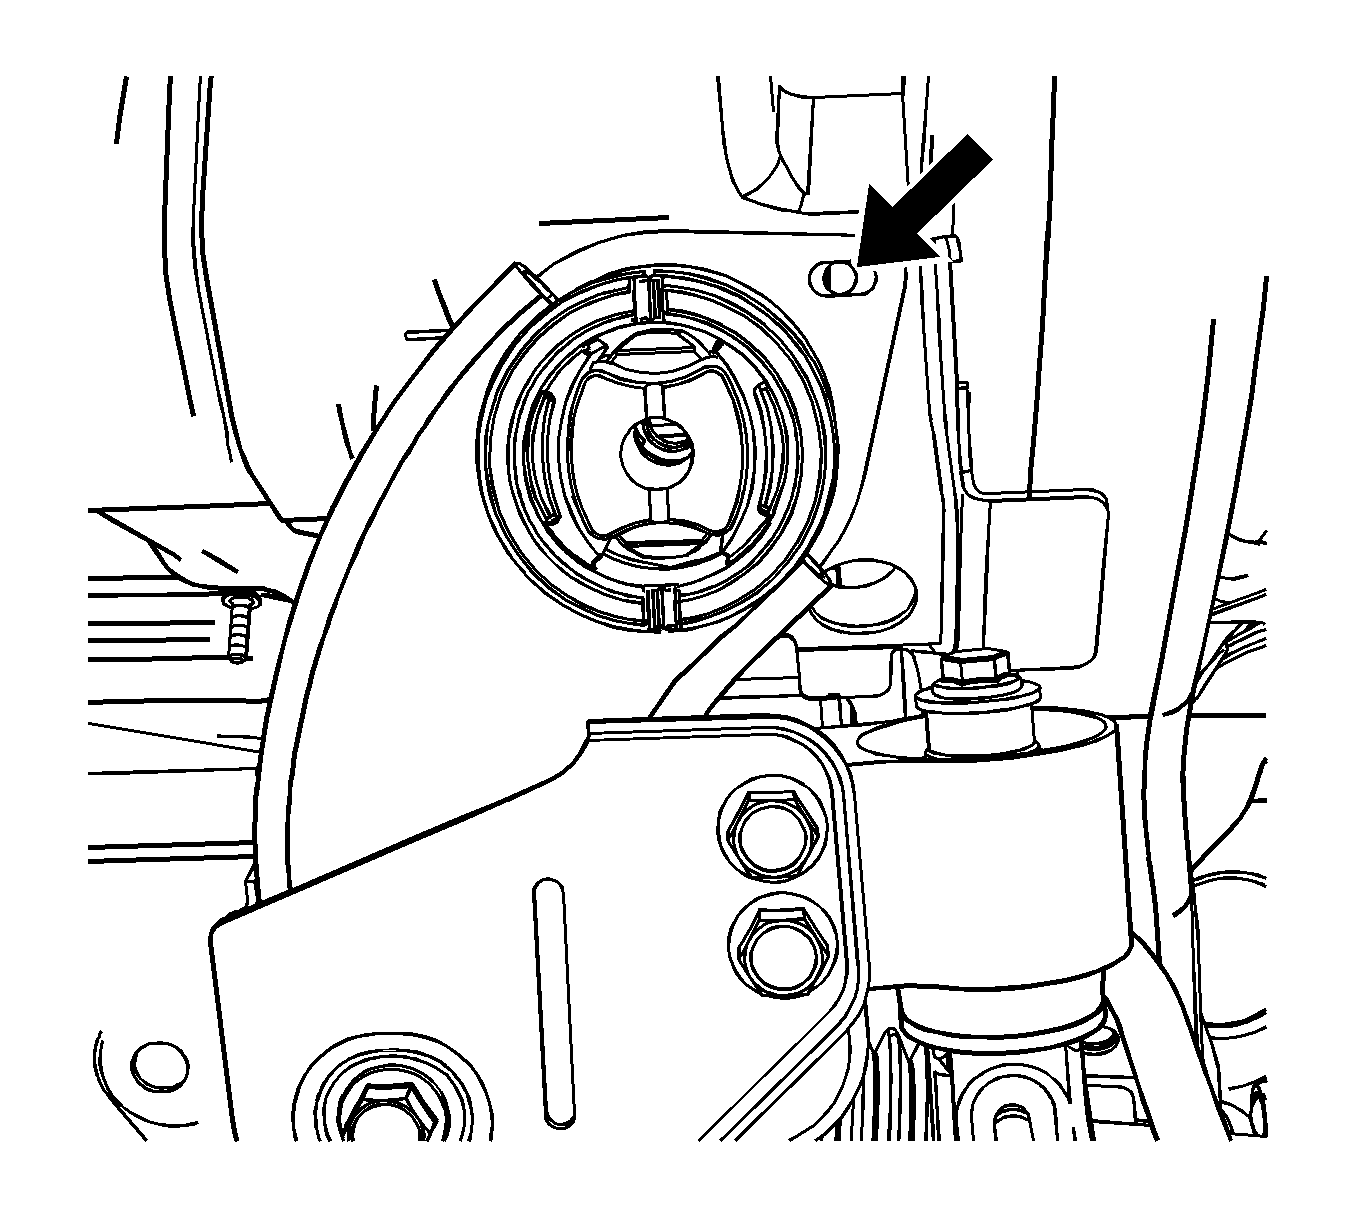
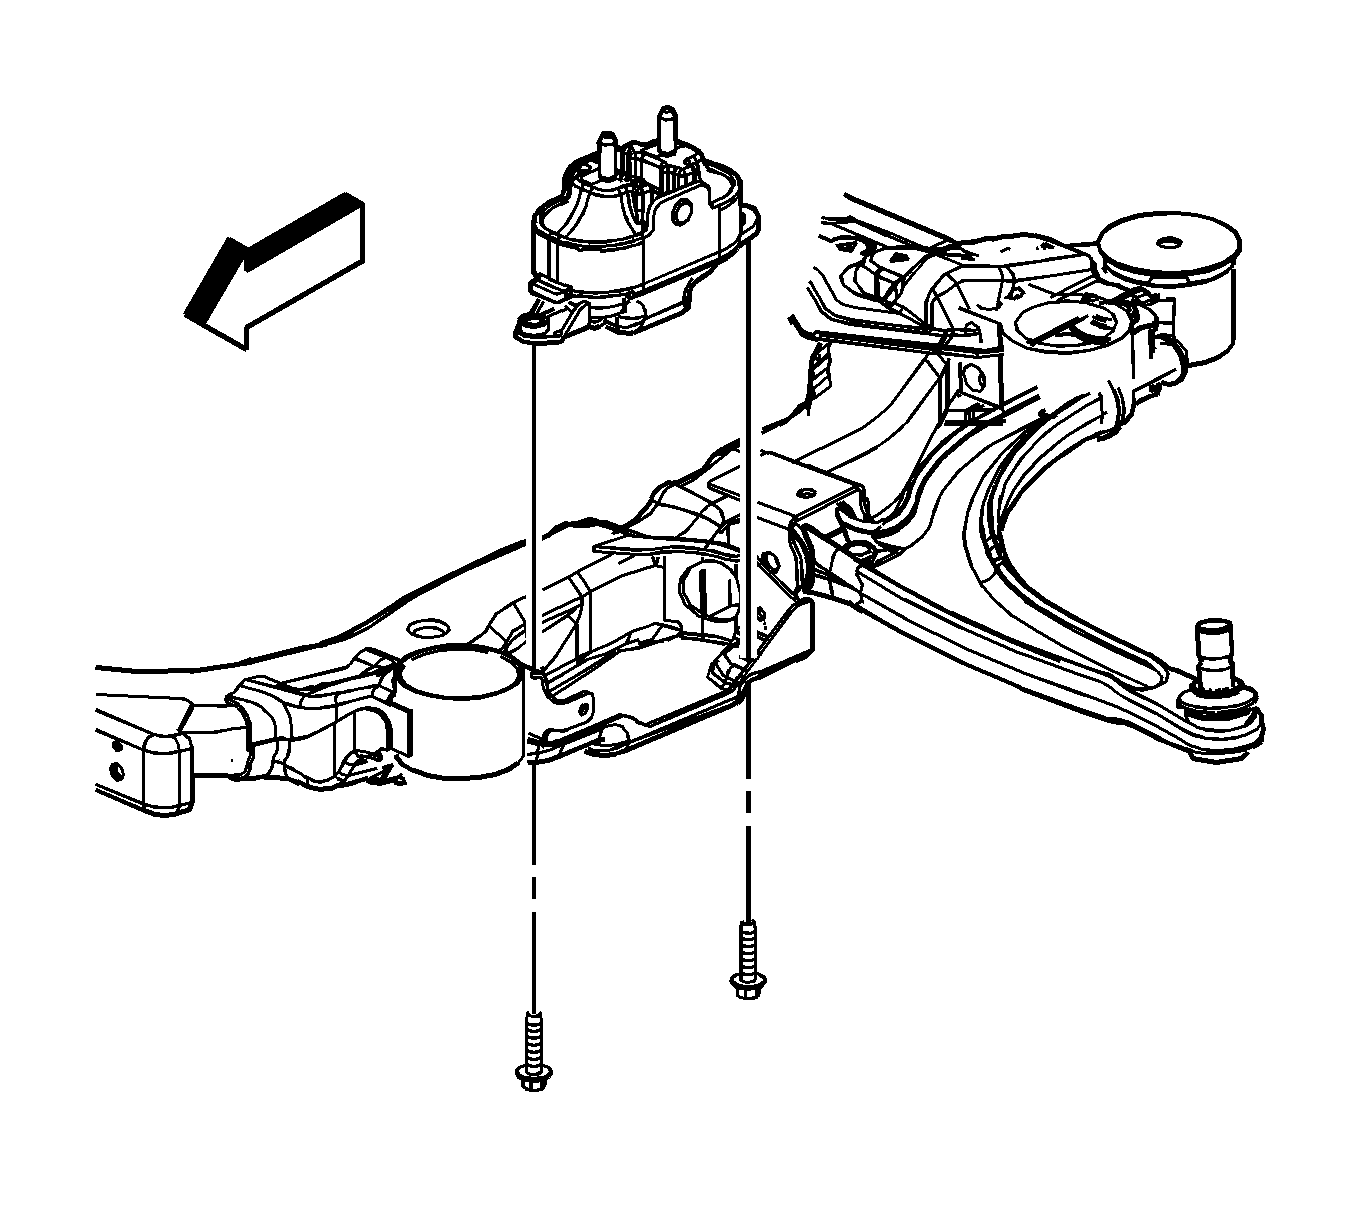
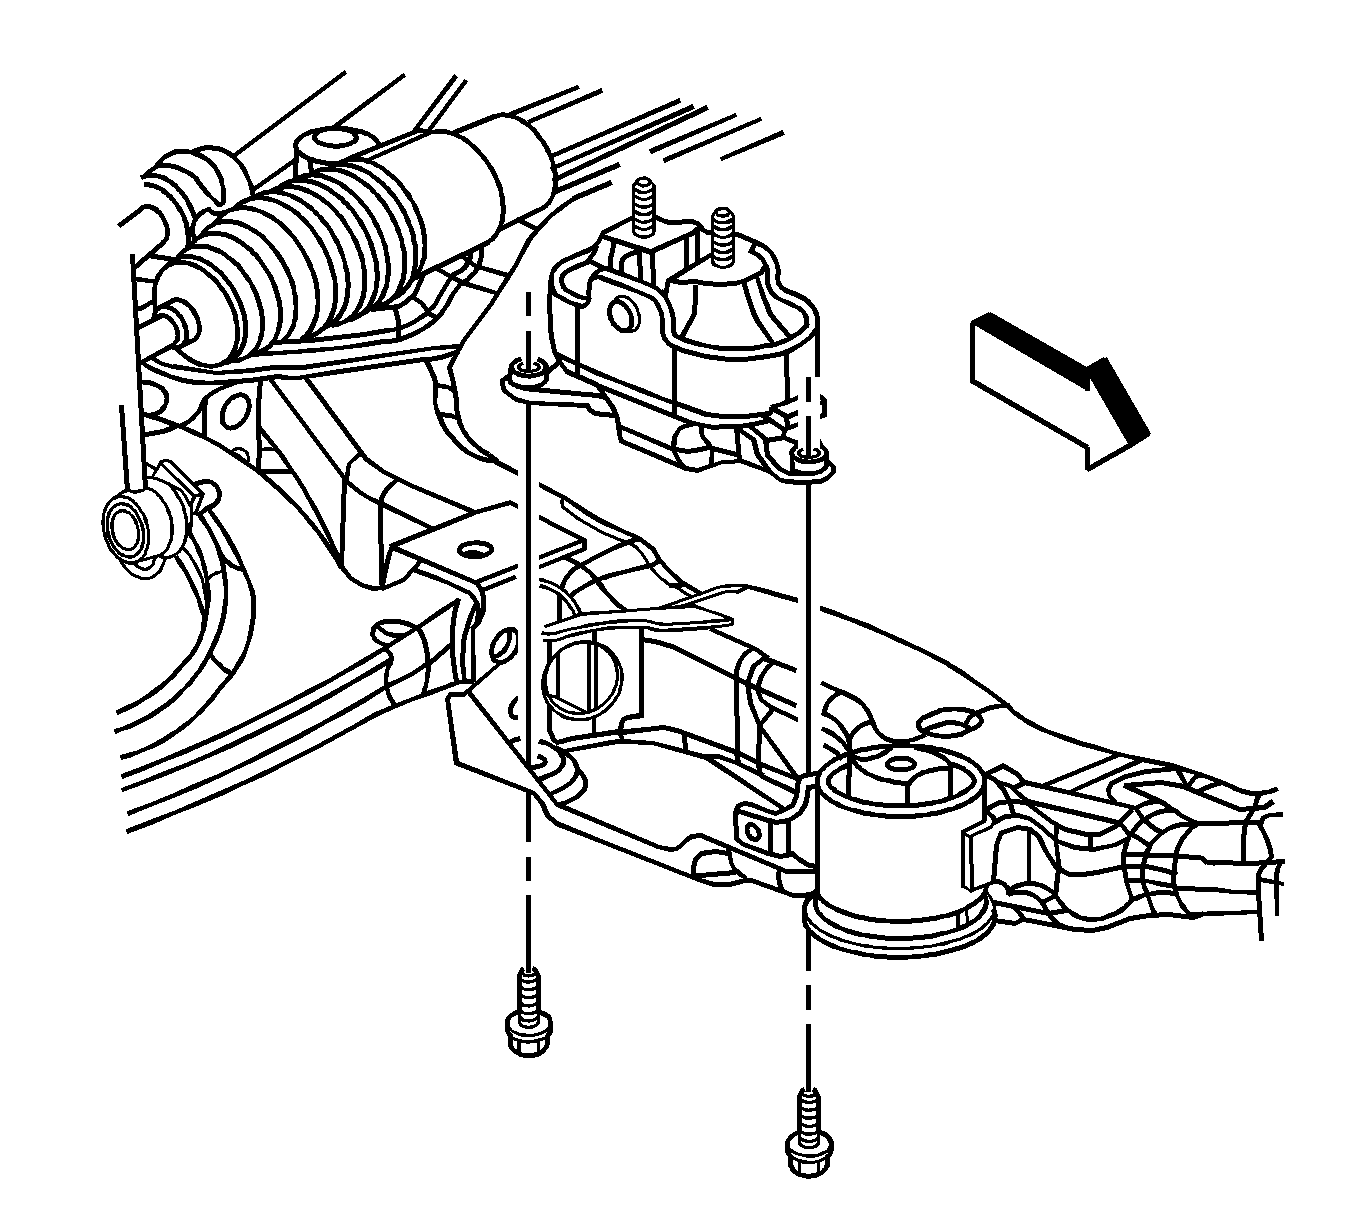
- Remove the frame to side transmission mount bolts.
- Remove the frame to engine mount bolts.
- Support the frame assembly with a support fixture.
- Remove the rear frame to support brace bolts.
- Remove the frame to body bolts.
- Lower the frame from the vehicle.
- Disconnect the heated oxygen sensor wiring harness from the retainer at the rear transmission mount.
- When replacing the frame, remove the following components:
Support the control arms using mechanics wire. DO NOT separate the ball stud from the knuckle.
| • | Steering gear--Refer to Steering Gear Replacement in Power Steering System. |
| • | Stabilizer shaft--Refer to Stabilizer Shaft Replacement in Front Suspension. |
| • | Rear transmission mount bracket--Refer to Transmission Rear Mount Replacement in Automatic Transaxle - 4T40-E/4T45-E. |
Installation Procedure
- When replacing the frame, install the following components:
- Raise the frame to the vehicle.
- Connect the heated oxygen sensor wiring harness on the retainer at the rear transmission mount.
- Install the frame to body bolts. Hand tighten only.
- Install the rear frame support brace to frame and body bolts. Hand tighten only.
- Using a drift or suitable alignment tool, align the frame to body through the supplied alignment holes in the rear of the frame.
- Remove the support fixture.
- Install the lower control arms to the frame. Refer Lower Control Arm Replacement in Front Suspension.
- Connect the outer tie rods (3) to the steering knuckles (6). Refer to Rack and Pinion Outer Tie Rod End Replacement in Power Steering System.
- Connect the stabilizer link to the stabilizer shaft. Refer to Stabilizer Shaft Link Replacement in Front Suspension.
- Install the frame to engine mount bolts.
- Install the frame to side transmission mount bolts.
- Install the rear transmission mount through bolt.
- Install the front transmission mount through bolt.
- Connect the intermediate steering shaft to the steering gear. Locate the shaft as previously noted.
- Install the intermediate steering shaft pinch bolt.
- Install the exhaust crossover pipe lower bolts. Refer to Exhaust Crossover Pipe Replacement in Engine Exhaust.
- Connect the lower radiator support bracket to frame bolts using the alignment feature.
- Install the engine splash shields. Refer to Radiator Air Lower Baffle and Deflector Replacement in Engine Cooling.
- Install the front wheels. Refer to Tire and Wheel Removal and Installation in Tires and Wheels.
- Lower the vehicle.
- Install the exhaust pipe heat shield and crossover pipe bolts at the front of the engine. Refer to Exhaust Crossover Pipe Replacement in Engine Exhaust.
- Remove the powertrain support fixture. Refer to Engine Support Fixture in Engine Mechanical - 3.5L (LX9).
- Remove the radiator and condenser support. Refer to Radiator Support Bracket Replacement in Engine Cooling.
| • | Steering gear--Refer to Steering Gear Replacement in Power Steering System. |
| • | Stabilizer shaft--Refer to Stabilizer Shaft Replacement in Front Suspension. |
| • | Rear transmission mount bracket --Refer to Transmission Rear Mount Replacement in Automatic Transaxle - 4T40-E/4T45-E. |
Notice: Refer to Fastener Notice in the Preface section.
Tighten
| • | Tighten the frame to body bolts to 100 N·m (74 lb ft) plus 90 degrees. |
| • | Tighten the frame support to body bolts to 100 N·m (74 lb ft). |
Tighten
Tighten the bolts to 50 N·m (37 lb ft).
Tighten
Tighten the bolts to 50 N·m (37 lb ft).
Tighten
Tighten the bolt to 90 N·m (66 lb ft).
Tighten
Tighten the bolt to 90 N·m (66 lb ft).
Tighten
Tighten the bolt to 49 N·m (36 lb ft).
Tighten
Tighten the radiator support bracket bolts to 60 N·m
(44 lb ft).
