For 1990-2009 cars only
Removal Procedure
- Remove the left Instrument Panel (I/P) closeout / insulator panel. Refer to Instrument Panel Insulator Panel Replacement - Left Side in Instrument Panel, Gages, and Console.
- Disconnect the electrical connections (3, 4) from the stop lamp switch (5).
- Rotate the stop lamp switch (5) counterclockwise until the travel stop has been reached.
- Pull the stop lamp switch (5) rearward.
- Remove the stop lamp switch (5) from the retainer (2)
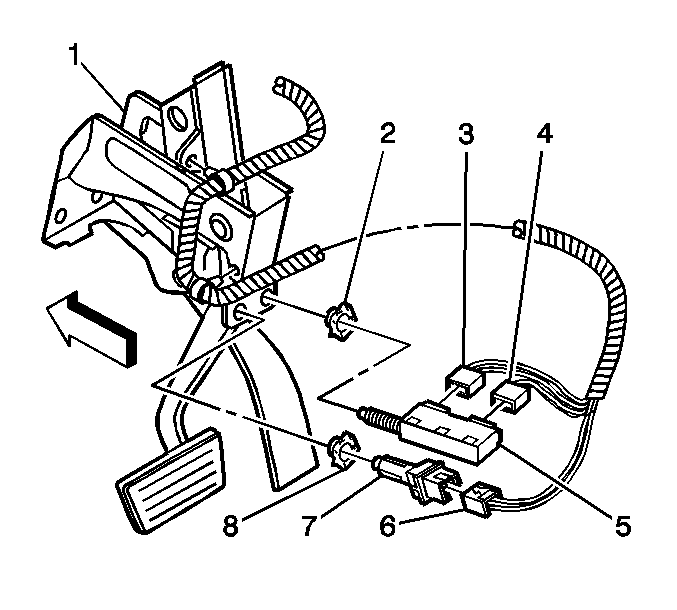
Installation Procedure
- Install the stop lamp switch (3) into the retainer (2).
- Push the stop lamp switch (3) into the retainer (2) until the switch plunger is fully depressed into the switch barrel.
- Rotate the stop lamp switch (3) clockwise until the travel stop has been reached.
- With a feeler gage check to ensure the minimum plunger extension is not less than 0.0 mm (0.0 in), and not greater than 2.0 mm (0.78 in) between the stop lamp switch barrel (3) and the brake pedal bracket (4).
- Connect the electrical connectors to the stop lamp switch.
- Install the left I/P closeout / insulator panel. Refer to Instrument Panel Insulator Panel Replacement - Left Side in Instrument Panel, Gages, and Console.
Important: The brake pedal must be attached to the power booster rod and undisturbed during the switch install. Do not press the brake pedal during the installation of the switch.
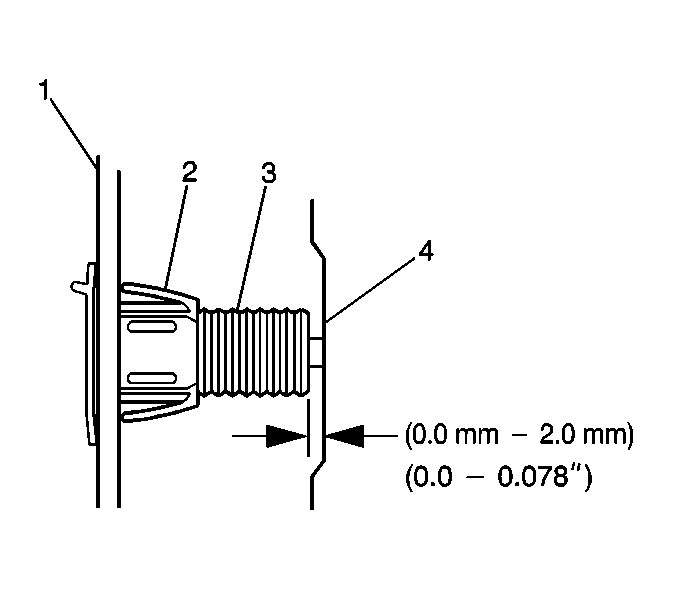
Important: Approximately 2 to 3 lbs force is required to depress the switch plunger flush with the switch barrel. Too much force could flex the brake pedal bracket and result in the stop lamp switch not being properly adjusted.
