For 1990-2009 cars only
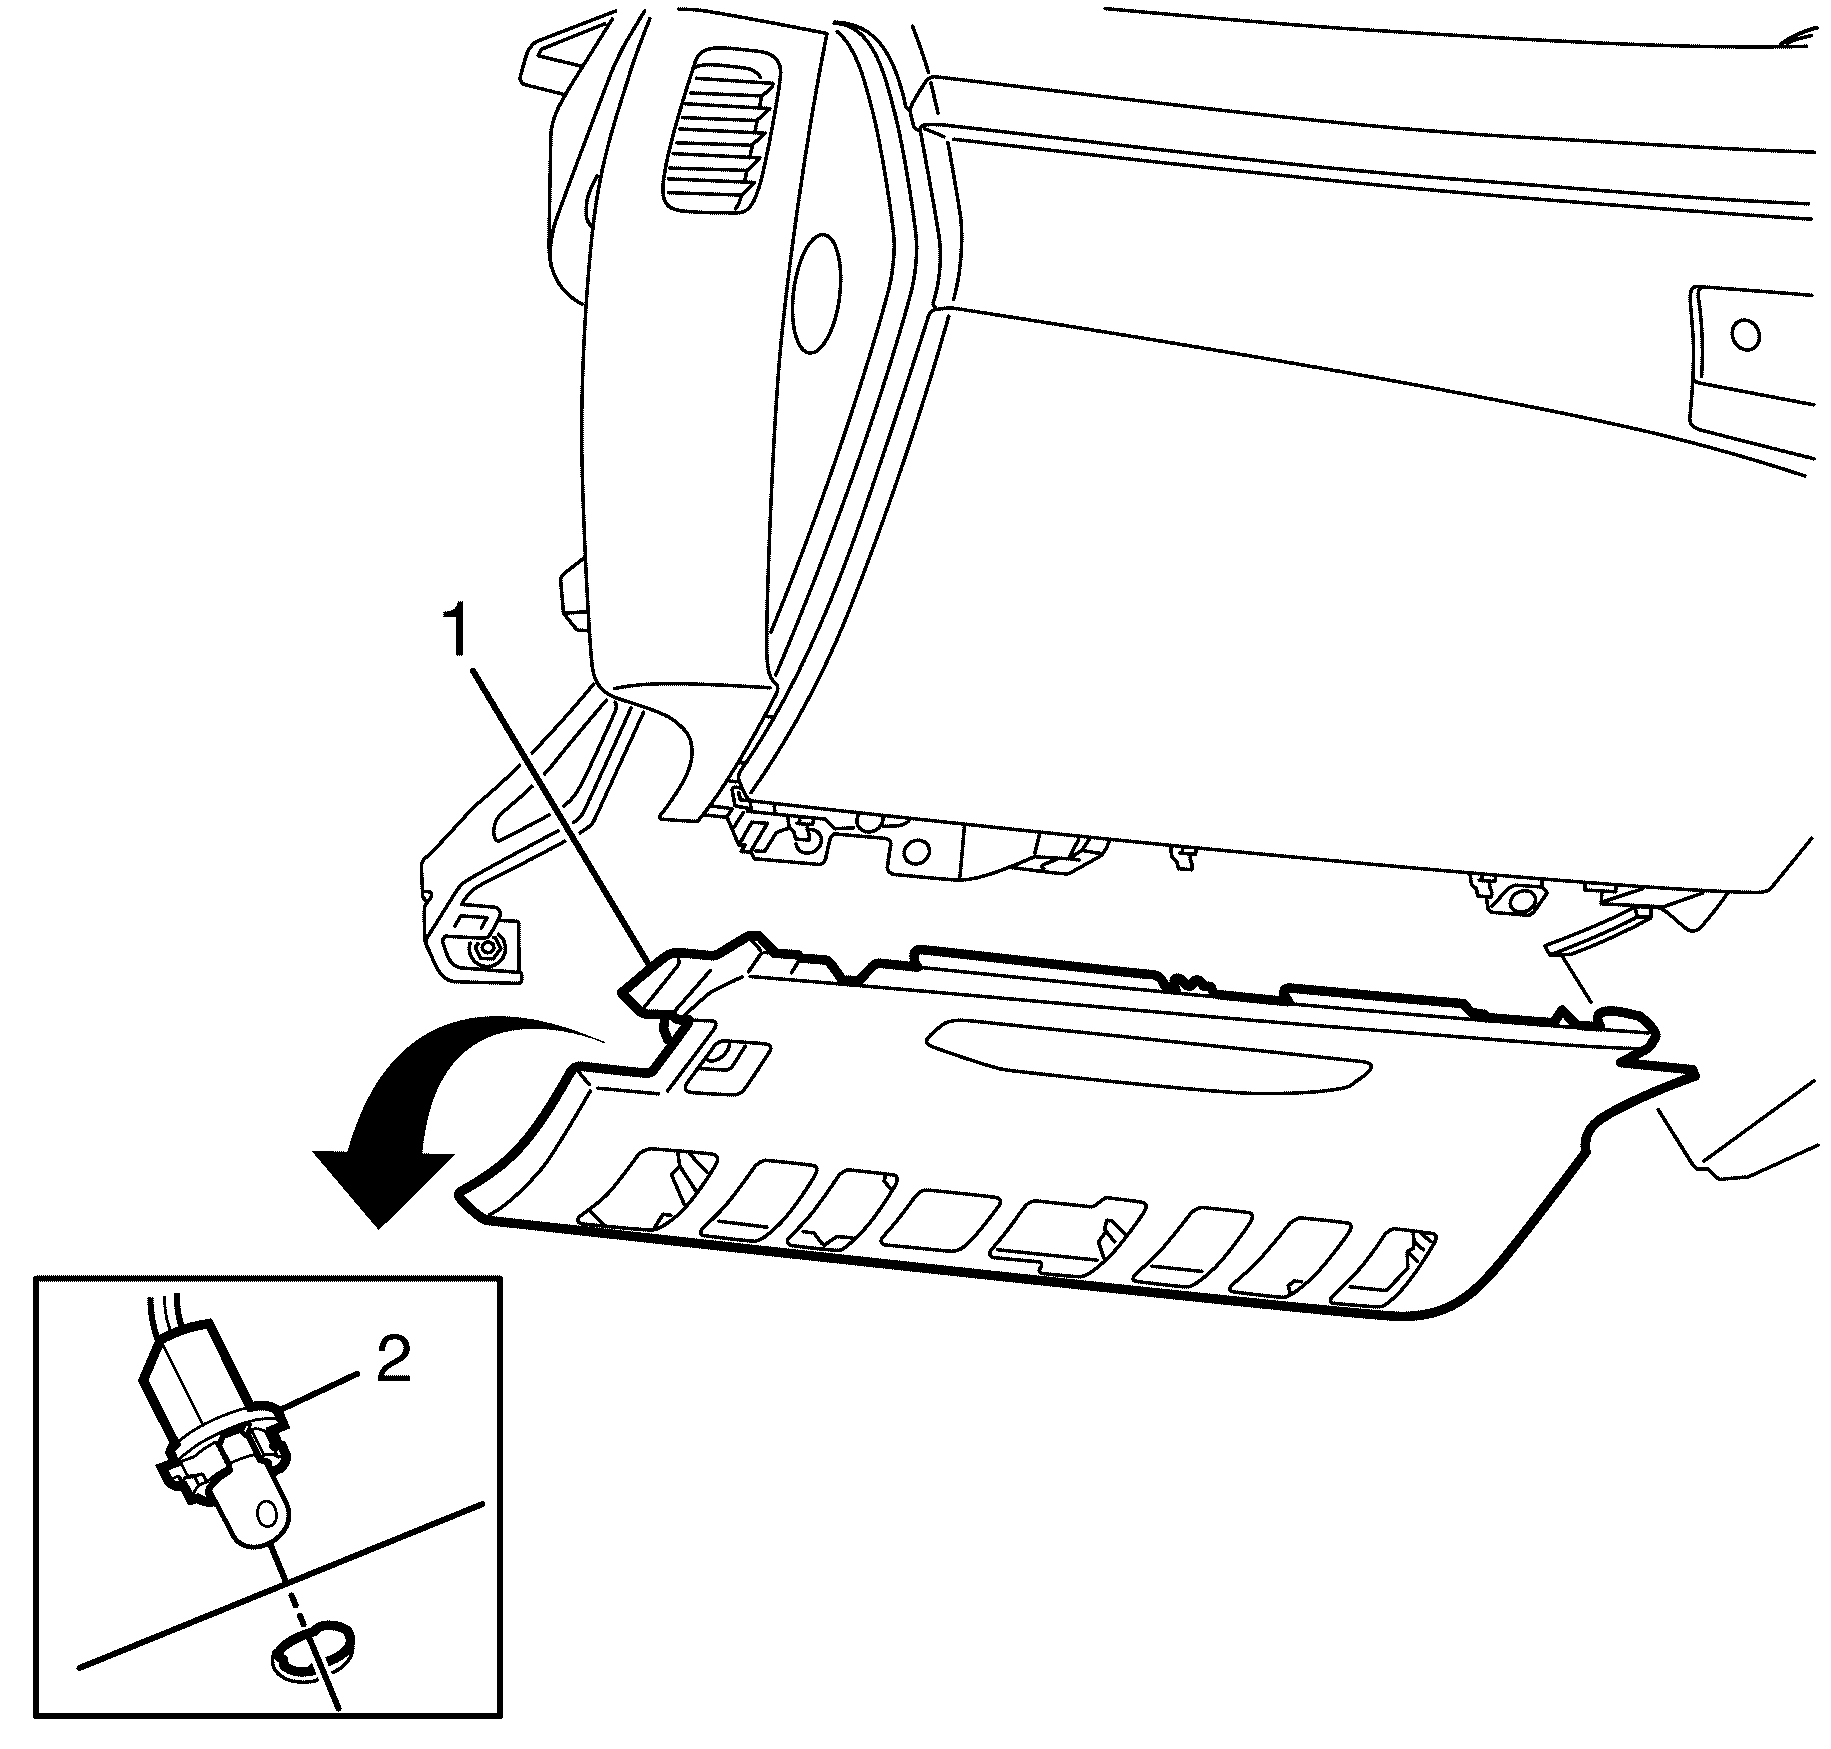
Instrument Panel Insulator Panel Replacement - Left Side RHD
Removal Procedure
- Grasp the I/P lower trim plate assembly (1) and carefully pull downward to disengage the retaining clips.
- Remove the courtesy lamp socket assembly (2) from the left lower trim plate by turning the socket counter-clockwise.
- Remove the I/P lower trim plate assembly (1).
Installation Procedure
- Install the courtesy lamp socket assembly (2) to the I/P lower trim plate assembly (1).
- Align the I/P lower trim plate assembly (1) to the I/P.
- Attach the I/P lower trim plate assembly (1) to the I/P by engaging the retaining clips.
- Ensure all clips are located correctly.
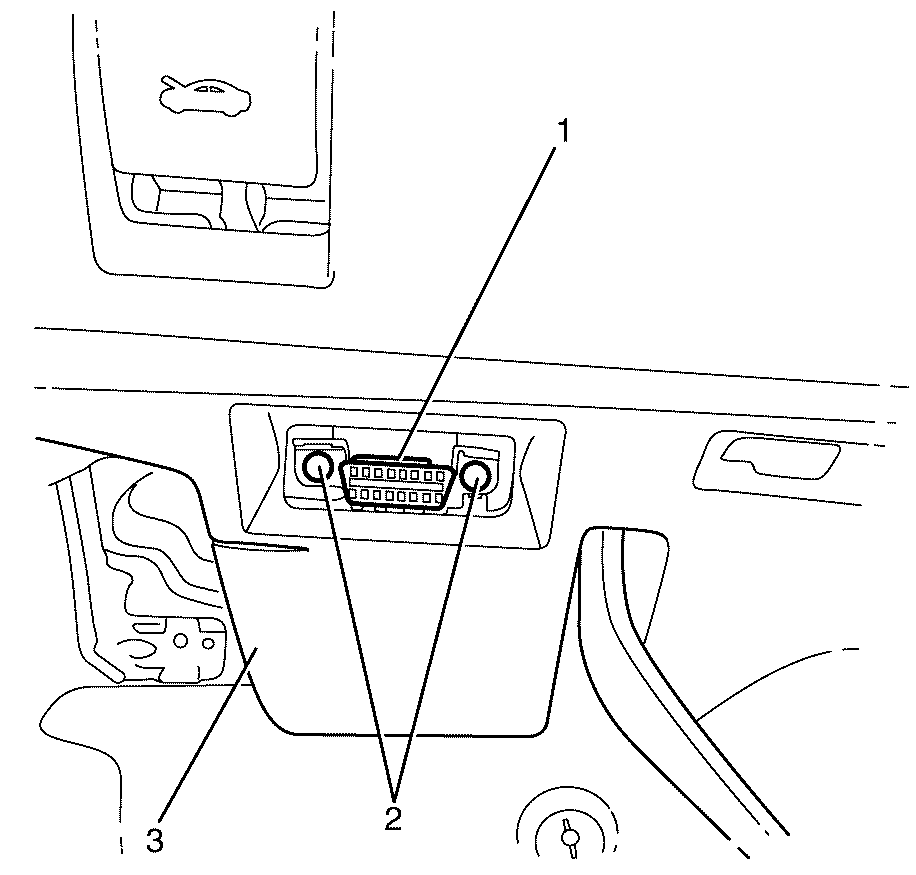
Instrument Panel Insulator Panel Replacement - Left Side LHD
Removal Procedure
- Remove the diagnostic plug to I/P lower trim plate assembly retaining screws (2).
- Remove the diagnostic plug (1) from the I/P lower trim plate assembly (3).
- Grasp the I/P lower trim plate assembly (1) and carefully pull downward to disengage the retaining clips.
- Remove the I/P lower trim plate assembly (1).
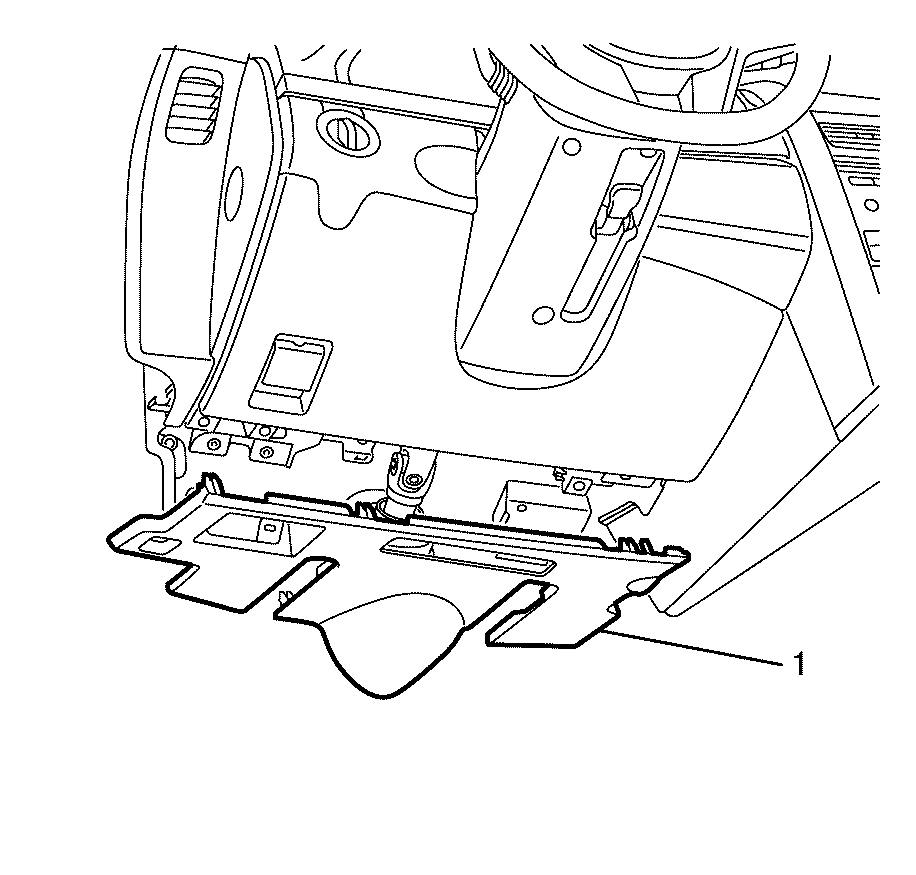
Installation Procedure
- Install the diagnostic plug (2) to the I/P lower trim plate assembly (1).
- Align the I/P lower trim plate assembly (1) to the I/P.
- Install the I/P lower trim plate assembly (1) to the I/P by pushing in the area of the retaining clips (2).
- Ensure all clips are located correctly.
- Install the diagnostic plug (1) to the I/P lower trim plate assembly (3).
- Install the diagnostic plug to I/P lower trim plate assembly retaining screws (2).
Notice: Refer to Fastener Notice in the Preface section.
Tighten
Tighten the screws (1) to 2 N·m (18 lb in).
