For 1990-2009 cars only
Instrument Panel Insulator Panel Replacement - Right Side RHD
Removal Procedure
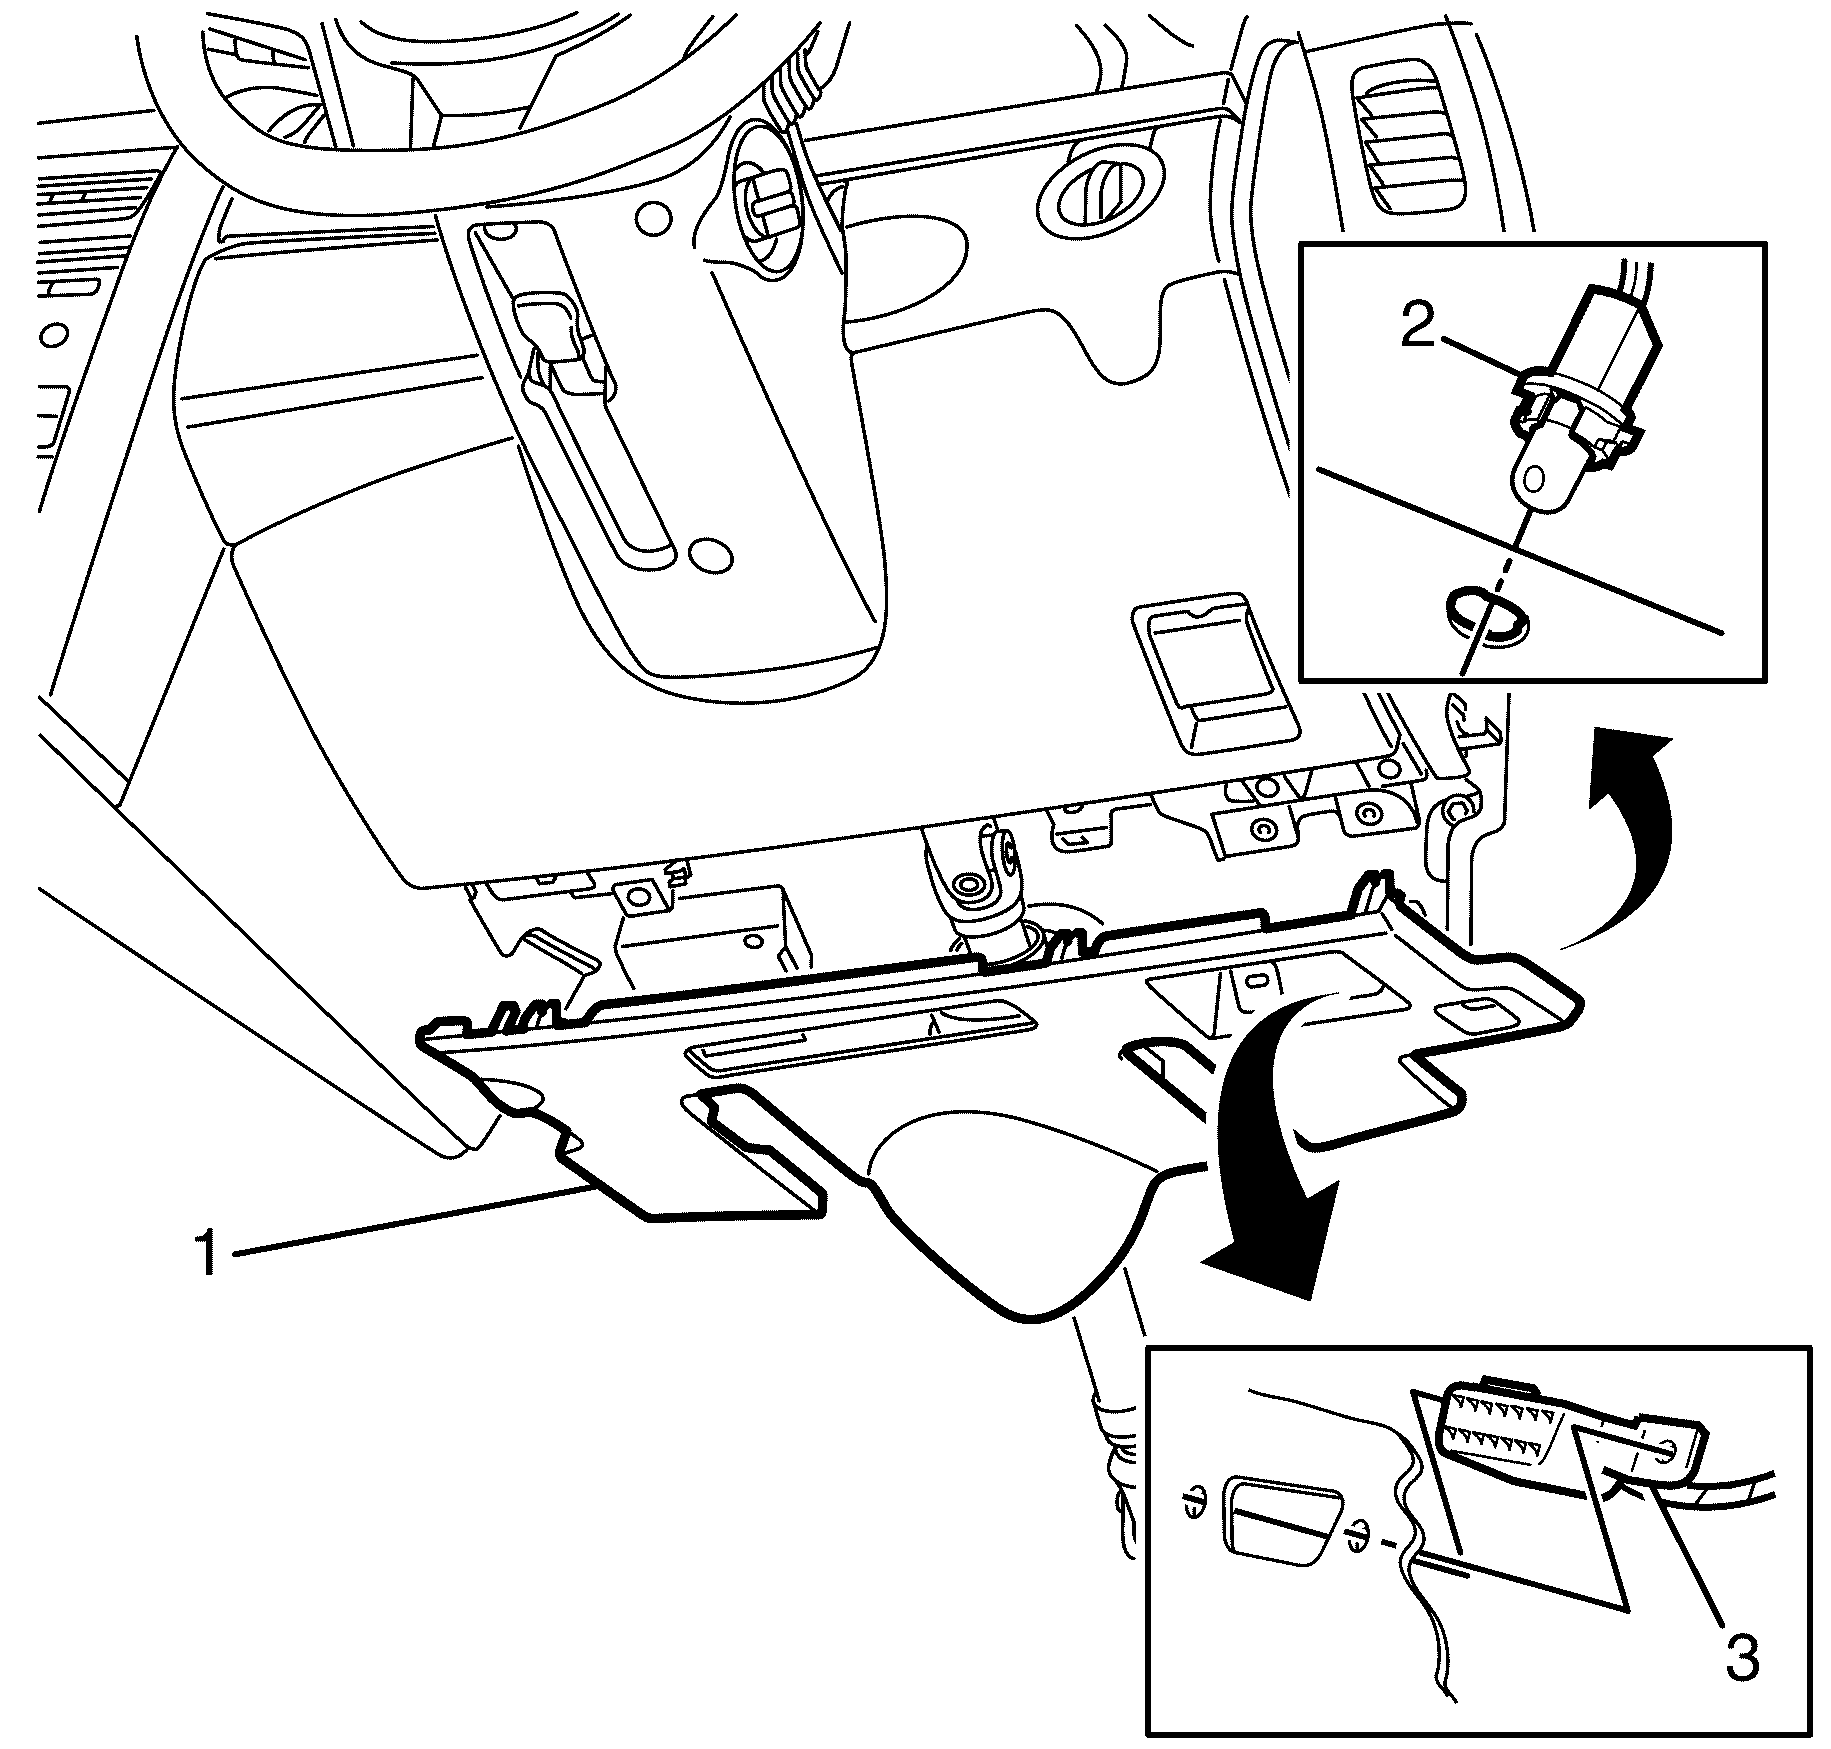
- Remove the diagnostic plug (3) from the I/P lower trim plate assembly (1).
- Grasp the I/P lower trim plate assembly (1) and carefully pull downward to disengage the retaining clips.
- Disconnect the courtesy lamp socket assembly (2) from the right lower trim plate by turning the socket counterclockwise.
- Remove the I/P lower trim plate assembly (1).

Installation Procedure
- Connect the courtesy lamp socket assembly (2) to the I/P lower trim plate assembly (1).
- Install the diagnostic plug (3) to the I/P lower trim plate assembly (1).
- Align the I/P lower trim plate assembly (1) to the I/P.
- Install the I/P lower trim plate assembly (1) to the I/P by pushing in the area of the retaining clips (2).
- Ensure all clips are located correctly.

Instrument Panel Insulator Panel Replacement - Right Side LHD
Removal Procedure
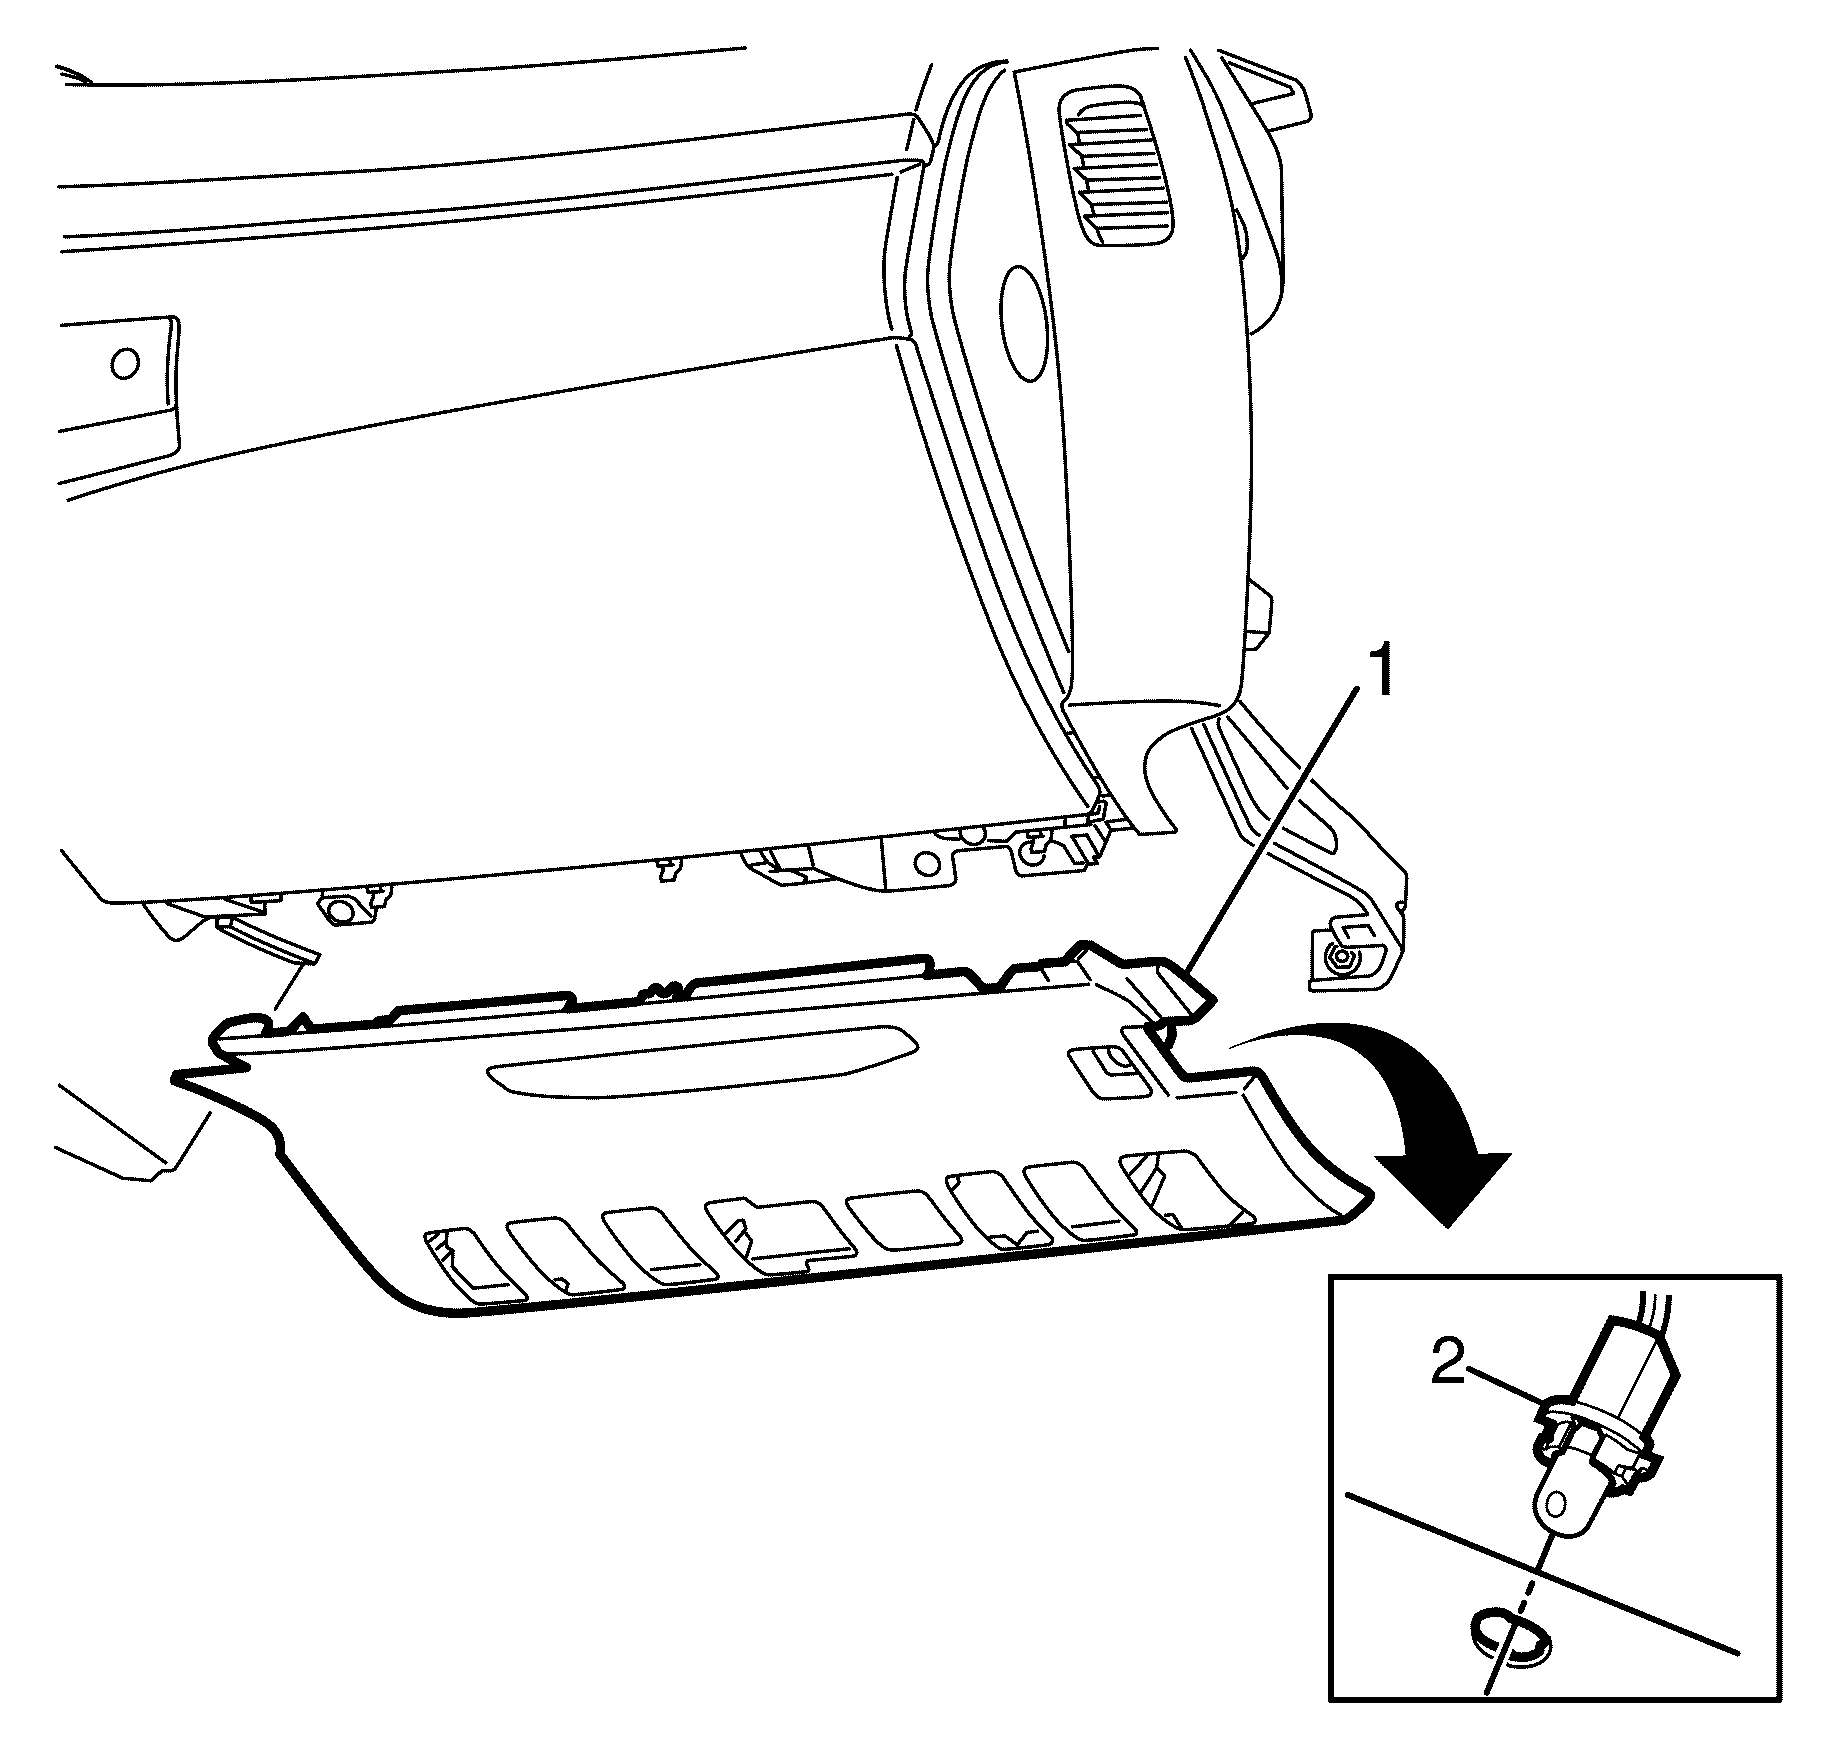
- Grasp the instrument panel (I/P) insulator panel (1) and carefully pull downward to disengage the retaining clips.
- Remove the courtesy lamp socket assembly (2) from the I/P insulator panel by turning the socket counter-clockwise.
- Remove the I/P insulator panel (1).

Installation Procedure
- Align the I/P insulator panel (1) to the I/P.
- Install the courtesy lamp socket assembly (2) to the I/P insulator panel (1).
- Attach the I/P insulator panel (1) to the I/P by engaging the retaining clips.

Important: Listen for audible clicks when fitting the I/P insulator panel to confirm correct fitment.
