Rear Bumper Fascia Replacement CSV SWBHSV VXR8
Removal Procedure
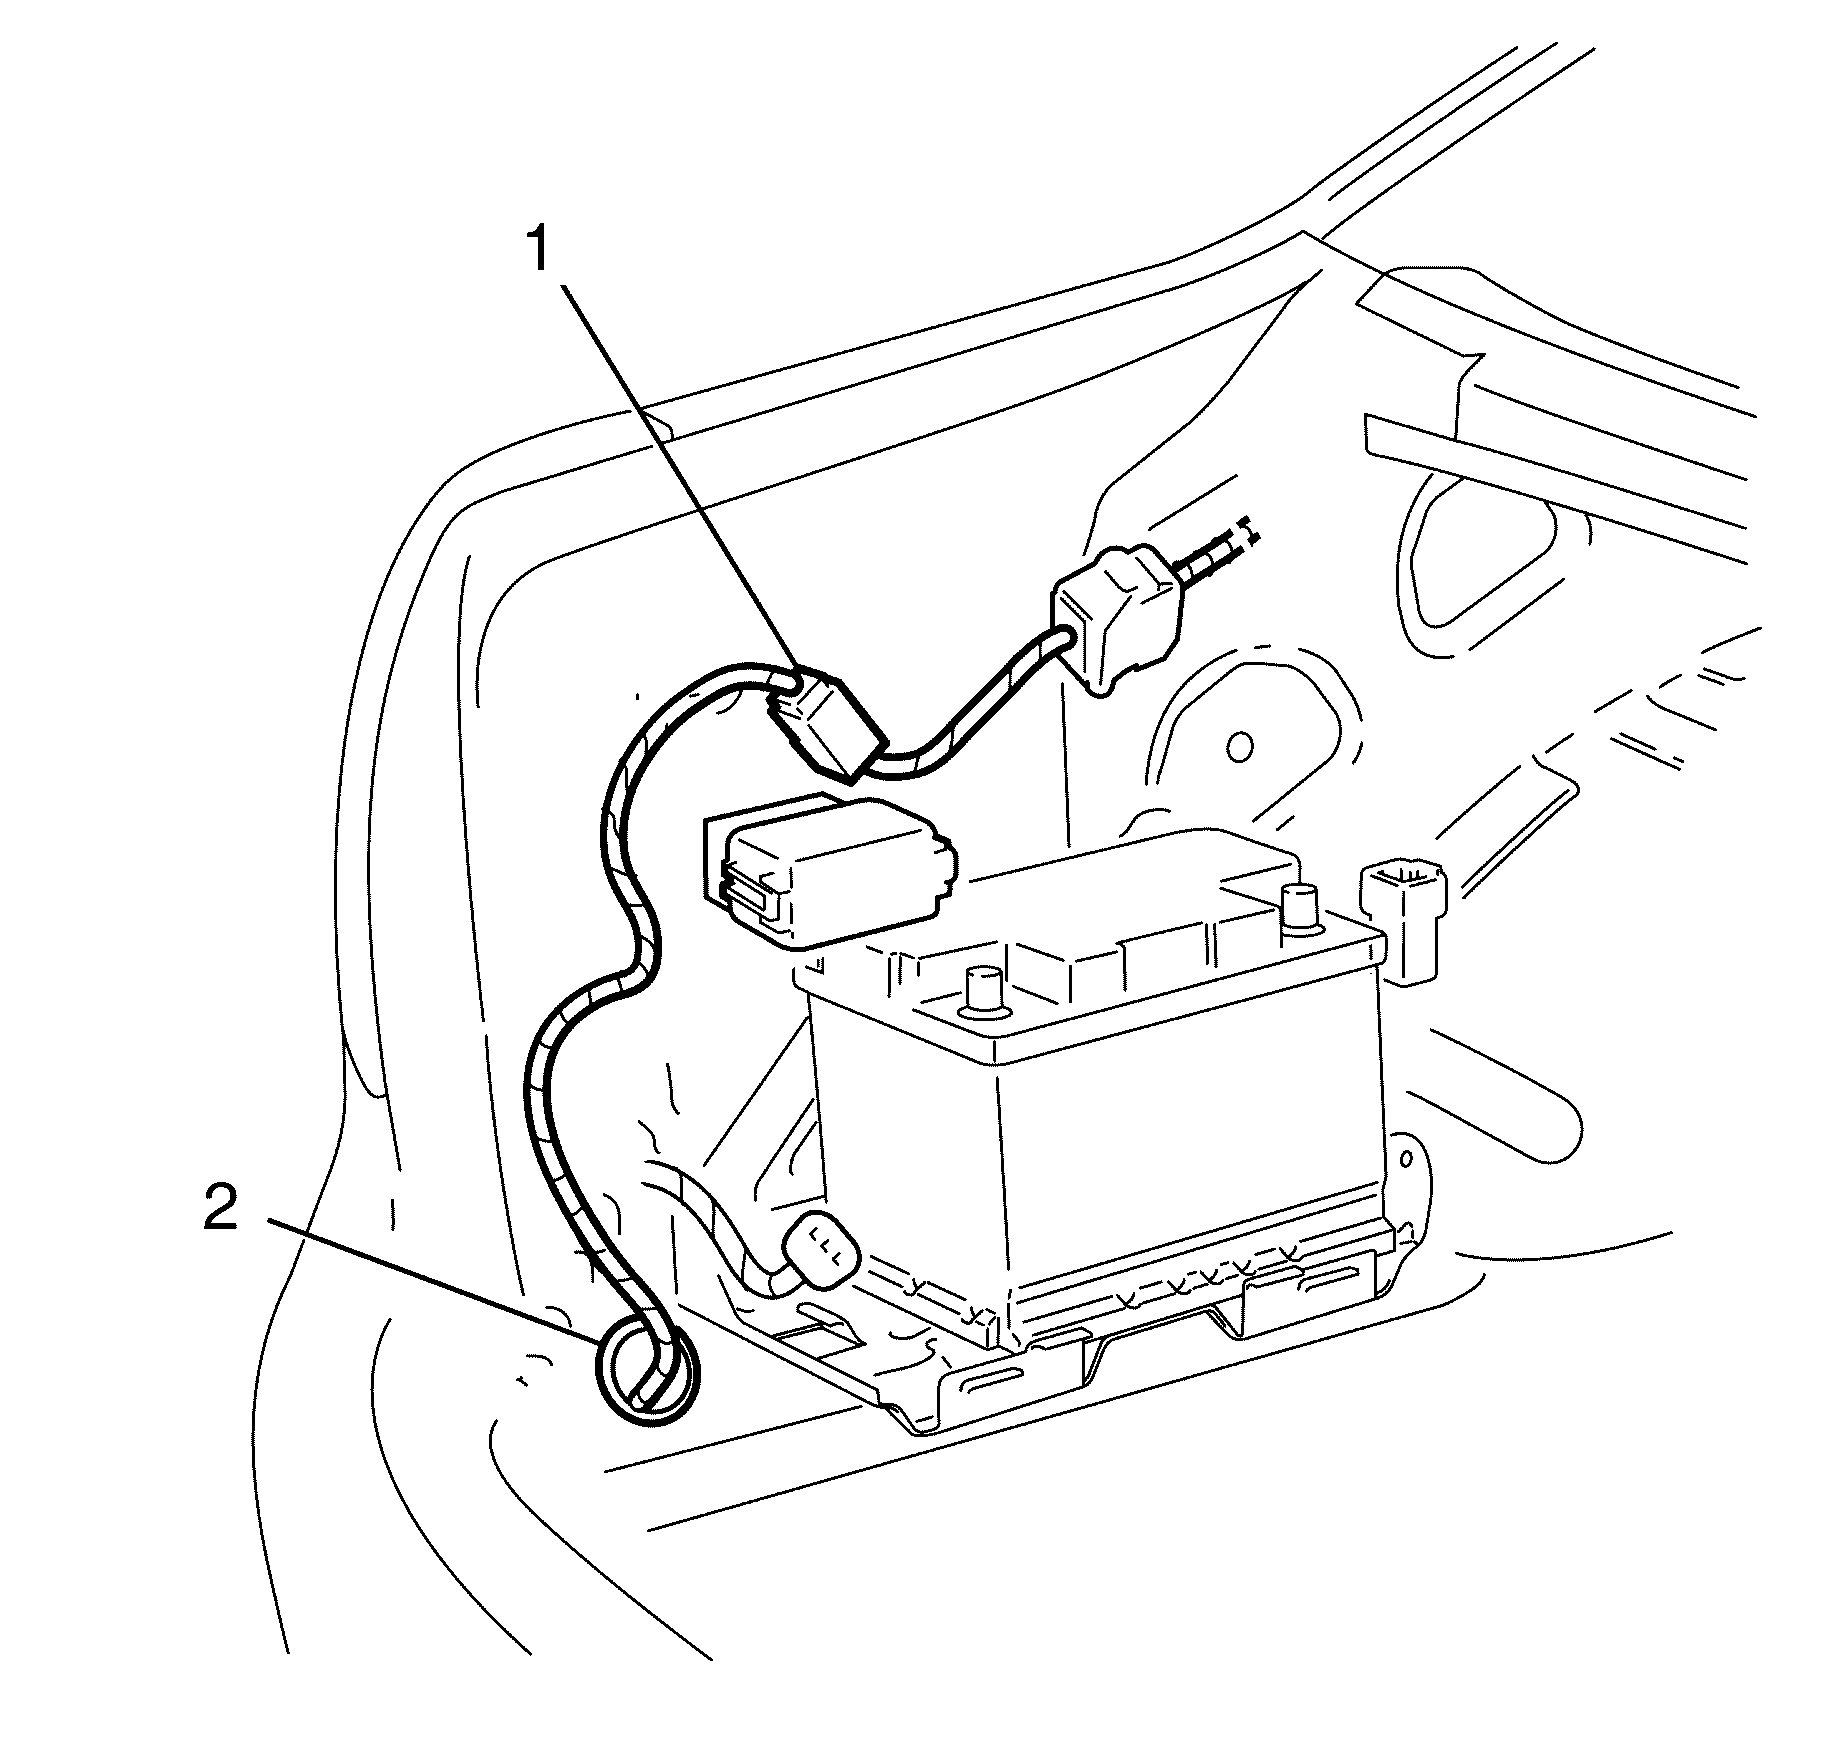
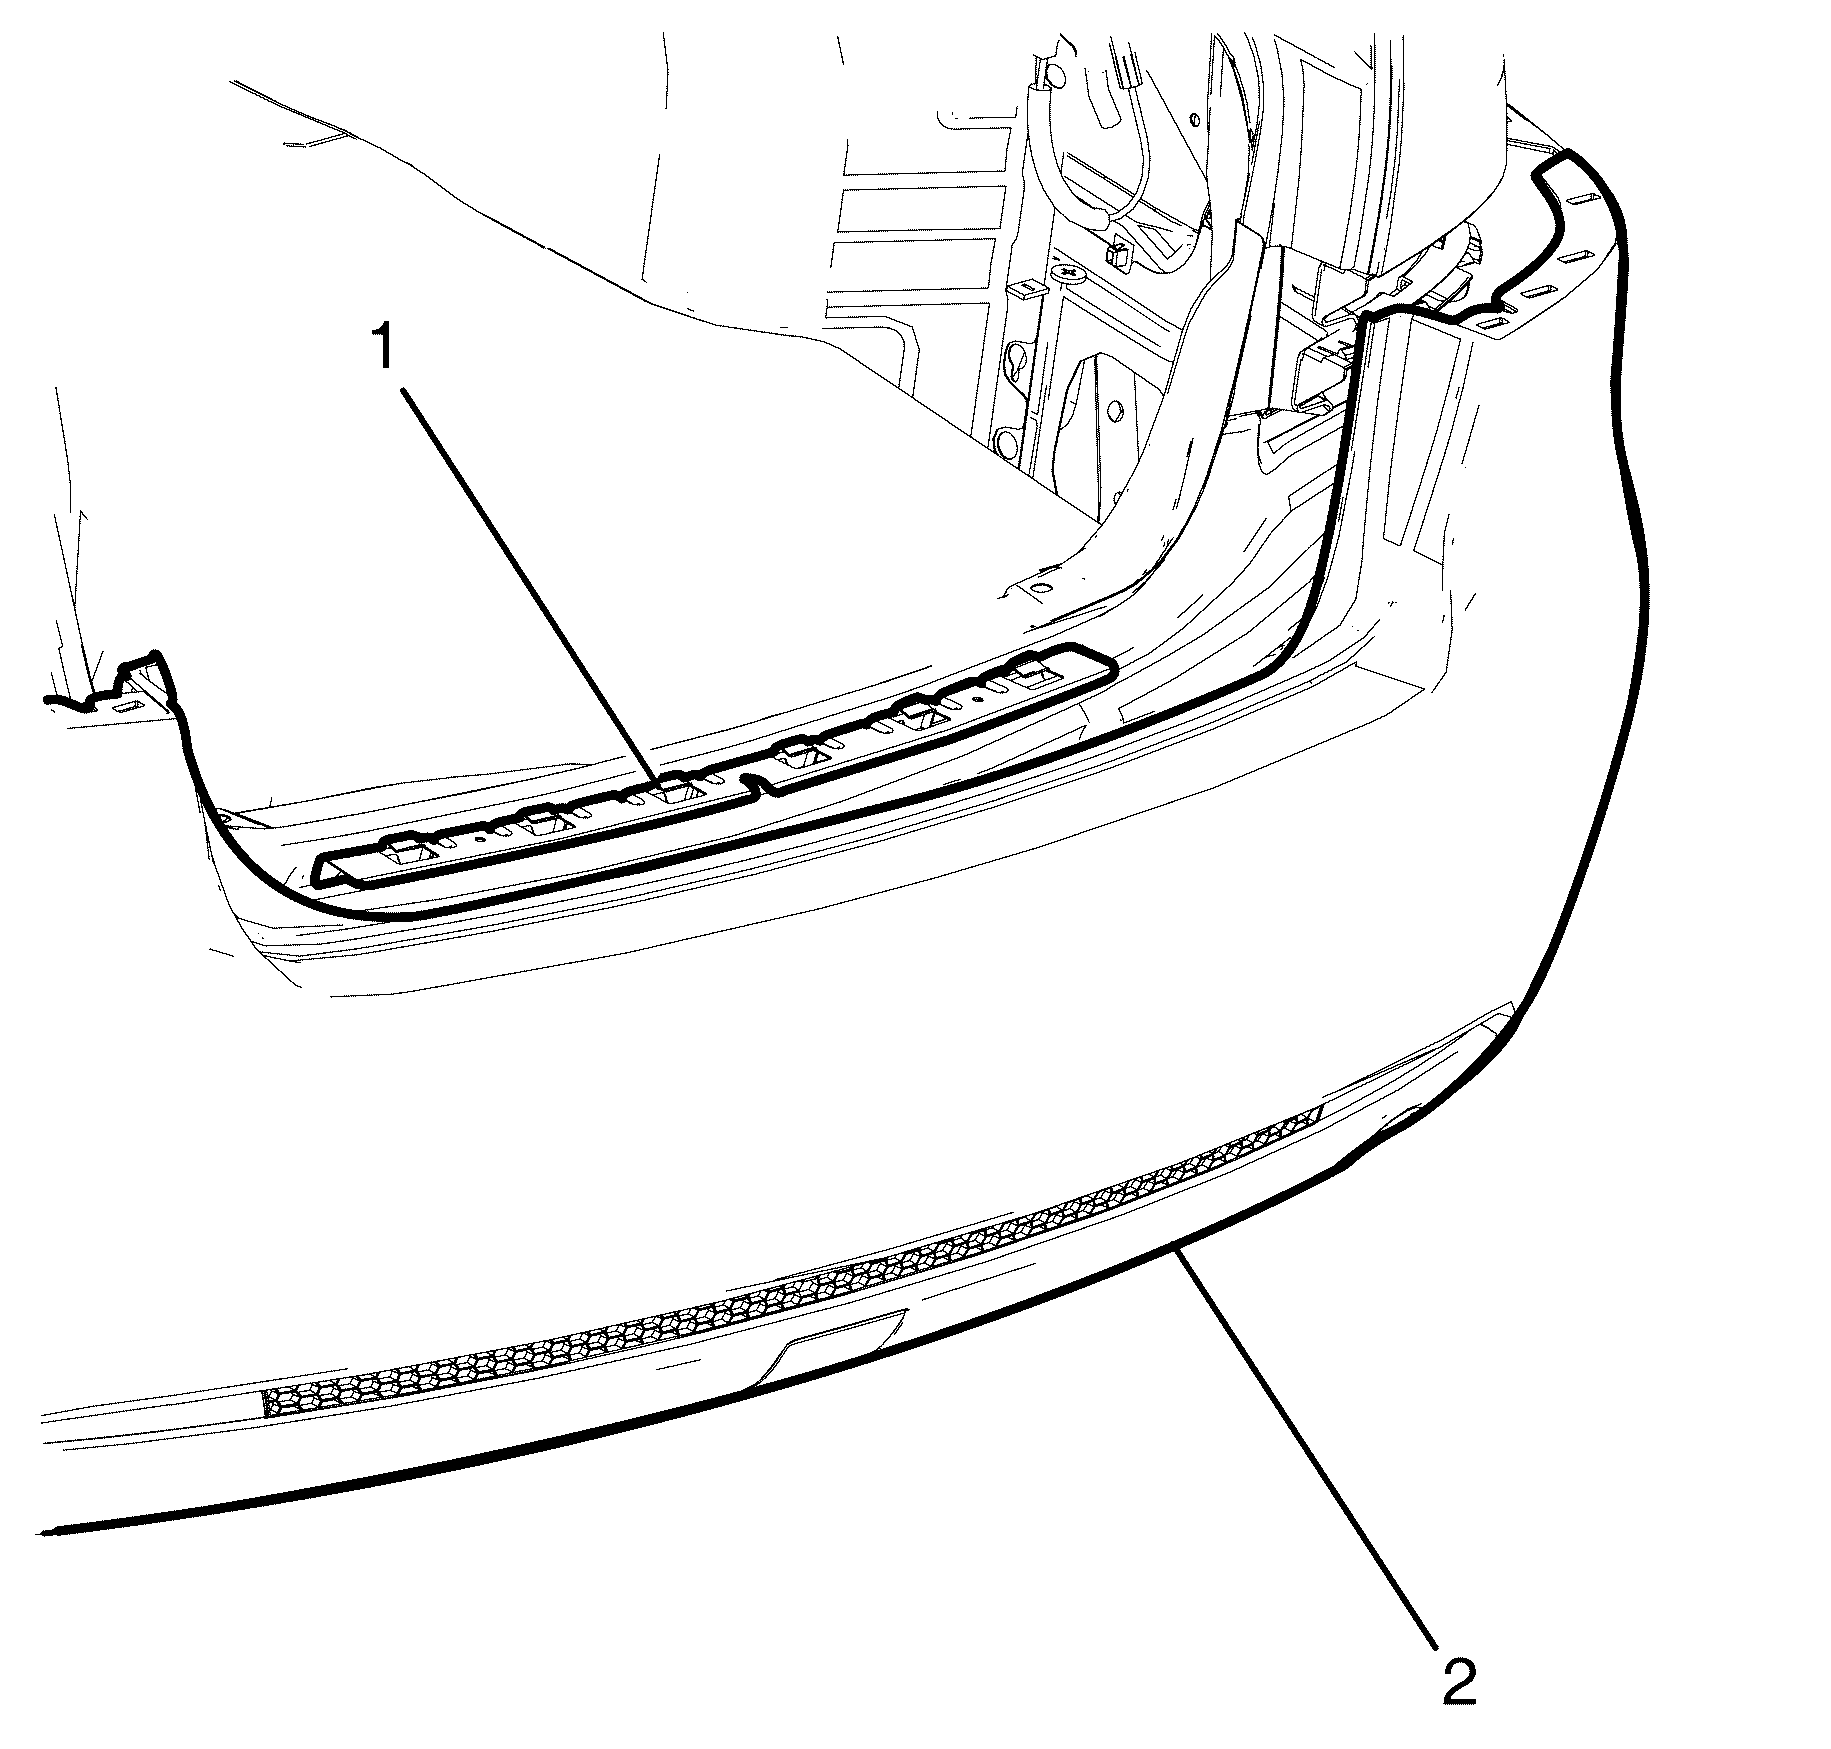
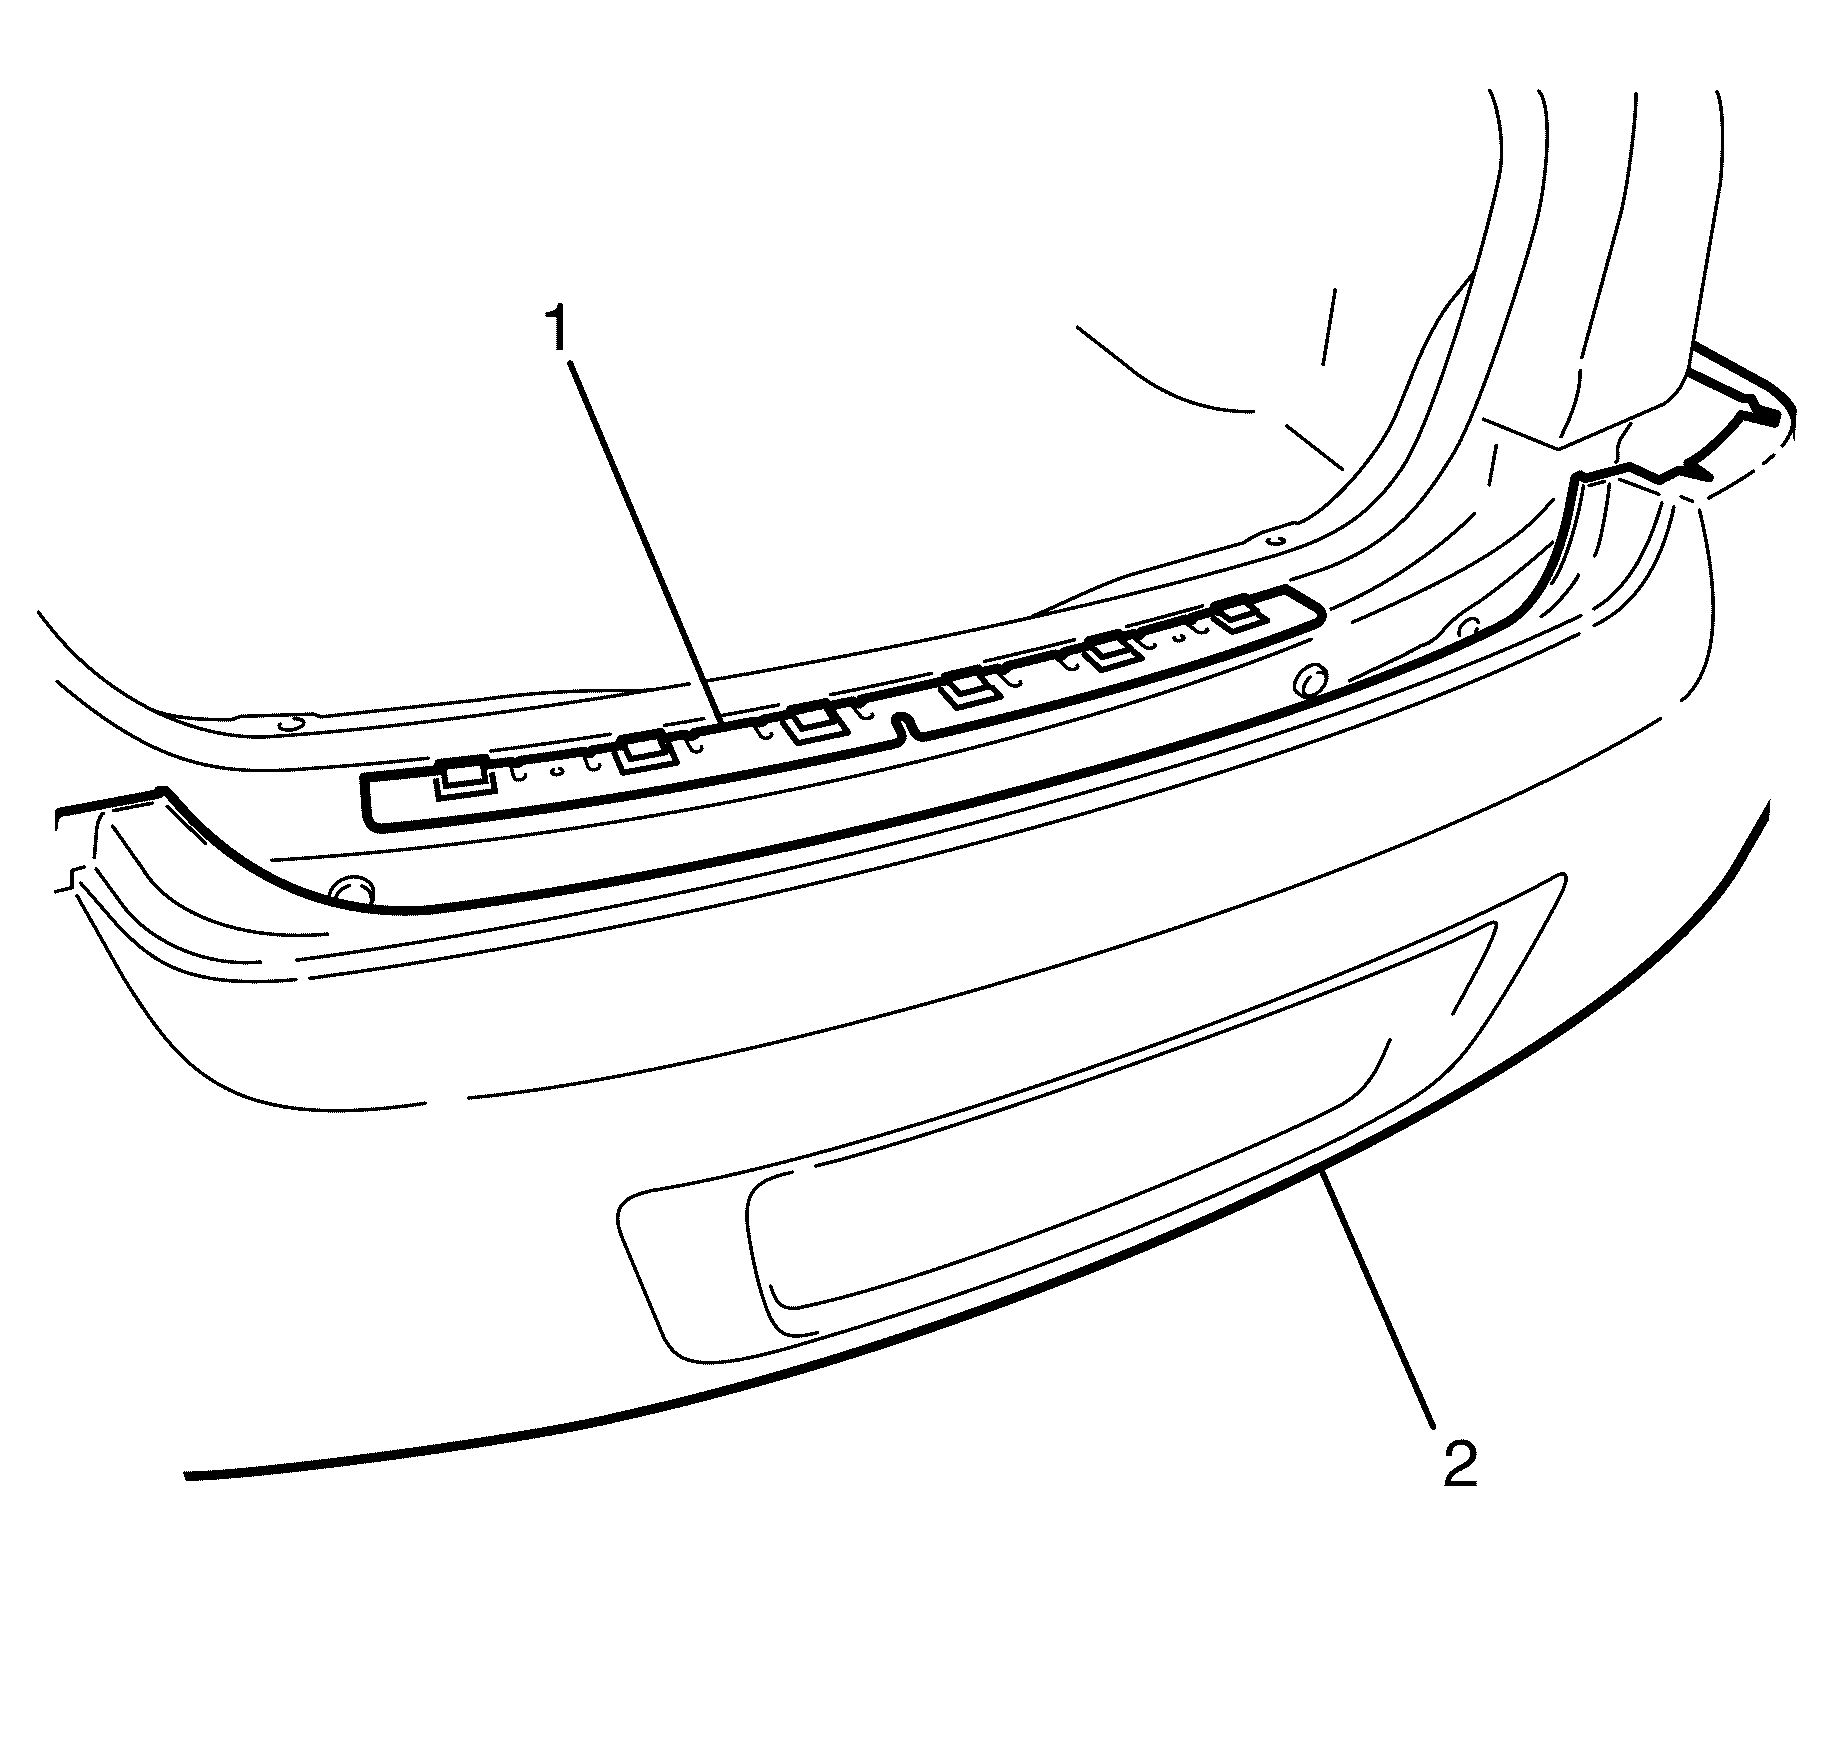
- Disconnect the rear fascia electrical connector (1) from the body wiring harness.
- Pull the rear fascia electrical wiring harness through the access hole (2).
- Remove the rear quarter end cap. Refer to Tail Lamp Mount Panel Replacement .
- Raise and support the vehicle. Refer to Lifting and Jacking the Vehicle .
- Remove the rear wheelhouse liner retaining scrivets (1, 2). Repeat for opposite side.
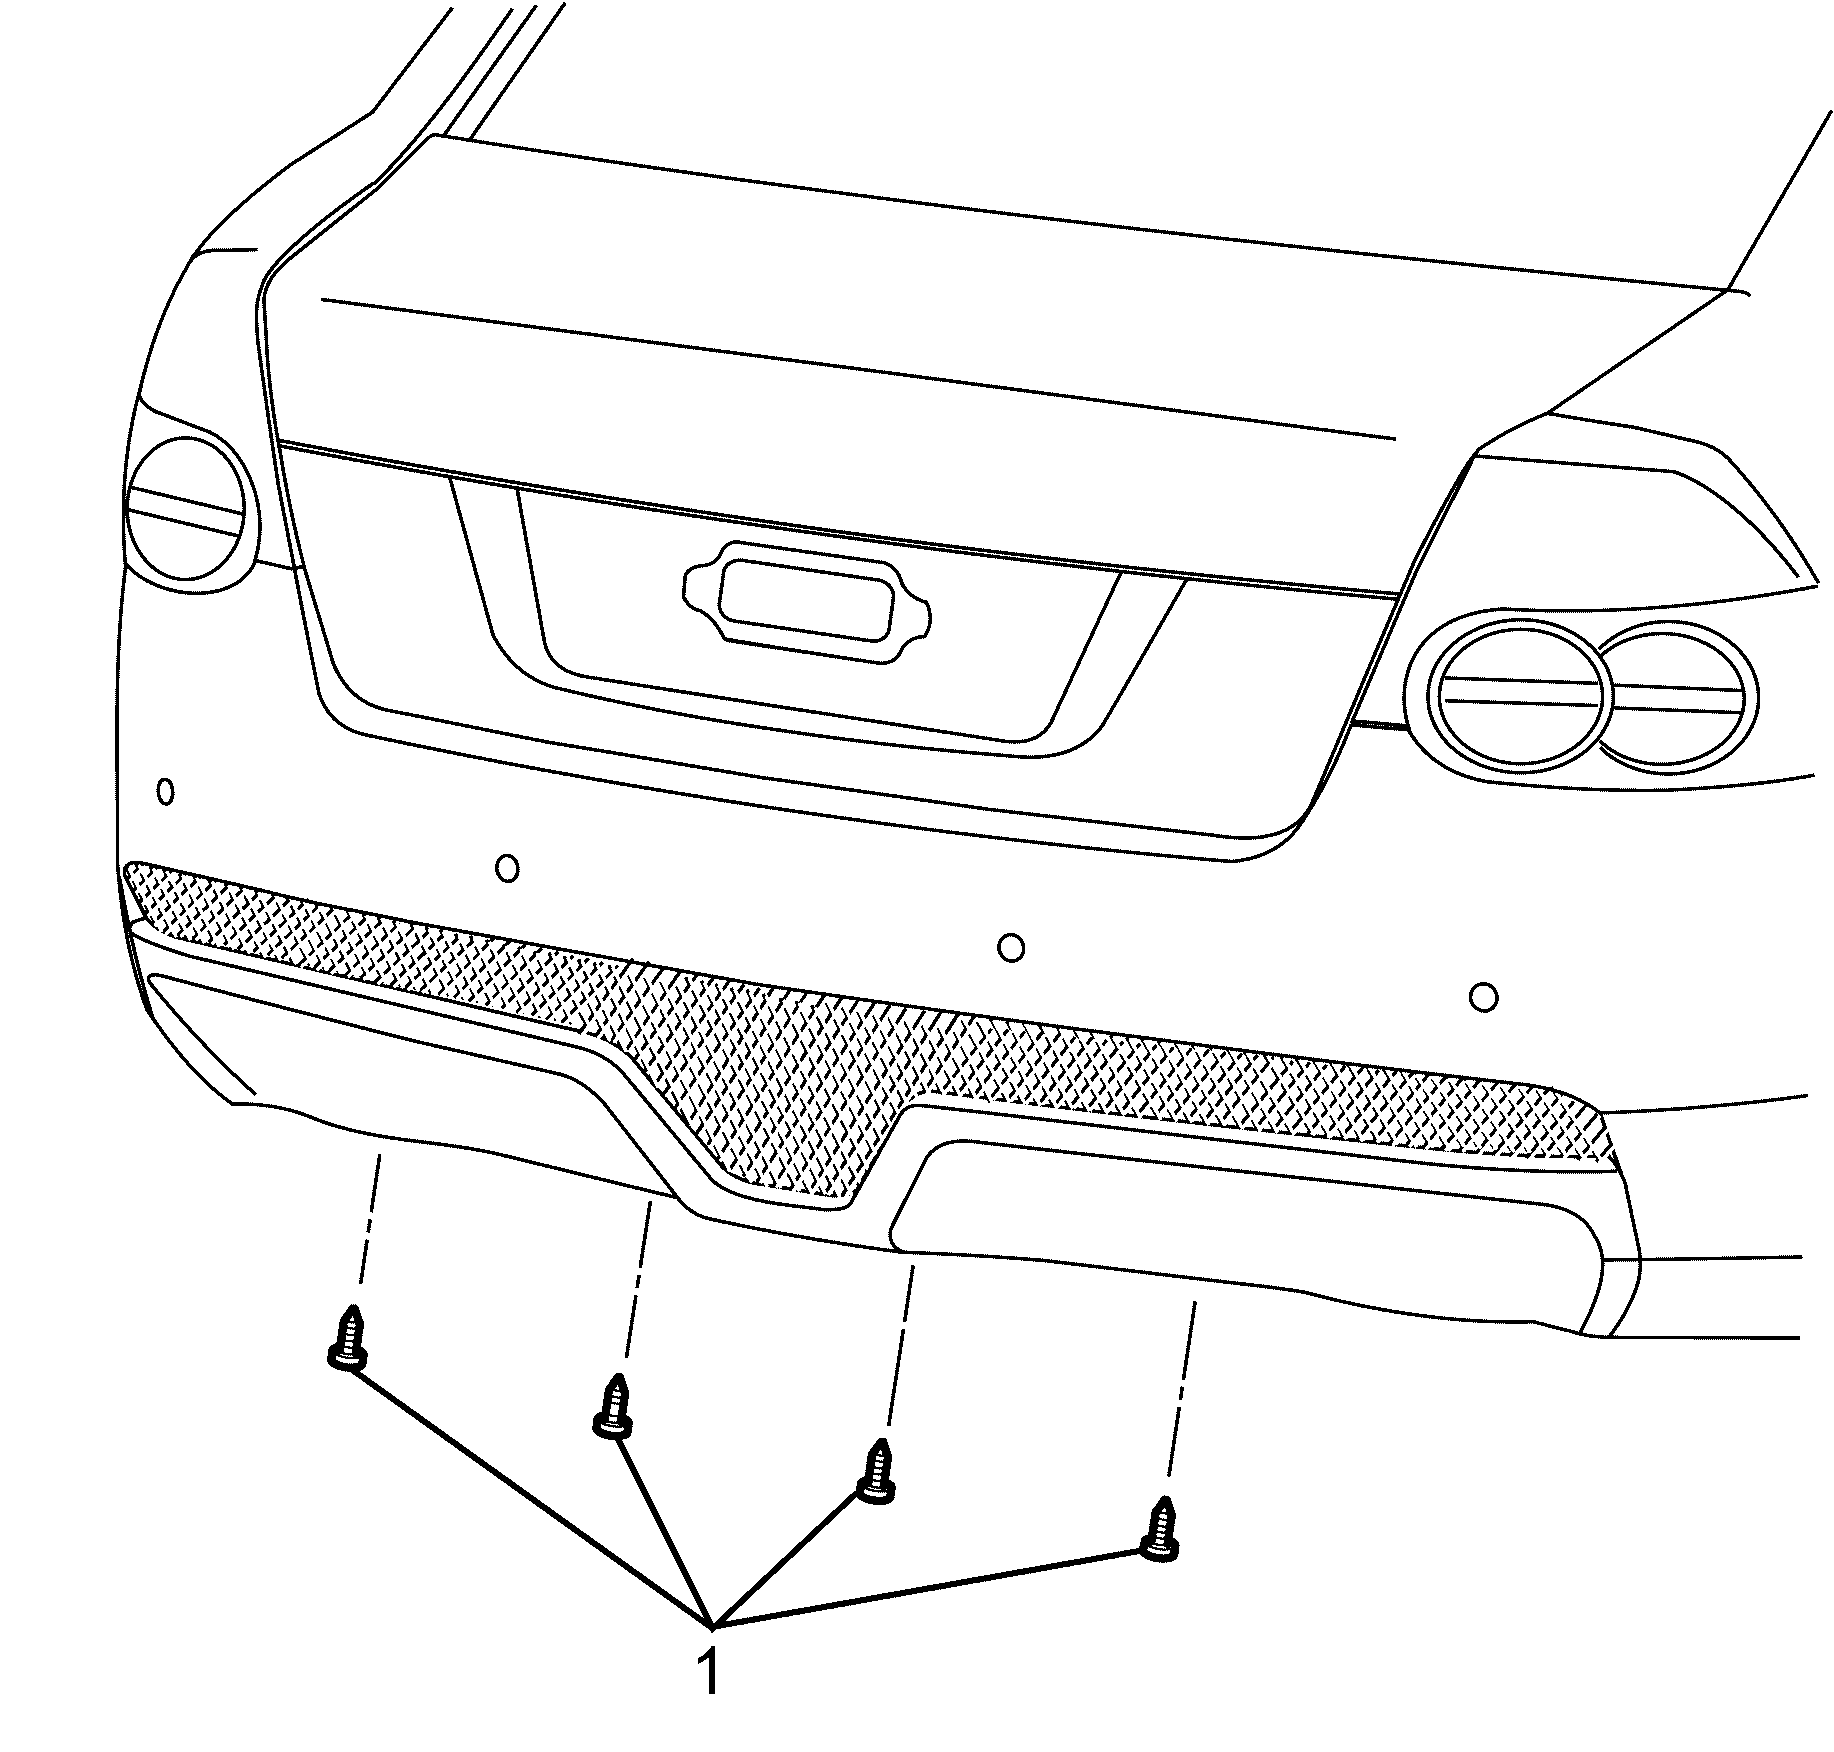
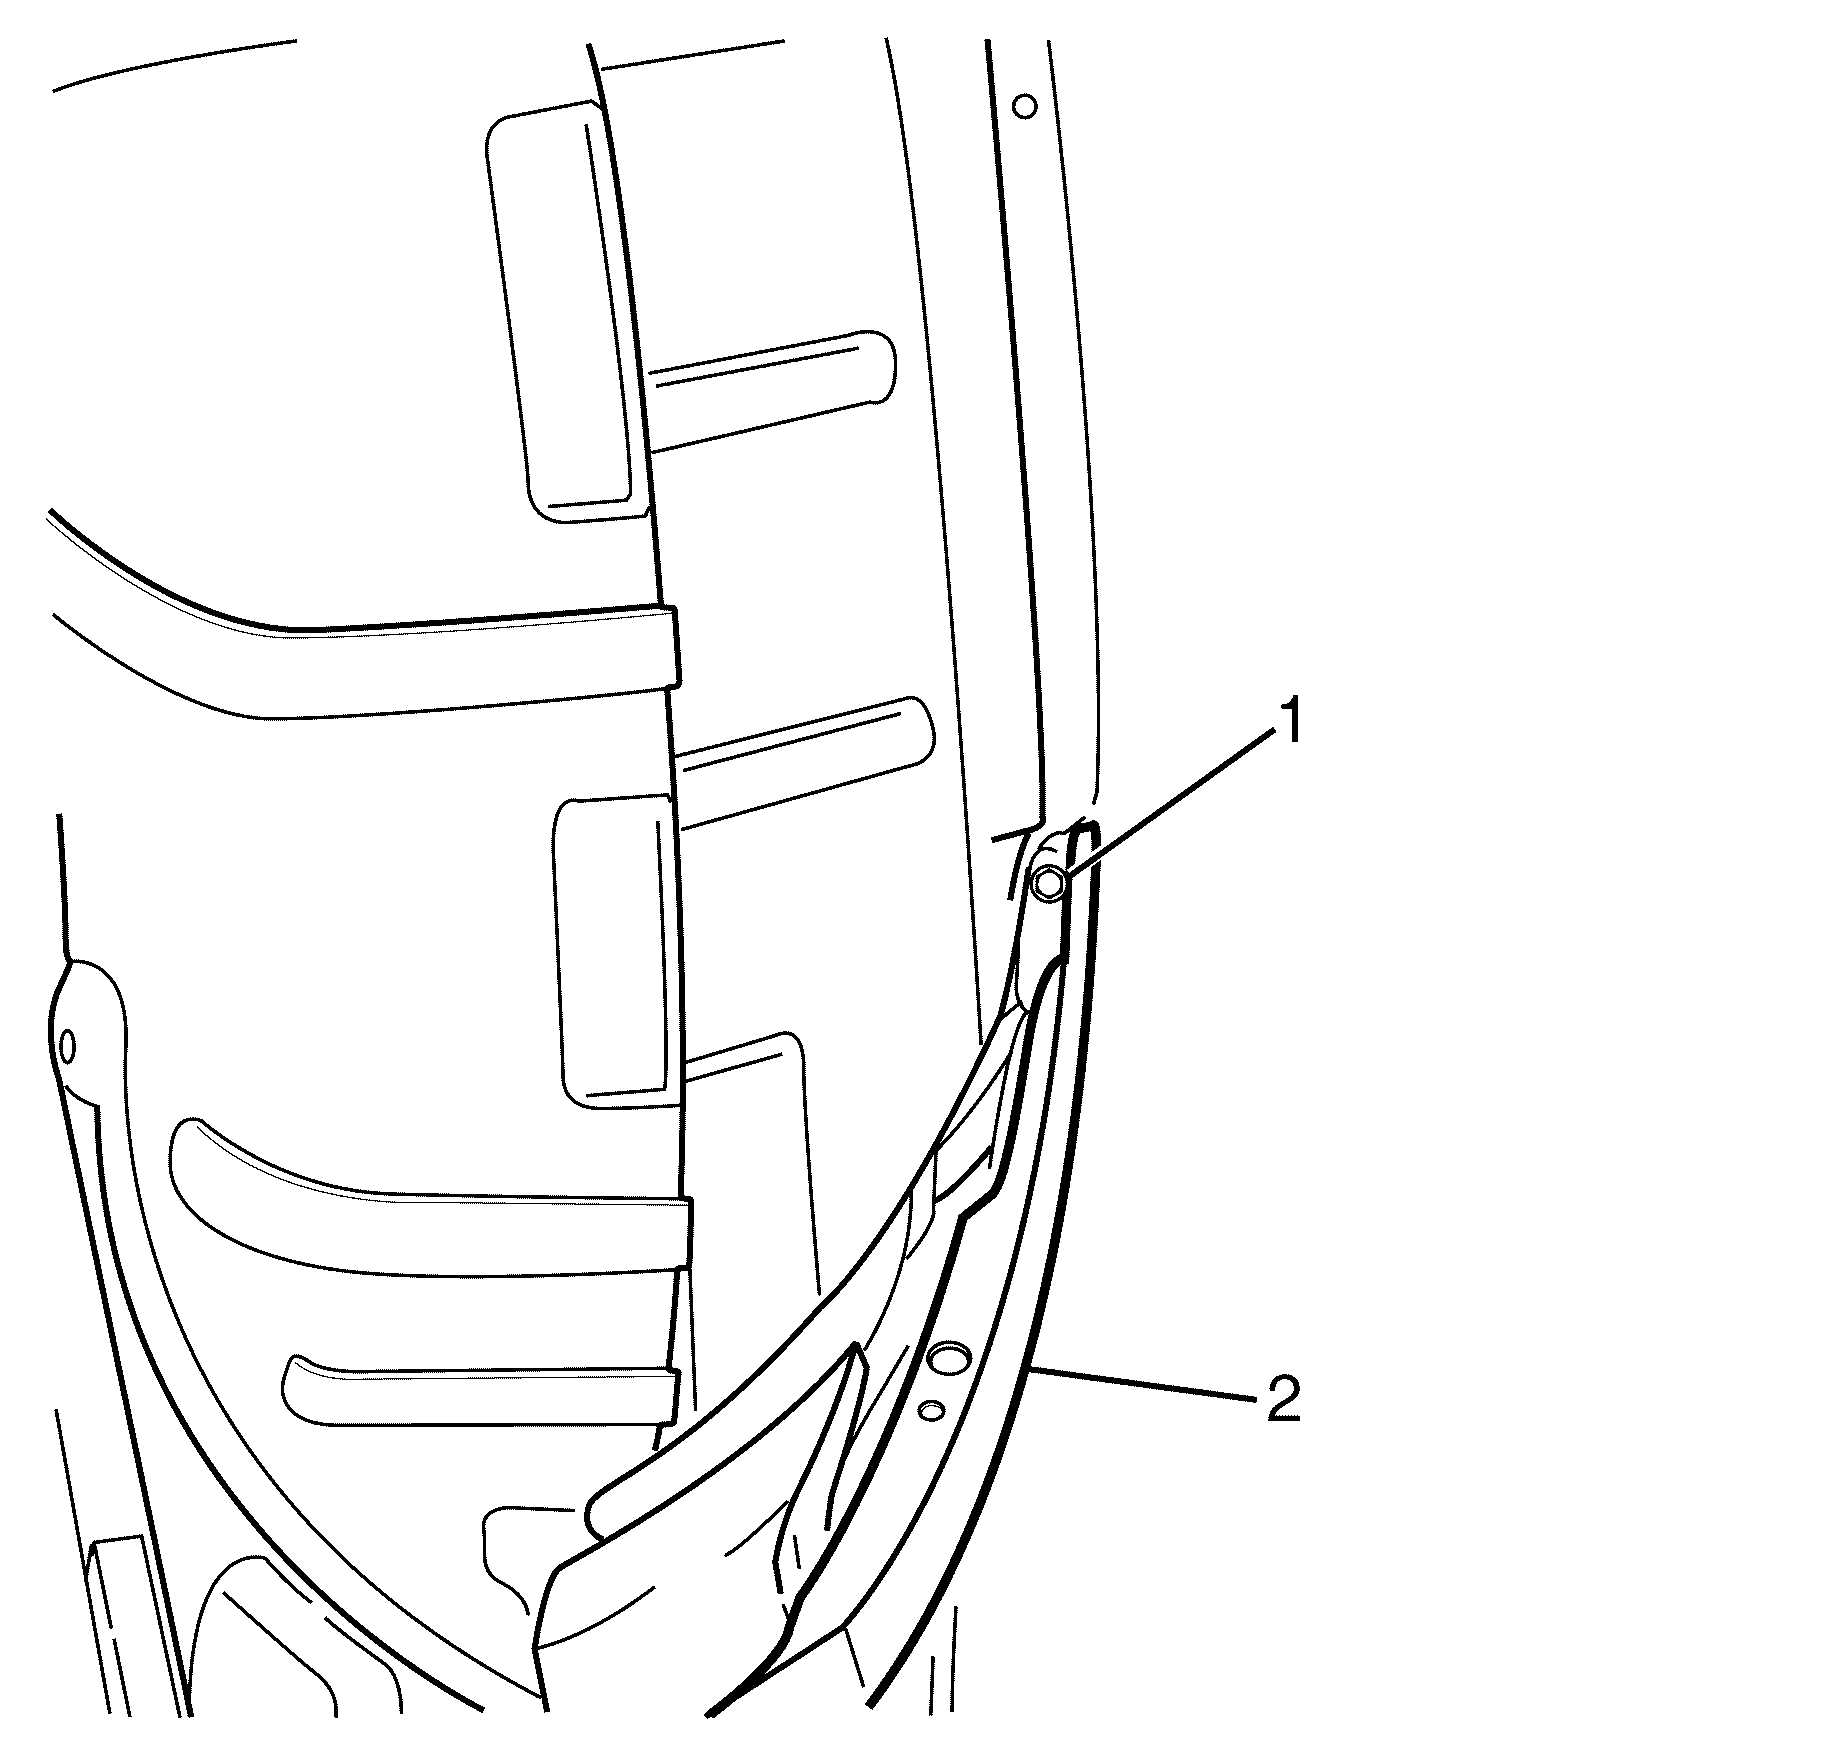
- Remove the rear bumper fascia retaining screws (1). Repeat for opposite side.
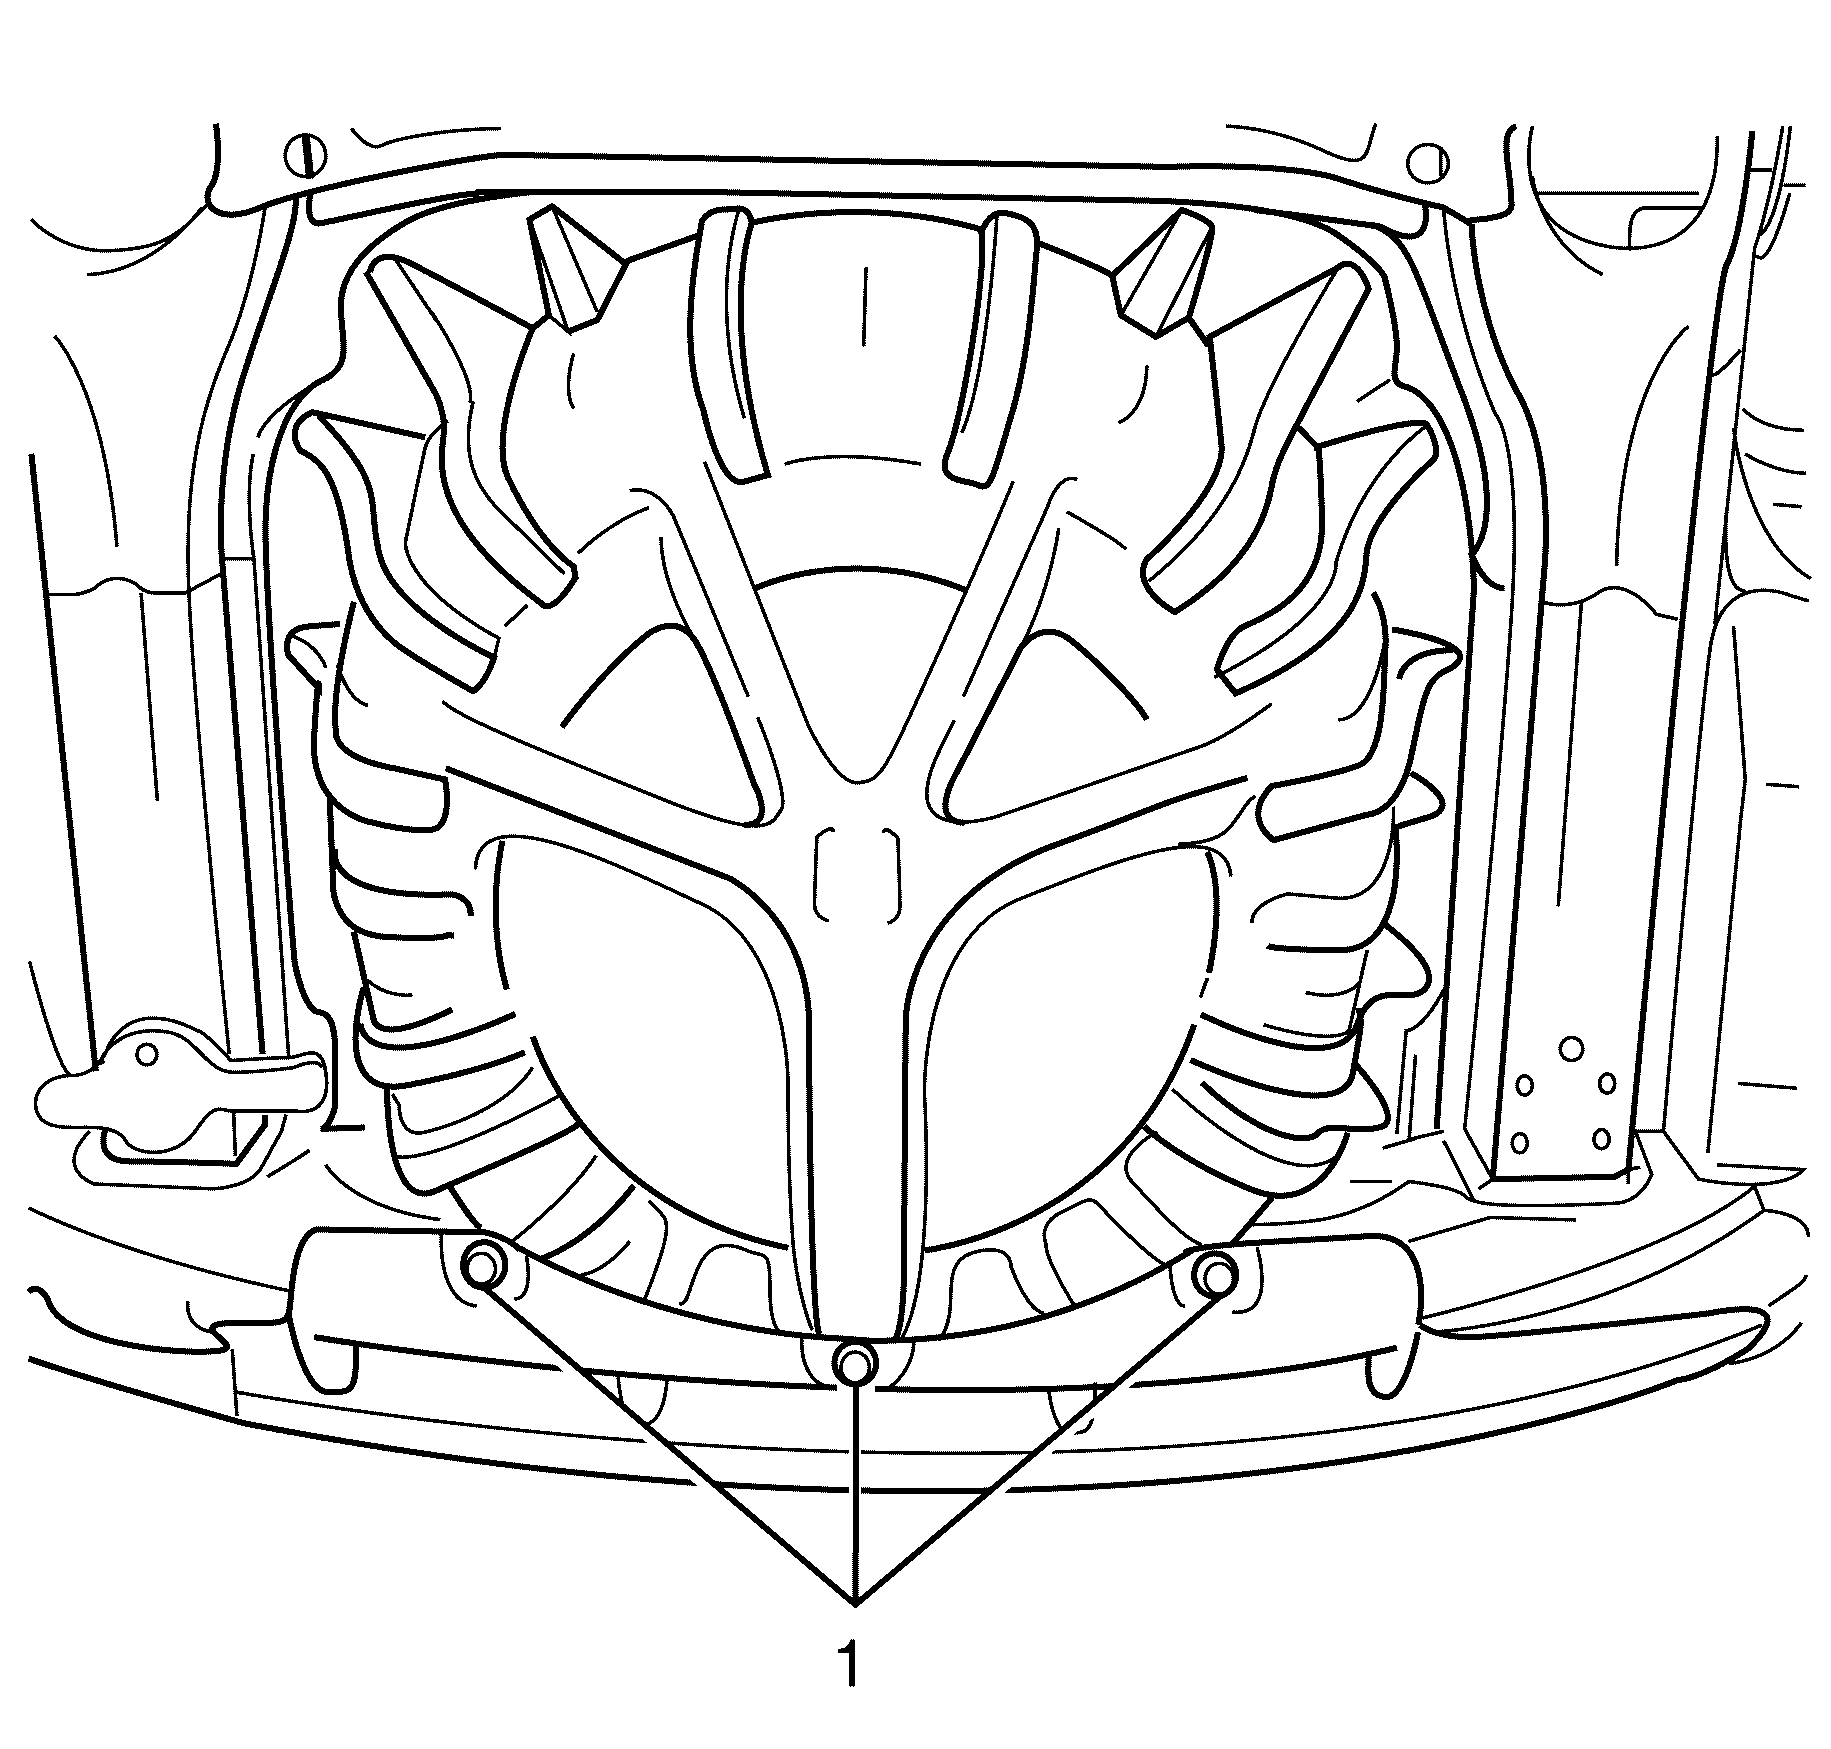
- Remove the rear bumper fascia to spare wheel carrier extension bracket retaining scrivets (1).
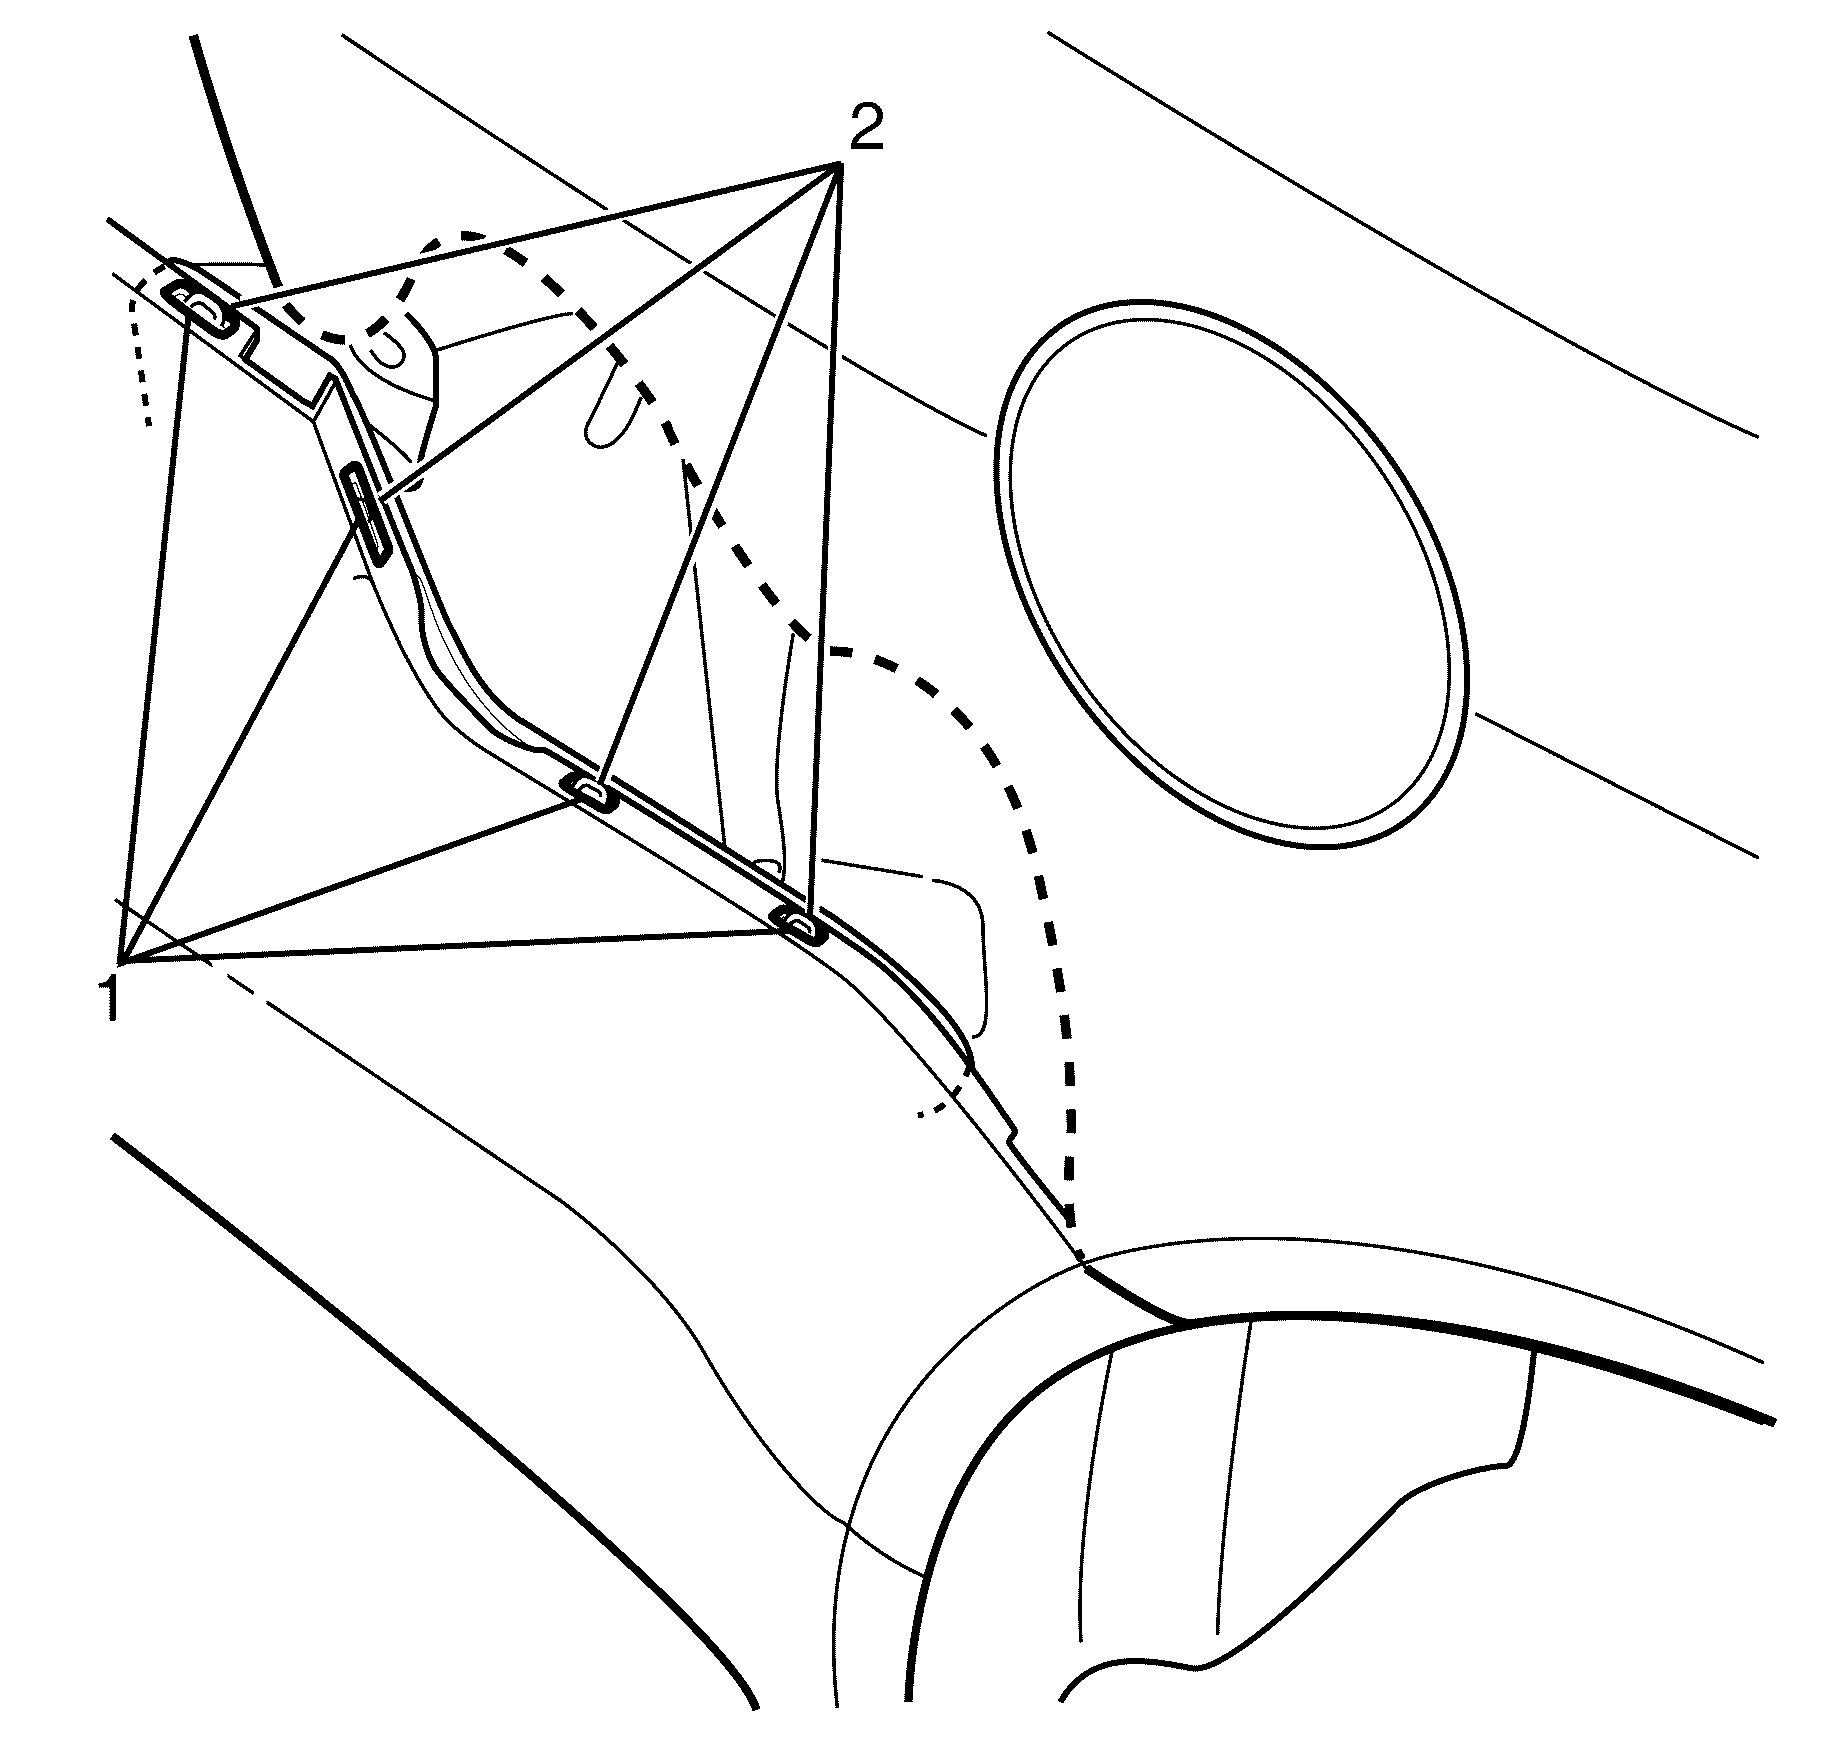
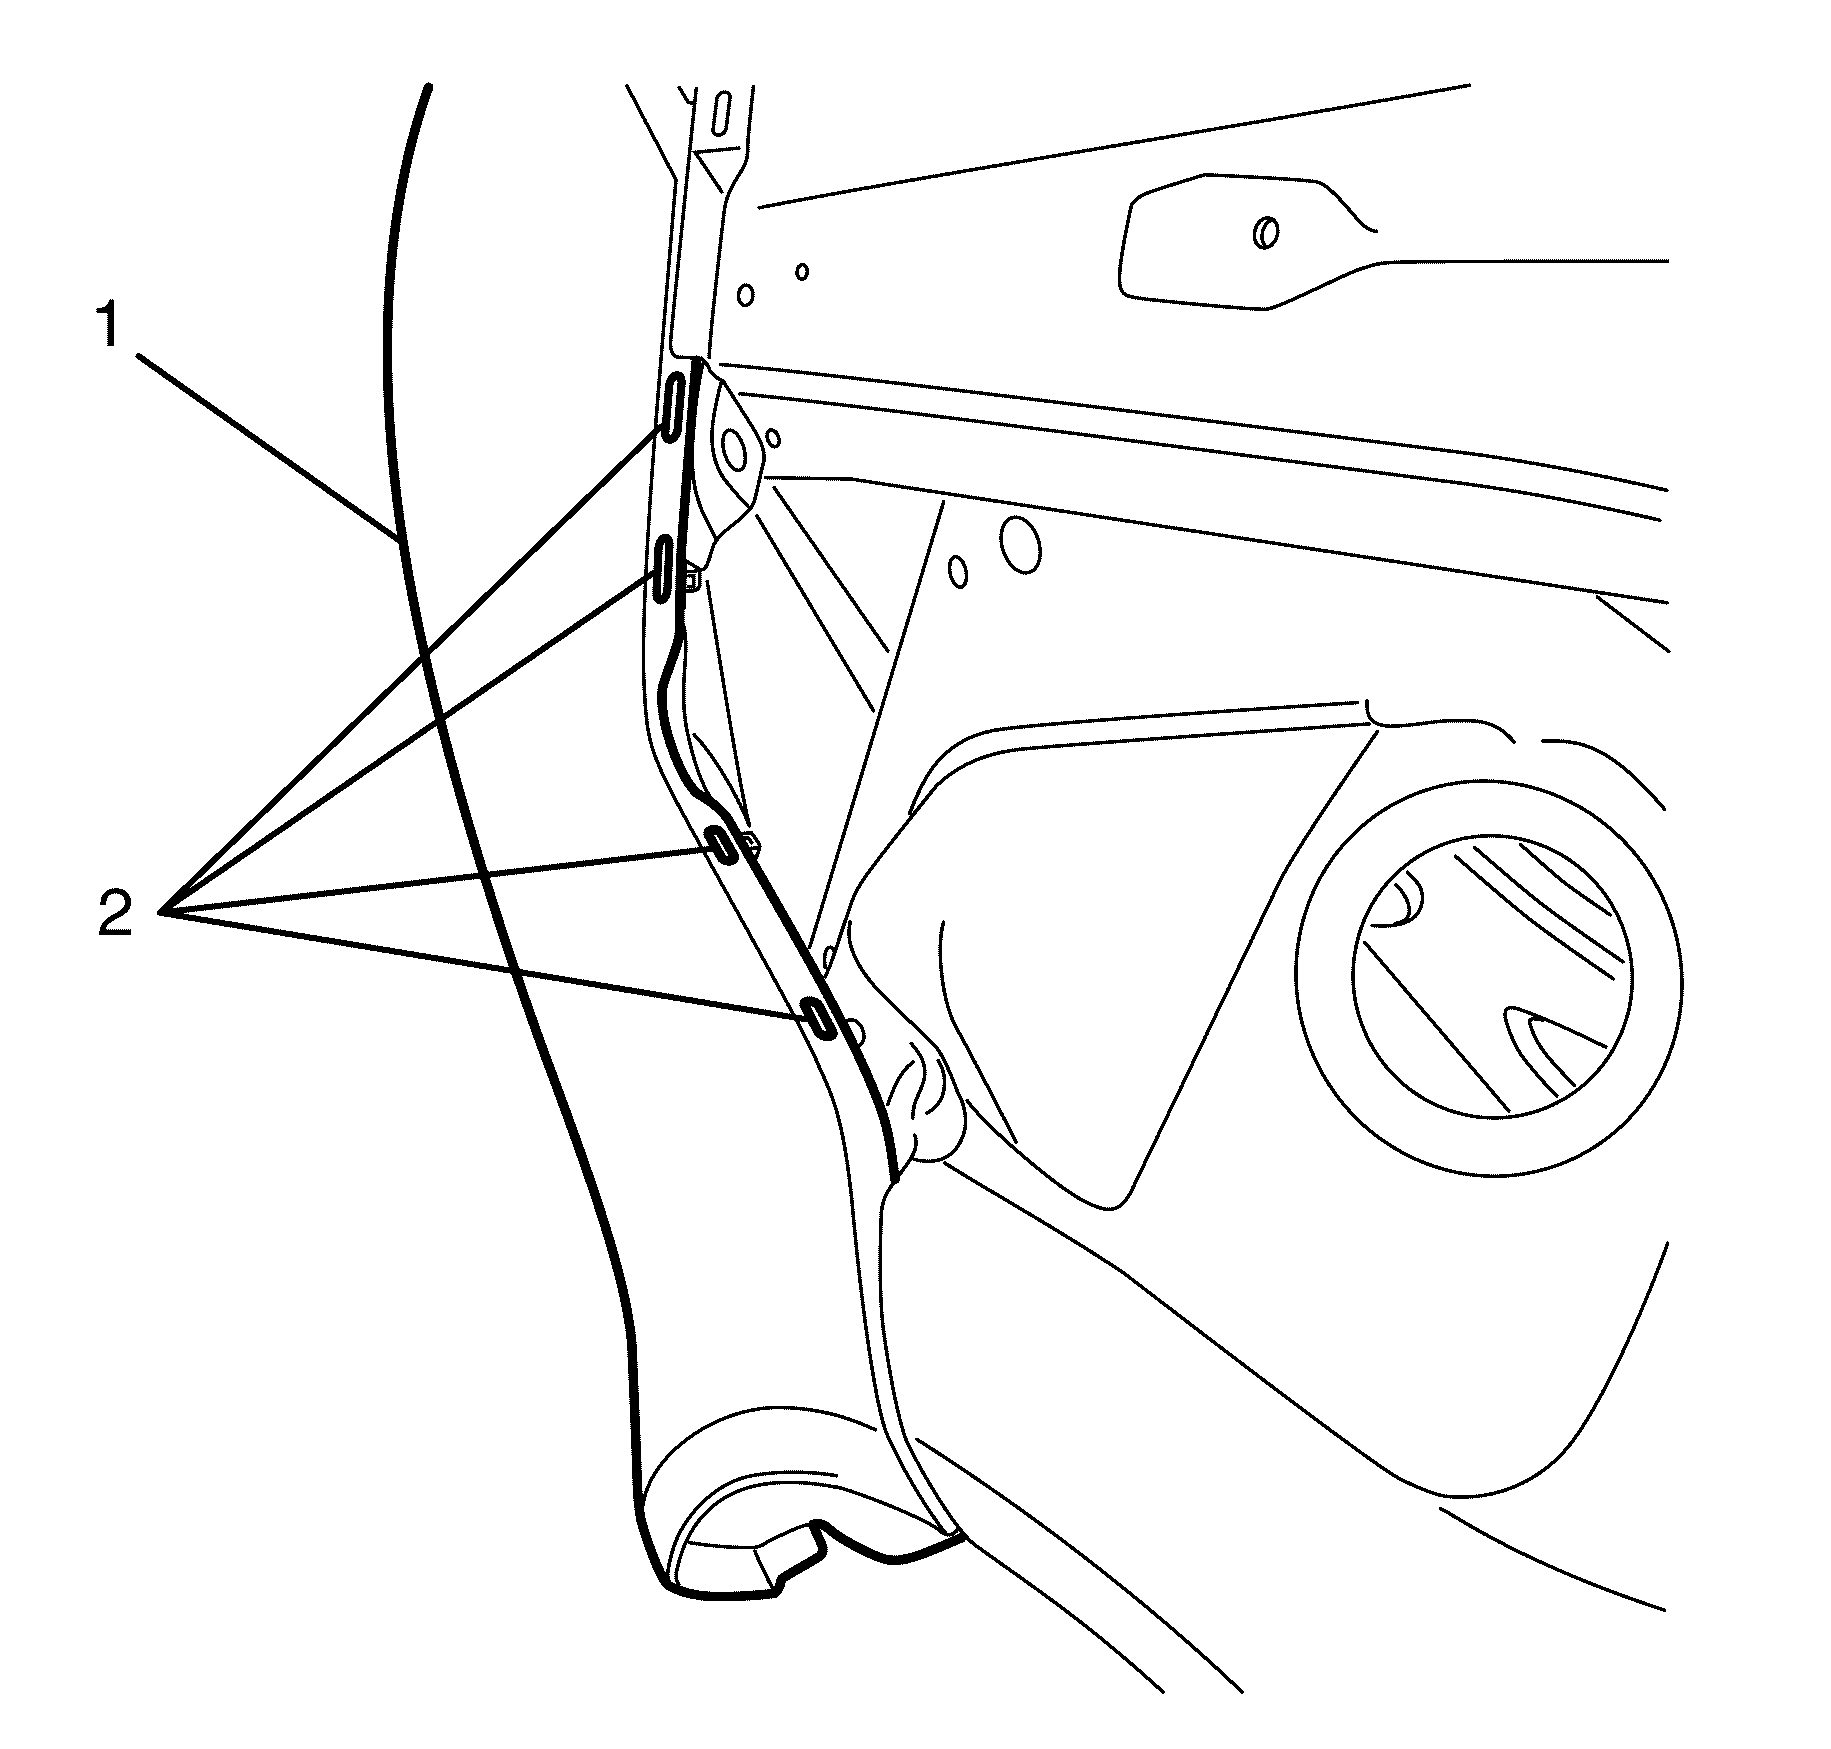
- Disengage the rear bumper fascia (1) from the rear bumper fascia guide rail retaining tabs (2).
- Disengage the rear bumper fascia to rear bumper fascia outer support retaining tabs (1).
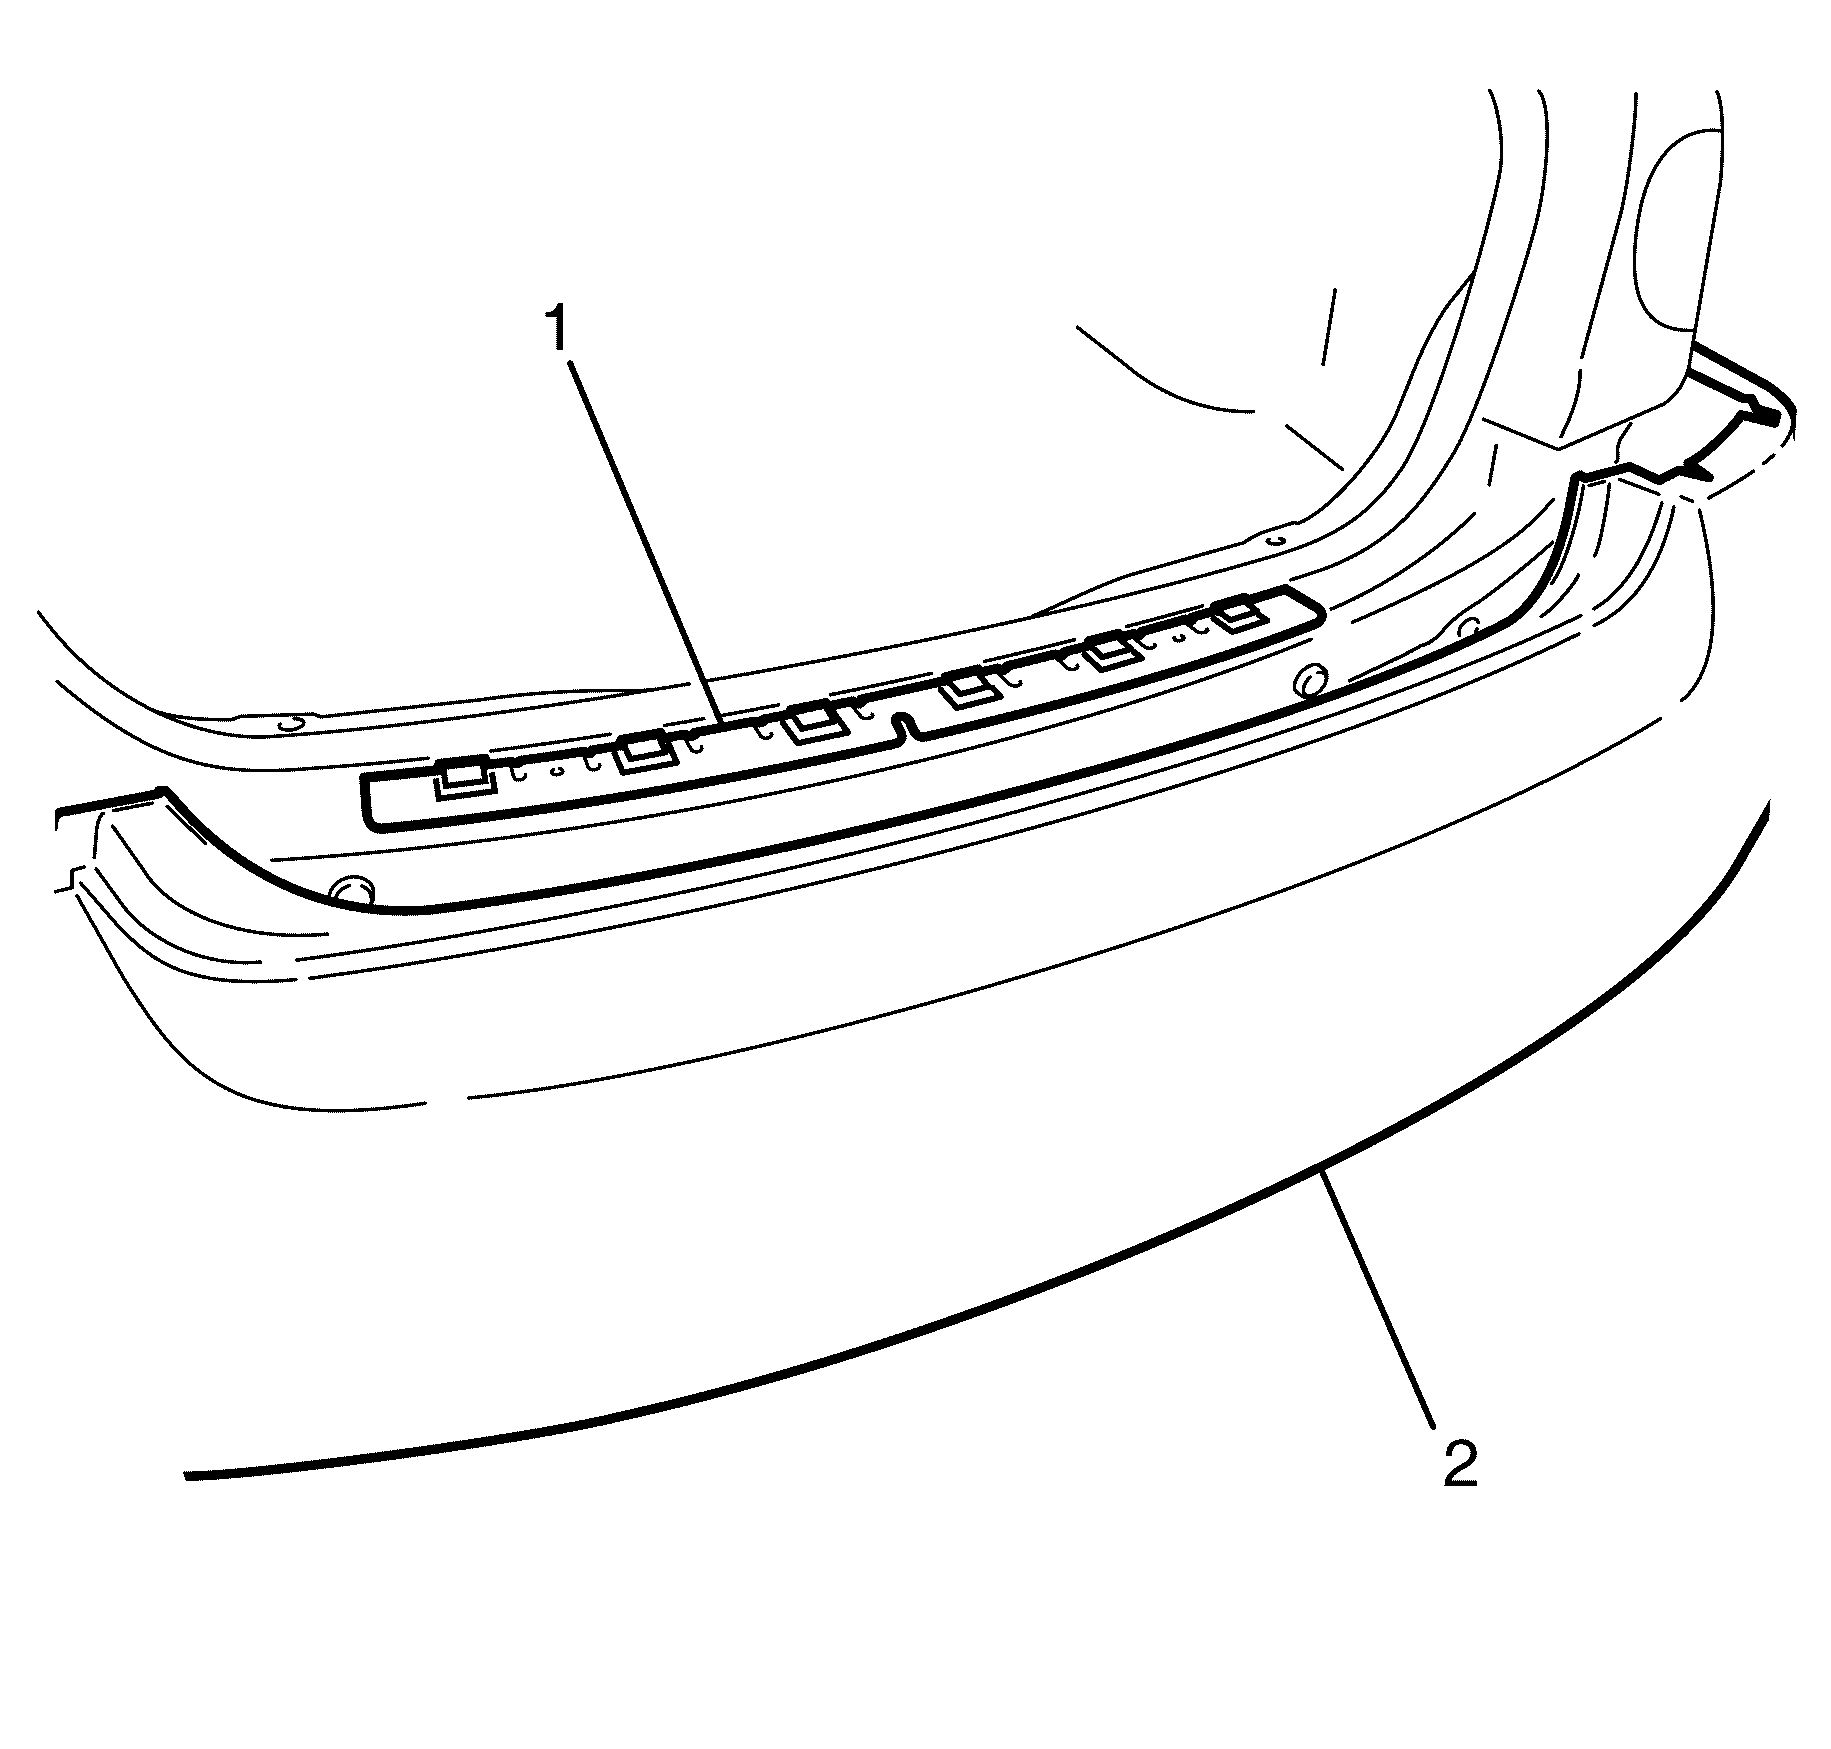
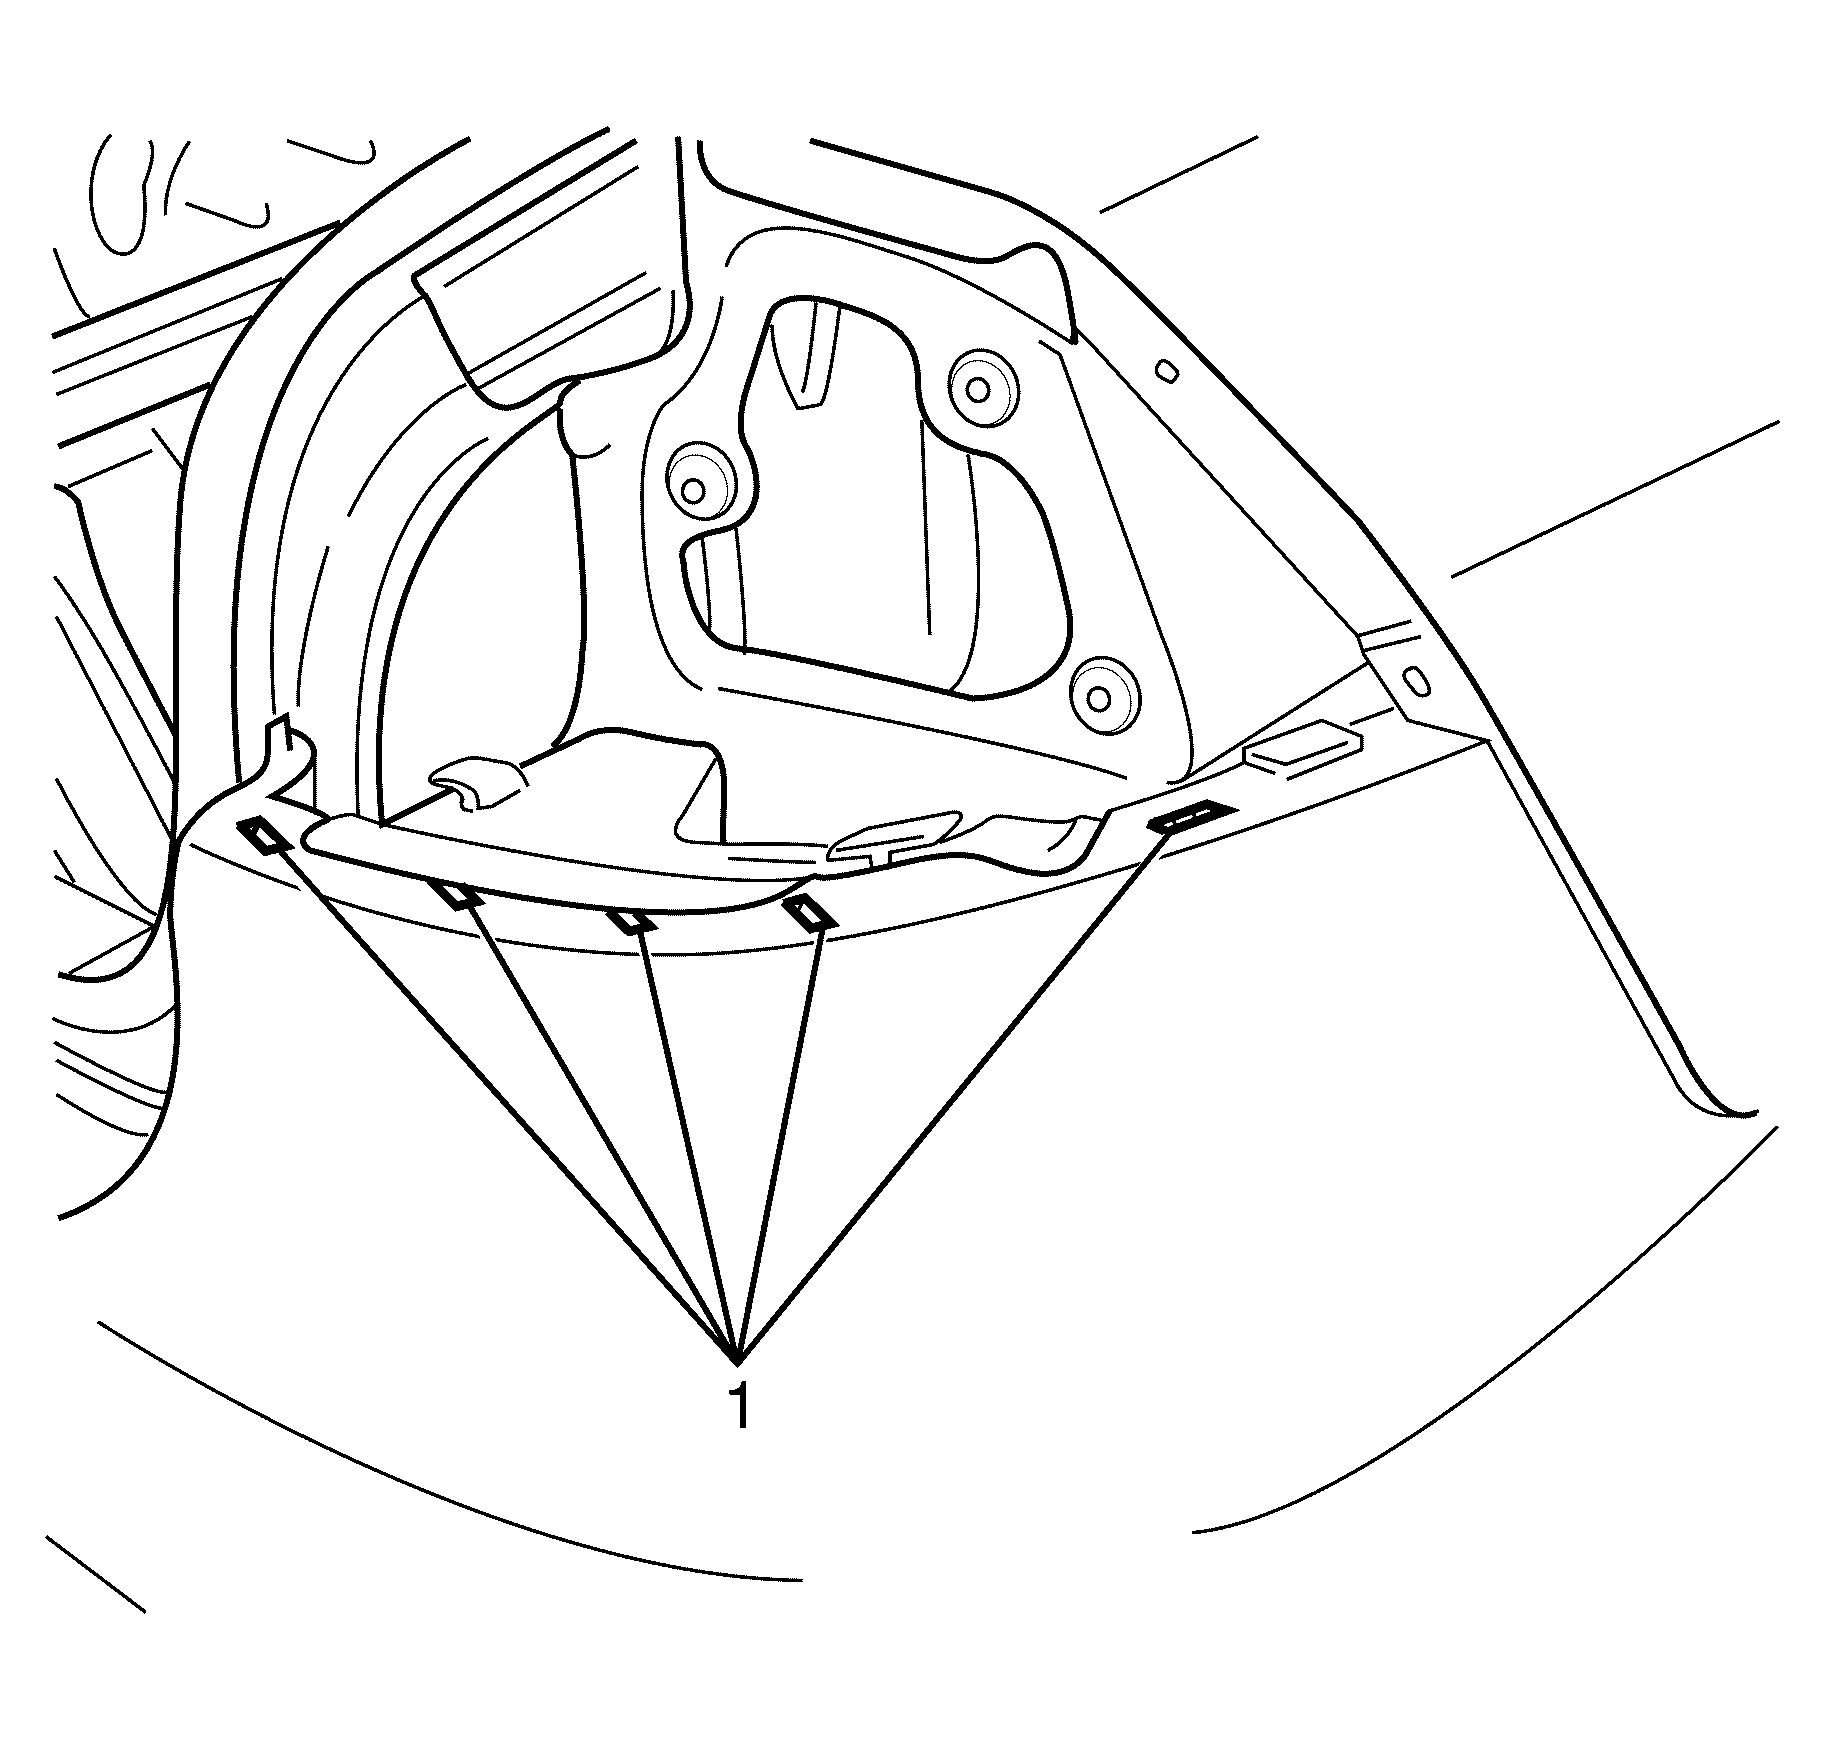
- With the aid of an assistant, remove the rear bumper fascia by sliding rearward to disengage the rear bumper fascia (2) from the rear bumper fascia centre support (1).
Caution: Refer to Safety Glasses Caution in the Preface section.
Caution: Refer to Vehicle Lifting Caution in the Preface section.
Important: Steps 1 and 2 are applicable to vehicles fitted with object detection and/or rear fog lamp systems.


Important: Disengage the rear bumper fascia (2) by sliding rearward.
Installation Procedure
- With the aid of an assistant, install the rear bumper fascia by sliding forward to engage the rear bumper fascia (2) to the rear bumper fascia centre support (1).
- Engage the rear bumper fascia to rear bumper fascia outer support retaining tabs (1).
- Engage the rear bumper fascia (1) to rear bumper fascia guide rail retaining tabs (2).
- Install the rear bumper fascia to spare wheel carrier extension bracket retaining scrivets (1).
- Install the rear bumper fascia panel retaining screws (1). Repeat for opposite side.
- Install the rear wheelhouse liner retaining scrivets (2) to the rear wheelhouse liner (1). Repeat for the opposite side.
- Feed the rear fascia electrical wiring harness through the access hole (2).
- Connect the rear fascia electrical connector (1) to the wiring harness.
- Lower the vehicle.
Important: Engage the rear bumper fascia (2) by sliding forward.
Important: Make sure the rear bumper fascia is secured to the rear bumper fascia centre, outer and lower supports by hearing an audible click.
Notice: Refer to Fastener Notice in the Preface section.
Tighten
Tighten the screws to 2 Nm (18 lb. in).
Important: Steps 7 and 8 are applicable to vehicles fitted with object detection and/or rear fog lamp systems.
Rear Bumper Fascia Replacement SWB
Removal Procedure
- Disconnect the object detection electrical connector (1) from the wiring harness.
- Feed the licence lamp wiring harness through the access hole (2).
- Raise and support the vehicle. Refer to Lifting and Jacking the Vehicle.
- Remove the rear wheelhouse liner (1) to rear bumper fascia retaining scrivets (2). Repeat for opposite side.
- Remove the rear bumper fascia (2) to rear quarter panel retaining screw (1). Repeat for opposite side.
- Remove the rear bumper fascia to spare wheel carrier retaining scrivets (1).
- Disengage the rear bumper fascia (1) to rear bumper fascia guide rail retaining tabs (2).
- Disengage the rear bumper fascia to rear bumper fascia outer support retaining tabs (1).
- With the aid of an assistant, remove the rear bumper fascia by sliding rearward to disengage the rear bumper fascia (2) from the rear bumper fascia centre support (1).
Caution: Refer to Safety Glasses Caution in the Preface section.
Caution: Refer to Vehicle Lifting Caution in the Preface section.
Important: Steps 1 and 2 are for the object detection assembly if fitted.
Disassembly Procedure
- Remove the rear bumper fascia reflector. Refer to Rear Bumper Fascia Reflector Replacement.
- Remove the rear bumper fascia extension. Refer to Rear Bumper Fascia Extension Replacement.
Assembly Procedure
Important: Prior to drilling the bumper fascia it is essential that the object detection bracket templates are aligned to their correct corresponding location within the bumper fascia. The location of the object detection bracket templates to the bumper fascia is alpha numeric, make sure that the letters correspond between the object detection bracket templates and the bumper fascia.
Important: Each object detection bracket template has a tolerance of 0.5 mm and must be taken into consideration.
Important: The Object Detection Bracket Template, normally found in the service manual has been removed. A review of its accuracy due to the new delivery system, and different printing methods available from the web site is currently in progress. Please reference the Holden Service Information disc, Version 4.01 for a current template.
- Install the object detection bracket templates (1) to the rear bumper fascia.
- Mark out the sensor hole from the object detection bracket templates (1) to the rear bumper fascia.
- Remove the object detection bracket templates (1) from the rear bumper fascia.
- Drill the holes in the rear bumper fascia 24.5 mm (0.96 in).
- Remove any swarf from the rear bumper fascia.
- Clean the rear bumper fascia with a suitable wax and grease remover.
- Remove the object detection bracket templates (1) from the rear bumper fascia.
- Apply the GM Specification 9982247 (Fusor 152-153) adhesive or equivalent to the ribs of the object detection bracket (1).
- Install the object detection bracket (1) to the rear bumper fascia.
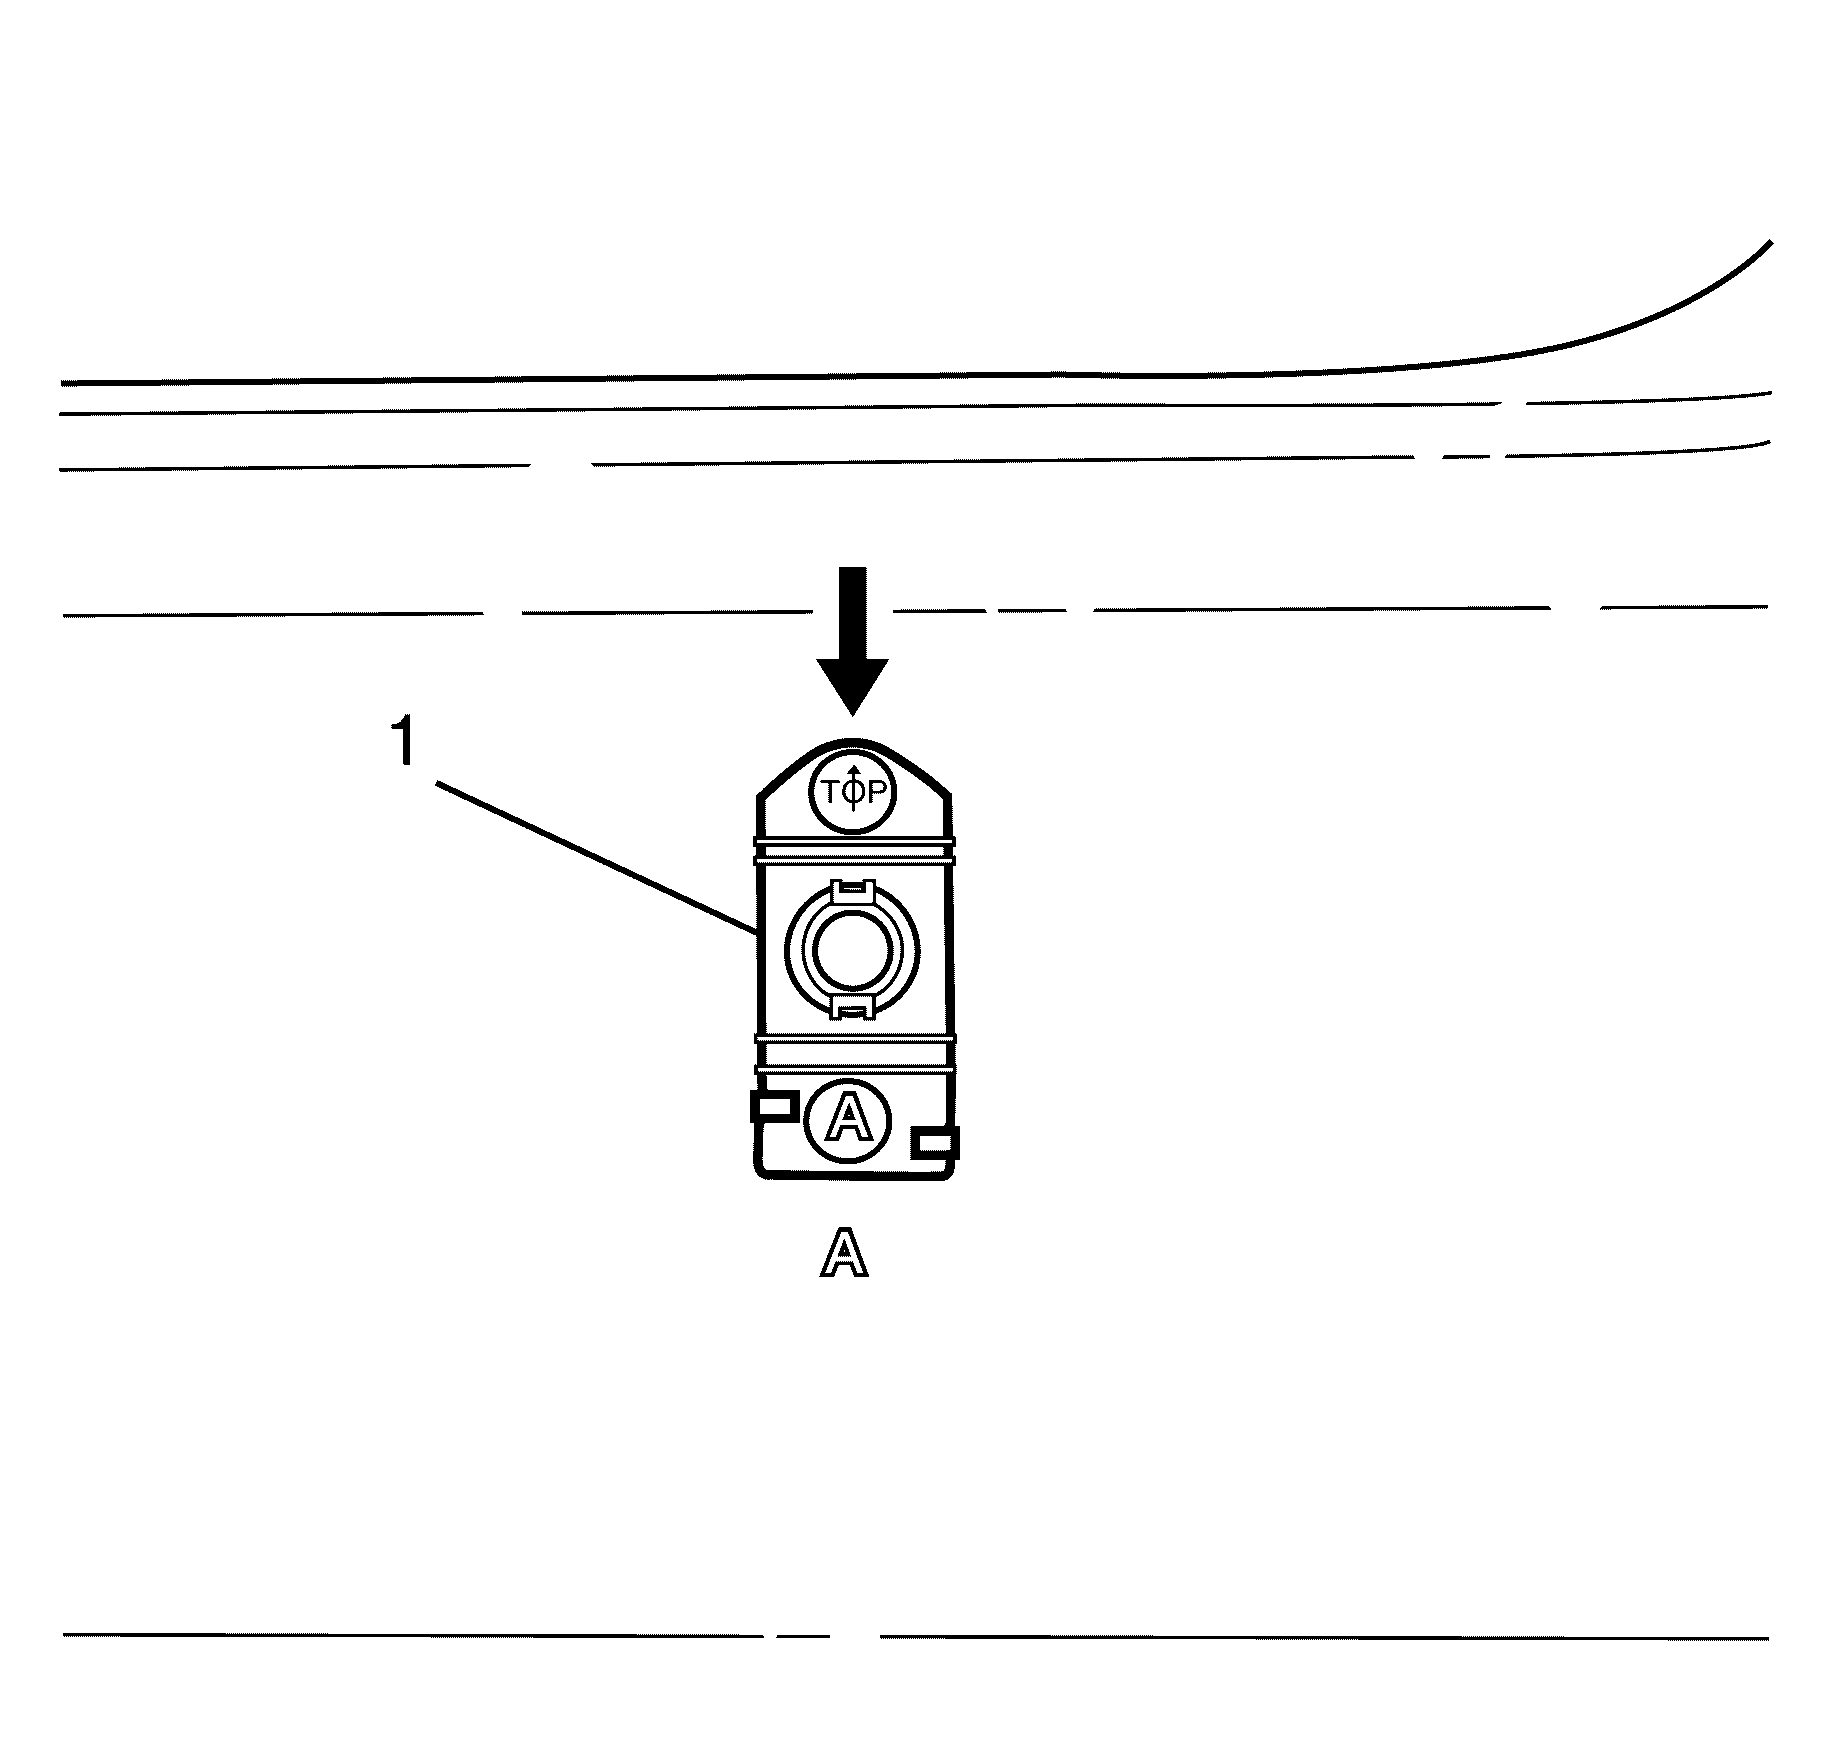
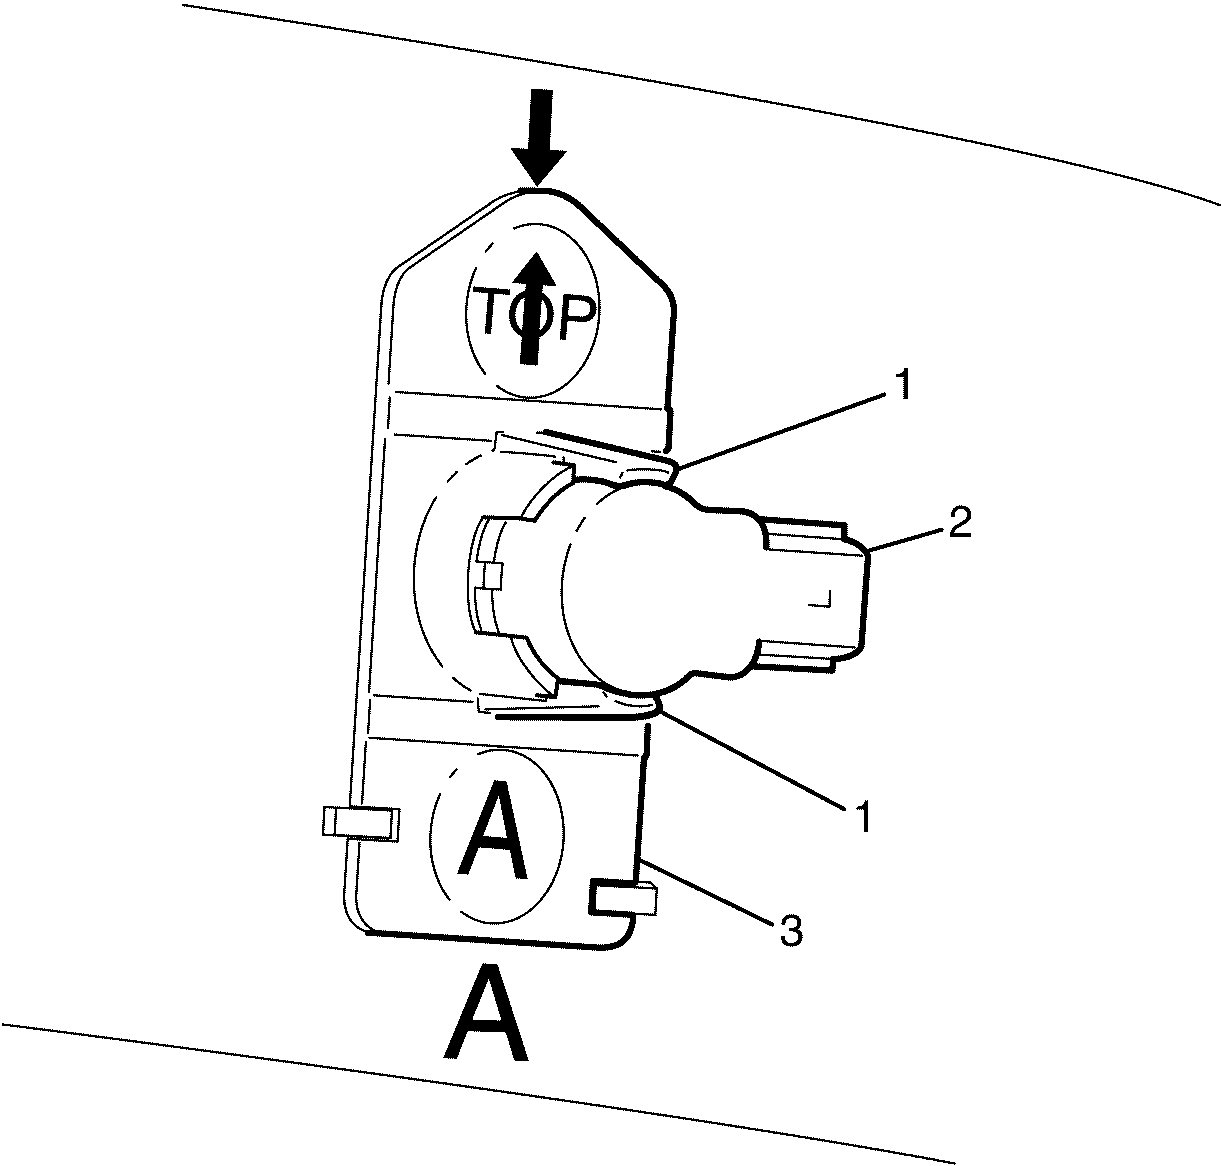
- Locate the top and bottom housing tabs (1) to install the rear object alarm sensor (2) to the rear object alarm sensor housing (3).
- Press the rear object sensor bezel flush to the fascia.
- Install the rear bumper fascia extension. Refer to Rear Bumper Fascia Extension Replacement.
- Install the rear bumper fascia reflector. Refer to Rear Bumper Fascia Reflector Replacement.
Important: This graphic is used as an example only and must not be used as a template, it displays one of the varying object detection bracket templates for reference.
Important: When aligning the object detection bracket template make sure that the locating tags align correctly and there is little or no movement, prior to drilling.
Important: This graphic is used as an example only and must not be used as a template, it displays one of the varying object detection bracket templates for reference.
Important: The location of the object detection brackets to the bumper fascia is alpha numeric, make sure that the letters correspond between the object detection brackets and the bumper fascia.
Important: Allow 20 minutes for the adhesive to cure to the rear bumper fascia.
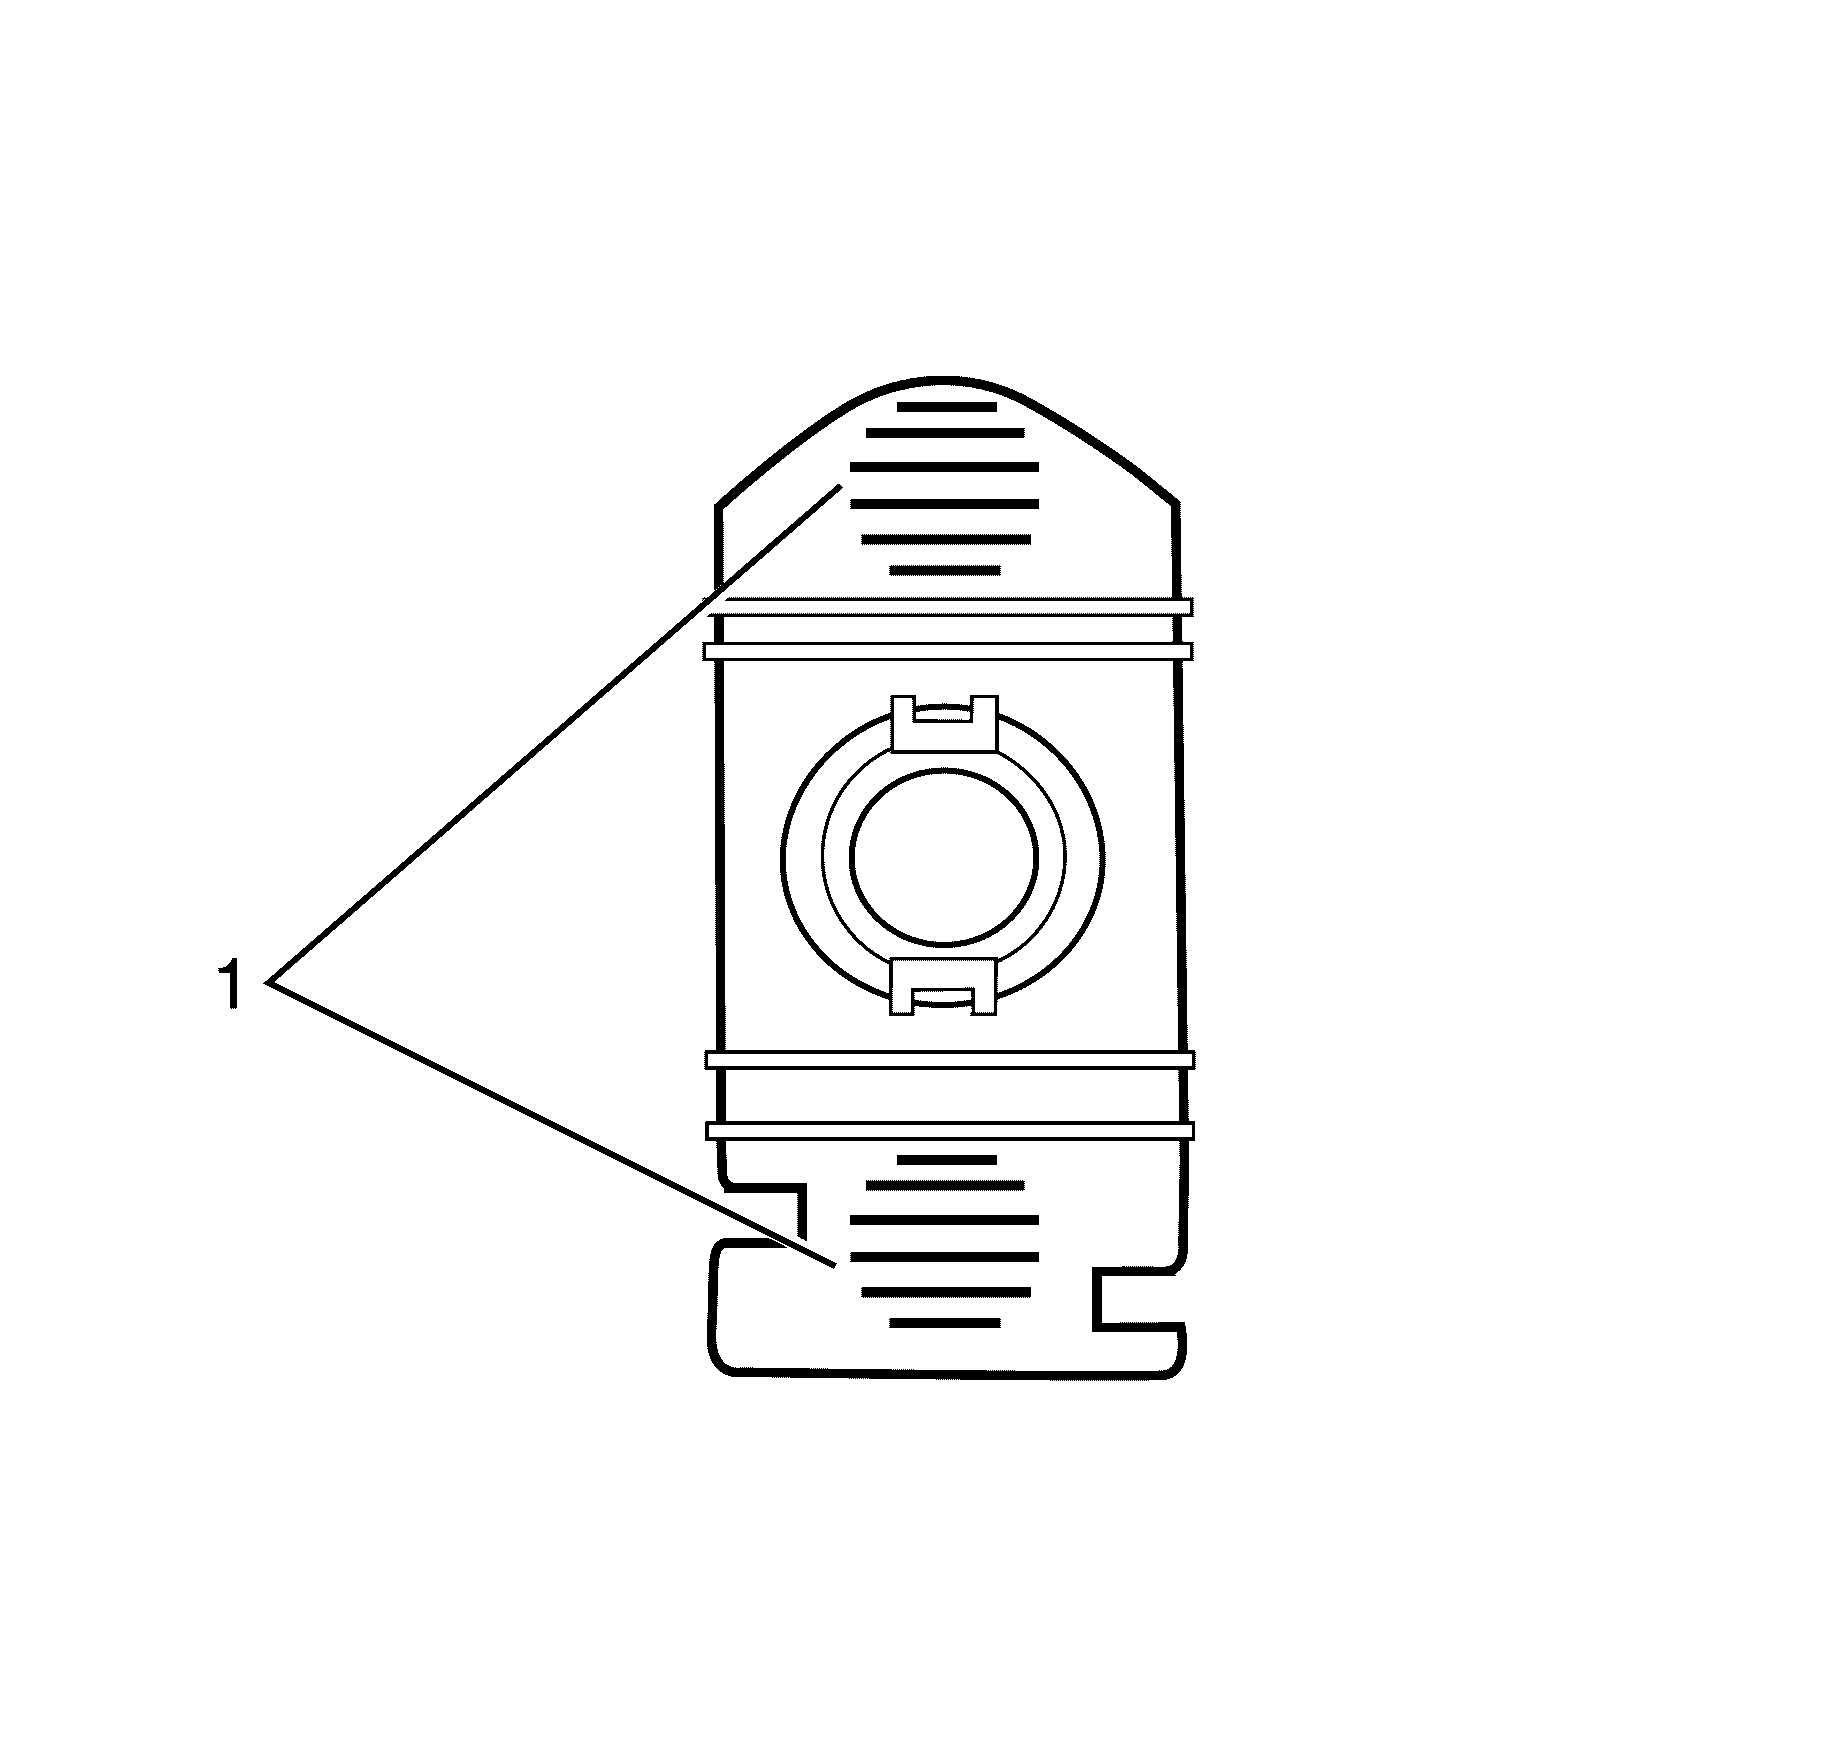
Important: Replacement front object alarm sensors (2) are not pre-painted, they will require painting before installation is carried out.
Important: Ensure that the rear object alarm sensor (2) is installed correctly.
Installation Procedure
- With the aid of an assistant, install the rear bumper fascia by sliding forward to engage the rear bumper fascia (2) to the rear bumper fascia centre support (1).
- Engage the rear bumper fascia to rear bumper fascia outer support retaining tabs (1).
- Engage the rear bumper fascia (1) to rear bumper fascia guide rail retaining tabs (2).
- Make sure the rear bumper fascia is secured to the rear bumper fascia centre, outer and lower supports by hearing an audible click.
- Install the rear bumper fascia to spare wheel carrier retaining scrivets (1).
- Install the rear bumper fascia (2) to rear quarter panel retaining screws (1). Repeat for opposite side.
- Install the rear wheelhouse liner (1) to rear bumper fascia retaining scrivets (2). Repeat for opposite side.
- Lower the vehicle.
- Feed the licence lamp wiring harness through the access hole (2).
- Connect the object detection electrical connector (1) to the wiring harness.
Notice: Refer to Fastener Notice in the Preface section.
Tighten
Tighten the screws to 2 N·m (18 lb in).
Important: The following steps are for the object detection assembly if fitted
Rear Bumper Fascia Replacement LWB
Removal Procedure
- Disconnect the licence lamp electrical connector (1) from the wiring harness.
- Feed the licence lamp wiring harness through the access hole (2).
- Raise and support the vehicle. Refer to Lifting and Jacking the Vehicle.
- Remove the rear wheelhouse liner (1) to rear bumper fascia retaining scrivets (2). Repeat for opposite side.
- Remove the rear bumper fascia (2) to rear quarter panel retaining screw (1). Repeat for opposite side.
- Remove the rear bumper fascia to spare wheel carrier retaining scrivets (1).
- Disengage the rear bumper fascia (1) to rear bumper fascia guide rail retaining tabs (2).
- Disengage the rear bumper fascia to rear bumper fascia outer support retaining tabs (1).
- With the aid of an assistant, remove the rear bumper fascia by sliding rearward to disengage the rear bumper fascia (2) from the rear bumper fascia centre support (1).
Caution: Refer to Safety Glasses Caution in the Preface section.
Caution: Refer to Vehicle Lifting Caution in the Preface section.
Disassembly Procedure
- Remove the rear bumper fascia reflector. Refer to Rear Bumper Fascia Reflector Replacement.
- Remove the rear bumper fascia extension. Refer to Rear Bumper Fascia Extension Replacement.
Assembly Procedure
Important: Prior to drilling the bumper fascia it is essential that the object detection bracket templates are aligned to their correct corresponding location within the bumper fascia. The location of the object detection bracket templates to the bumper fascia is alpha numeric, make sure that the letters correspond between the object detection bracket templates and the bumper fascia.
Important: Each object detection bracket template has a tolerance of 0.5 mm and must be taken into consideration.
Important: The Object Detection Bracket Template, normally found in the service manual has been removed. A review of its accuracy due to the new delivery system, and different printing methods available from the web site is currently in progress. Please reference the Holden Service Information disc, Version 4.01 for a current template.
- Install the object detection bracket templates (1) to the rear bumper fascia.
- Mark out the sensor hole from the object detection bracket templates (1) to the rear bumper fascia.
- Remove the object detection bracket templates (1) from the rear bumper fascia.
- Drill the holes in the rear bumper fascia 24.5 mm (0.96 in).
- Remove any swarf from the rear bumper fascia.
- Clean the rear bumper fascia with a suitable wax and grease remover.
- Remove the object detection bracket templates (1) from the rear bumper fascia.
- Apply the GM Specification 9982247 (Fusor 152-153) adhesive or equivalent to the ribs of the object detection bracket (1).
- Install the object detection bracket (1) to the rear bumper fascia.
- Locate the top and bottom housing tabs (1) to install the rear object alarm sensor (2) to the rear object alarm sensor housing (3).
- Press the rear object sensor bezel flush to the fascia.
- Install the rear bumper fascia extension. Refer to Rear Bumper Fascia Extension Replacement.
- Install the rear bumper fascia reflector. Refer to Rear Bumper Fascia Reflector Replacement.
Important: This graphic is used as an example only and must not be used as a template, it displays one of the varying object detection bracket templates for reference.
Important: When aligning the object detection bracket template make sure that the locating tags align correctly and there is little or no movement, prior to drilling.
Important: This graphic is used as an example only and must not be used as a template, it displays one of the varying object detection bracket templates for reference.
Important: The location of the object detection brackets to the bumper fascia is alpha numeric, make sure that the letters correspond between the object detection brackets and the bumper fascia.
Important: Allow 20 minutes for the adhesive to cure to the rear bumper fascia.
Important: Replacement front object alarm sensors (2) are not pre-painted, they will require painting before installation is carried out.
Important: Ensure that the rear object alarm sensor (2) is installed correctly.
Installation Procedure
- With the aid of an assistant, install the rear bumper fascia by sliding forward to engage the rear bumper fascia (2) to the rear bumper fascia centre support (1).
- Engage the rear bumper fascia to rear bumper fascia outer support retaining tabs (1).
- Engage the rear bumper fascia (1) to rear bumper fascia guide rail retaining tabs (2).
- Make sure the rear bumper fascia is secured to the rear bumper fascia centre, outer and lower supports by hearing an audible click.
- Install the rear bumper fascia to spare wheel carrier retaining scrivets (1).
- Install the rear bumper fascia (2) to rear quarter panel retaining screws (1). Repeat for opposite side.
- Install the rear wheelhouse liner (1) to rear bumper fascia retaining scrivets (2). Repeat for opposite side.
- Lower the vehicle.
- Feed the licence lamp wiring harness through the access hole (2).
- Connect the licence lamp electrical connector (1) to the wiring harness.
Notice: Refer to Fastener Notice in the Preface section.
Tighten
Tighten the screws to 2 N·m (18 lb in).
