For 1990-2009 cars only
Rear Window Shelf Trim Panel Replacement LWB
Removal Procedure
- Remove the seat back assembly. Refer to Rear Seat Back Replacement.
- Remove the centre seat back assembly. Refer to Rear Split Folding Seat Back Replacement.
- Remove the upper quarter trim panel. Refer to Quarter Upper Trim Panel Replacement.
- Remove the centre seat belt lower retaining bolt. Refer to Seat Belt Replacement - Center Rear.
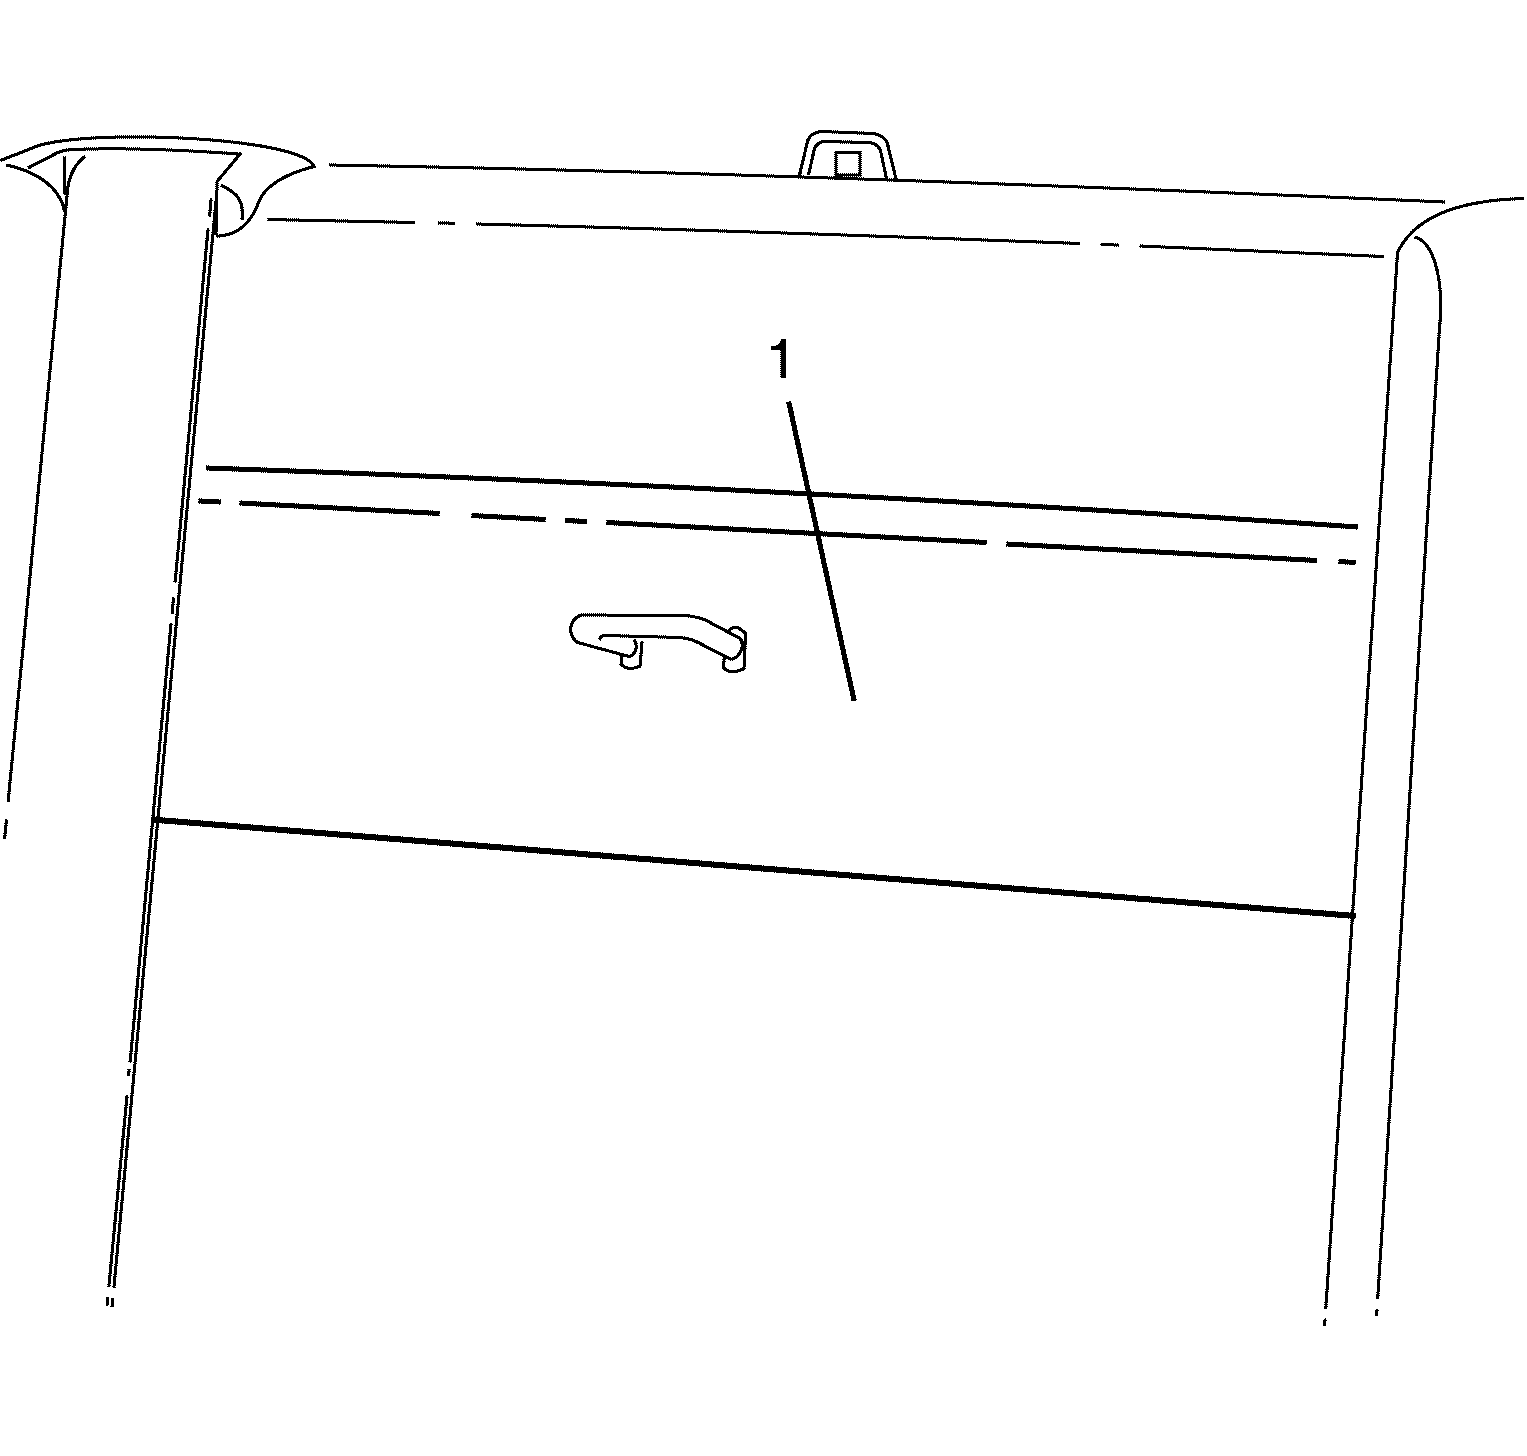
- Remove the rear lock striker trim panel by disengaging the retaining clips (1).
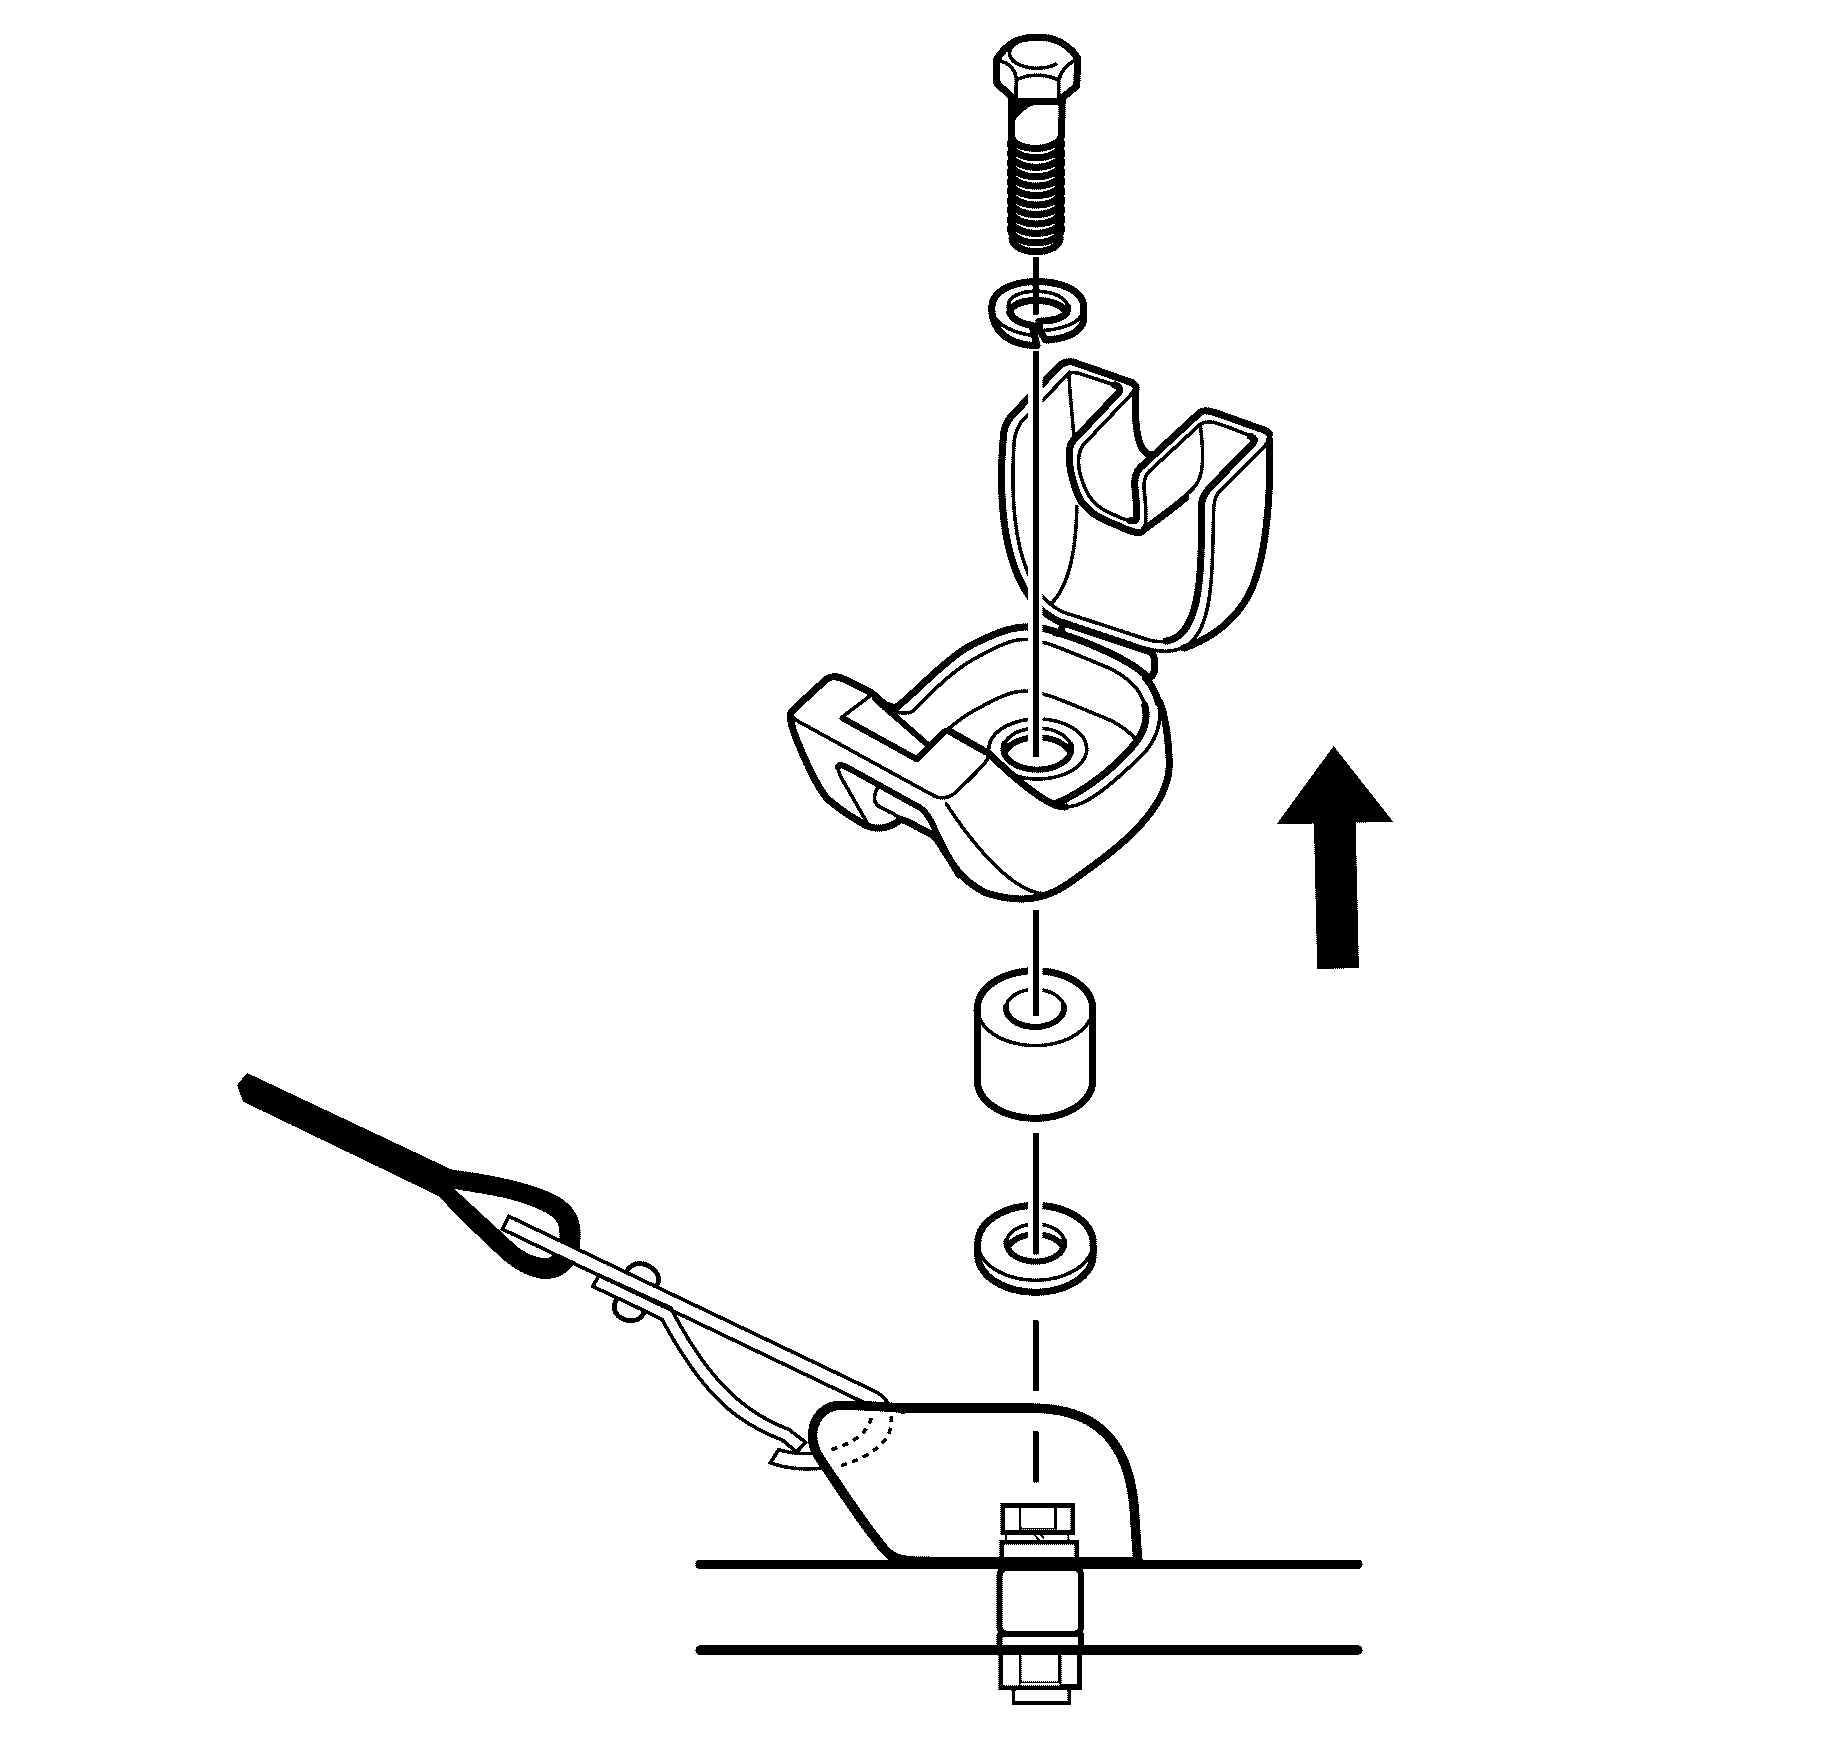
- Remove the child restraint anchor assembly, as shown in illustration.
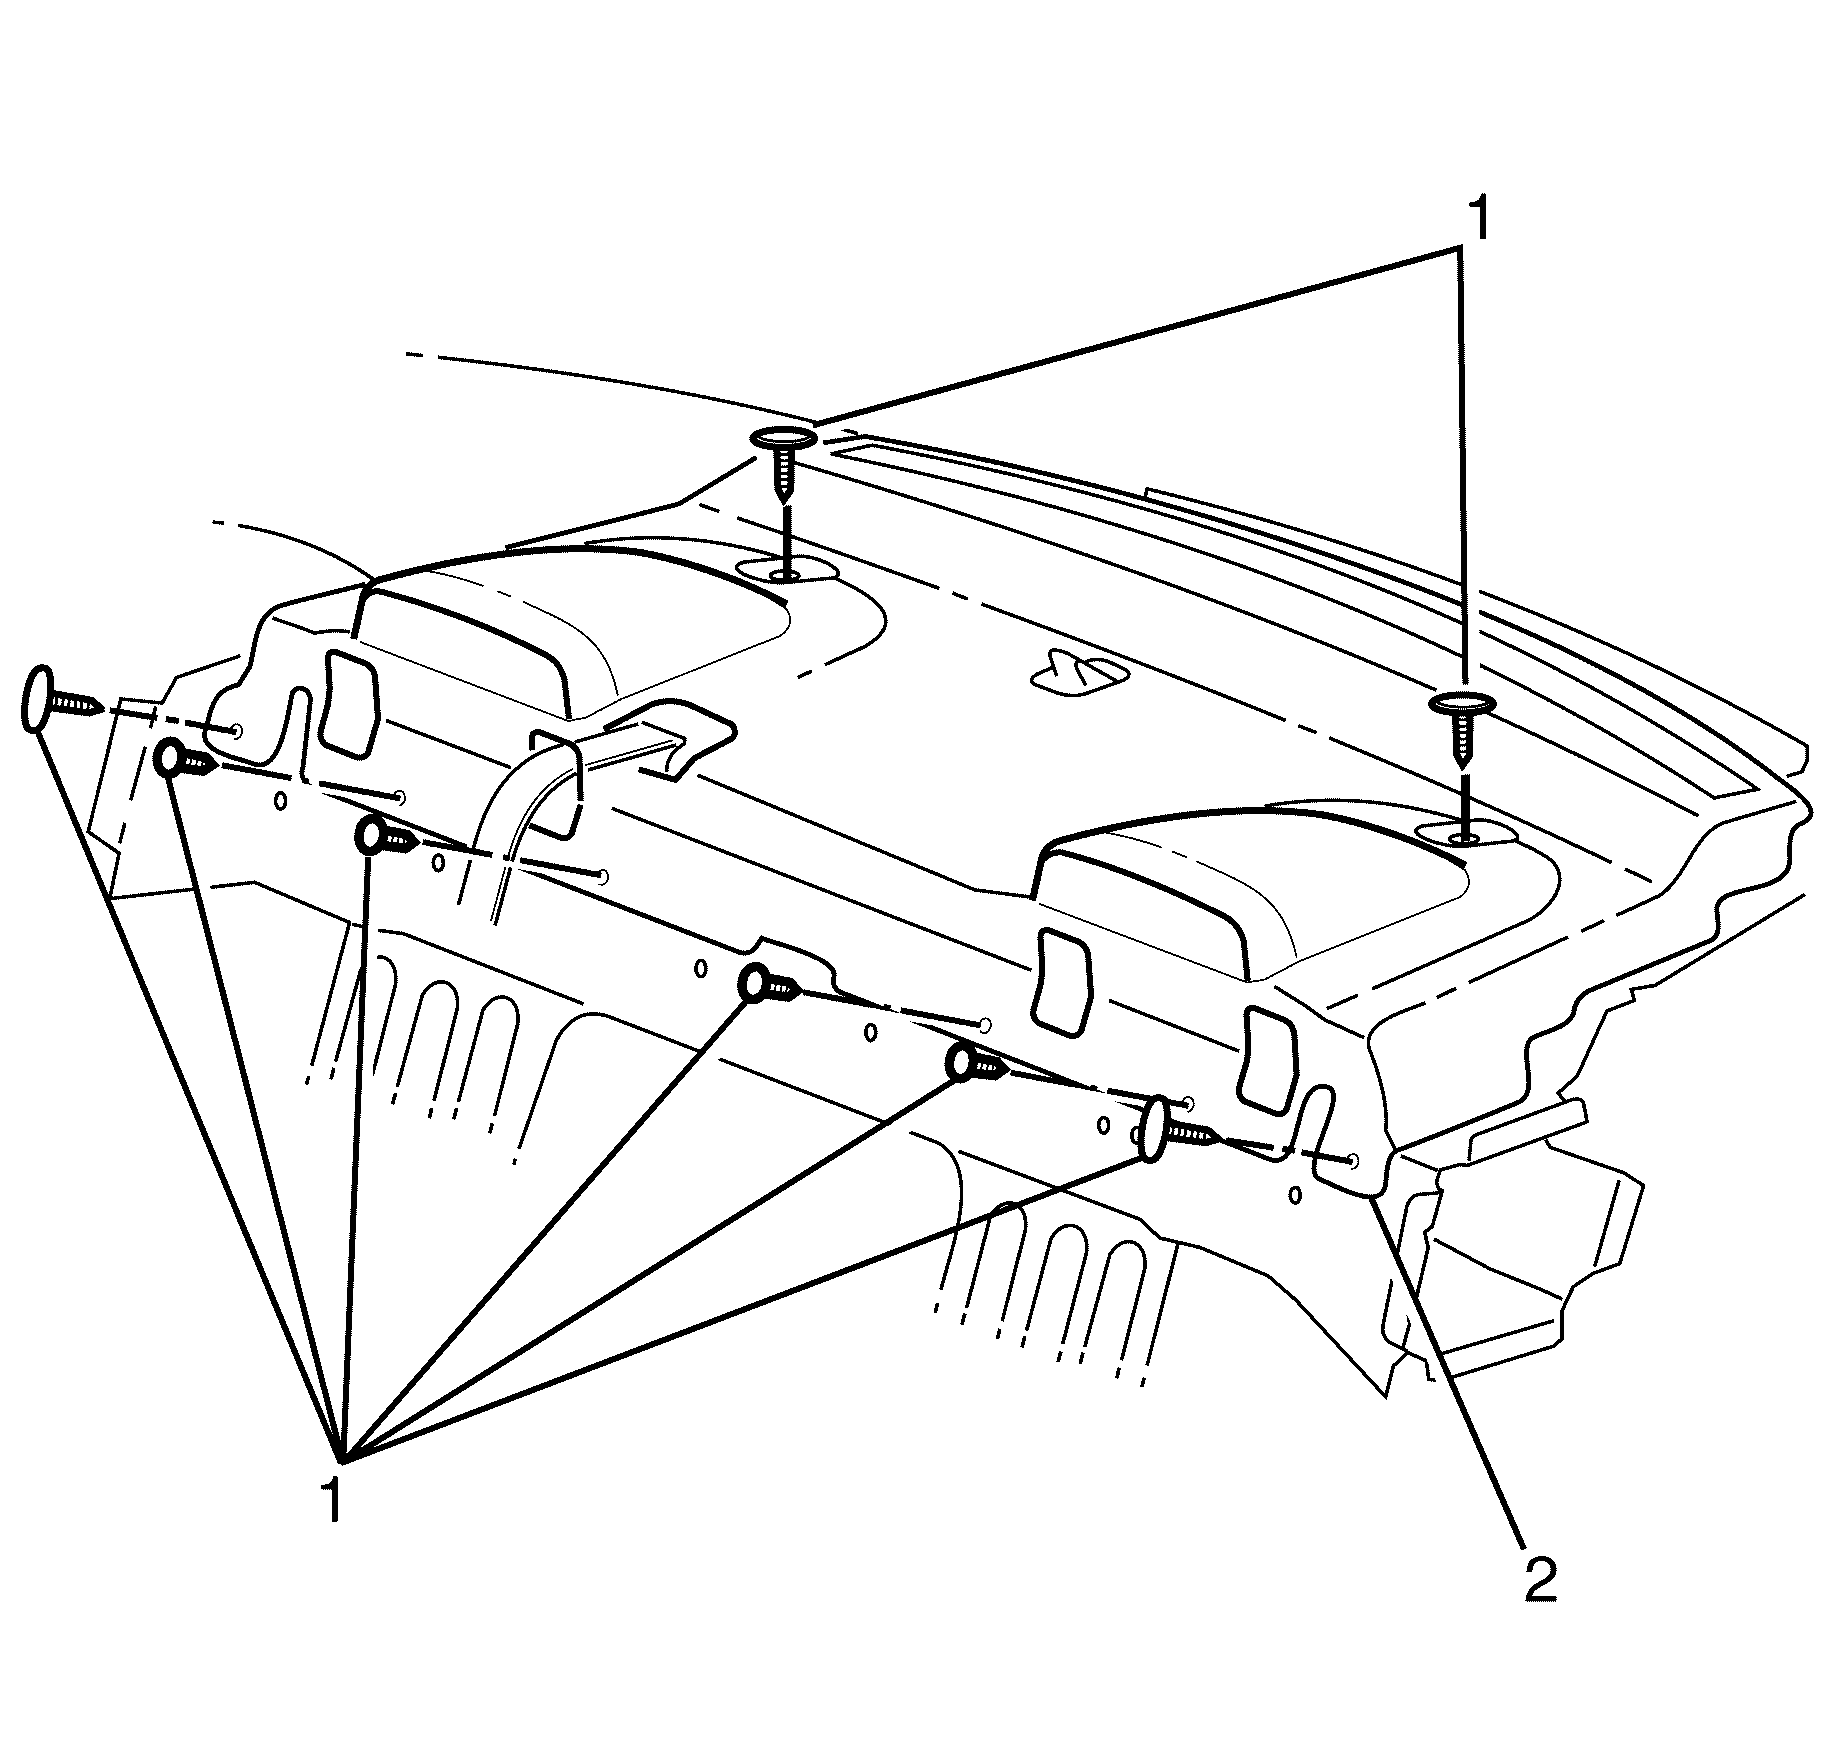
- Remove the eight retaining clips (1) two at the back of the rear window shelf trim panel (2) and six on the front.
- Pull the rear window shelf forward (2) at centre and then lift upward to disengage datum tower from clip.
- Slide the centre seat belt through the centre seat belt slot and remove the rear window shelf trim panel (2).
Installation Procedure
- Install the centre seat belt by sliding the belt through the slot.
- Install the rear window shelf trim panel (2).
- Install the rear window shelf trim panel retaining clips (1).
- Install the rear lock striker trim panel by engaging the retaining clips.
- Install child restraint anchor assembly.
- Install the centre seat belt lower retaining bolt. Refer to Front Seat Belt Replacement.
- Install the centre seat back assembly. Refer to Rear Split Folding Seat Back Replacement.
- Install the upper quarter trim panel. Refer to Quarter Upper Trim Panel Replacement.
- Install the set back assembly. Refer to Rear Seat Back Replacement.

Important: Ensure child restraint assembly is installed as per illustration, failure to adhere to this installation will result in incorrect operation of the child restraint assembly.
Tighten
Tighten the bolt to 22 N·m (16 lb ft).
Rear Window Shelf Trim Panel Replacement SWB
Removal Procedure
- Remove the seat back assembly. Refer to Rear Seat Back Replacement.
- Remove the centre seat back assembly. Refer to Rear Split Folding Seat Back Replacement.
- Remove the upper quarter trim panel. Refer to Quarter Upper Trim Panel Replacement.
- Remove the centre seat belt lower retaining bolt. Refer to Seat Belt Replacement - Center Rear.
- Remove the rear lock striker trim panel by disengaging the retaining clips (1).
- Remove the child restraint anchor assembly, as shown in illustration.
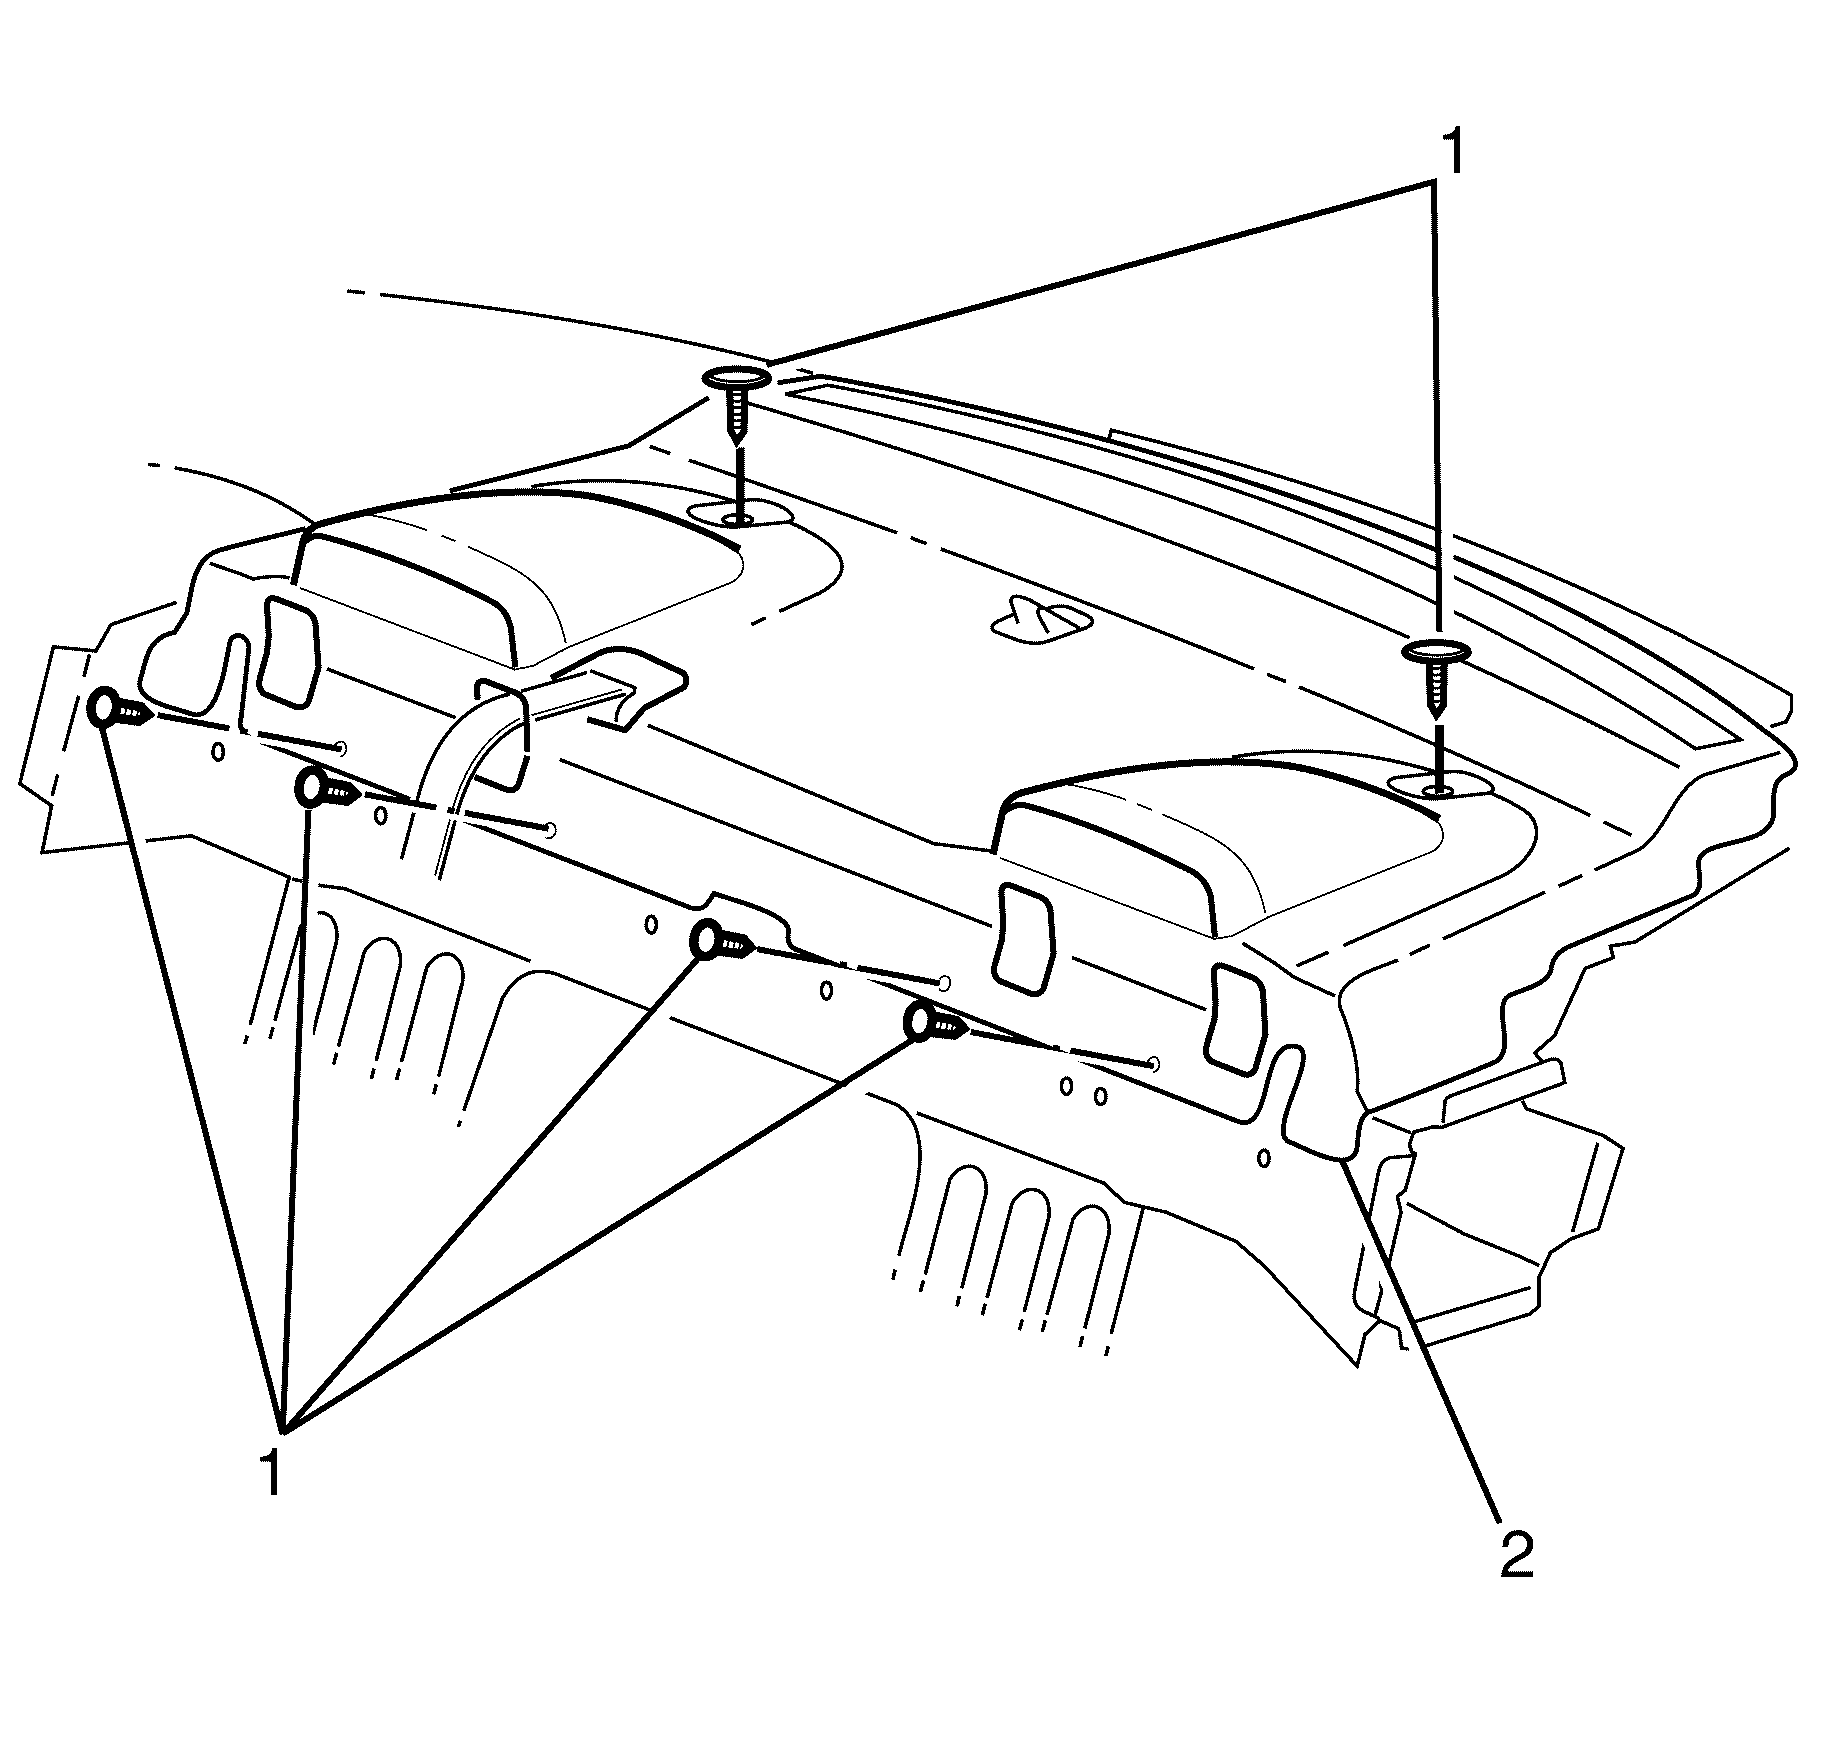
- Remove the six retaining clips (1) two at the back of the rear window shelf trim panel (2) and six on the front.
- Pull the rear window shelf (2) forward at centre and then lift upward to disengage datum tower from clip.
- Slide the centre seat belt through the centre seat belt slot and remove the rear window shelf trim panel (2).
Installation Procedure
- Install the centre seat belt by sliding the belt through the slot.
- Install the rear window shelf trim panel (2).
- Install the rear window shelf trim panel retaining clips (1).
- Install the rear lock striker trim panel by engaging the retaining clips.
- Install child restraint anchor assembly.
- Install the centre seat belt lower retaining bolt. Refer to Front Seat Belt Replacement.
- Install the centre seat back assembly. Refer to Rear Split Folding Seat Back Replacement.
- Install the upper quarter trim panel. Refer to Quarter Upper Trim Panel Replacement.
- Install the seat back assembly. Refer to Rear Seat Back Replacement.
Important: Ensure child restraint assembly is installed as per illustration, failure to adhere to this installation will result in incorrect operation of the child restraint assembly.
Tighten
Tighten the retaining bolt to 22 N·m
(16 lb ft).
