Instrument Panel Center Trim Panel Replacement SWB LHD
Removal Procedure - (Omega)
- Remove the knee bolster. Refer to Knee Bolster Replacement .
- Remove the instrument panel compartment. Refer to Instrument Panel Compartment Replacement
- Remove the radio. Refer to Radio Replacement .
- Remove the centre console trim plate. Refer to Console Trim Plate Replacement .
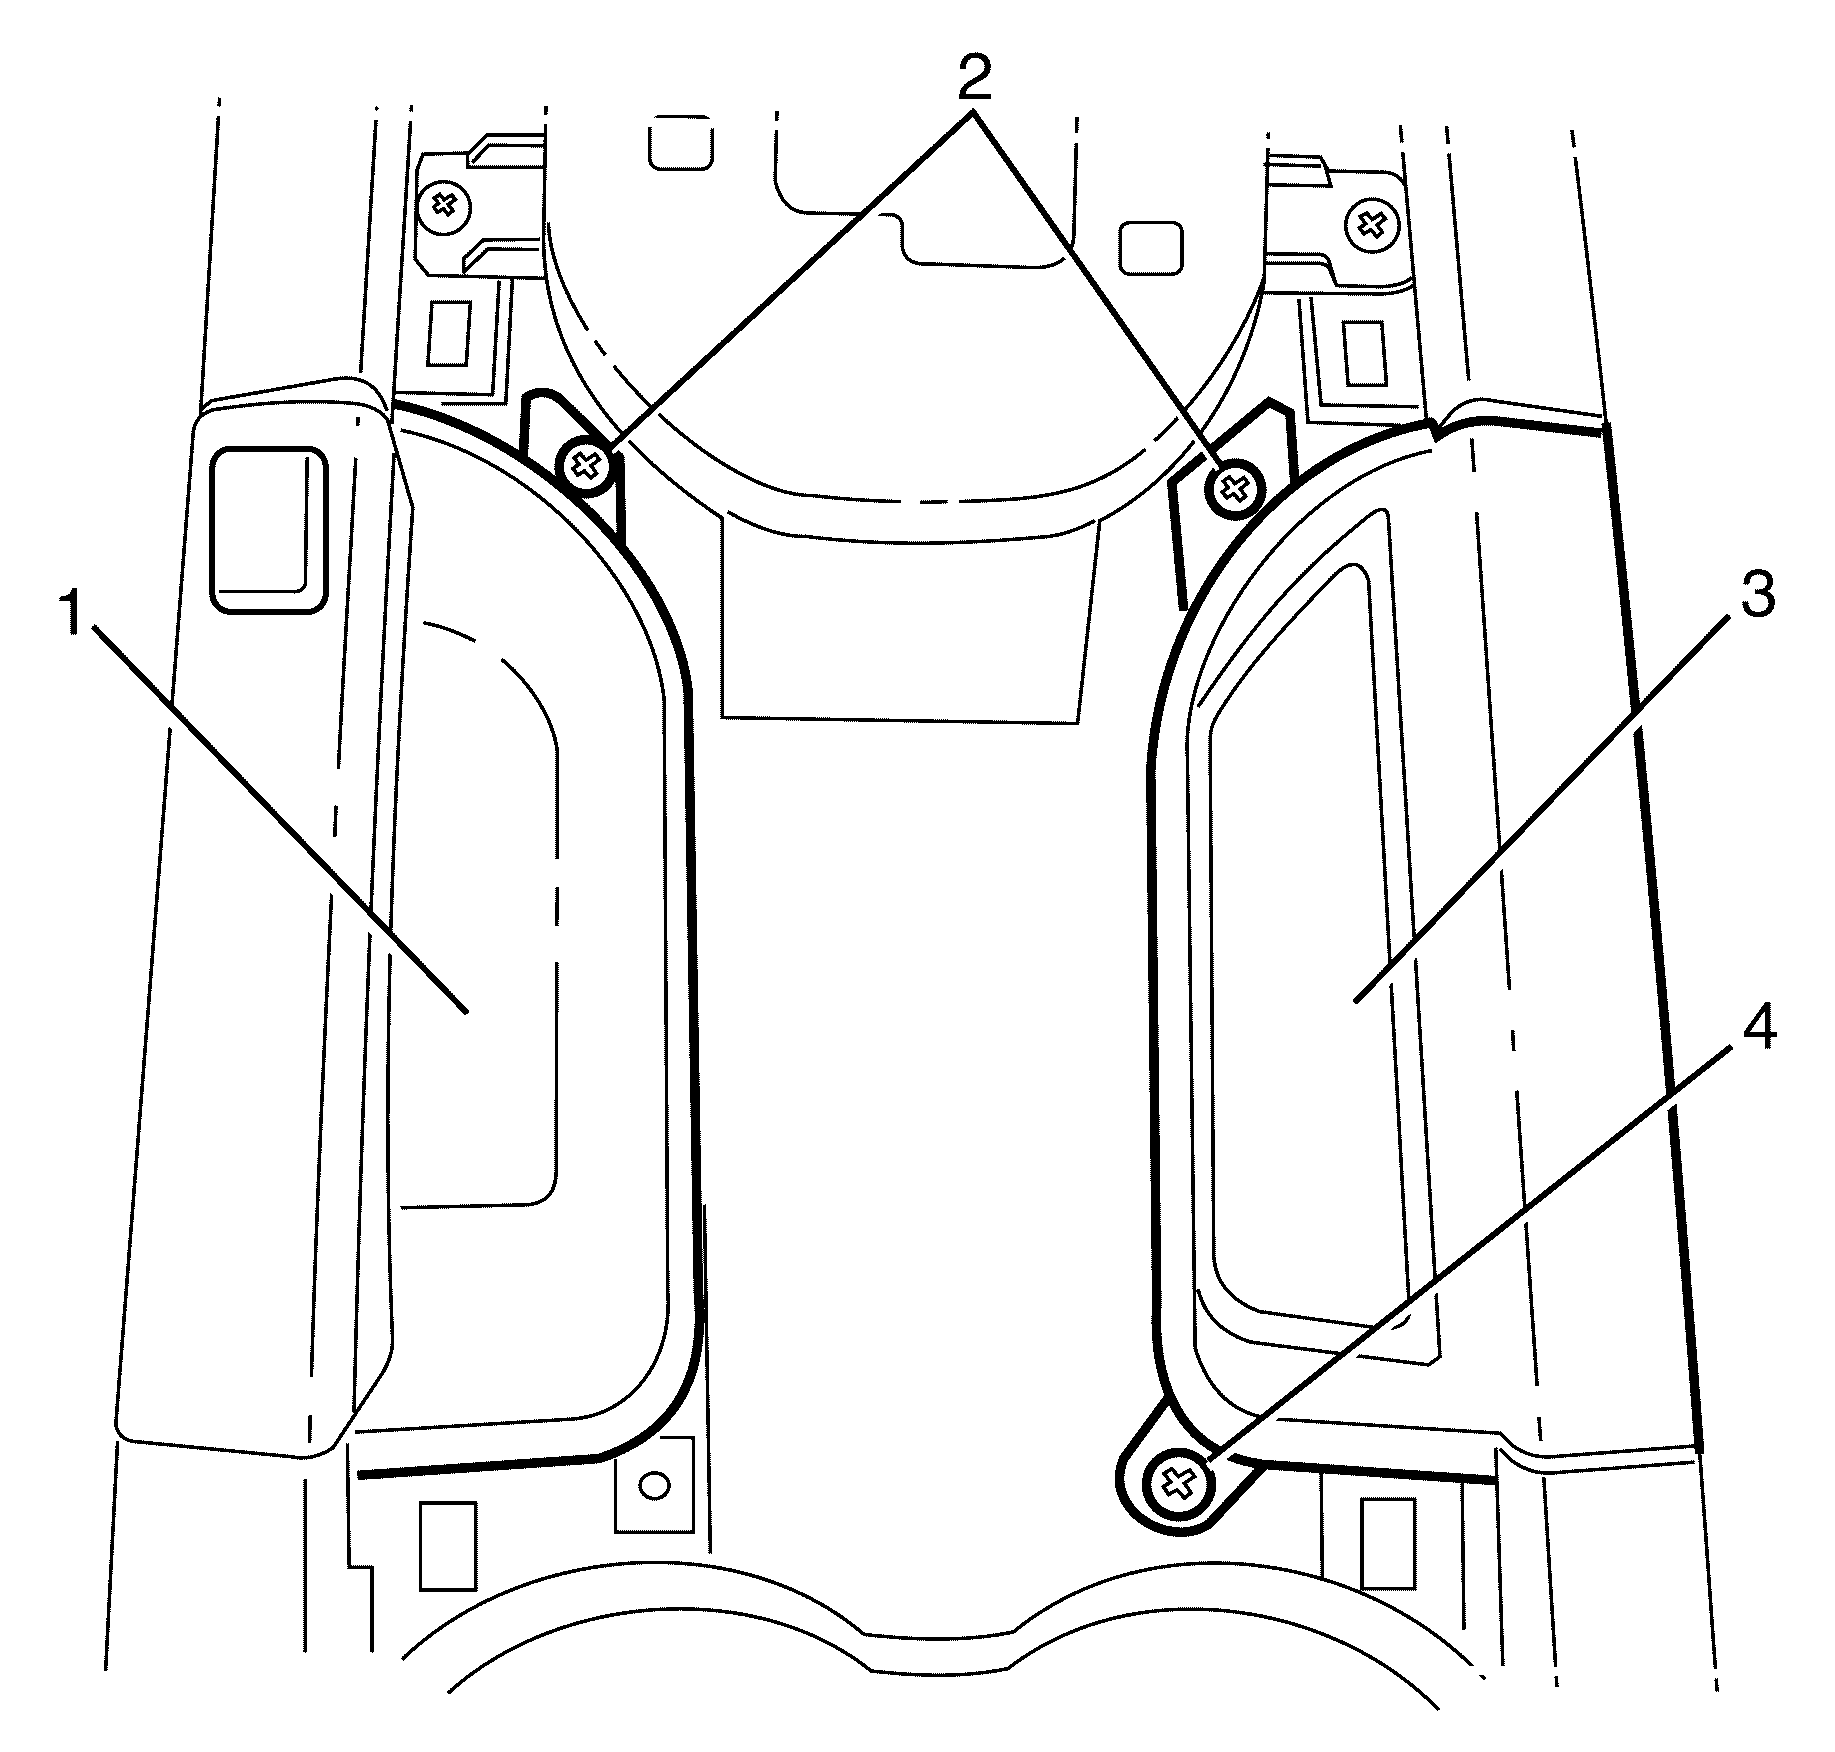
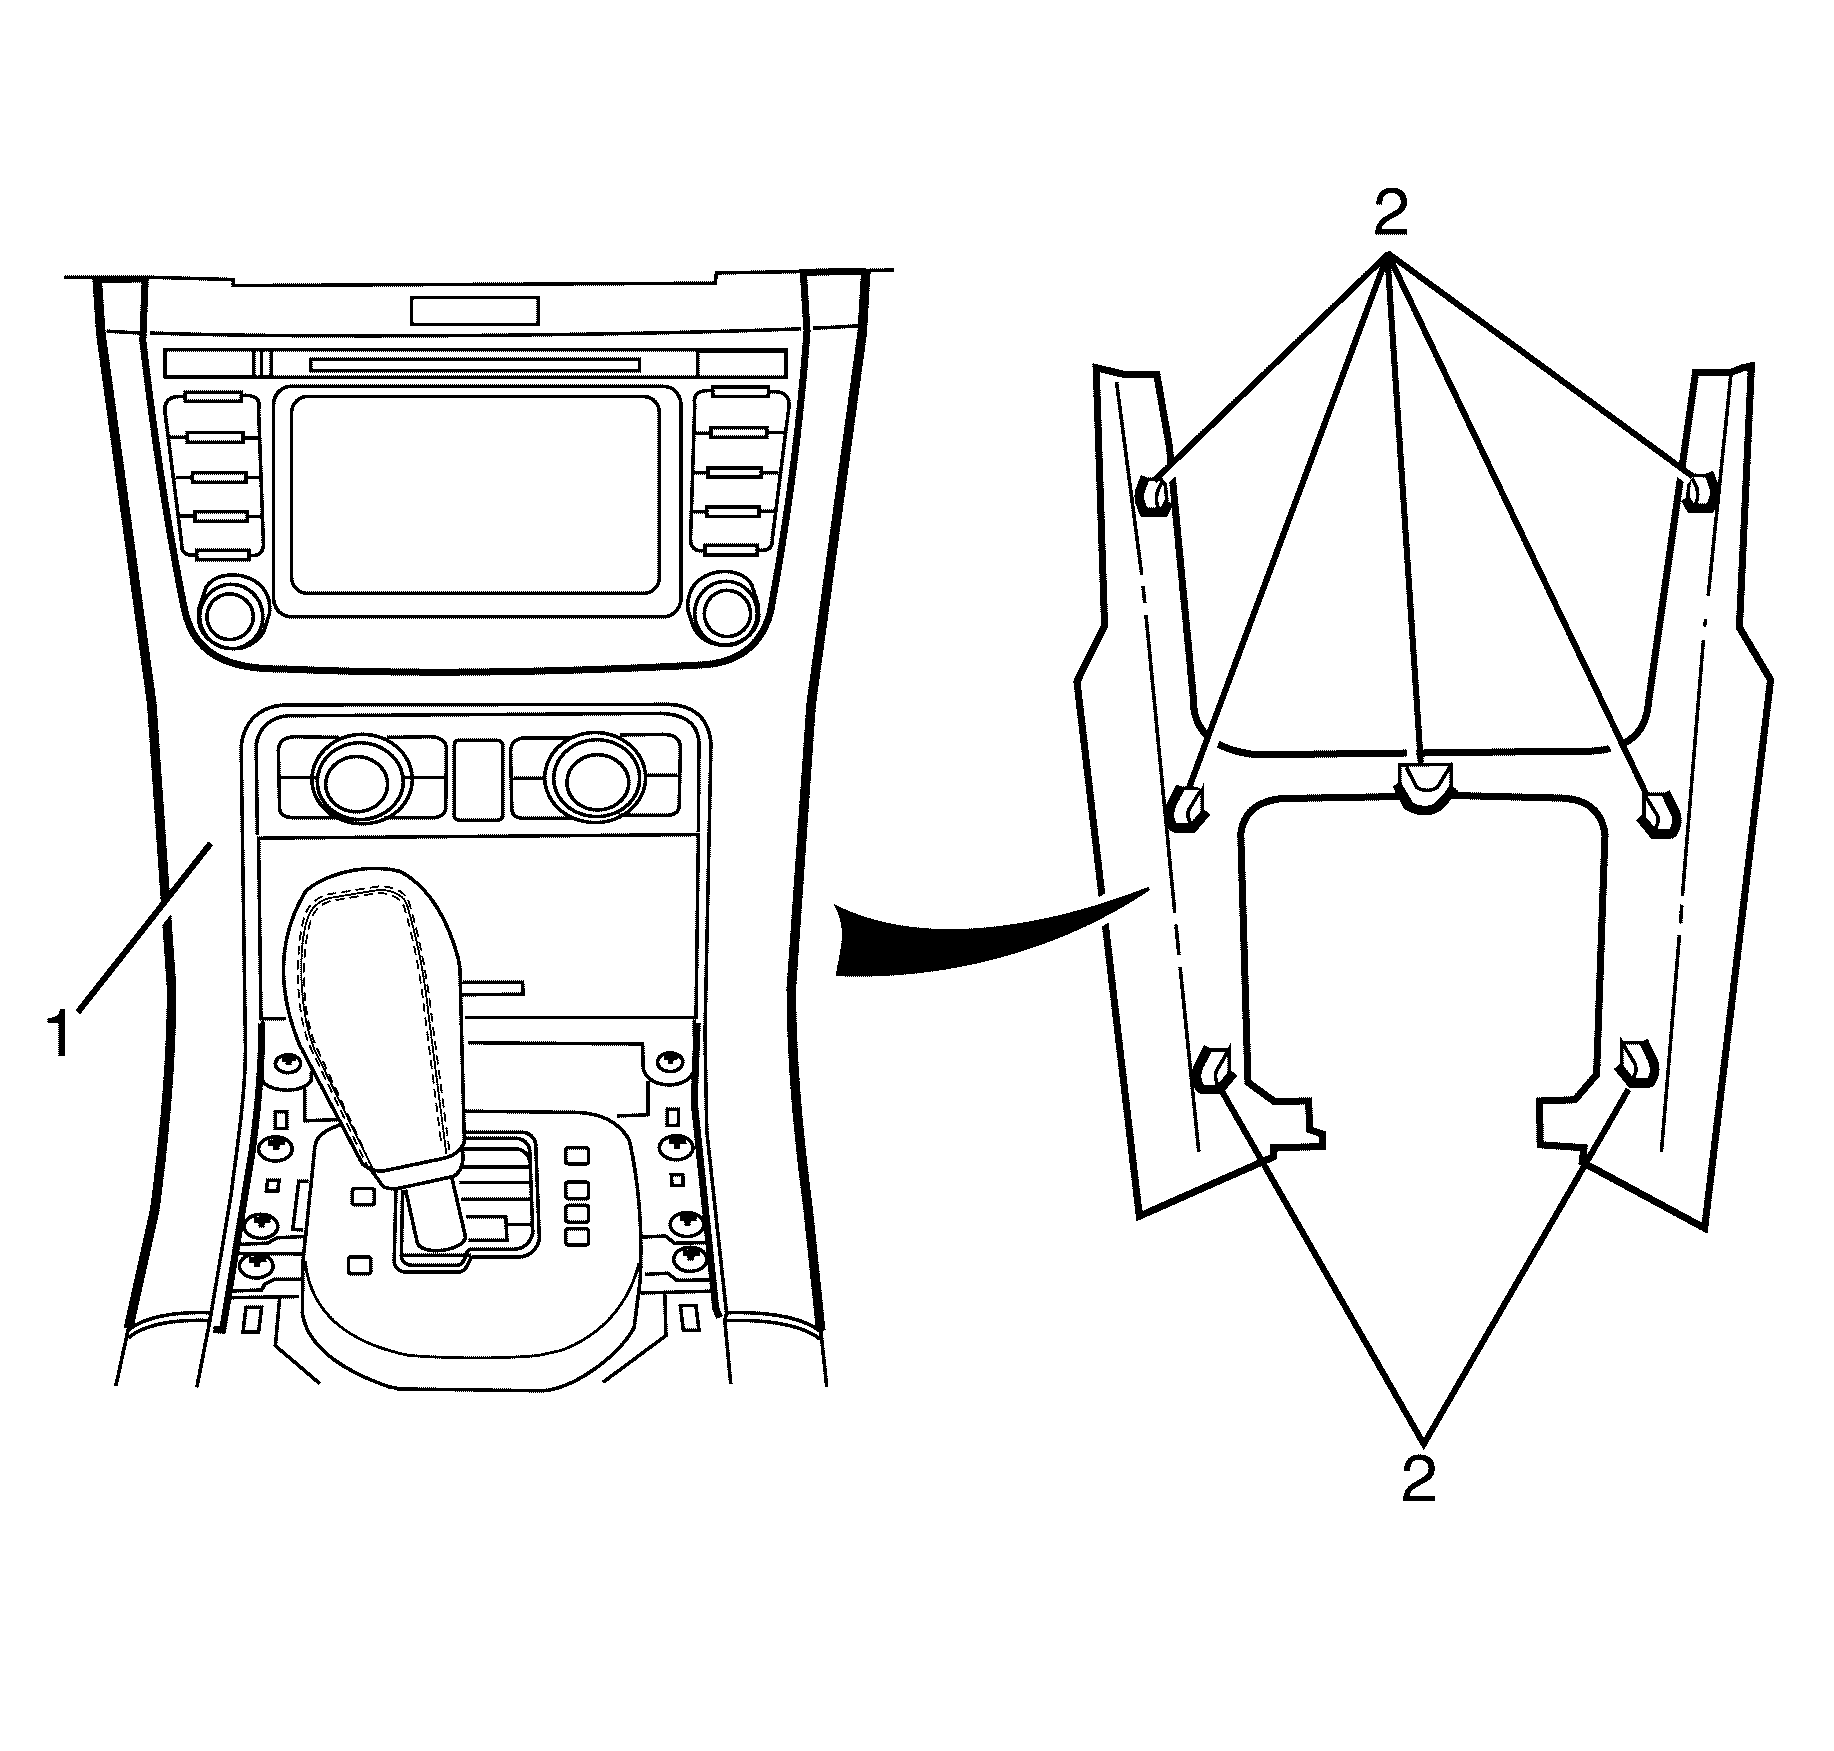
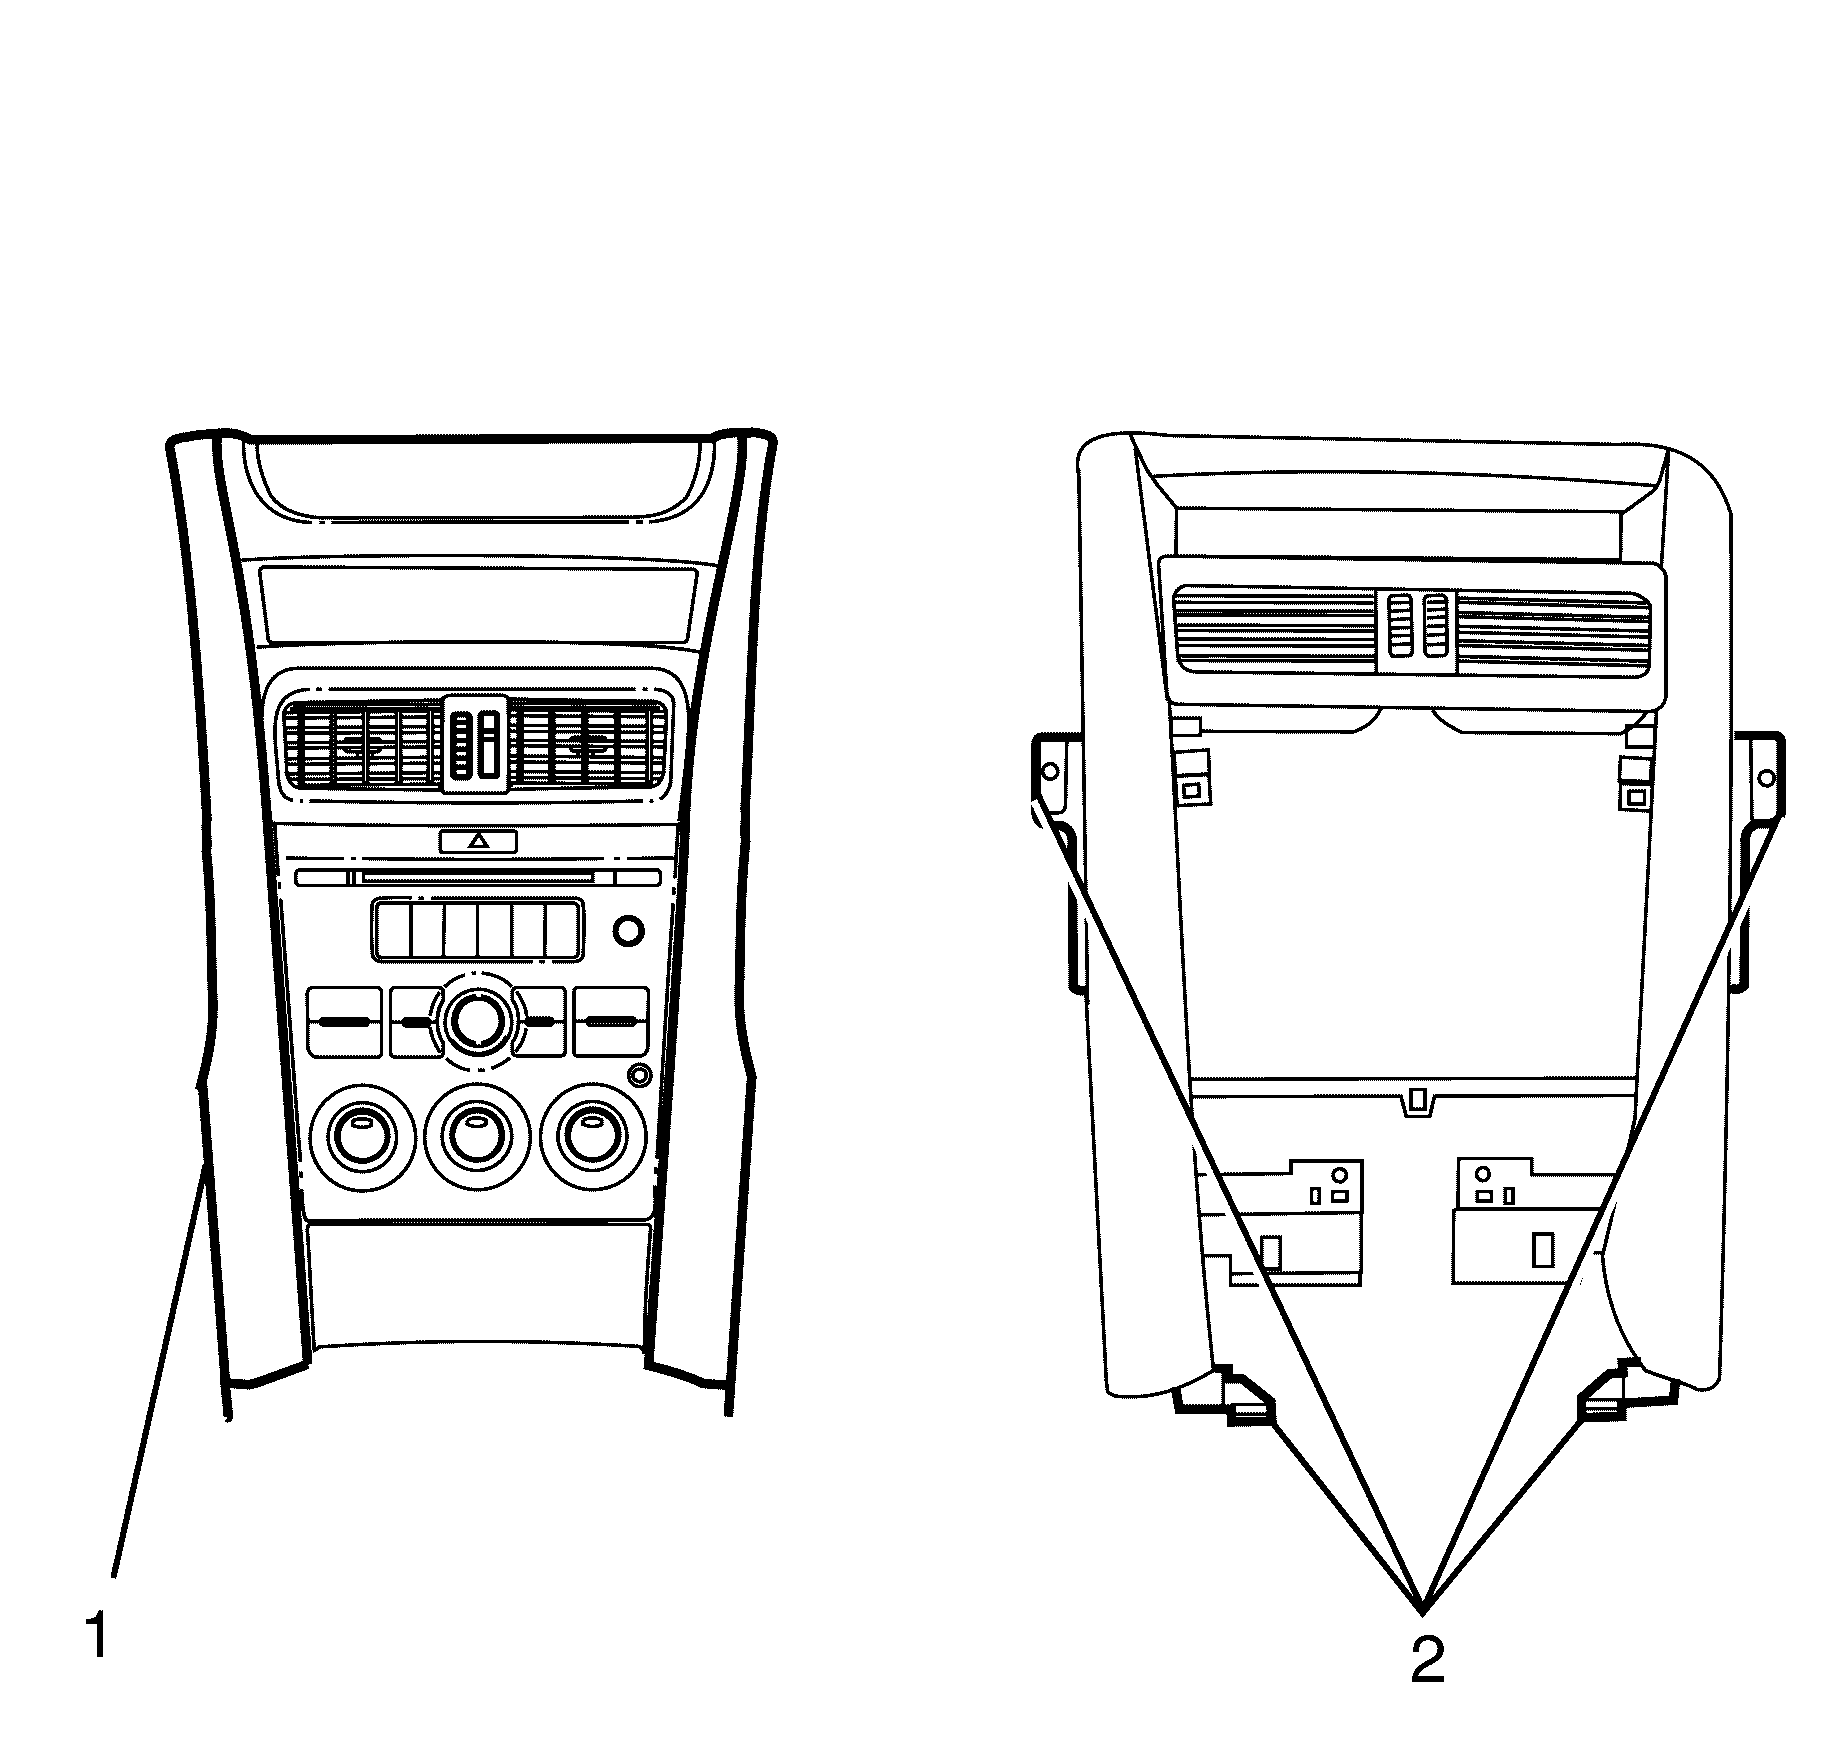
- Remove the coin holder upper retaining screws (2,4) and remove the park brake recess trim (1).
- Remove the park recces tray upper retaining screw (2) and remove the coin holder (3).
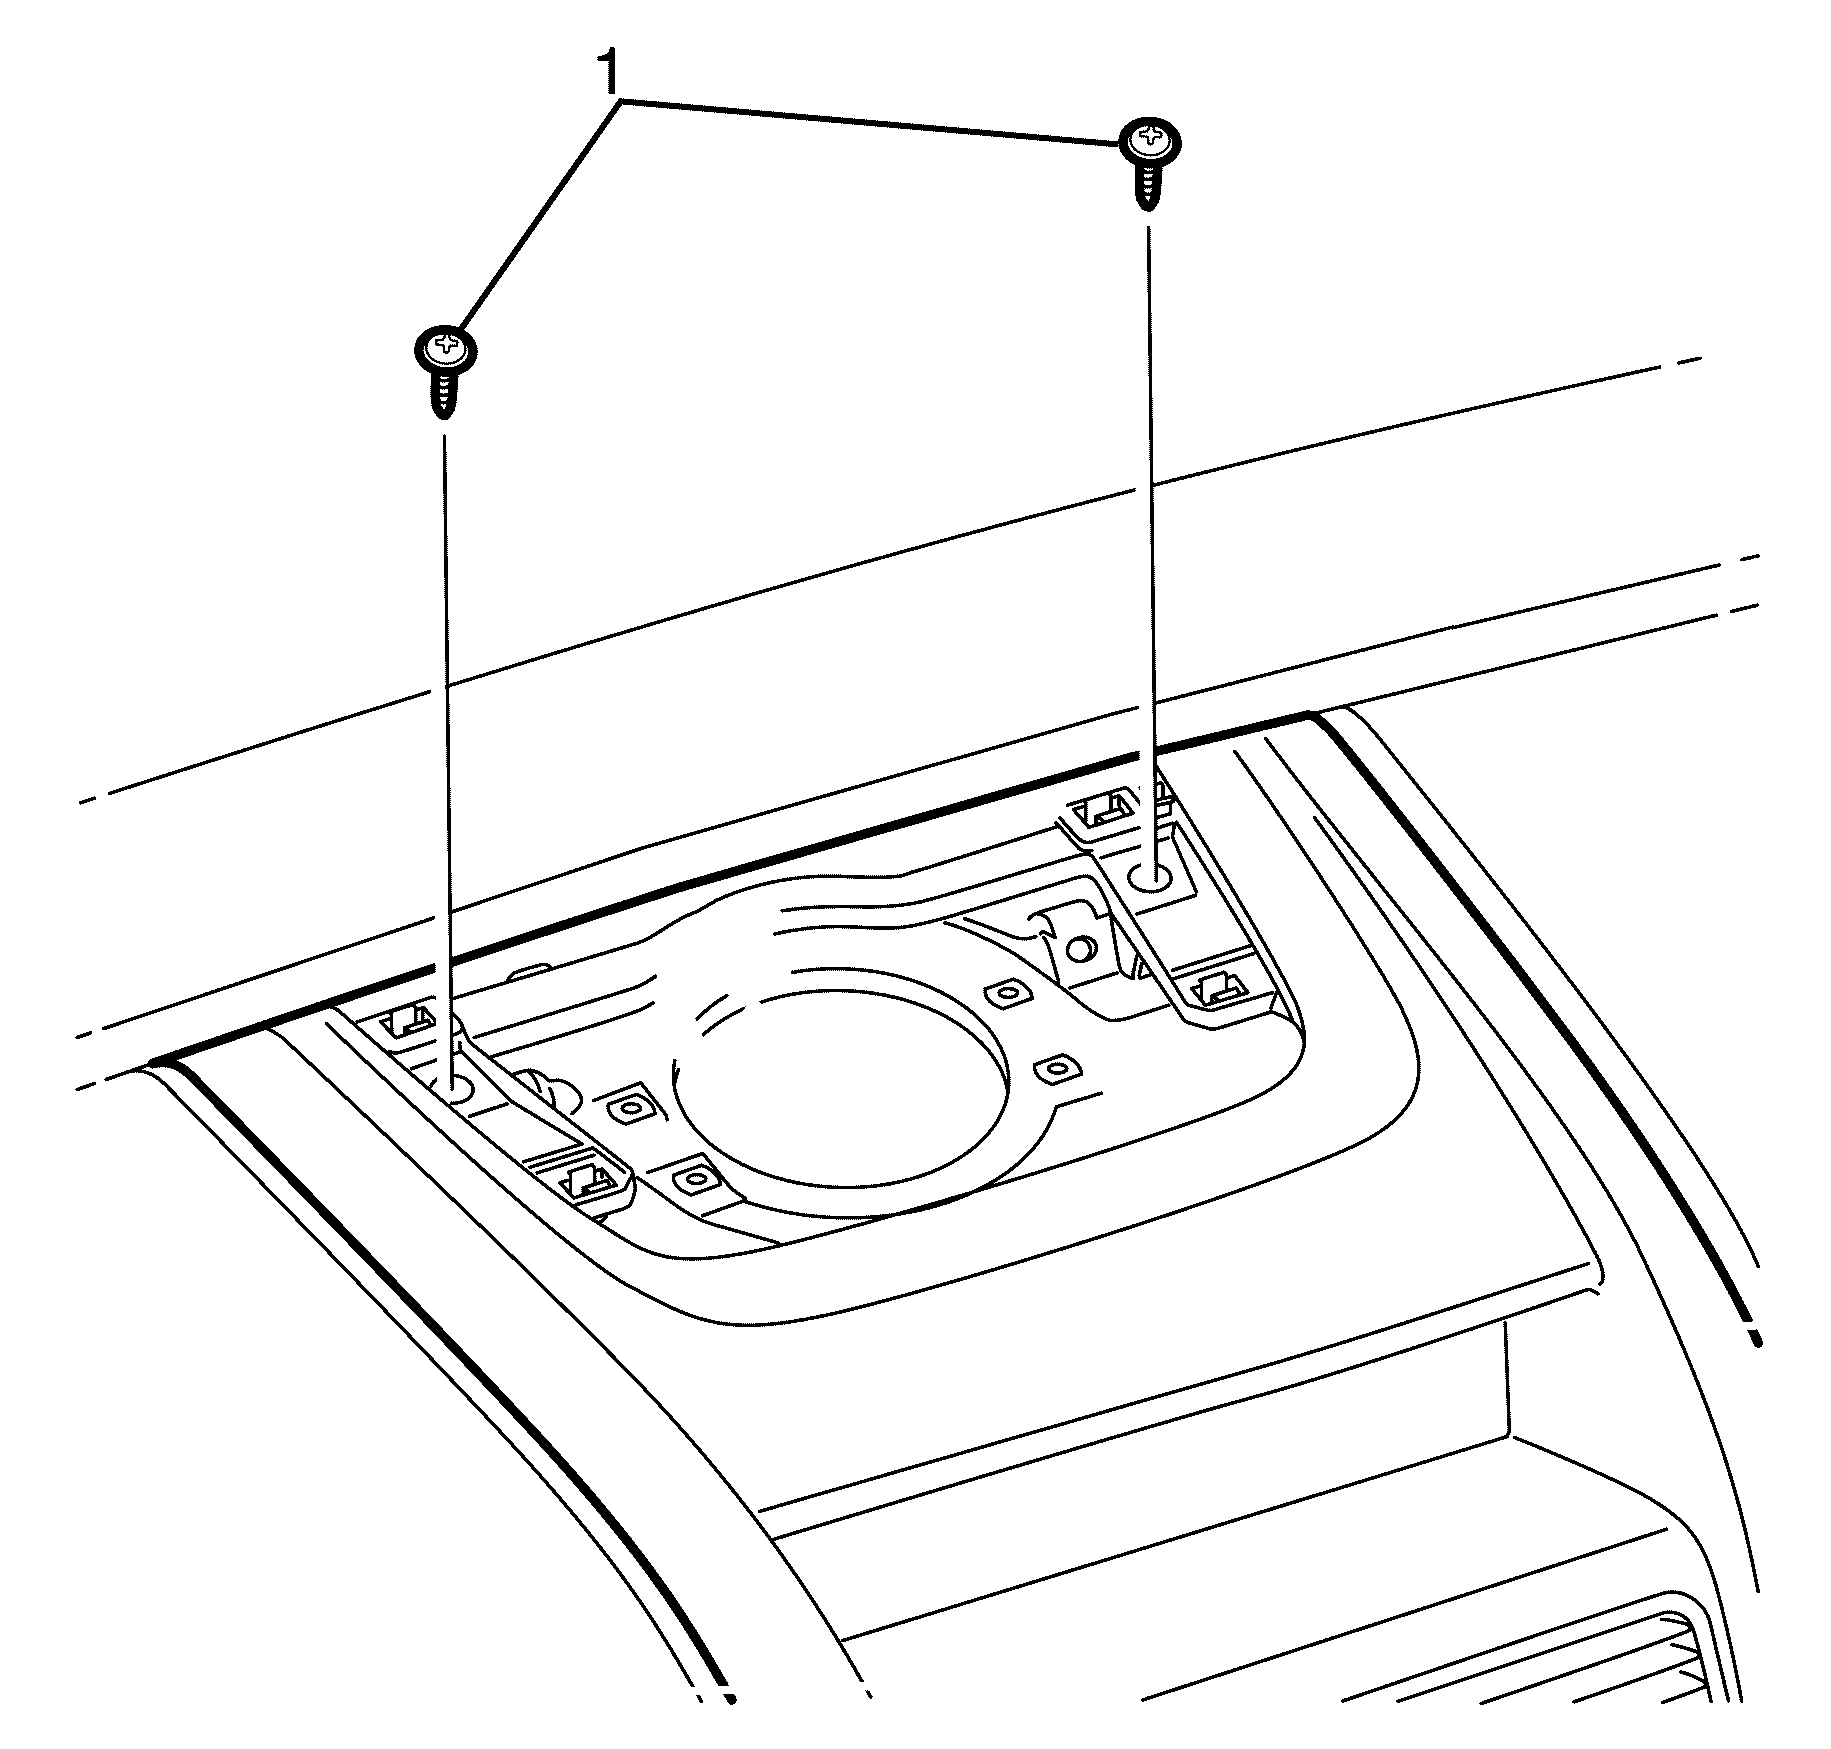
- Remove the trim panel (3) to I/P tower lower retaining screws (4).
- Remove the trim panel (3) to centre console upper retaining screws (2,1).
- Remove the trim panel (3) from the centre console
Installation Procedure
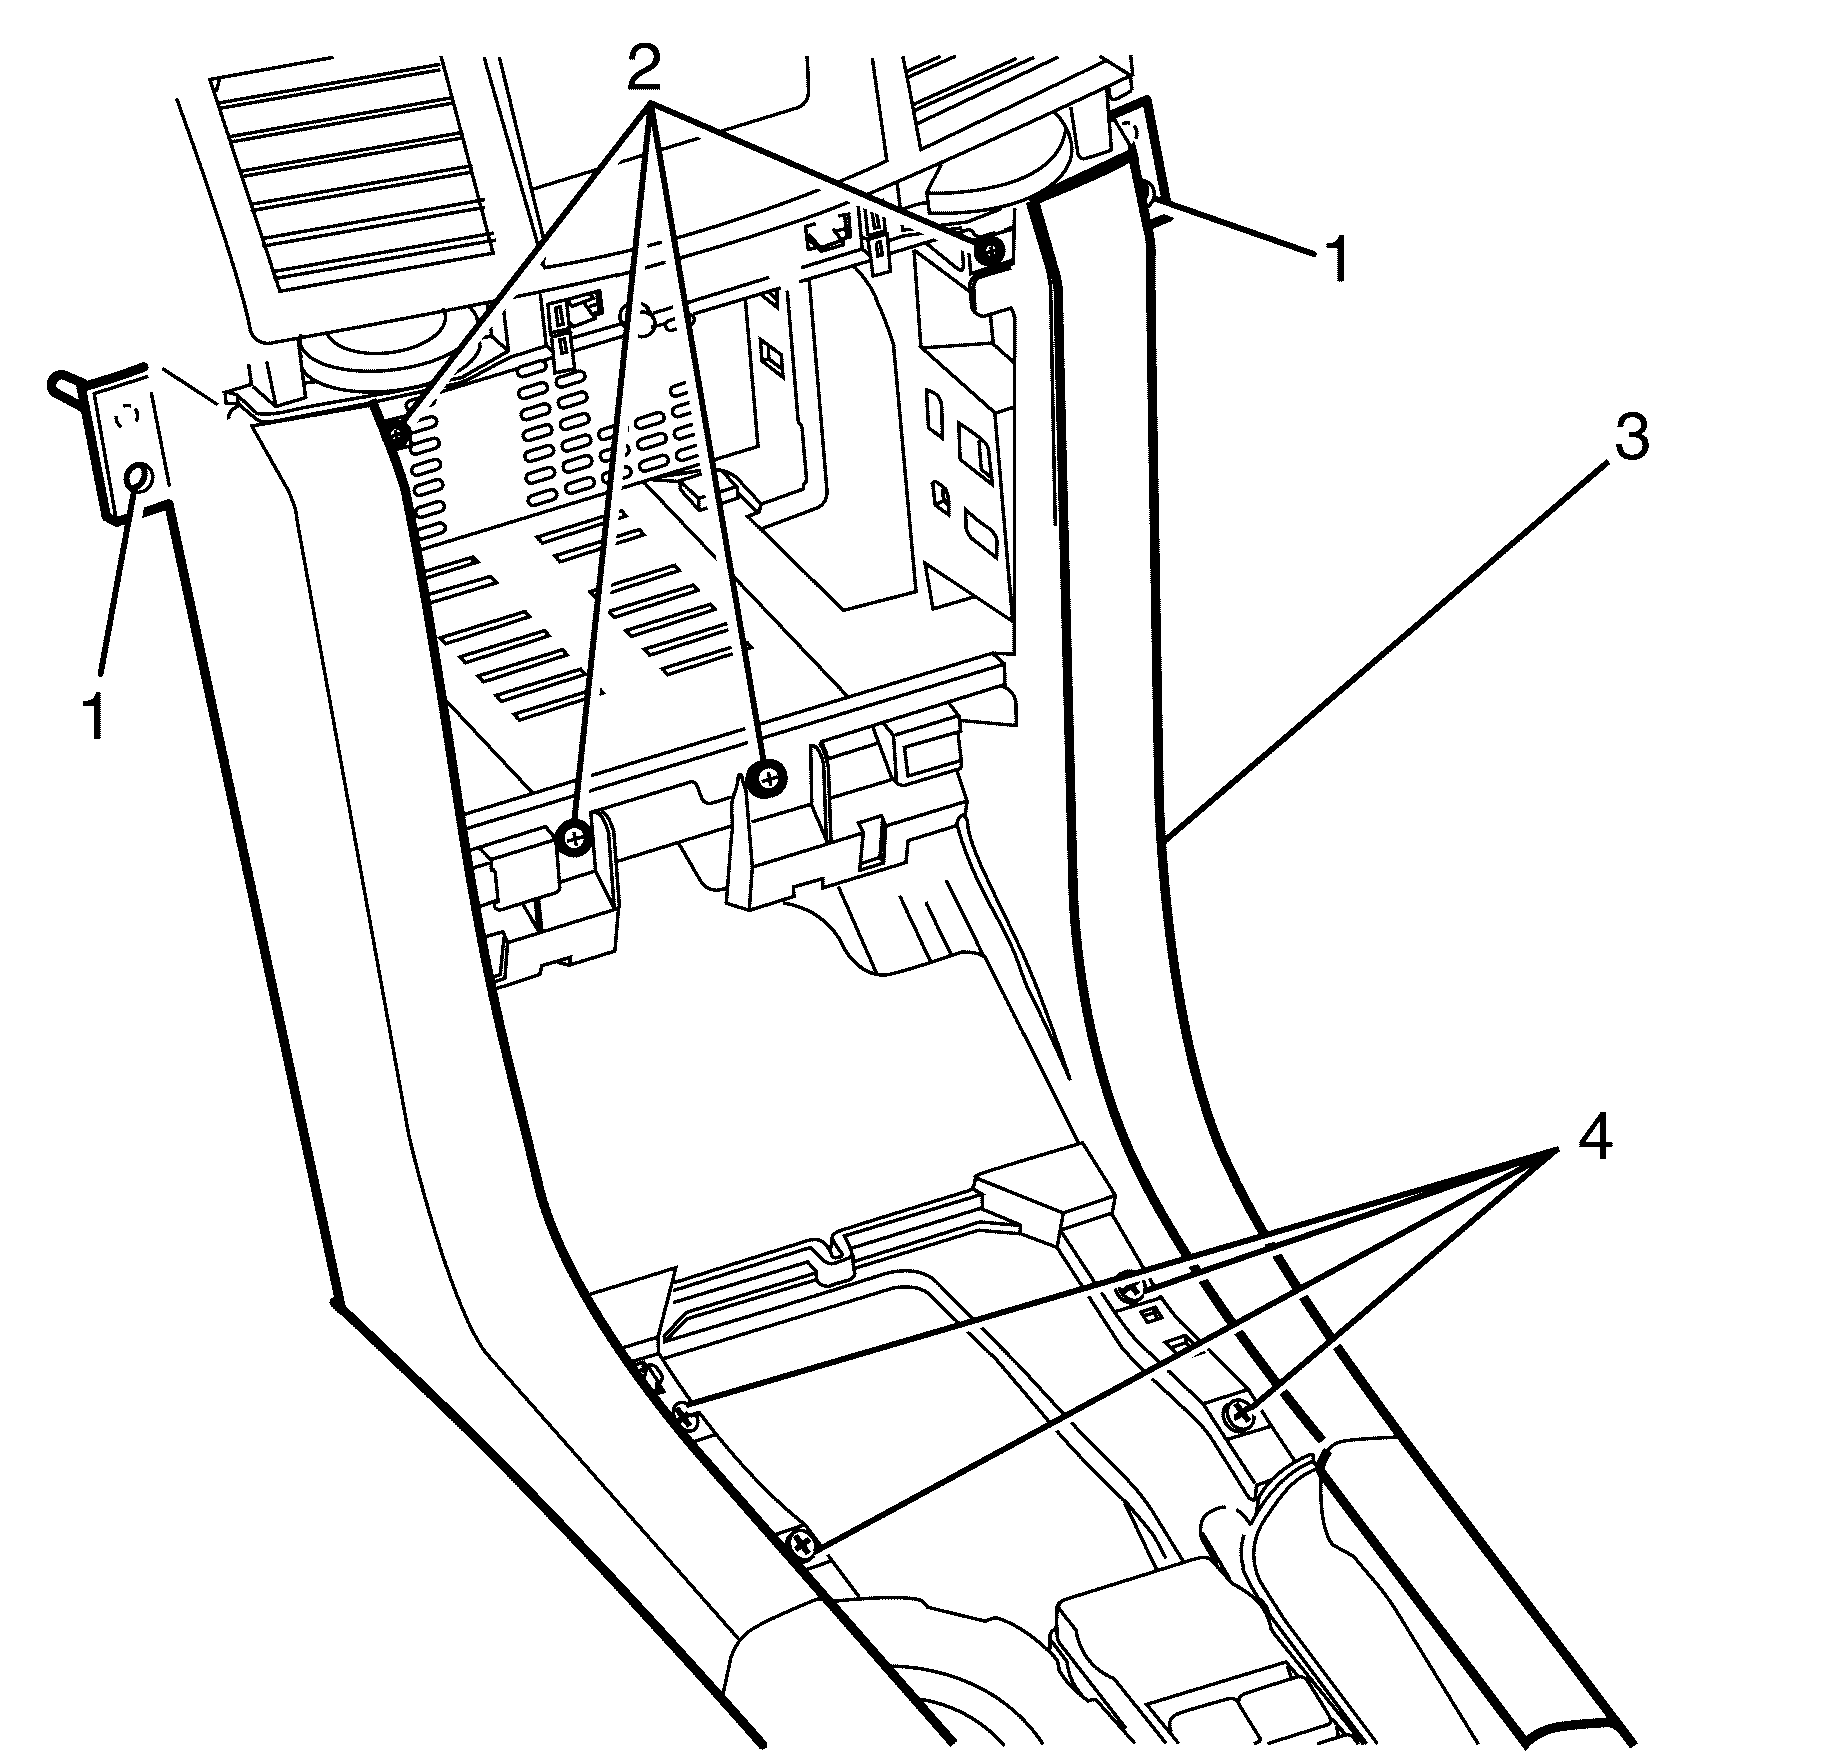
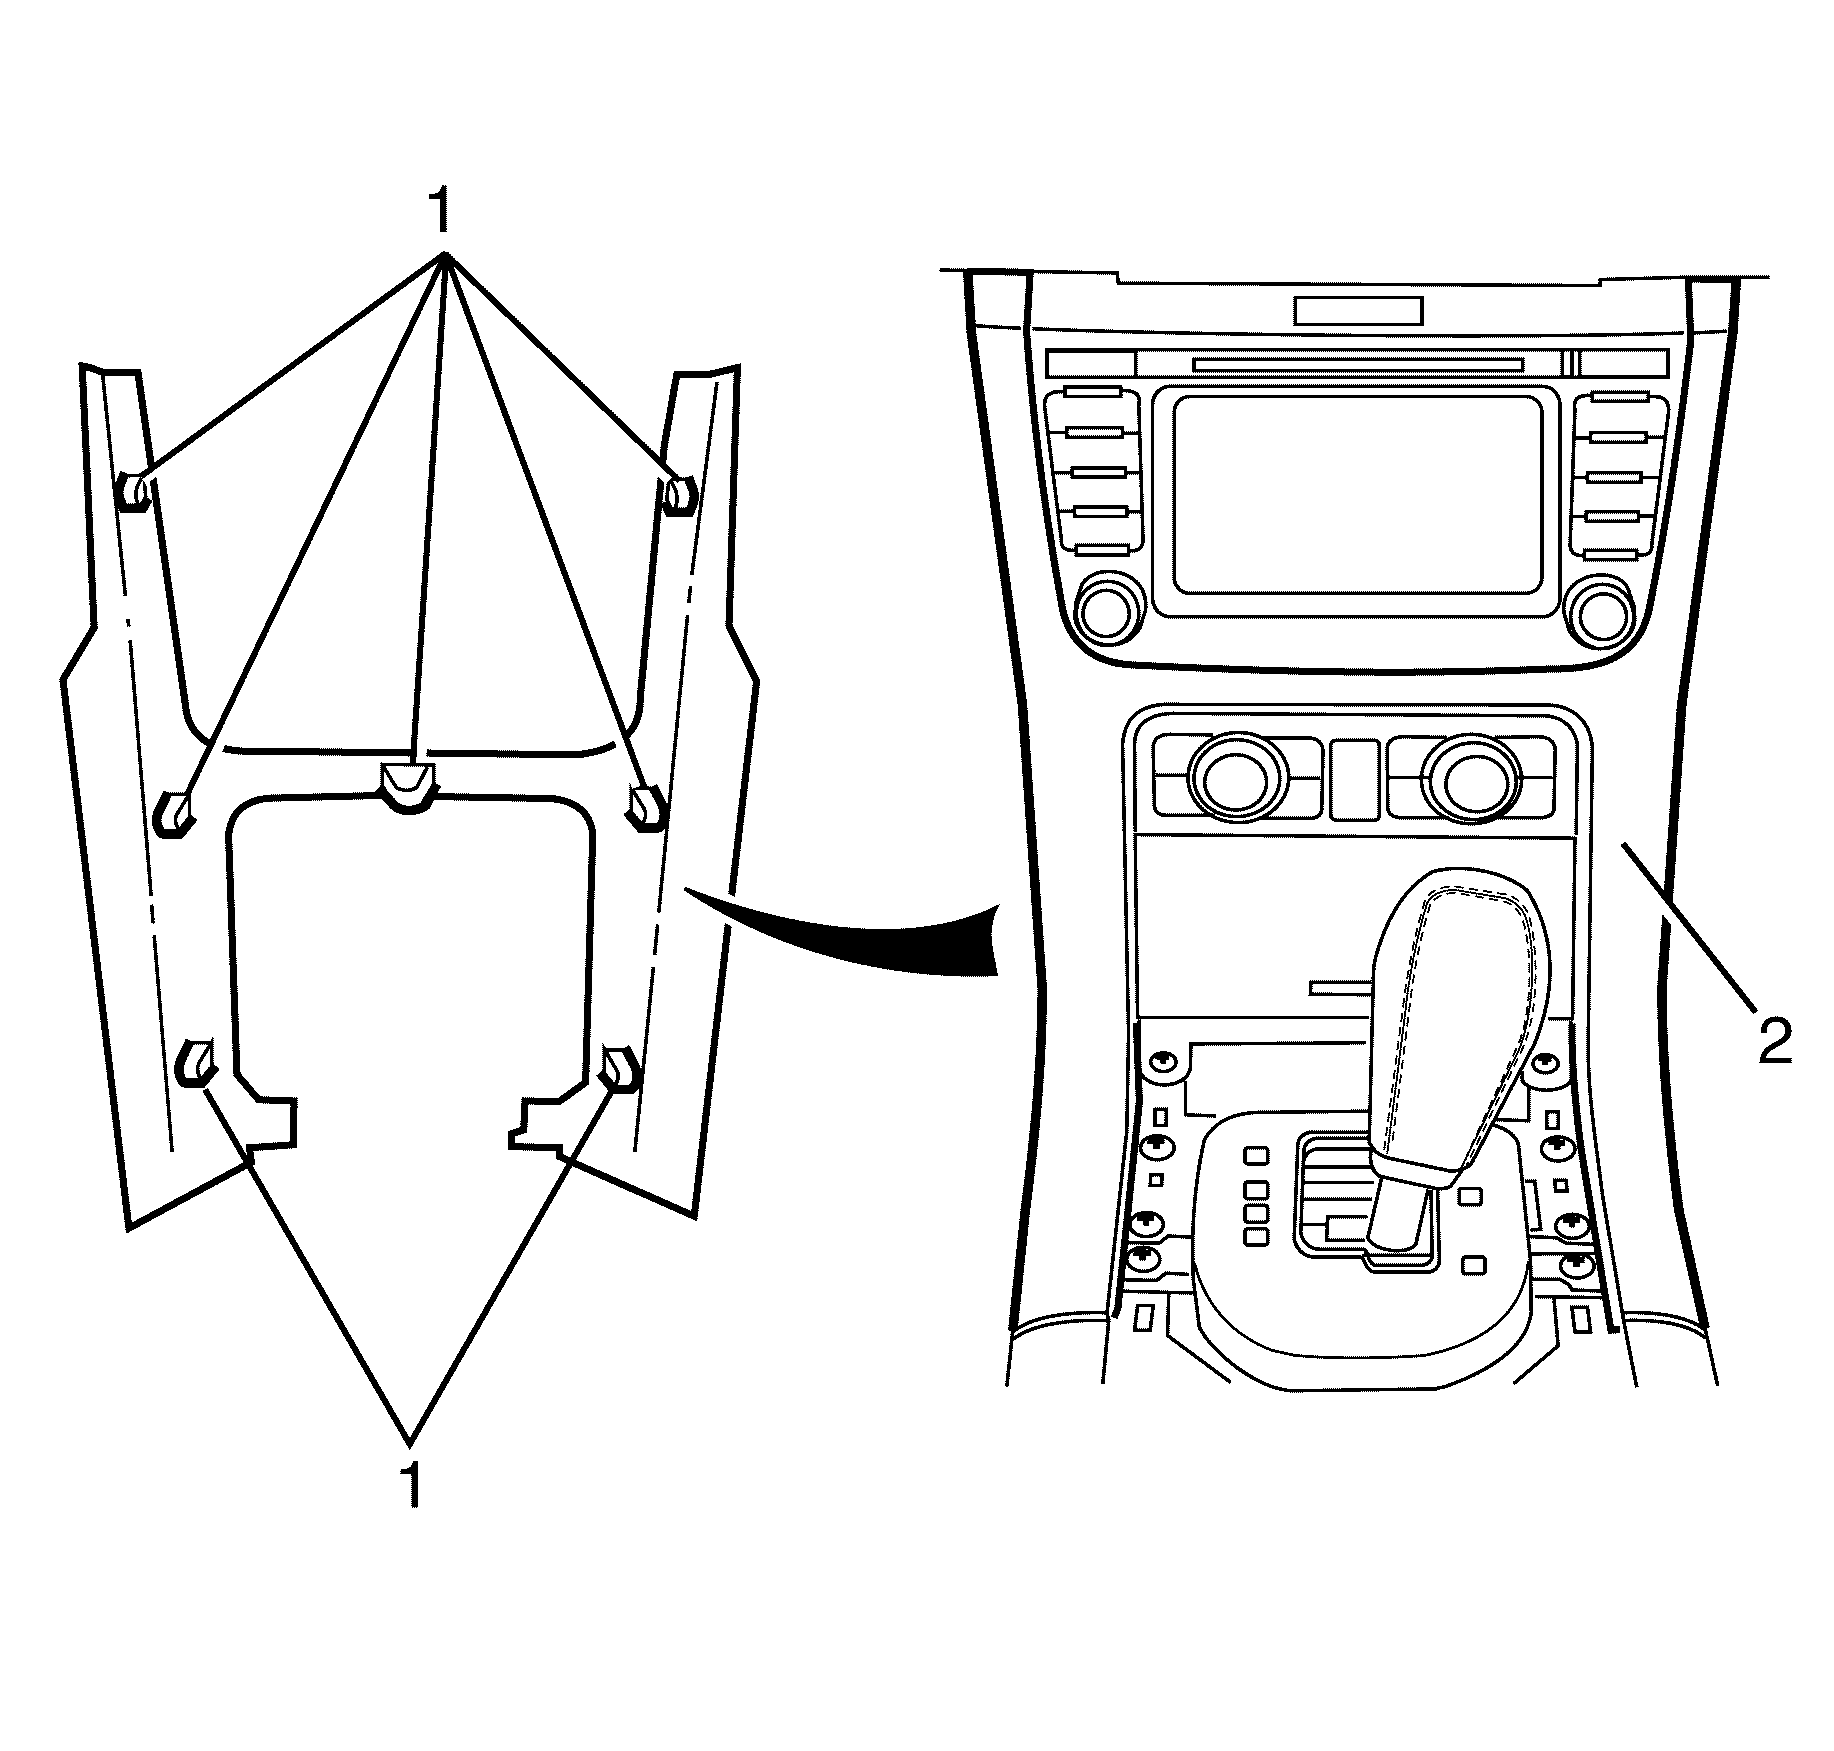
- Install the trim panel (4) to the I/P carrier.
- Install the trim panel to I/P tower upper retaining screws (3,1).
- Install the trim panel (4) to centre console lower retaining screws (5).
- Install the coin holder (3) and park brake recess trim (1).
- Install the coin holder (3) upper retaining screws (2,4).
- Install the park recess tray upper retaining screw (2).
- Install the radio. Refer to Radio Replacement .
- Install the instrument panel compartment. Refer to Instrument Panel Compartment Replacement .
- Install the knee bolster. Refer to Knee Bolster Replacement .
- Install the centre console trim plate. Refer to Console Trim Plate Replacement .
- Test radio for correct operation.
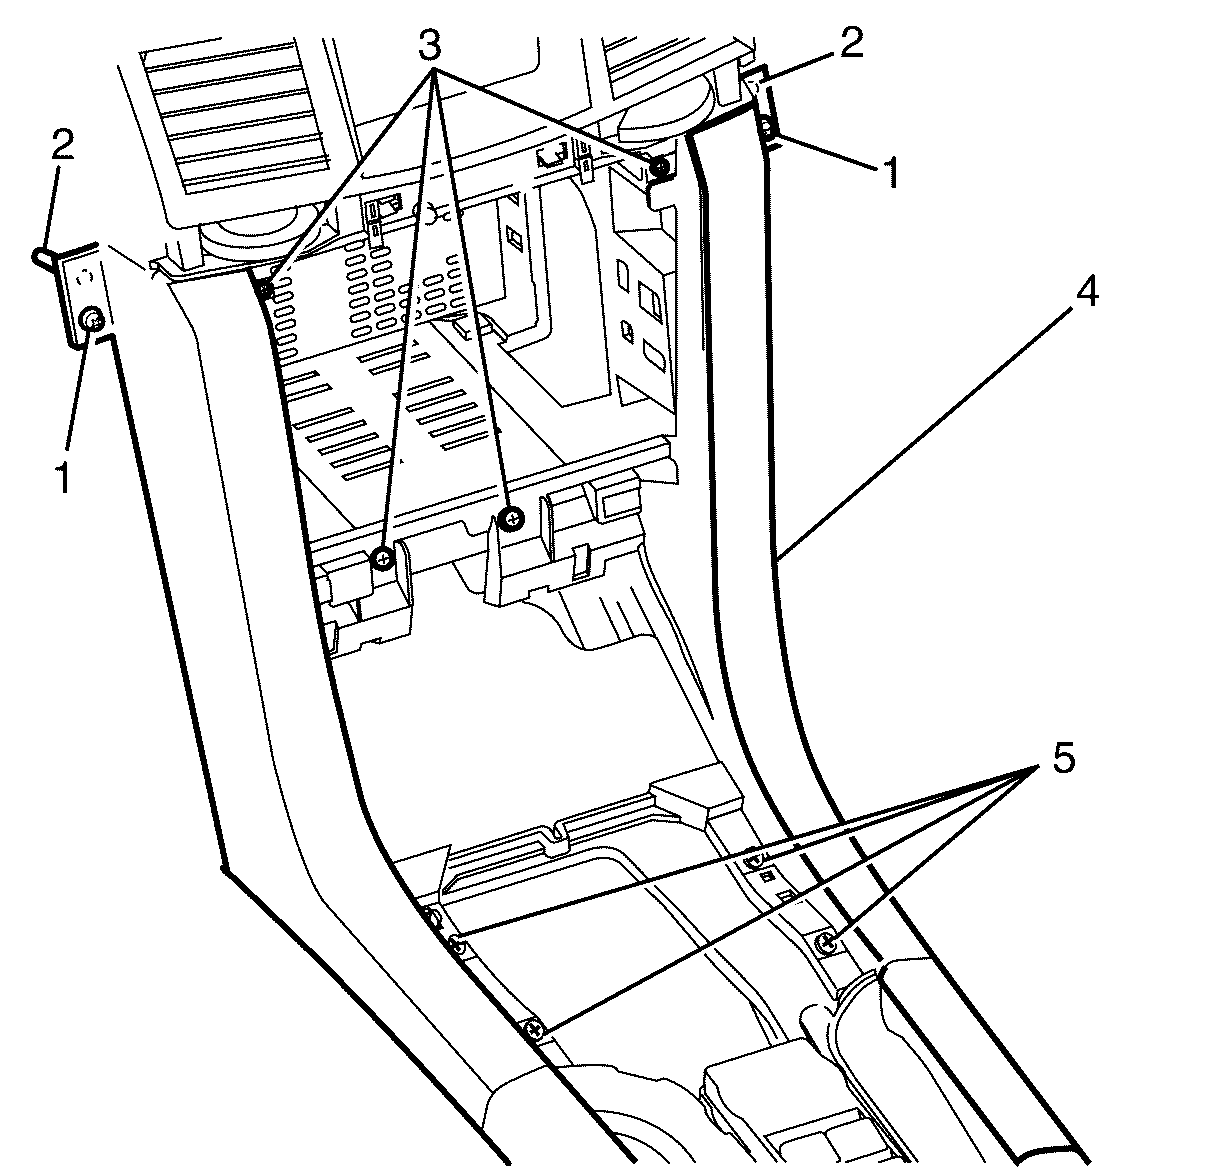
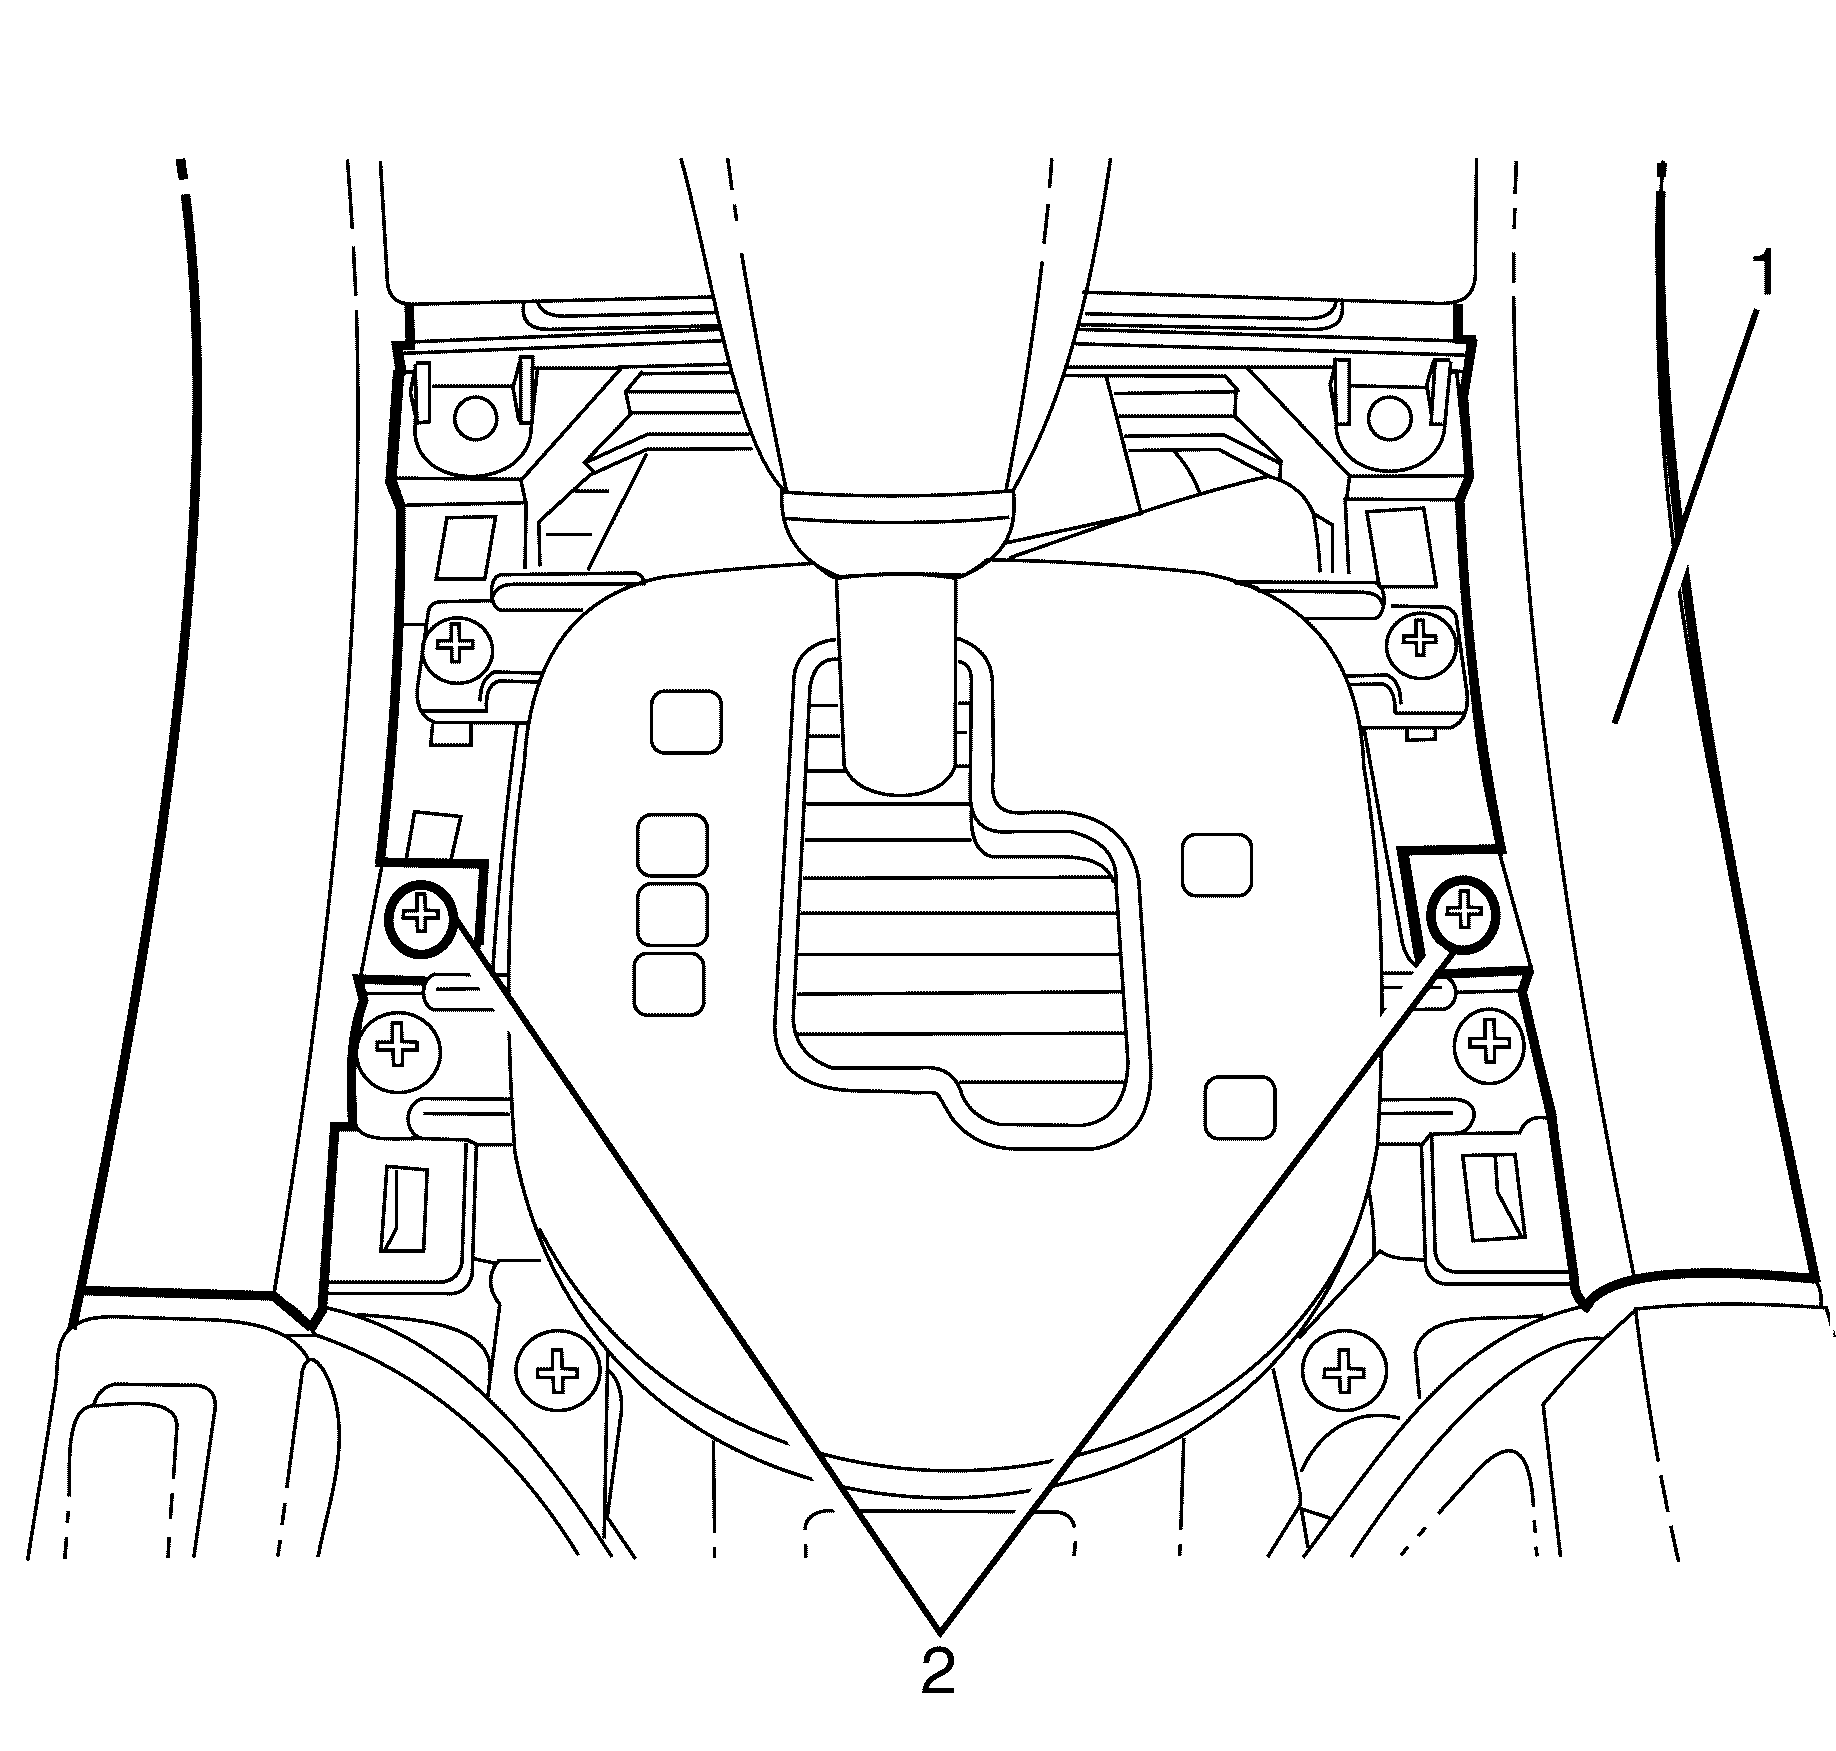
Important: When installing the trim panel make sure the locating pins (2) are correctly aligned with the locating holes.
Notice: Refer to Fastener Notice in the Preface section.
Tighten
Tighten the screws (3,1) to 2 N·m
(18 lb in).
Tighten
Tighten the screws (5) to 2 N·m (18 lb in).
Tighten
Tighten the screws (1) to 2 N·m (18 lb in).
Tighten
Tighten the screws (1) to 2 N·m (18 lb in).
Instrument Panel Center Trim Panel Replacement LWB LHD
Removal Procedure - LS
- Remove the trim plate - console. Refer to Console Trim Plate Replacement.
- Remove the trim panel (1) to centre console retaining screws (2).
- Carefully disengage the trim panel (1) retaining clips (2) and remove the trim panel.
Notice: Refer to General Repair Instructions in the Preface section.
Installation Procedure - LS
- Align the trim panel (1) with the centre console.
- Install the trim (1) panel by engaging the retaining clips (2).
- Install the trim panel (1) to centre console retaining screws (2).
- Install the trim plate - console. Refer to Console Trim Plate Replacement.
Notice: Refer to Fastener Notice in the Preface section.
Tighten
Tighten the screws (2) to N·m (18 lb in).
Removal Procedure - LTZ, SS, Royale
- Remove the trim plate - console. Refer to Console Trim Plate Replacement.
- Remove the trim panel (1) to centre console retaining screws (2).
- Carefully disengage the trim panel retaining clips (1) and remove the trim panel (2).
Notice: Refer to General Repair Instructions in the Preface section.
Installation Procedure - LTZ, SS, Royale
- Align the trim panel (2) with the centre console.
- Install the trim panel (2) by engaging the retaining clips (1).
- Install the trim panel (1) to centre console retaining screws (2).
- Install the trim plate - console. Refer to Console Trim Plate Replacement.
Notice: Refer to Fastener Notice in the Preface section.
Tighten
Tighten the screws (2) to 2 N·m (18 lb in).
Instrument Panel Center Trim Panel Replacement LWB RHD
Removal Procedure
- Remove the trim plate - console. Refer to Console Trim Plate Replacement.
- Remove the trim panel (1) to centre console retaining screws (2).
- Carefully disengage the trim panel (1) retaining clips (2) and remove the trim panel.
Notice: Refer to General Repair Instructions in the Preface section.
Installation Procedure
- Align the trim panel (1) with the centre console.
- Install the trim (1) panel by engaging the retaining clips (2).
- Install the trim panel (1) to centre console retaining screws (2).
- Install the trim plate - console. Refer to Console Trim Plate Replacement.
Notice: Refer to Fastener Notice in the Preface section.
Tighten
Tighten the screws (2) to N·m (18 lb in).
Instrument Panel Center Trim Panel Replacement SWB RHD
Removal Procedure - (Omega)
- Remove the knee bolster. Refer to Knee Bolster Replacement .
- Remove the instrument panel compartment. Refer to Instrument Panel Compartment Replacement .
- Remove the radio. Refer to Radio Replacement .
- Remove the centre console trim plate. Refer to Console Trim Plate Replacement .
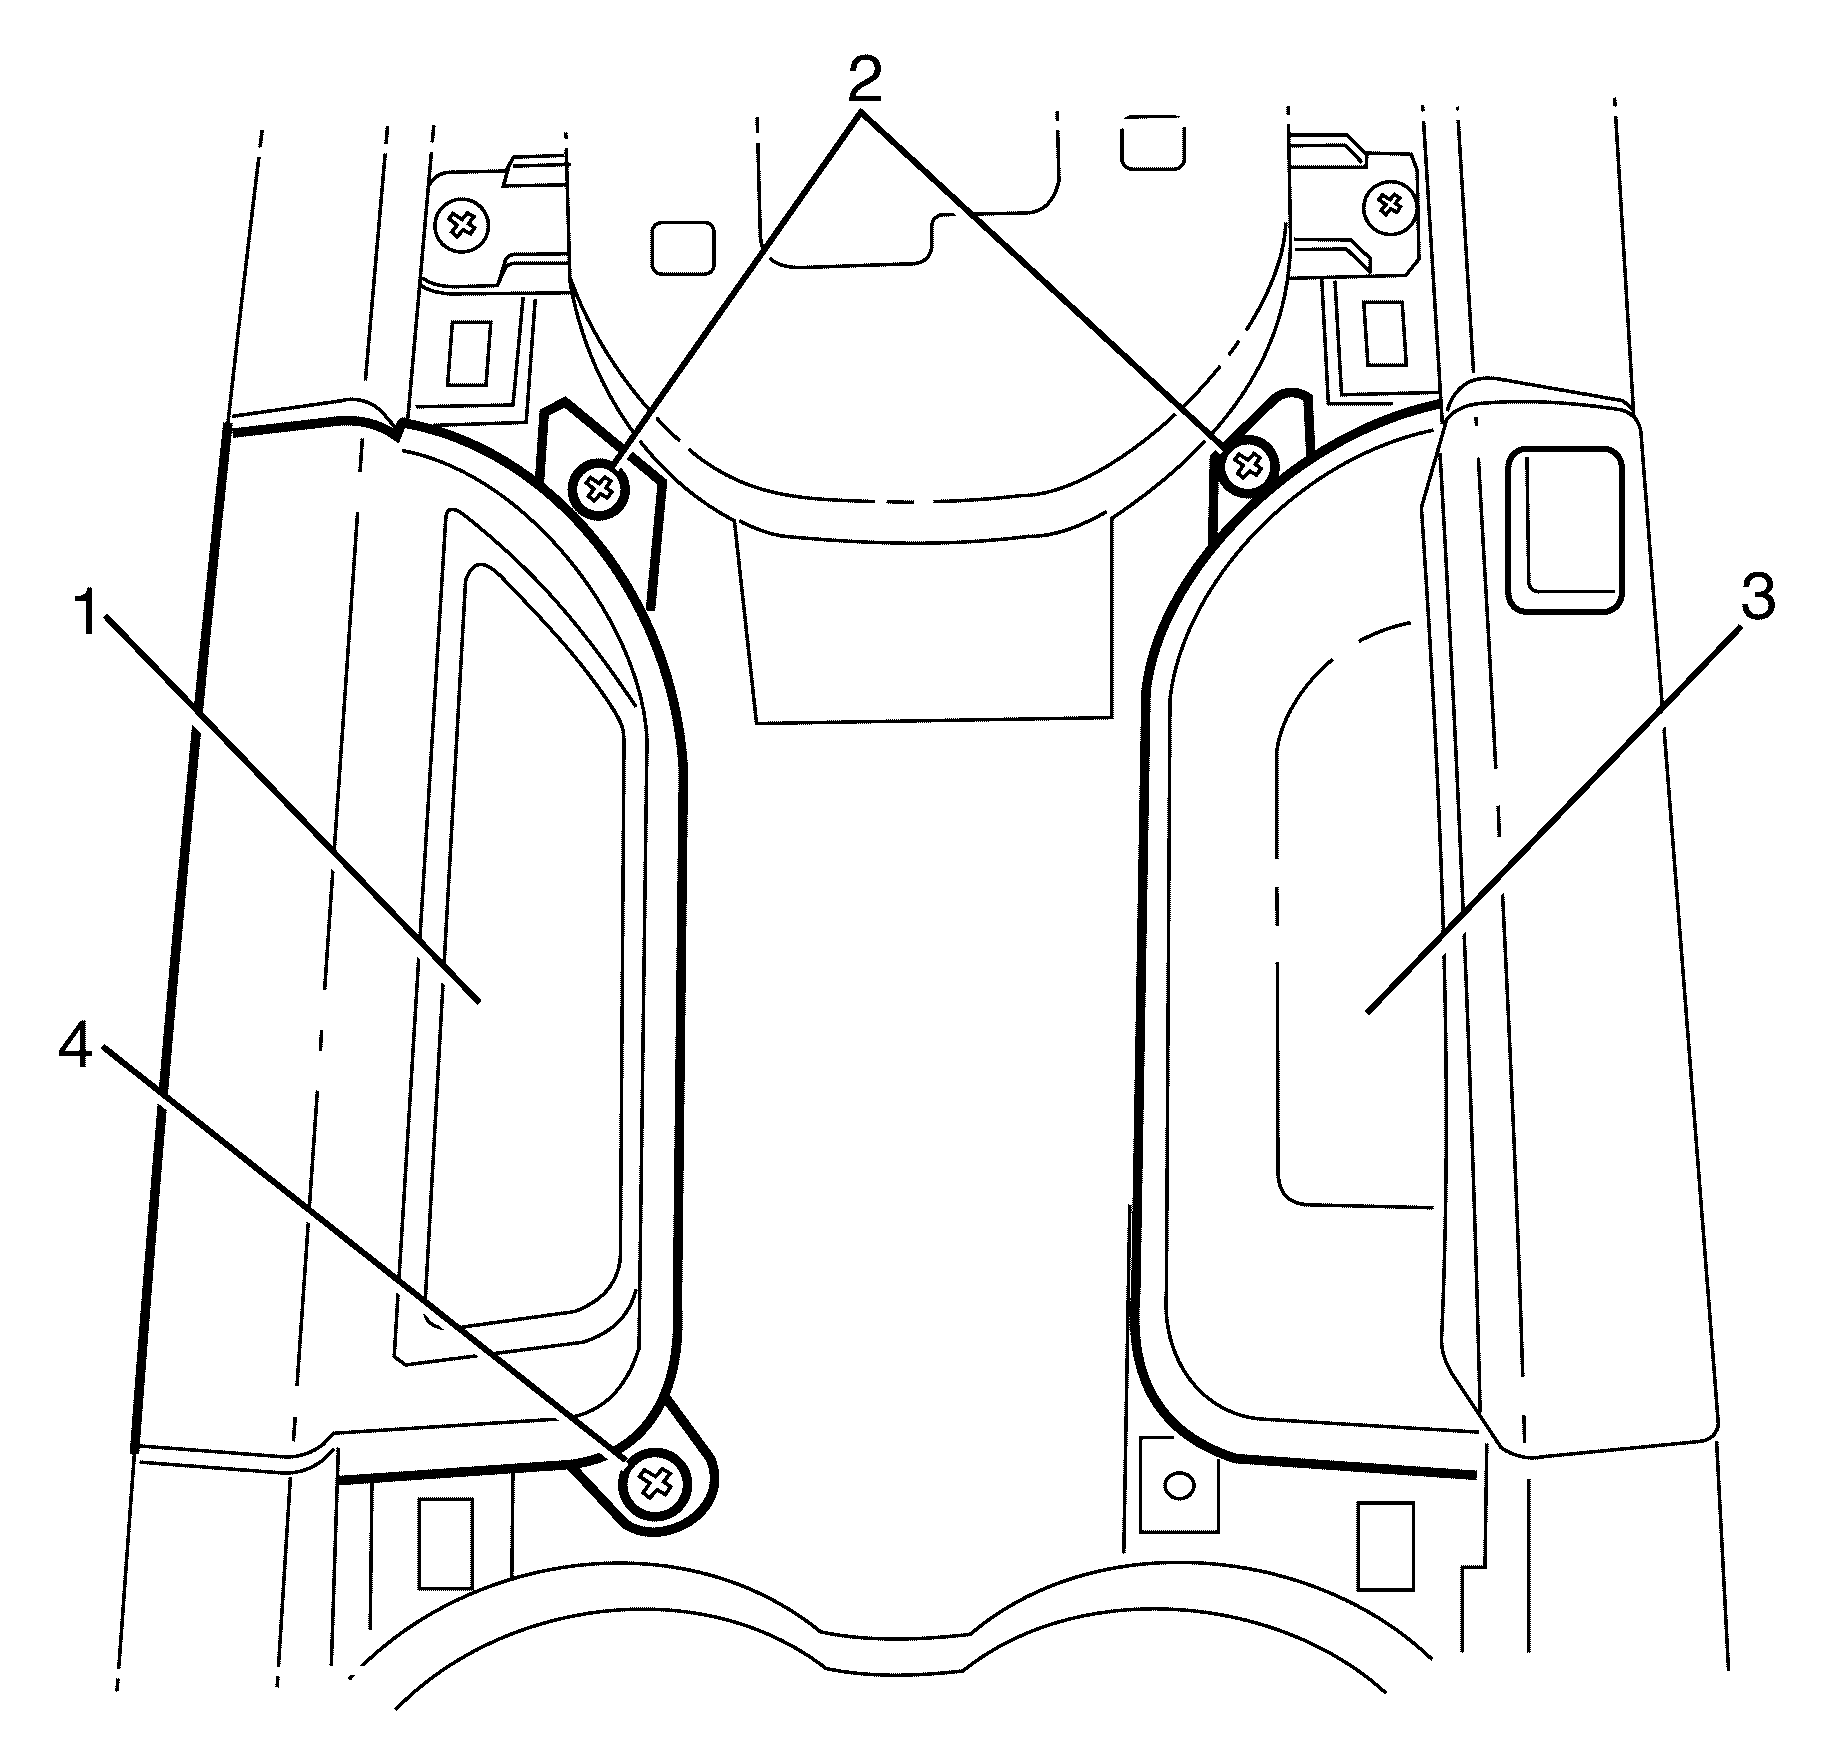
- Remove the coin holder upper retaining screws (2,4) and remove the coin holder (1).
- Remove the park recces tray upper retaining screw (2) and remove the recess trim (3).
- Remove the trim panel (4) to I/P tower lower retaining screws (1).
- Remove the upper trim panel retaining screws (1) from the trim panel (4).
- Remove the trim panel (3) to centre console retaining screws (5).
- Remove the trim panel (5) to centre console
Installation Procedure
- Install the trim panel to the I/P carrier.
- Install the trim panel to centre console retaining screws (1) and (3).
- Install the trim panel (4) to I/P tower retaining screws (1) and (3).
- Install the coin holder upper retaining screws (2,4) and remove the coin holder (1).
- Install the park recces tray upper retaining screw (2) and remove the recess trim (3).
- Install the radio. Refer to Radio Replacement .
- Install the instrument panel compartment. Refer to Instrument Panel Compartment Replacement .
- Install the knee bolster. Refer to Knee Bolster Replacement .
- Install the centre console trim plate. Refer to Console Trim Plate Replacement .
- Test radio for correct operation.
Notice: Refer to Fastener Notice in the Preface section.
Tighten
Tighten the screws (1) and (3) to 2 N·m
(18 lb in).
Tighten
Tighten the screws (3) to 2 N·m (18 lb in).
Notice: Refer to Fastener Notice in the Preface section.
Tighten
Tighten the screws (1) to 2 N·m (18 lb in).
Tighten
Tighten the screws (1) to 2 N·m (18 lb in).
Removal Procedure - (SV6,SS and SS-V)
- Remove the knee bolster. Refer to Knee Bolster Replacement .
- Remove the instrument panel compartment. Refer to Instrument Panel Compartment Replacement .
- Remove the radio fascia. Refer to Instrument Panel Compartment Replacement .
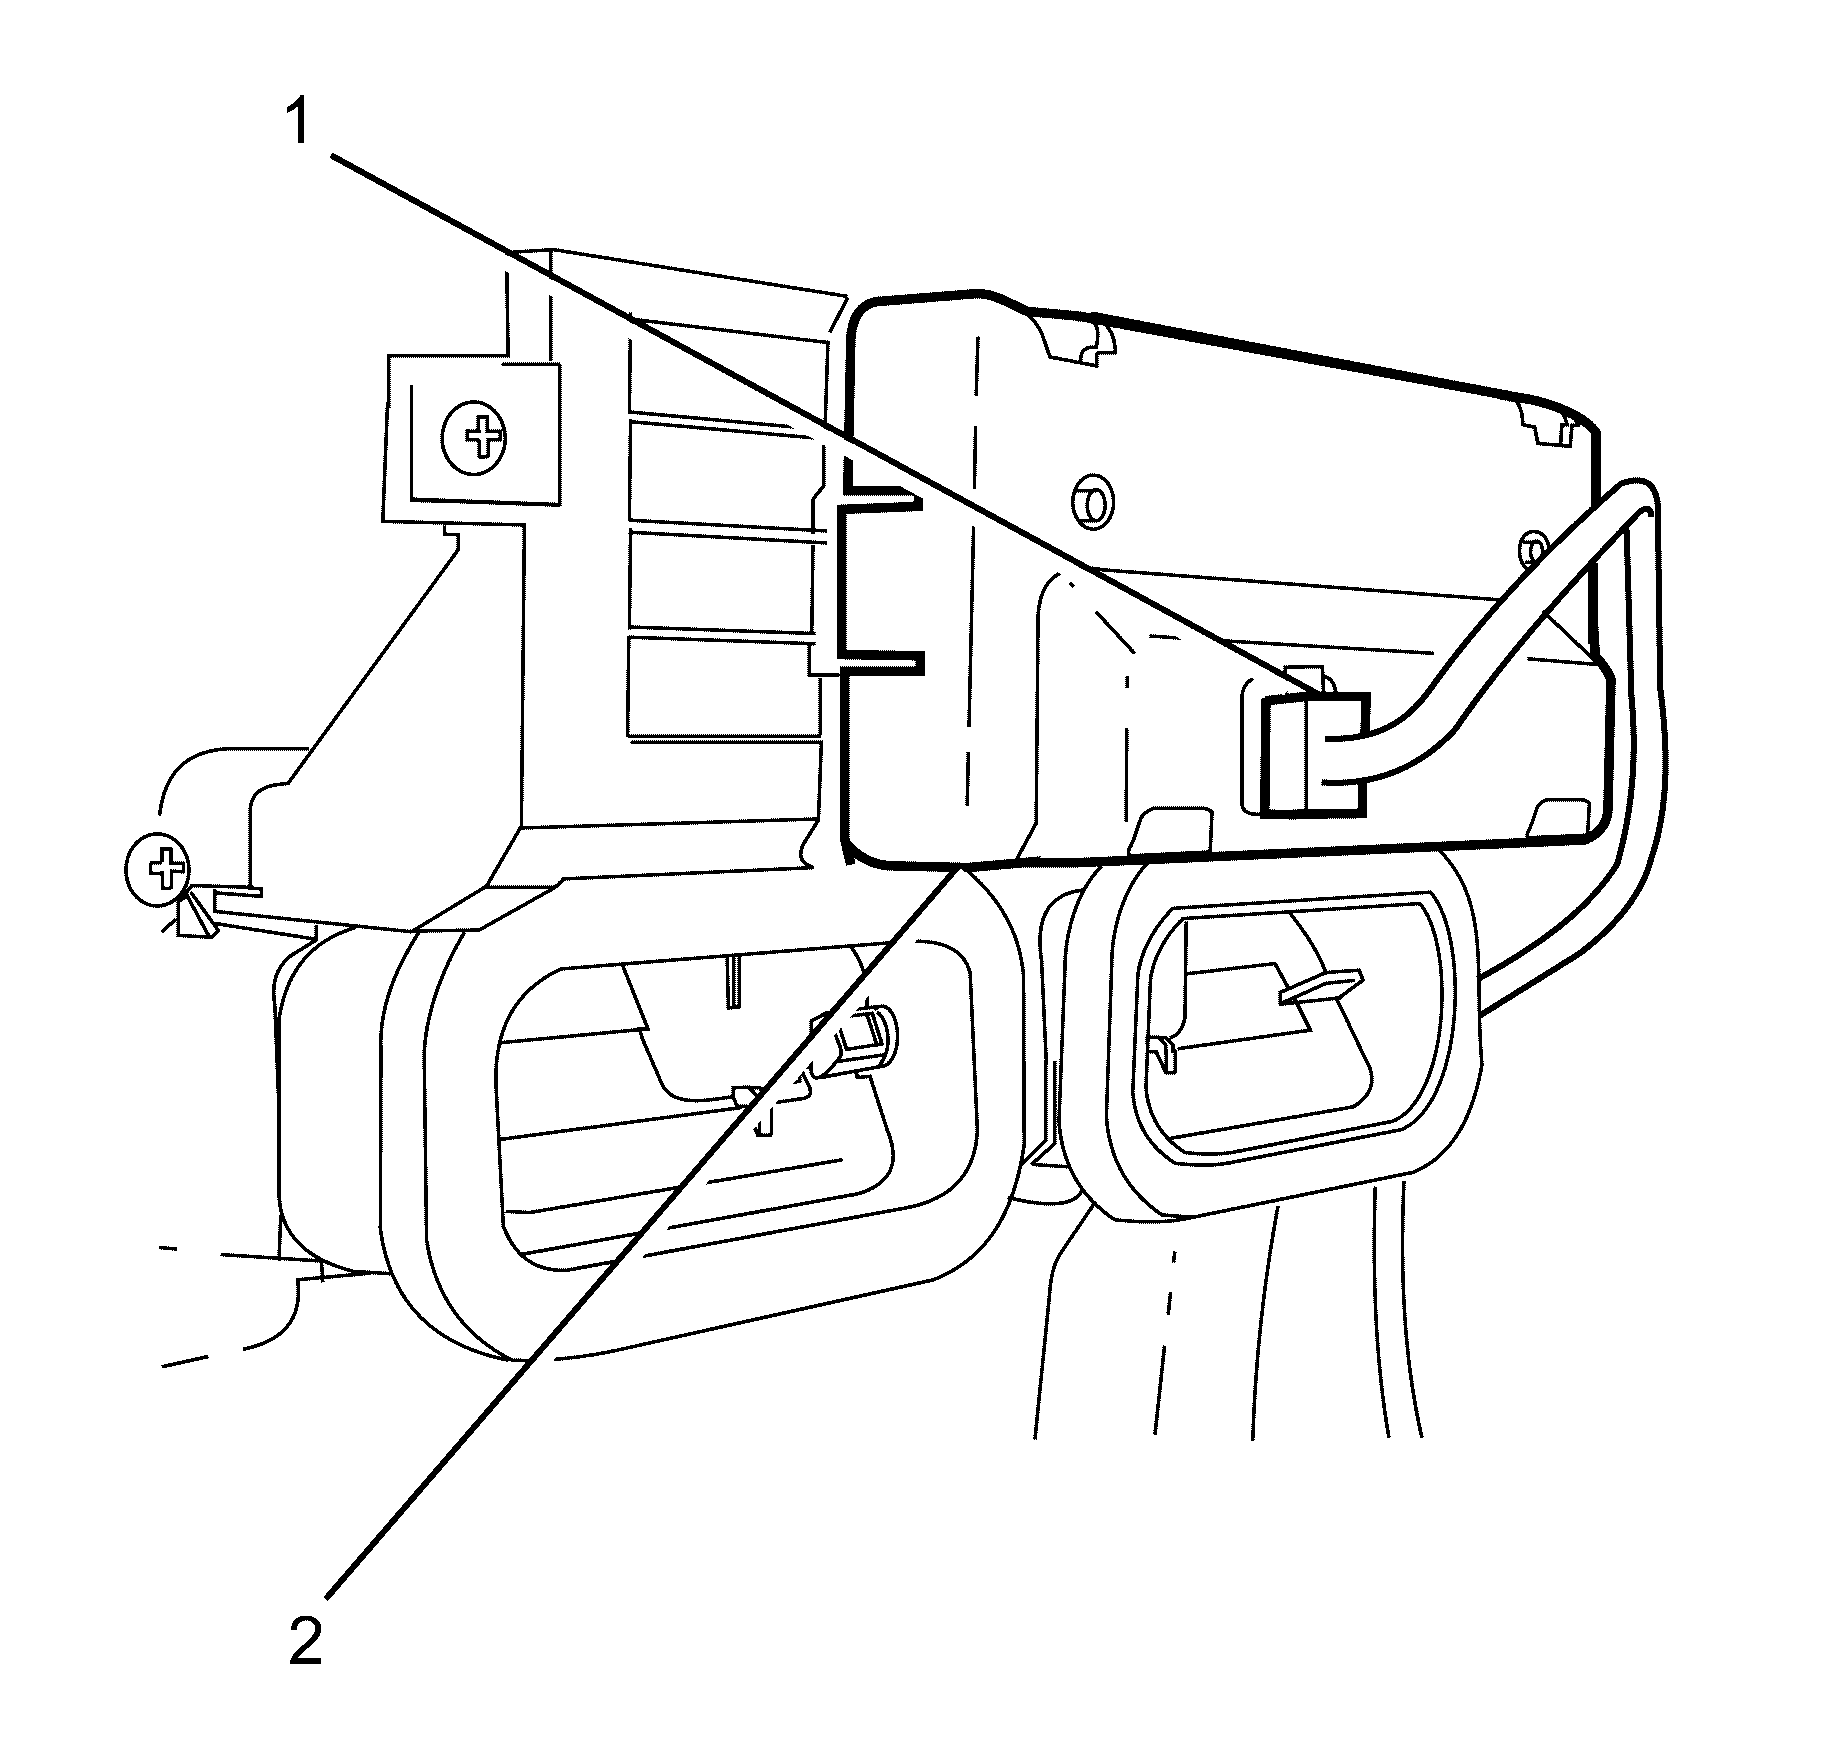
- Remove the trim panel (1) to I/P tower lower retaining screws (2).
- Remove the upper trim panel to I/P pad retaining screws (1).
- Disengage the trim panel to I/P pad retaining clips, located at the top of the trim panel.
- Lift the trim panel upward and forward to gain access to the multi function display unit electrical connector.
- Disconnect the multi function display unit (2) electrical connector (1).
- Remove the trim panel.
Installation Procedure
- Connect the multi function display unit (2) electrical connector (1).
- Install the top trim panel to I/P pad retaining screws (1).
- Align the trim panel (1) with the I/P tower.
- Engage the trim panel retaining clips.
- Install the trim panel to I/P tower retaining screws (2).
- Install the radio fascia. Refer to Instrument Panel Compartment Replacement .
- Install the instrument panel compartment. Refer to Instrument Panel Compartment Replacement
- Install the knee bolster. Refer to Knee Bolster Replacement .
- Test the multi function display and radio for correct operation.
Notice: Refer to Fastener Notice in the Preface section.
Tighten
Tighten the screws (1) to 2 N·m (18 lb in).
Notice: Refer to Fastener Notice in the Preface section.
Tighten
Tighten the screws (1) to 2 N·m (18 lb in).
