For 1990-2009 cars only
Warning: Refer to Brake Dust Warning in the Preface section.
Caution: Refer to Brake Fluid Effects on Paint and Electrical Components Caution in the Preface section.
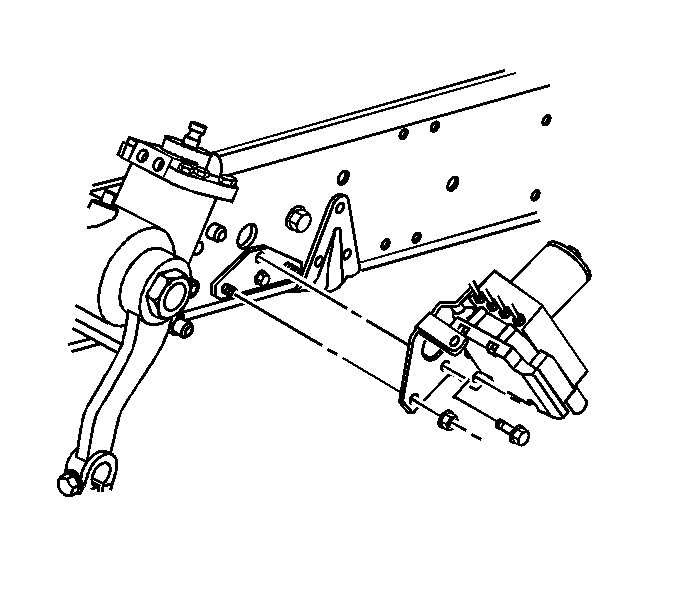
Removal Procedure
- Disconnect the negative battery cable.
- Remove the electrical connector.
- Remove the brake lines from the brake pressure modulator valve (BPMV).
- Remove the bolts that fasten the electronic brake control module (EBCM) to the BPMV.
- Remove the EBCM from the BPMV. Removal may require a light amount of force.
- Remove the BPMV mounting bracket nuts and washers.
- Remove the BPMV from the electric hydraulic control unit (EHCU) mounting bracket.
- Clean the BPMV with a clean, dry cloth.
Warning: Refer to Battery Disconnect Warning in the Preface section.
Caution: Do not use a tool to pry the EBCM from the BPMV. Excessive force will damage the EBCM.
Installation Procedure
- Install the BPMV onto the EHCU mounting bracket.
- Install EBCM to BPMV.
- Install the new EBCM bolts.
- Install the electrical connector.
- Install the EHCU to the vehicle.
- Connect the negative battery cable.
- Bleed the brake system. Refer to Hydraulic Brake System Bleeding.
Caution: Refer to Fastener Caution in the Preface section.
Note: Do not reuse the EBCM mounting bolts. Always install new EBCM mounting bolts with the new EBCM.
Tighten
Tighten the BPMV mounting bolts to 9 N·m (7 lb ft).
Tighten
Tighten the bolts to 2 N·m (18 lb in) in an X-pattern.
