For 1990-2009 cars only
Removal Procedure
- Recover the refrigerant from the A/C system. Refer to Refrigerant Recovery and Recharging .
- Remove the right wheelhouse panel. Refer to Wheelhouse Panel Replacement .
- Remove the air cleaner. Refer to the appropriate procedure:
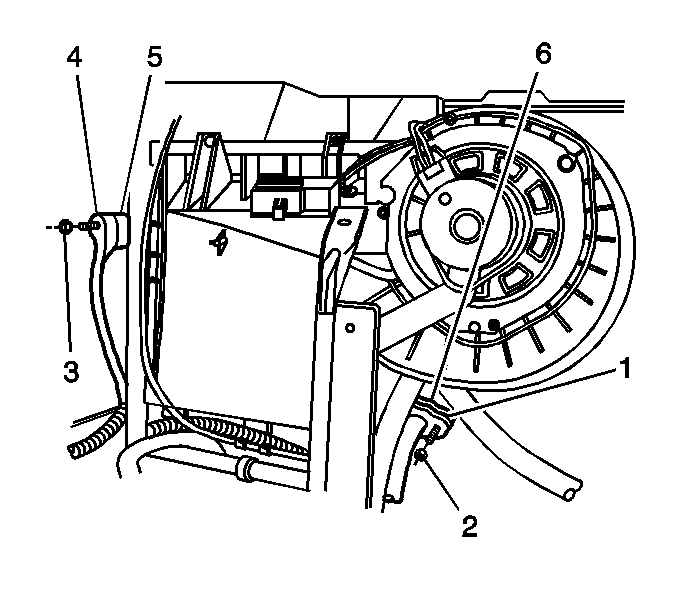
- Disconnect the electrical connectors from the low pressure sensor.
- Disconnect the electrical connector to the blower motor assembly.
- Disconnect the electrical connector to the blower motor resistor assembly.
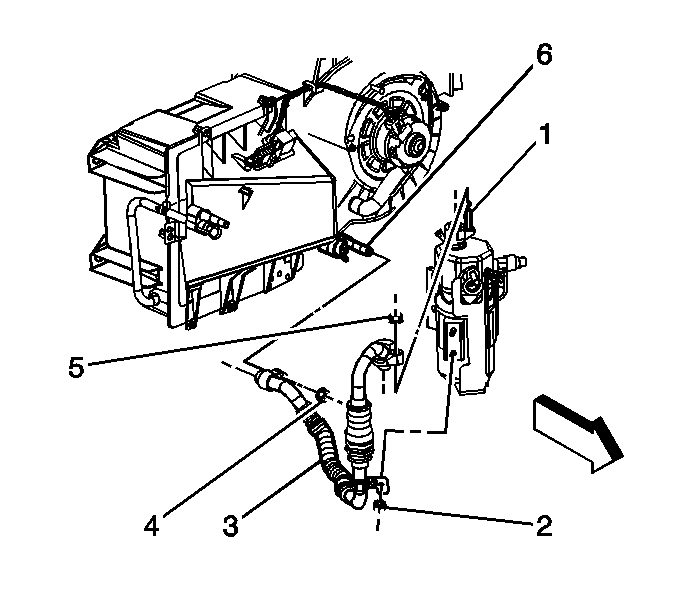
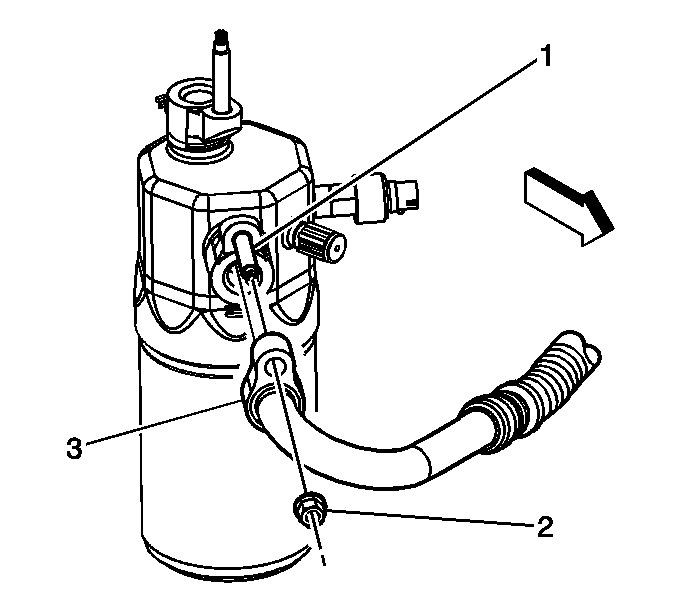
- Remove the evaporator outlet hose retaining nut (5) from the accumulator.
- Remove the compressor suction hose retaining nut (2).
- Remove the compressor suction hose from the accumulator.
- Remove the retaining nuts (3) from the accumulator retaining bracket.
- Remove the accumulator (5) from the bracket.
- Remove the multi-use module bracket. Refer to the appropriate procedure:
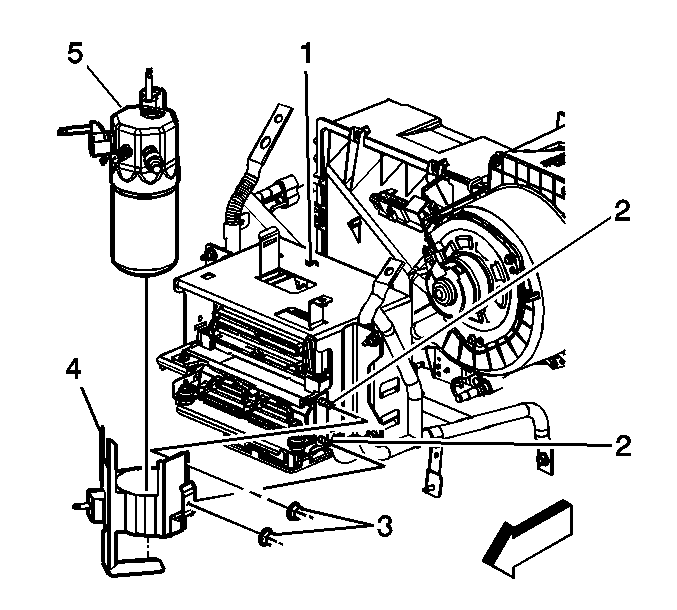
- Remove the retaining nut (3) from the evaporator inlet tube (5).
- Remove the evaporator inlet tube from the evaporator.
- Remove the sealing washer.
- Remove the retaining nut (4) from the evaporator outlet tube (3).
- Remove the evaporator outlet tube from the evaporator.
- Remove the sealing washer.
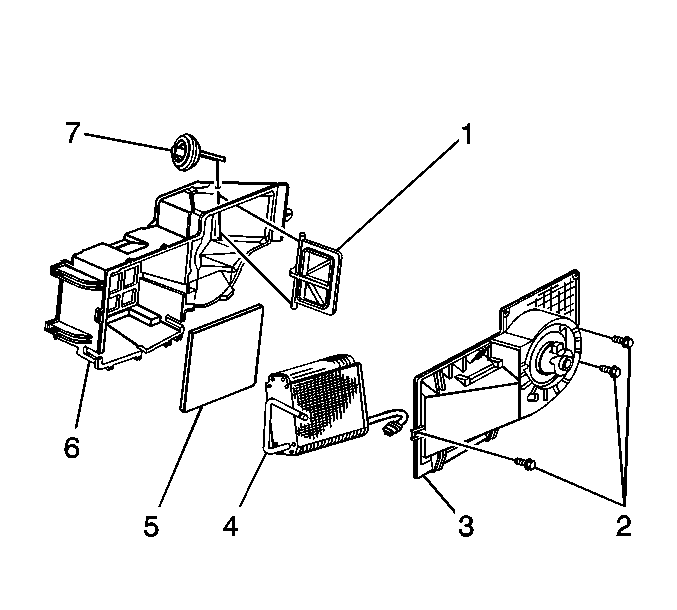
- Remove the screws (2) from the evaporator and blower module assembly.
- Remove the evaporator and blower module assembly front cover (3).
- Remove the recirculation door actuator (7) and the linkage.
- Remove the recirculation door (1) from the evaporator and blower module assembly (6).
| • | Air Cleaner Assembly Replacement for the 6.6L engine |
| • | Air Cleaner Replacement for the 8.1L engine |
| • | Air Cleaner Assembly Replacement for the 7.8L engine |
| • | Caterpillar® 3126 Unit Repair Manual for the 7.2L (Caterpillar) engine |
| • | Multiuse Module Bracket Replacement for the 8.1L engine |
| • | Multiuse Module Bracket Replacement for the 7.8L engine |
| • | Caterpillar® 3126 Unit Repair Manual |
Installation Procedure
- Install the recirculation door (1) to the evaporator and blower module assembly (6).
- Install the recirculation door actuator (7) and the linkage.
- Install the evaporator and blower module assembly cover (3).
- Install the screws.
- Install new sealing washers to the evaporator inlet and outlet tubes. Refer to O-Ring Replacement .
- Install the evaporator inlet tube (1) to the evaporator.
- Install the evaporator inlet tube retaining nut (3).
- Install the evaporator outlet tube to the evaporator.
- Install the evaporator outlet tube retaining nut (4).
- Install the multi-use module bracket. Refer to the appropriate procedure:
- Install the accumulator (5) to the bracket.
- Install the nuts (3) to the accumulator retaining bracket.
- Install new O-ring seals. Refer to O-Ring Replacement .
- Install the evaporator outlet hose.
- Install the evaporator outlet hose retaining nut (5) to the accumulator.
- Install the compressor suction hose to the accumulator.
- Install the compressor inlet hose retaining nut (2) to the accumulator.
- Connect the electrical connectors to the low pressure sensor.
- Connect the electrical connector to the blower motor assembly.
- Connect the electrical connector to the blower motor resistor assembly.
- Install the air cleaner. Refer to the appropriate procedure:
- Install the right wheelhouse panel. Refer to Wheelhouse Panel Replacement .
- Evacuate and recharge the A/C system. Refer to Refrigerant Recovery and Recharging .
Notice: Refer to Fastener Notice in the Preface section.
Tighten
Tighten the screws to 1.9 N·m (17 lb in).
Tighten
Tighten the nut to 16 N·m (12 lb ft).
Tighten
Tighten the nut to 16 N·m (12 lb ft).
| • | Multiuse Module Bracket Replacement for the 8.1L engine |
| • | Multiuse Module Bracket Replacement for the 7.8L engine |
| • | Caterpillar® 3126 Unit Repair Manual |
Tighten
Tighten the nuts to 9 N·m (80 lb in).
Tighten
Tighten the nut to 18 N·m (13 lb ft).
Tighten
Tighten the nut to 18 N·m (13 lb ft).
| • | Air Cleaner Assembly Replacement for the 6.6L engine |
| • | Air Cleaner Replacement for the 8.1L engine |
| • | Air Cleaner Assembly Replacement for the 7.8L engine |
| • | Caterpillar® 3126 Unit Repair Manual for the 7.2L (Caterpillar) engine |
