For 1990-2009 cars only
Removal Procedure
- Disconnect the negative battery cable. Refer to Battery Negative Cable Disconnection and Connection.
- Remove the air inlet pipes. Refer to Charge Air Cooler Inlet Pipe and Outlet Pipe Replacement.
- Remove the valve rocker arm cover. Refer to Valve Rocker Arm Cover Replacement.
- Remove the fuel injector harness assembly.
- Loosen all the valve adjusters, but do not remove.
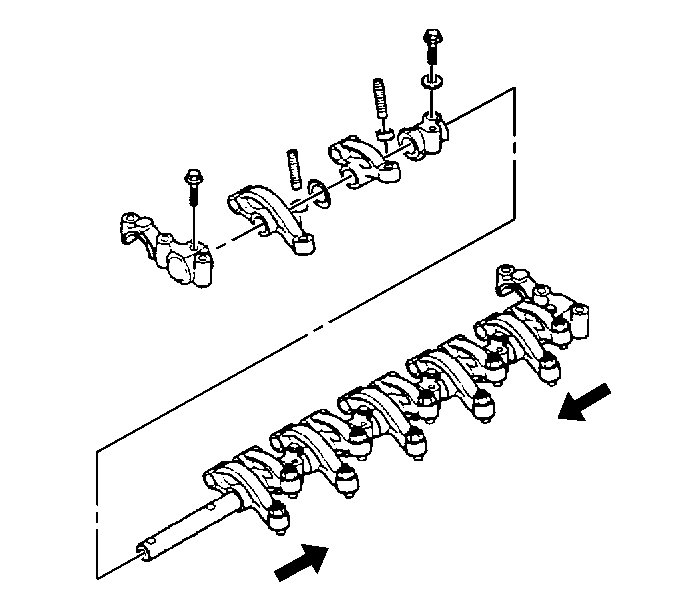
- Loosen the valve rocker arm shaft bracket bolts evenly, starting from the outer bolts moving to the inner bolts.
- Remove the valve rocker arm shaft assembly.
- Remove the valve rocker arm retaining bolt.
- Remove the valve rocker arm.

Important: Do not remove the rocker arm shaft bolts from the valve rocker arm shaft assembly until the assembly is removed from the vehicle. Place on a work bench before disassembling.
Installation Procedure
- Install the valve rocker arm on the valve rocker arm shaft.
- Install the valve rocker arm retaining bolt.
- Install the valve rocker arm shaft assembly to the cylinder head.
- Adjust the valve rocker arms. Refer to Valve Adjustment.
- Install the fuel injector harness.
- Install the fuel injector harness bolts.
- Install the valve rocker arm cover. Refer to Valve Rocker Arm Cover Replacement.
- Install the intake air ducts. Refer to Charge Air Cooler Inlet Pipe and Outlet Pipe Replacement.
- Install the negative battery cable. Refer to Battery Negative Cable Disconnection and Connection.

Notice: Refer to Fastener Notice in the Preface section.
Tighten
Tighten the valve rocker arm retaining bolt to 27 N·m (20 lb ft).
Tighten the valve rocker arm shaft bracket bolts to the following specifications:
Tighten
| • | M8 bolts to 27.5 N·m (20 lb ft) |
| • | M10 bolts to 56 N·m (41 lb ft) |
Tighten
Tighten the fuel injector harness bolts to 21 N·m (16 lb ft).
