Battery Negative Cable Disconnection and Connection C 6/7/8
Removal Procedure
Caution: Unless directed otherwise, the ignition and start switch must be in the OFF or LOCK position, and all electrical loads must be OFF before servicing any electrical component. Disconnect the negative battery cable to prevent an electrical spark should a tool or equipment come in contact with an exposed electrical terminal. Failure to follow these precautions may result in personal injury and/or damage to the vehicle or its components.
- Turn off all the lamps and accessories.
- Turn the ignition OFF.
- Remove the battery ground negative cable and bolt from the battery.
Installation Procedure
- Install the battery ground negative cable and bolt to the battery.
- Set the clock to the current time and program the customer's preferred radio stations.
Notice: Replacement components must be the correct part number for the application. Components requiring the use of the thread locking compound, lubricants, corrosion inhibitors, or sealants are identified in the service procedure. Some replacement components may come with these coatings already applied. Do not use these coatings on components unless specified. These coatings can affect the final torque, which may affect the operation of the component. Use the correct torque specification when installing components in order to avoid damage.
Important: Clean any existing corrosion from the battery terminal bolt flange and the battery cable end.
Tighten
Tighten the battery terminal bolt to 17 N·m (13 lb ft).
Battery Negative Cable Disconnection and Connection C4/C5 - Gas Engine
Removal Procedure
Caution: Unless directed otherwise, the ignition and start switch must be in the OFF or LOCK position, and all electrical loads must be OFF before servicing any electrical component. Disconnect the negative battery cable to prevent an electrical spark should a tool or equipment come in contact with an exposed electrical terminal. Failure to follow these precautions may result in personal injury and/or damage to the vehicle or its components.
- Turn off all the lamps and accessories.
- Turn the ignition OFF.
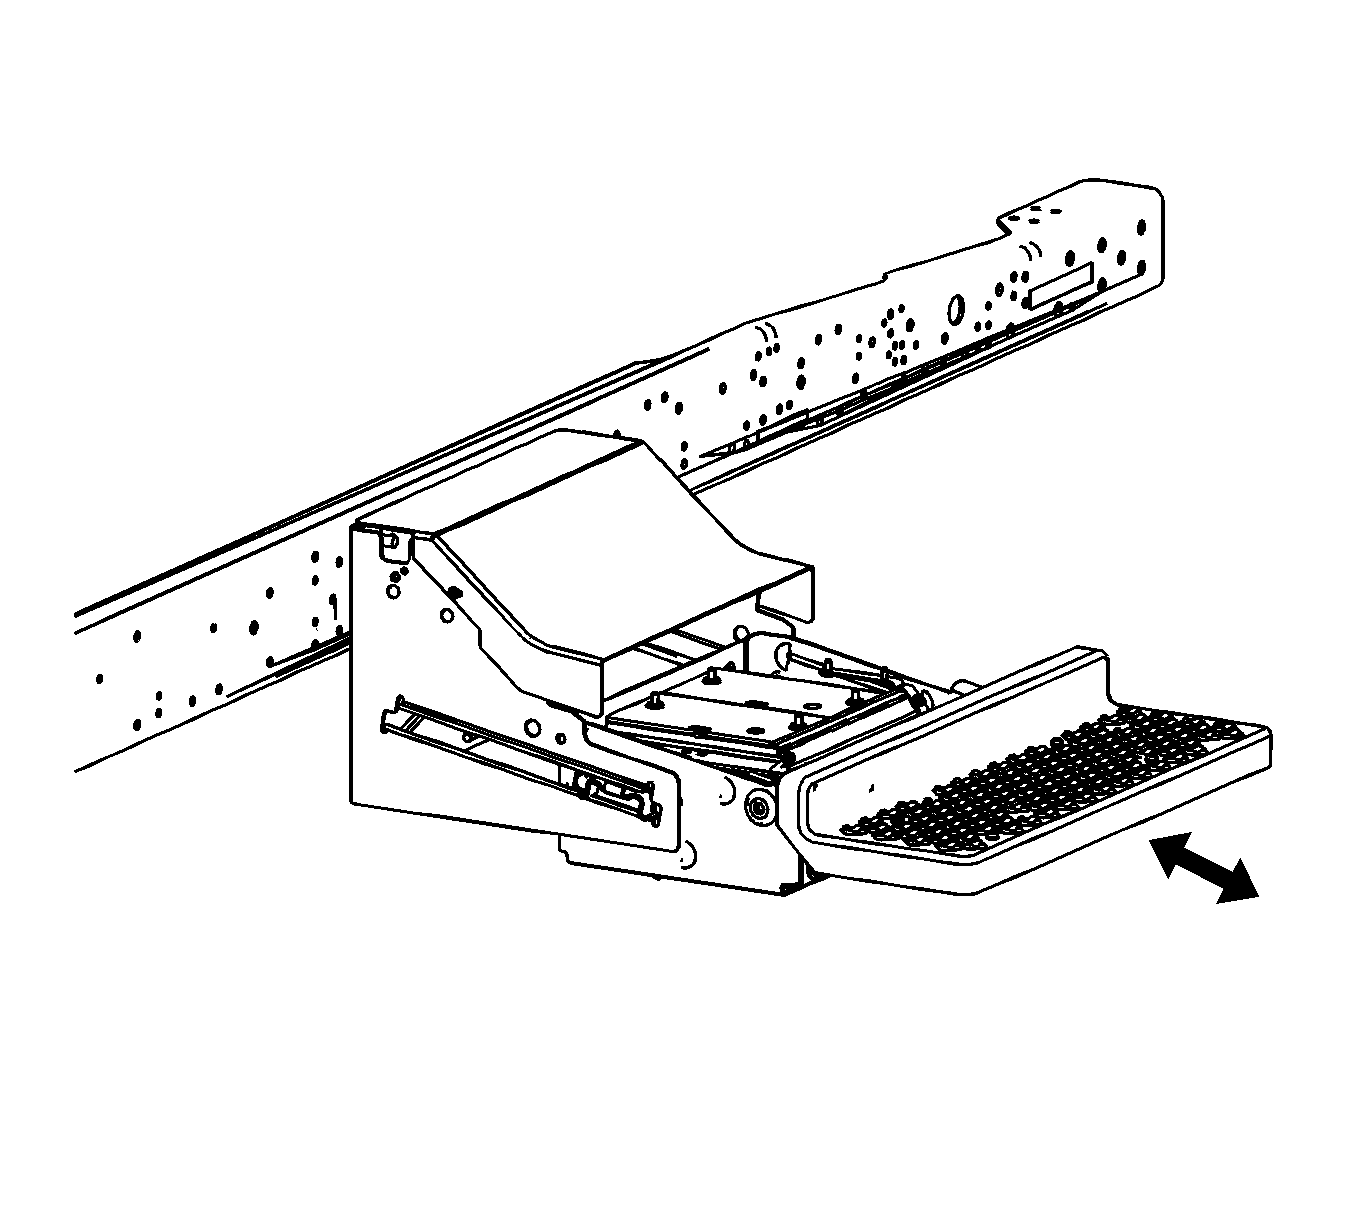
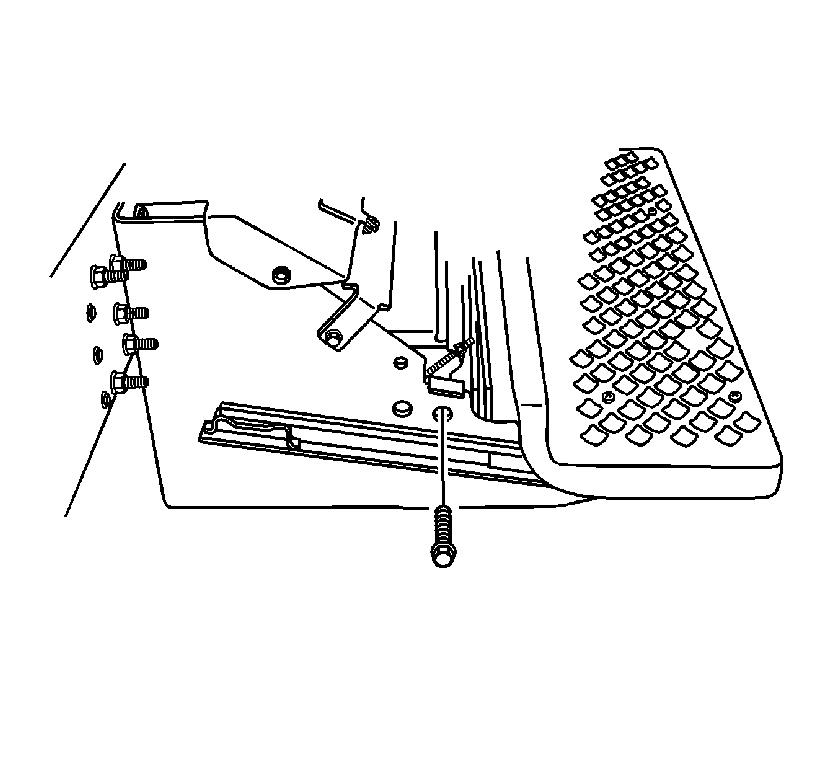
- Remove the battery tray stop bolts.
- Slide out the battery tray.
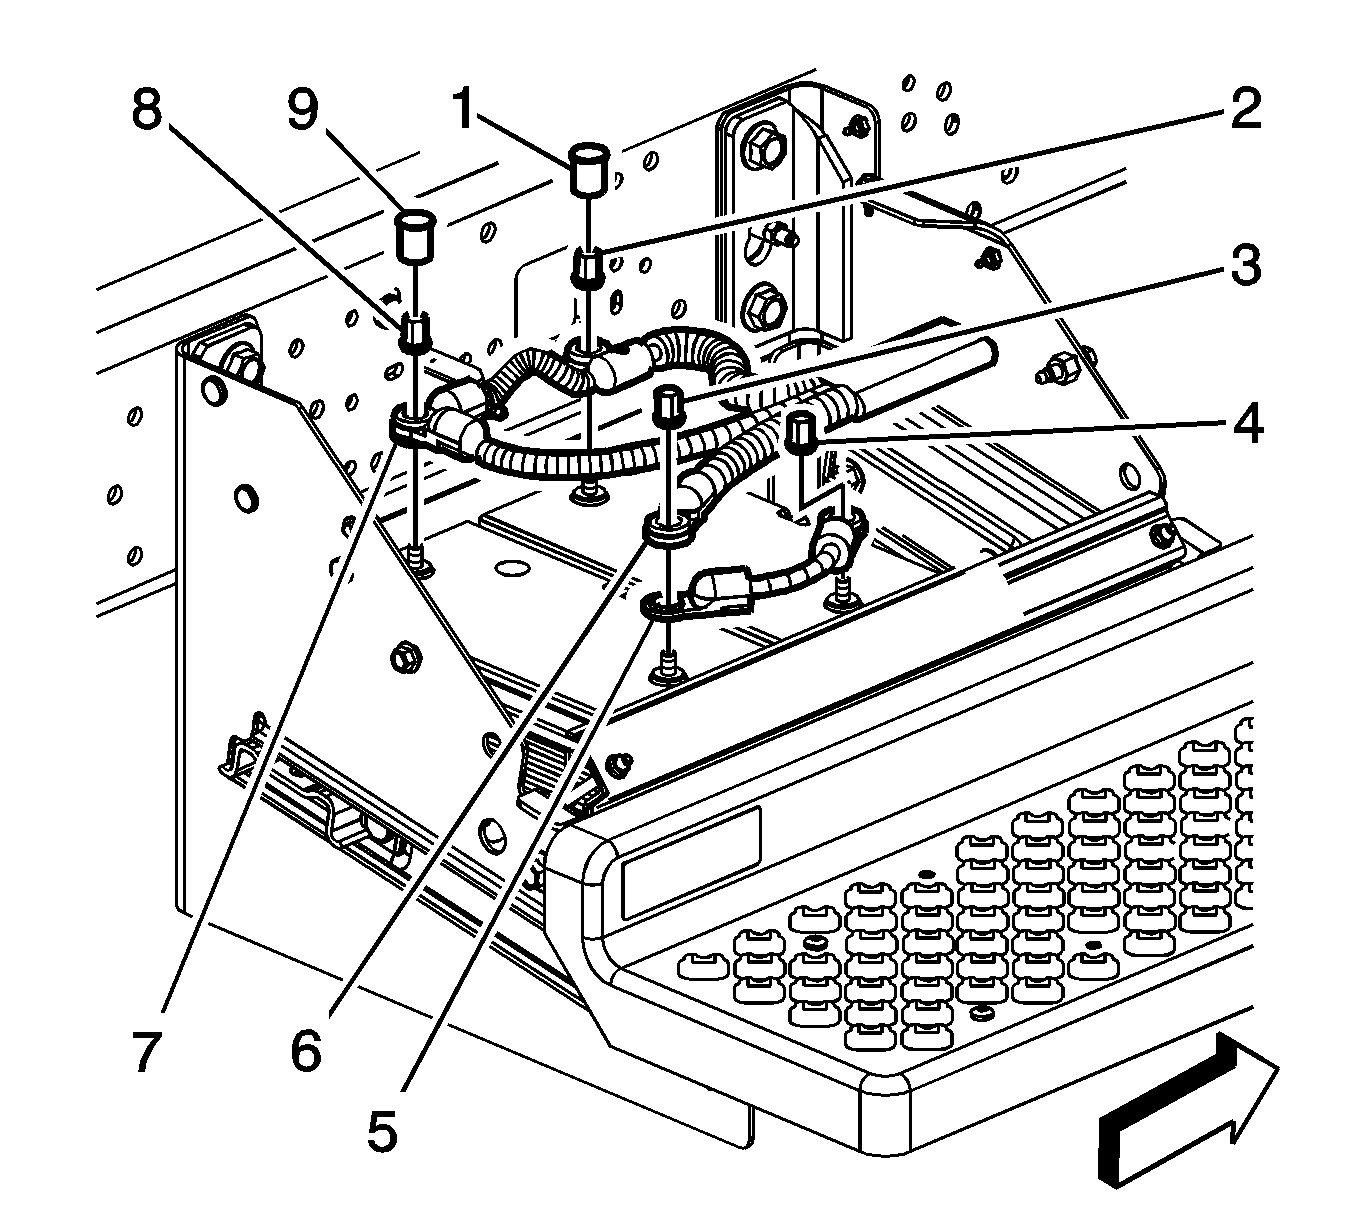
- If equipped with a single battery perform the following steps, otherwise proceed the step 9.
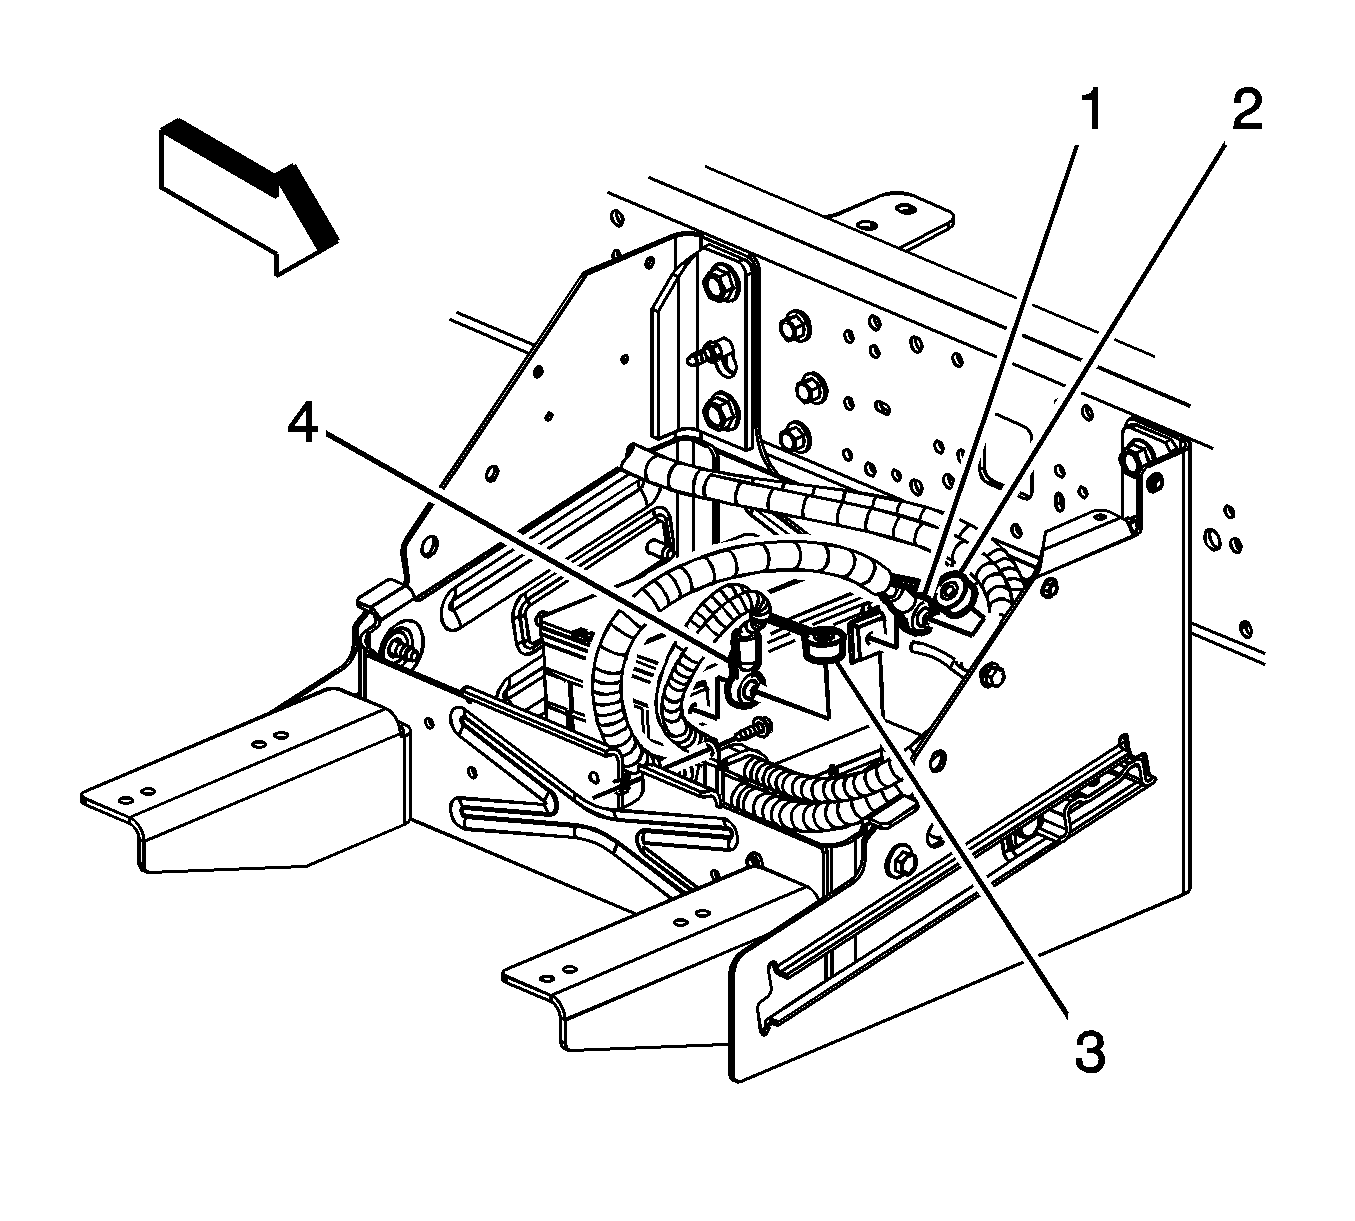
- Open the negative battery cable cover (2).
- Loosen the negative battery cable bolt (1).
- Reposition the negative battery cable from the battery.
- If equipped with dual batteries, remove the negative battery cable nut (2).
- Remove the negative battery cable (3) from the first battery.
- Remove the negative battery cable (5) from the first battery.

Installation Procedure
Important: Clean any existing corrosion from the battery terminal mount and the battery cable end.
- If equipped with a single battery perform the following steps, otherwise proceed the step 5.
- Position the negative battery cable to the battery.
- Tighten the negative battery cable bolt (1).
- Close the negative battery cable cover (2).
- If equipped with dual batteries, install the negative battery cable (5) to the first battery.
- Install the negative battery cable (3) to the first battery.
- Install the negative battery cable nut (2).
- Slide in the battery tray.
- Install the battery tray stop bolts.
Notice: Refer to Fastener Notice in the Preface section.
Tighten
Tighten the bolt to 17 N·m (13 lb ft).
Tighten
Tighten the nut to 22 N·m (16 lb ft).
Tighten
Tighten the bolt to 80 N·m (60 lb ft).
Battery Negative Cable Disconnection and Connection C4/C5 - Diesel Engine
Removal Procedure
Caution: Unless directed otherwise, the ignition and start switch must be in the OFF or LOCK position, and all electrical loads must be OFF before servicing any electrical component. Disconnect the negative battery cable to prevent an electrical spark should a tool or equipment come in contact with an exposed electrical terminal. Failure to follow these precautions may result in personal injury and/or damage to the vehicle or its components.
- Turn off all the lamps and accessories.
- Turn the ignition OFF.
- Remove the battery tray stop bolts.
- Slide out the battery tray.
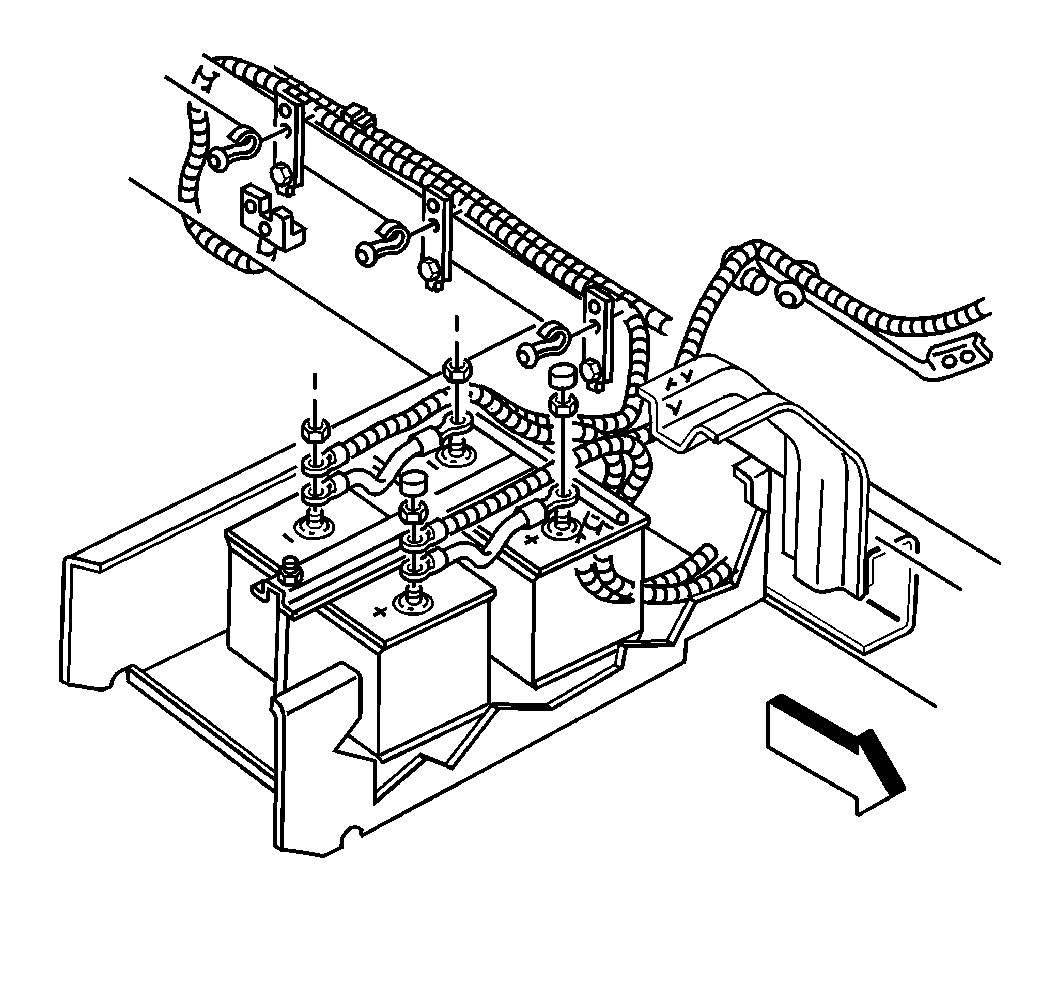
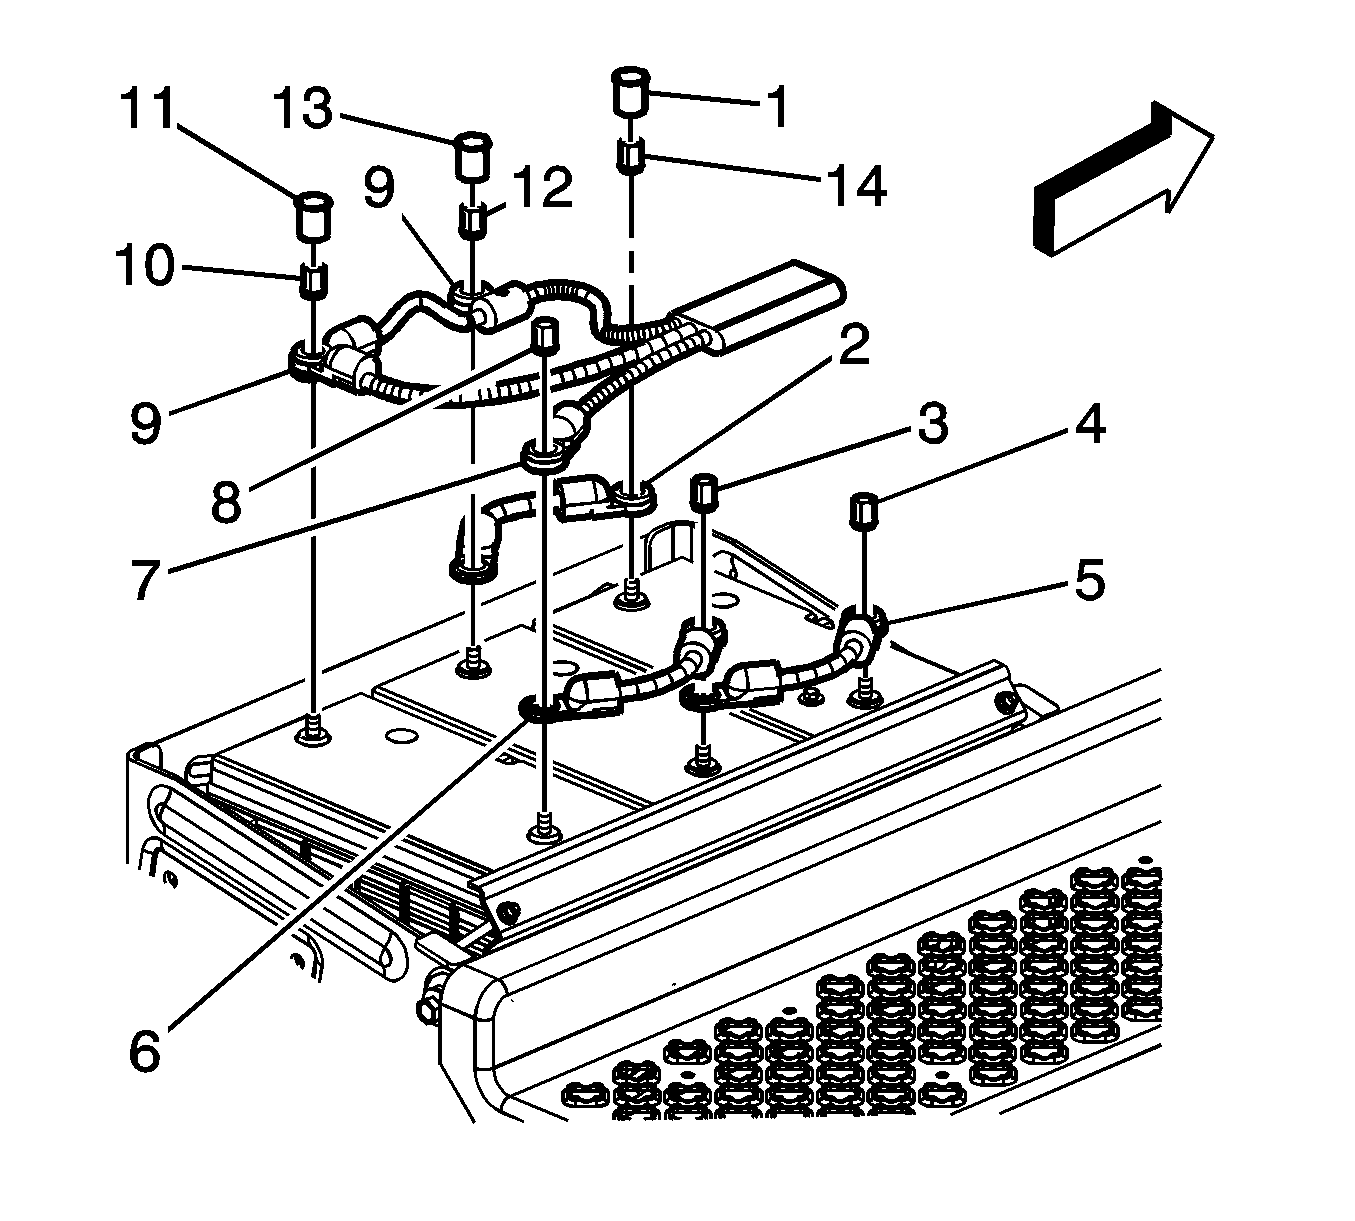
- If equipped with dual batteries perform the following steps, otherwise proceed the step 9.
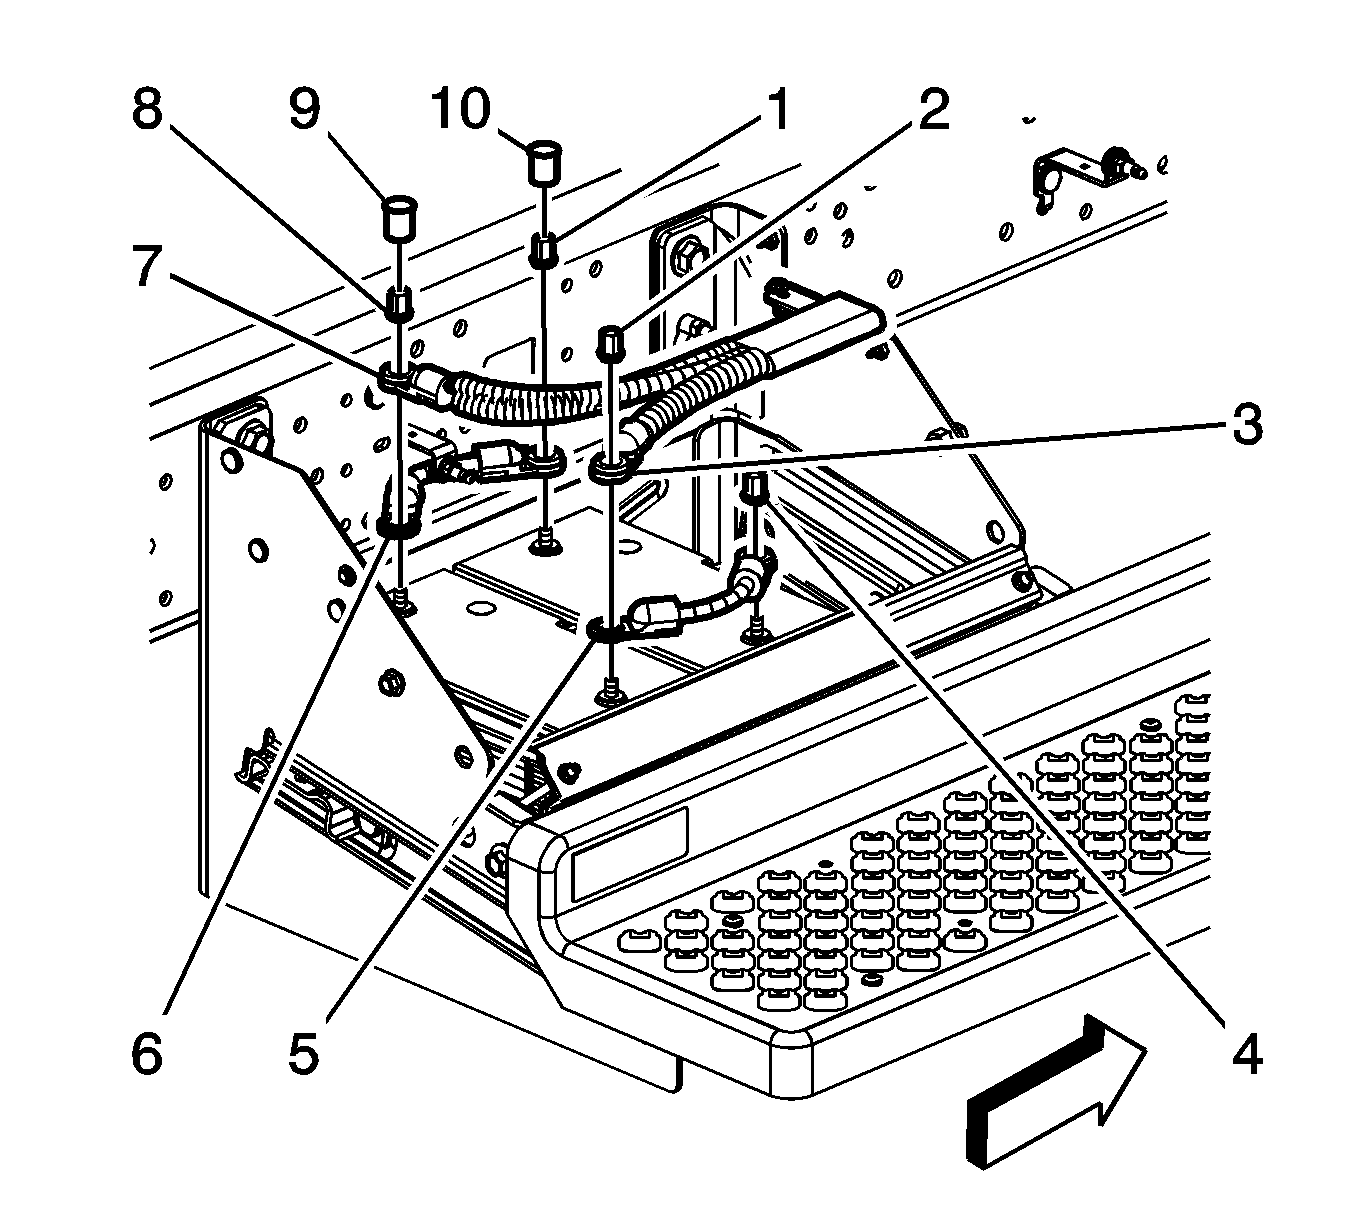
- Remove the negative battery cable nut (3).
- Remove the negative battery cable (6) from the first battery.
- Remove the negative battery cable (5) from the first battery.
- If equipped with triple batteries, remove the negative battery cable nuts (8 and 3).
- Remove the negative battery cable (7) from the first battery.
- Remove the negative battery cable (6) from the first and second batteries.
- Remove the negative battery cable (5) from the second battery.
Installation Procedure
Important: Clean any existing corrosion from the battery terminal bolt flange and the battery cable end.
- If equipped with dual batteries perform the following steps, otherwise proceed the step 5.
- Install the negative battery cable (5) to the first battery.
- Install the negative battery cable (6) to the first battery.
- Install the negative battery cable nut (3).
- If equipped with triple batteries, install the negative battery cable (5) to the second battery.
- Install the negative battery cable (6) to the first and second batteries.
- Install the negative battery cable (7) to the first battery.
- Install the negative battery cable nuts (8 and 3).
- Slide in the battery tray.
- Install the battery tray stop bolts.
Notice: Refer to Fastener Notice in the Preface section.
Tighten
Tighten the nut to 22 N·m (16 lb ft).
Tighten
Tighten the nuts to 22 N·m (16 lb ft).
Tighten
Tighten the bolt to 80 N·m (60 lb ft).
