For 1990-2009 cars only
Fuel Filter Replacement Primary
Removal Procedure
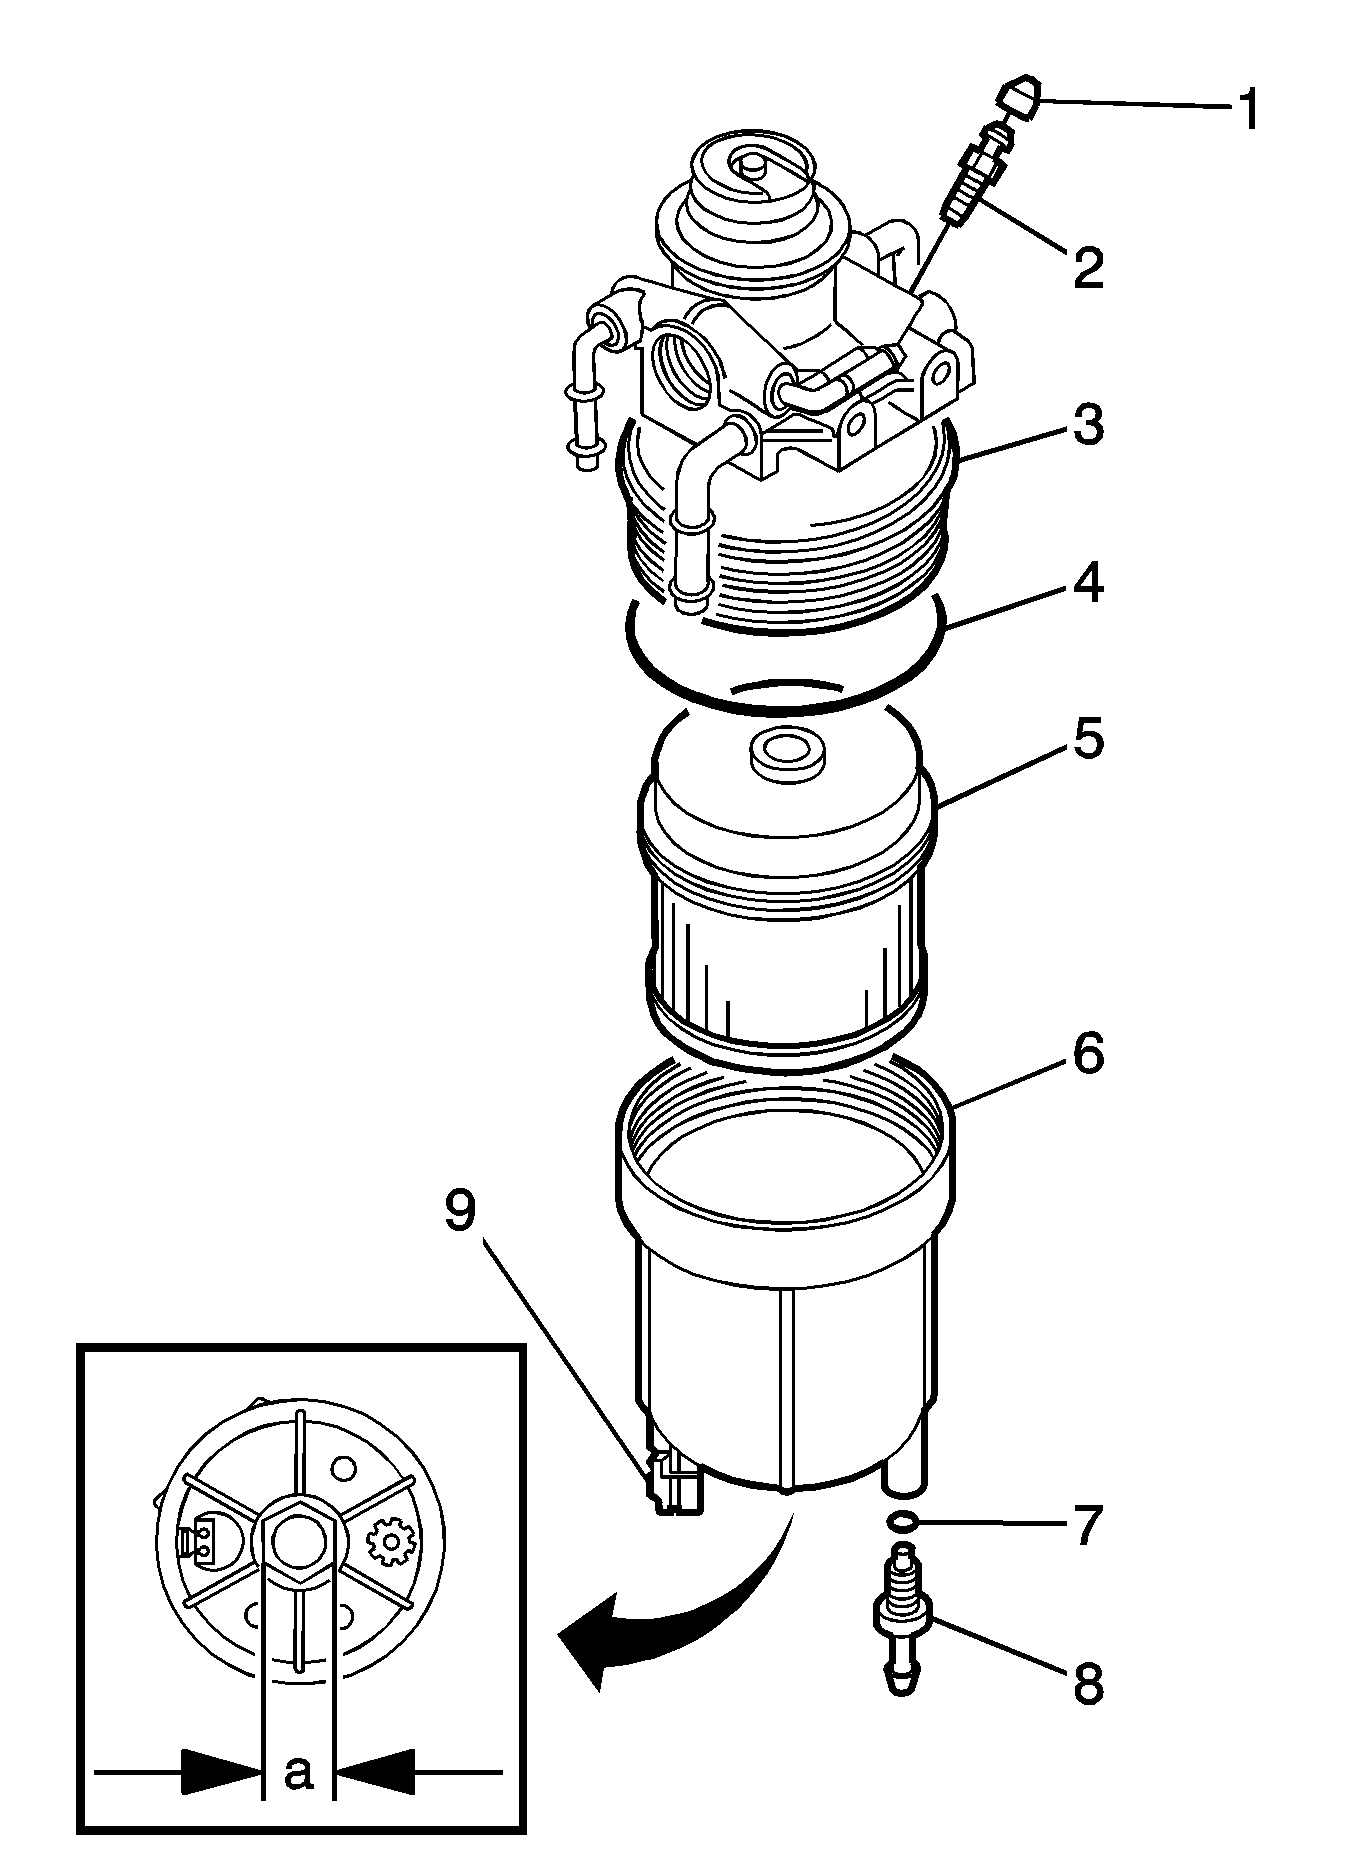
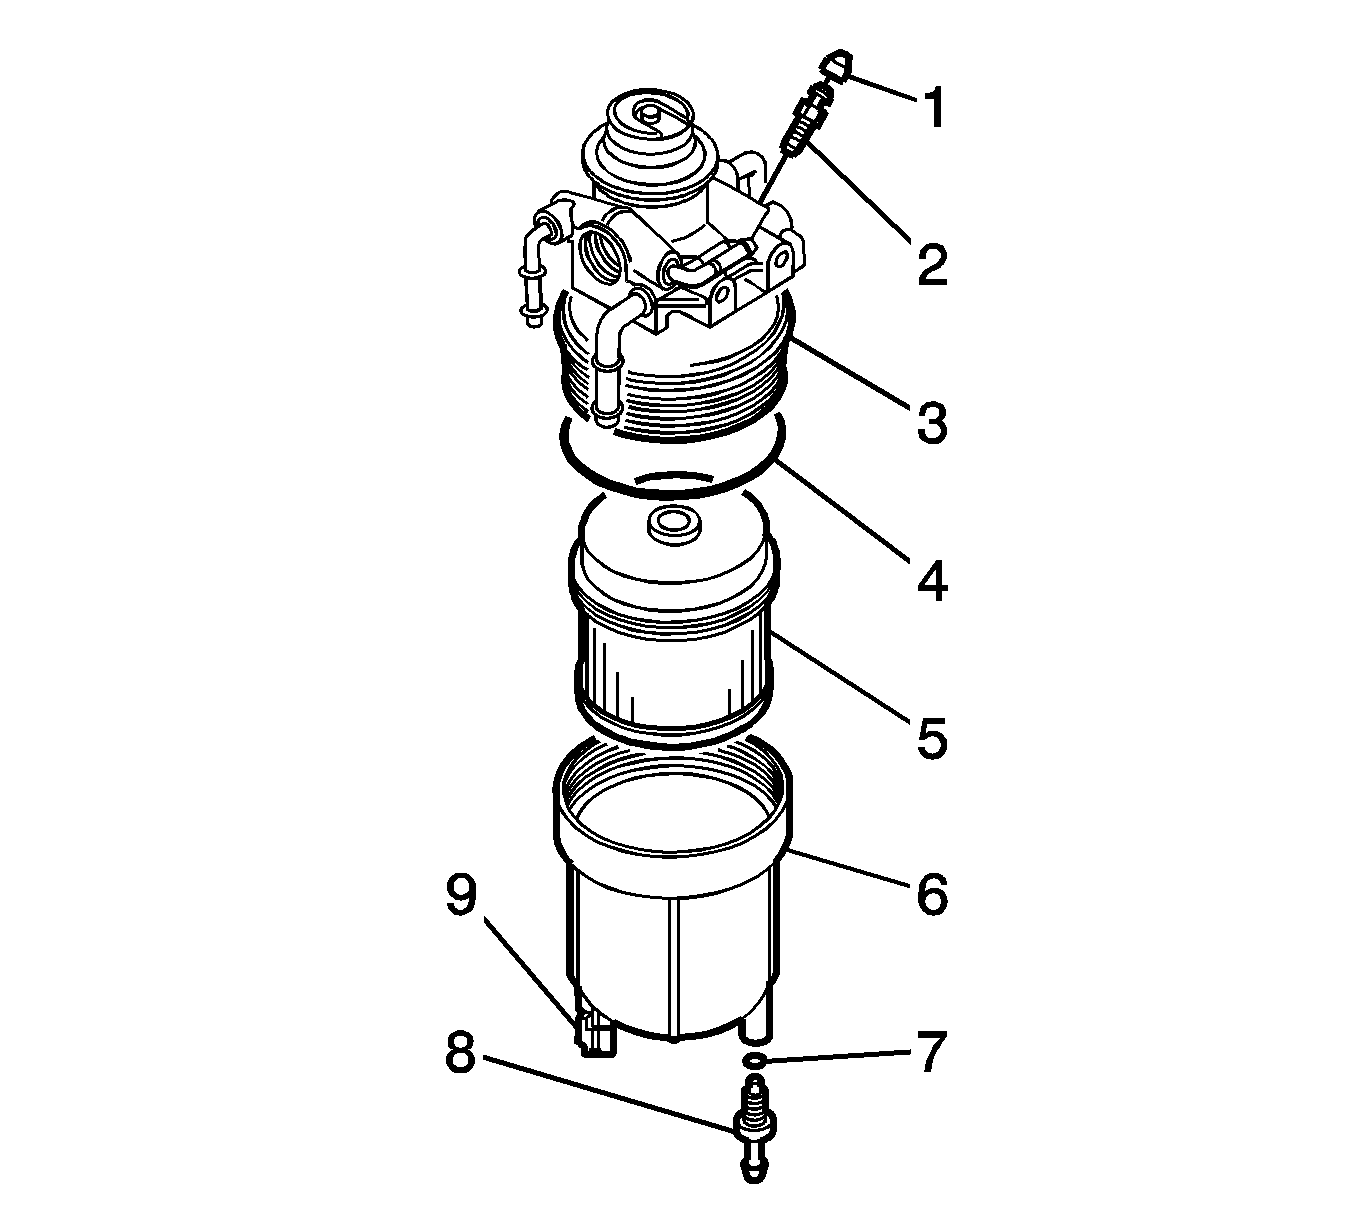
- Open the air bleeder (2) in the fuel head (3).
- Use the drain plug (8) to drain the fuel from the fuel filter element case (6).
- Disconnect the water warning switch harness connector.
- Use the 5-8840-0253-0 fuel filter wrench on the bottom of the element case nut feature (a) to remove the element case (6).
- Remove the fuel filter element (5) and O-ring (4) from the fuel filter head. Discard the O-ring.
- Confirm that the float at the bottom of the element case moves up and down smoothly.
- Clean and inspect the fuel filter head and element case of deposits and foreign material.
Important: The air bleeder must be open in order for fuel to drain from the element case.
Installation Procedure
- Install the NEW O-ring to the fuel filter head groove (7).
- Apply a thin layer of fuel to lubricate the fuel filter element gasket (4) and install the fuel filter element (3) into the fuel filter head. Use a clockwise rotation to seat the element in the fuel filter body.
- Apply a thin layer of fuel to the inner circumference of the element case and fuel filter head O-ring.
- Use the 5-8840-0253-0 fuel filter wrench on the bottom of the element case nut feature to install the element case.
- Tighten the drain plug on the element case.
- Bleed the fuel system. Refer to Fuel System Bleeding .
- Start the engine and check for fuel leaks and no looseness in each fuel filter component.
Notice: Refer to Fastener Notice in the Preface section.
Tighten
Tighten the case to 33 N·m (25 lb ft).
Tighten
Tighten the drain plug to 4 N·m (35 lb in).
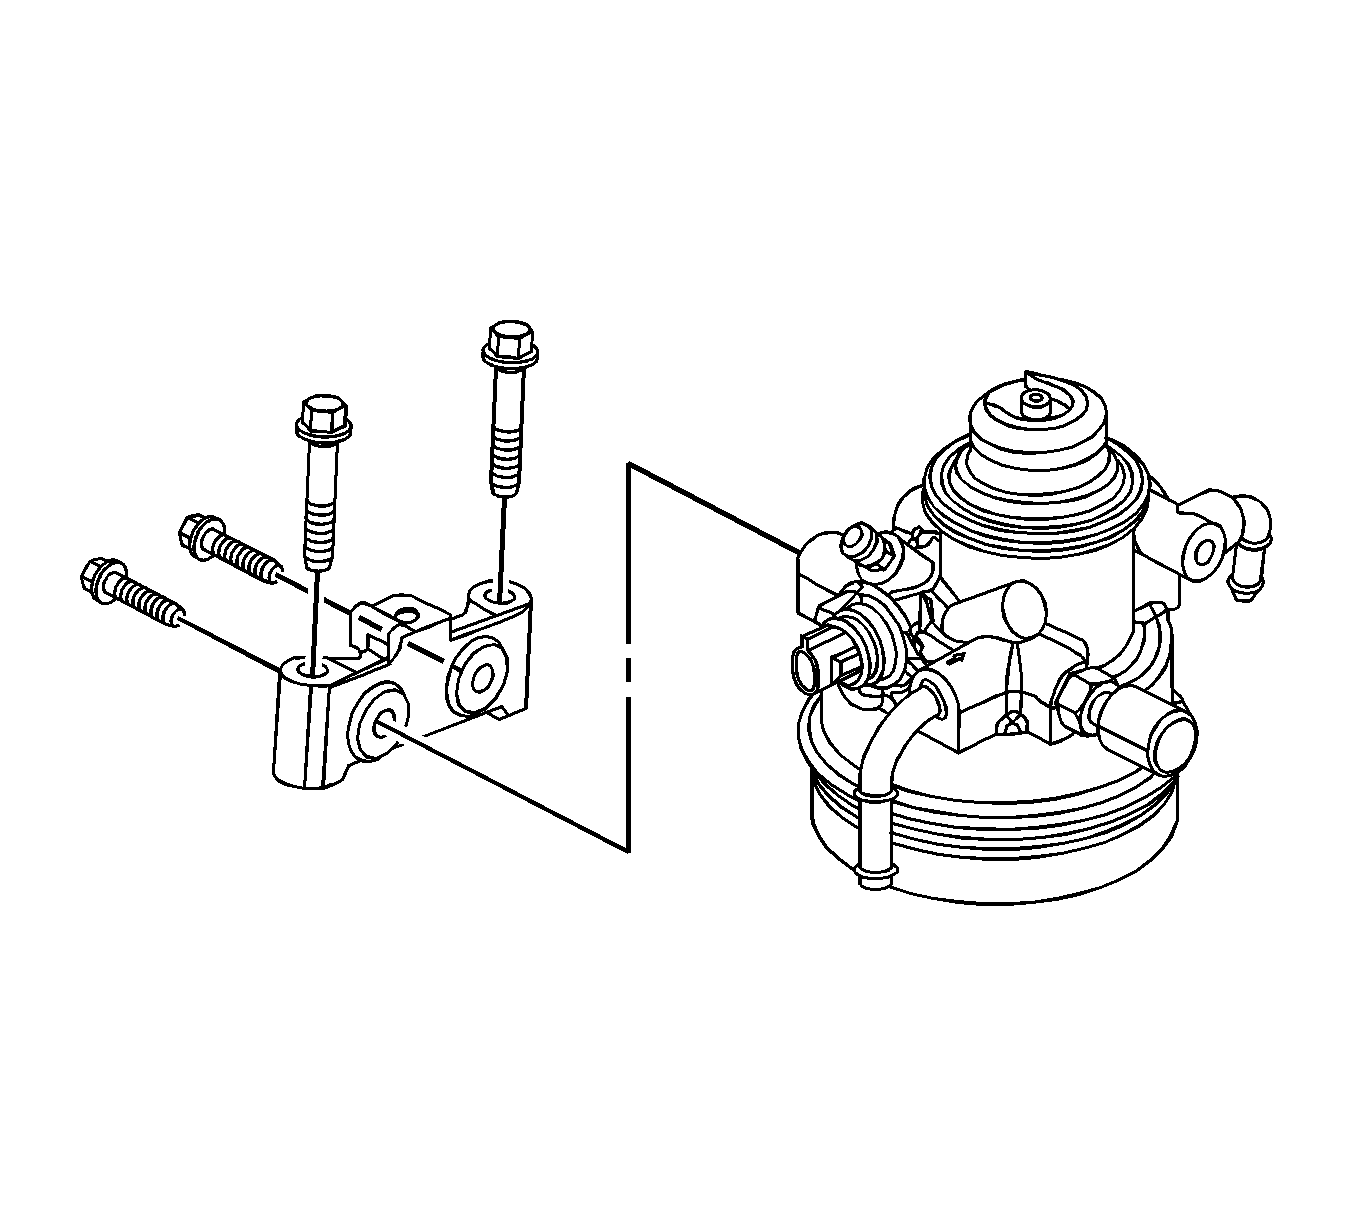
Fuel Filter Replacement Secondary
Removal Procedure
- Open the air bleeder (2) in the fuel head (3).
- Use the drain plug (8) to drain the fuel from the fuel filter element case (6).
- Disconnect the water warning switch harness connector.
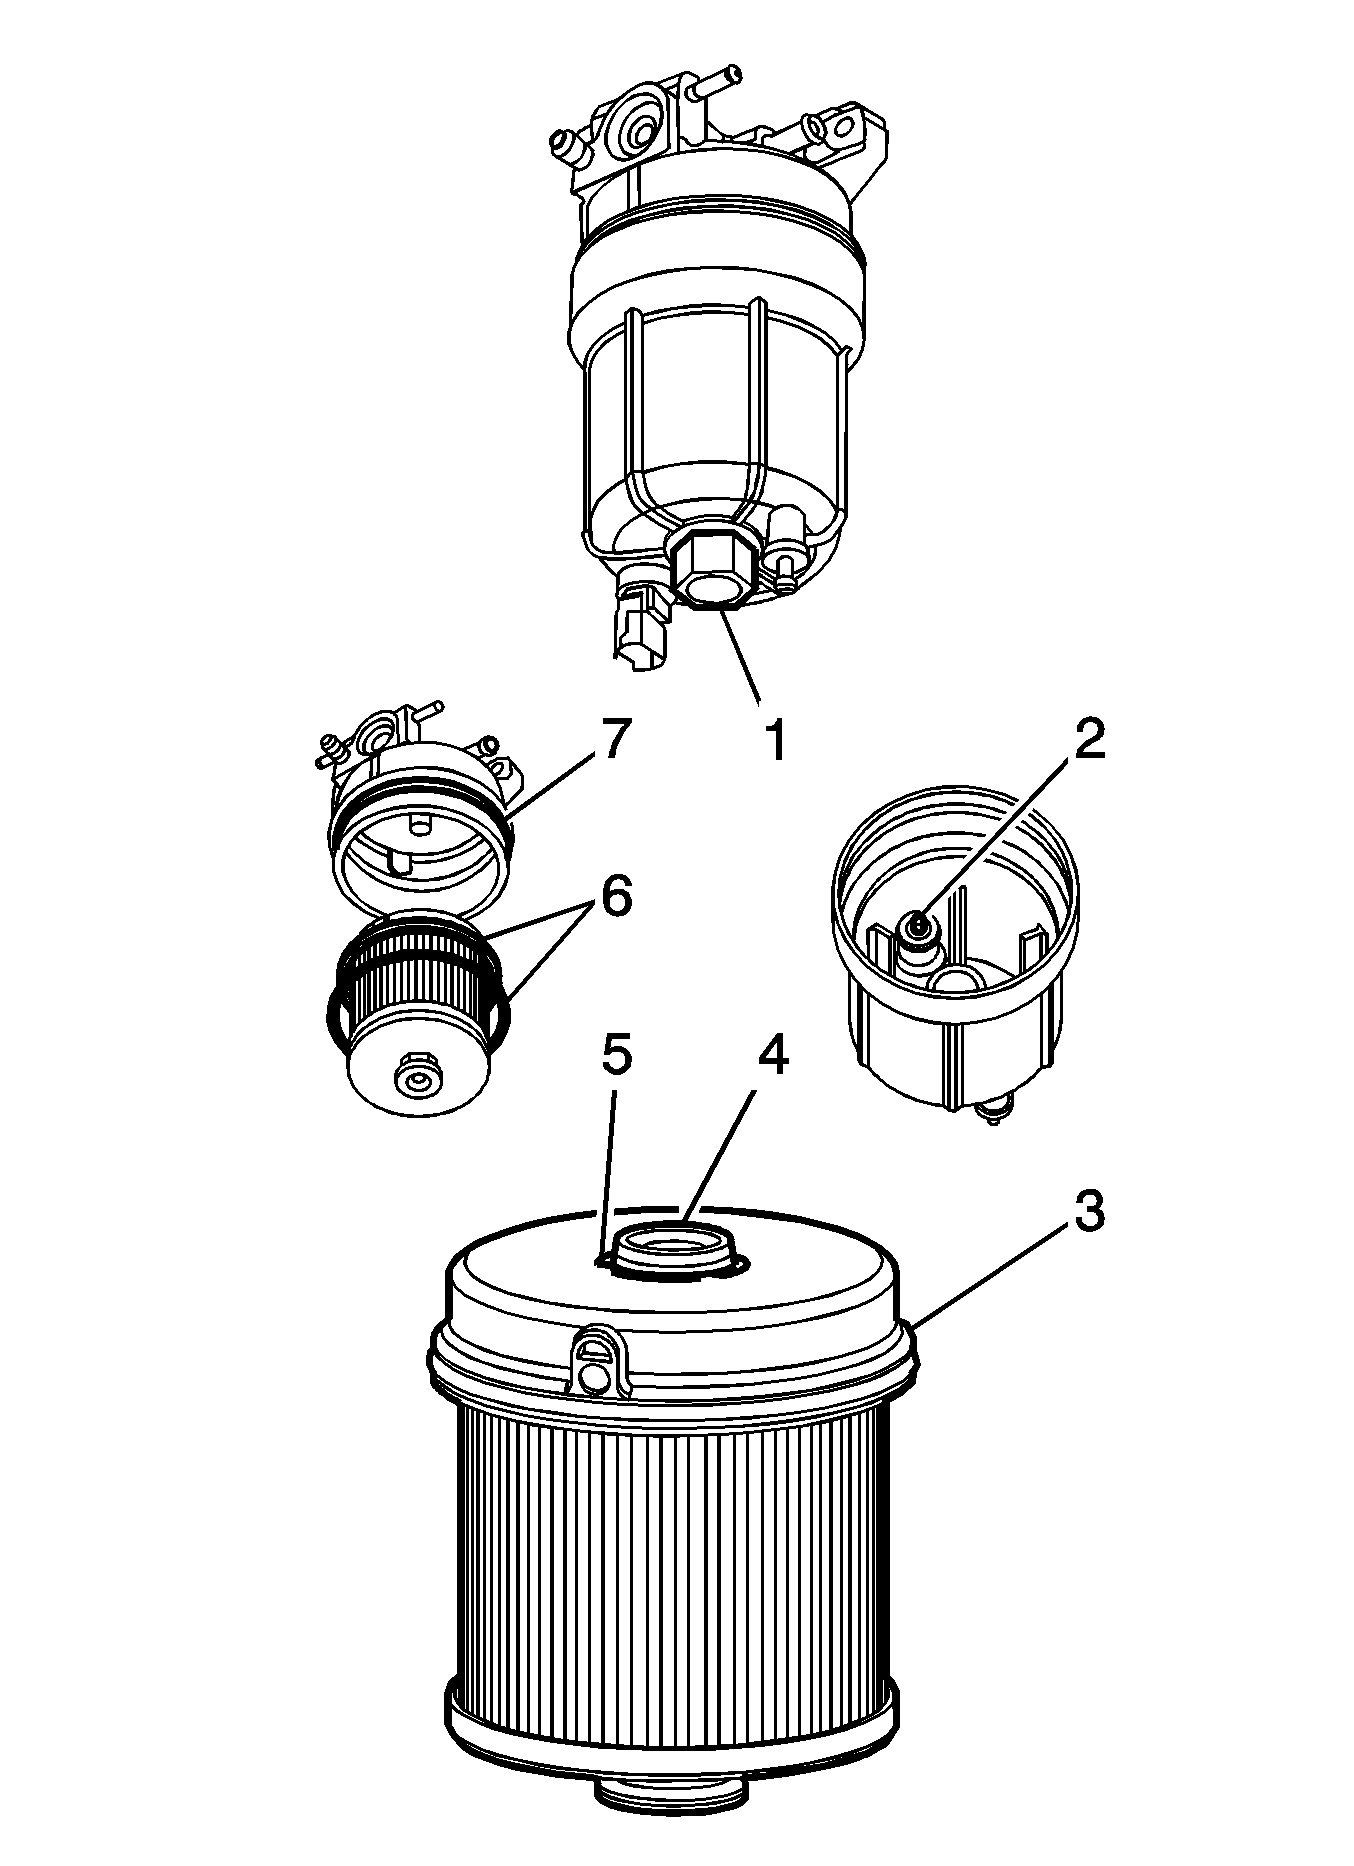
- Use the 5-8840-0253-0 fuel filter wrench on the bottom of the element case nut feature to remove the element case (6).
- Remove the fuel filter element (5) and O-ring (4) from the fuel filter head. Discard the O-ring.
- Check the primary filter for clogging. Replace if necessary.
- Inspect the fuel filter head contact surface for cracks and pitting. Replace if necessary.
- Disconnect the fuel filter head harness connector.
- Remove the clips.
- Disconnect the fuel hoses from the fuel filter head.
- Remove the fuel filter and the fuel filter head from the fuel filter head bracket.
Important: The air bleeder must be open in order for fuel to drain from the element case.
Important: If fuel filter head replacement is necessary, perform Steps 4, 5, 6. If not necessary, go to step 7.
Important: If fuel filter head replacement is necessary, perform Steps 4, 5, 6. If not necessary, go to step 7.
Installation Procedure
- Install the fuel filter head to the fuel filter bracket.
- Install the fuel filter element (5) into the fuel filter head. Use a clockwise rotation to seat the element in the fuel filter body.
- Use the 5-8840-0253-0 fuel filter wrench on the bottom of the element case nut feature to install the element case.
- Install the drain plug and O-ring into the element case.
- Install the fuel hoses to the fuel filter.
- Connect the fuel filter head harness connector.
- Bleed the fuel system. Refer to Fuel System Bleeding .
- Start the engine and check for fuel leaks and no looseness in each fuel filter component.
Notice: Refer to Fastener Notice in the Preface section.
Tighten
Tighten the case to 33 N·m (25 lb ft).
