For 1990-2009 cars only
Removal Procedure
- Raise the vehicle. Refer to Lifting and Jacking the Vehicle.
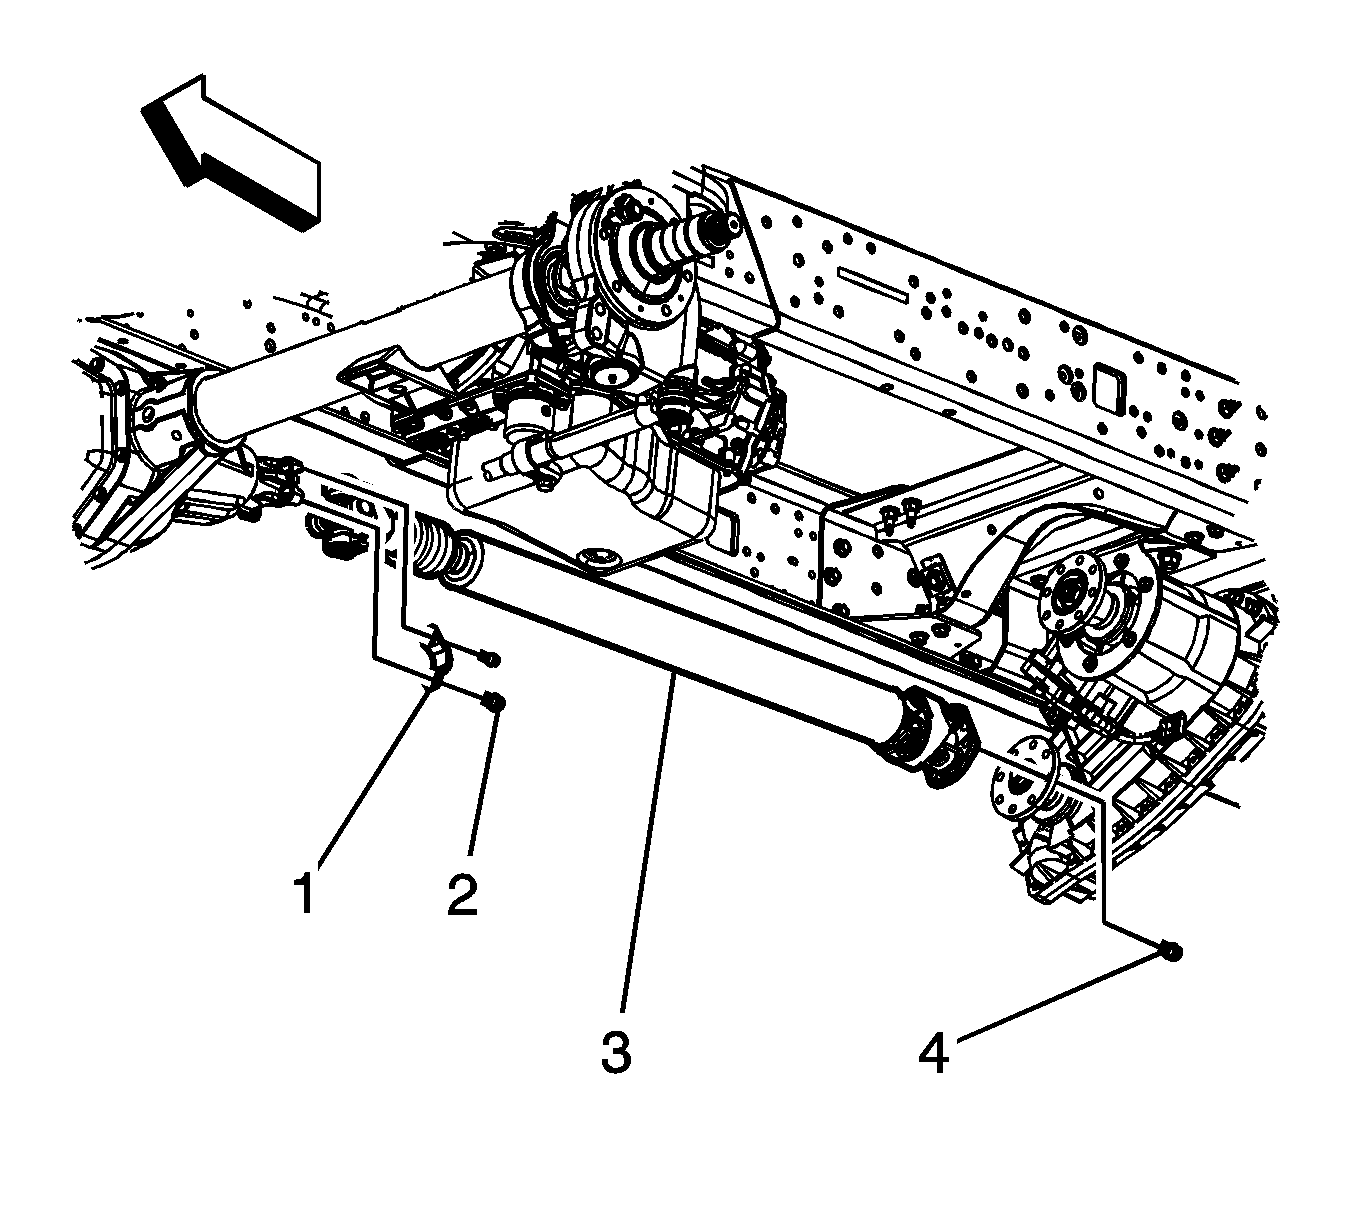
- Reference mark the relationship of the propeller shaft (3) to the front axle pinion yoke and the transfer case flange.
- Remove the propeller shaft retainer bolts (2) and retainers (1).
- Remove the propeller shaft flange bolts (4).
- Remove the front propeller shaft (3) from the transfer case.
Note: Observe the position of all the driveline components. Accurately mark the relationship of the components before removal. These components include the propeller shafts, the drive axles, the pinion flanges, and the output shafts. Reassemble all components in the exact relationship to each other as they were before removal. Follow the specifications, the torque values, and any measurements obtained prior to disassembly.
Installation Procedure
- Install the propeller shaft (3) to the transfer case and the front axle.
- Align the reference marks made during removal.
- Before installing the propeller shaft flange bolts perform the following procedure:
- Install the propeller shaft flange bolts (4).
- Tighten the propeller shaft flange bolts.
- Install the propeller shaft yoke retainer (1) and bolts (2).
- Tighten the propeller shaft yoke retainer bolts.
- Lower the vehicle. Refer to Lifting and Jacking the Vehicle.
| 3.1. | Remove all traces of the original adhesive patch. |
| 3.2. | Clean the threads of the bolts with denatured alcohol or equivalent and allow to dry. |
| 3.3. | Apply threadlocker GM P/N 12345493 (Canadian P/N 10953488) to the threads of the bolts. |
Caution: Refer to Fastener Caution in the Preface section.
Tighten
Tighten the bolts to 140 N·m (103 lb ft).
Tighten
Tighten the bolts to 66 N·m (49 lb ft).
